Normal view

Unequal Exchange of Labour in the World Economy

“Researchers have argued that wealthy nations rely on a large net appropriation of labour and resources from the rest of the world through unequal exchange in international trade and global commodity chains. Here we assess this empirically by measuring flows of embodied labour in the world economy from 1995–2021, accounting for skill levels, sectors and wages.

We find that, in 2021, the economies of the global North net-appropriated 826 billion hours of embodied labour from the global South, across all skill levels and sectors. The wage value of this net-appropriated labour was equivalent to €16.9 trillion in Northern prices, accounting for skill level. This appropriation roughly doubles the labour that is available for Northern consumption but drains the South of productive capacity that could be used instead for local human needs and development.

Unequal exchange is understood to be driven in part by systematic wage inequalities. We find Southern wages are 87–95% lower than Northern wages for work of equal skill. While Southern workers contribute 90% of the labour that powers the world economy, they receive only 21% of global income.”

Read more (open access): Hickel, J., Hanbury Lemos, M. & Barbour, F. Unequal exchange of labour in the world economy. Nat Commun 15, 6298 (2024). https://doi.org/10.1038/s41467-024-49687-y

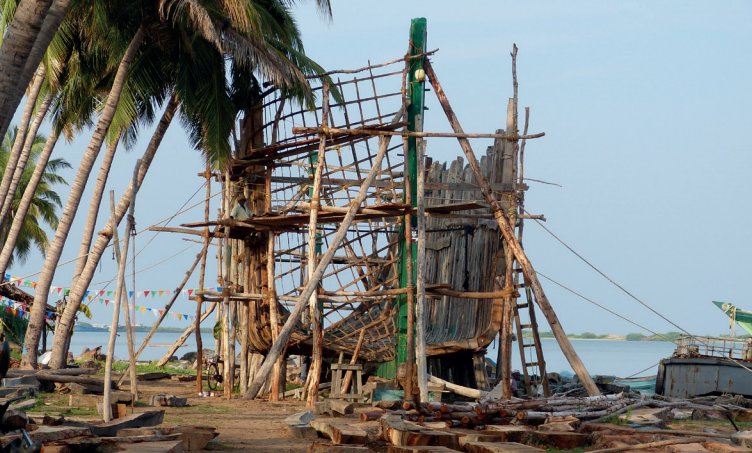
Wild Craft: Wooden cargo ships of South India

Giant wooden cargo ships that braved the oceans for thousands of years are still being made in the South Indian state of Tamil Nadu. Even as metal motorised ships became the norm, some shoreline communities in South India continue to craft this wooden cargo ship. In a blend of reason, creativity and hard work the communities engineered their past to forge a future. This book traces the transition of this tradition over time.

The authors have created a photo documentation using hundreds of images that capture the shipyard’s atmosphere to offer a narrative and the manufacture of these ships at each step of their construction. It analyzes the conditions of their economic viability and how it has evolved over time. Through visual anthropology this book offers a narrative of wooden cargo ship building and craftsmanship in south Asia.

The open access book can be downloaded from https://www.ifpindia.org/bookstore/wild-craft/.

There is also a video about the project: Of Wind and Wood. Sustainable cargo ships in France and in India.

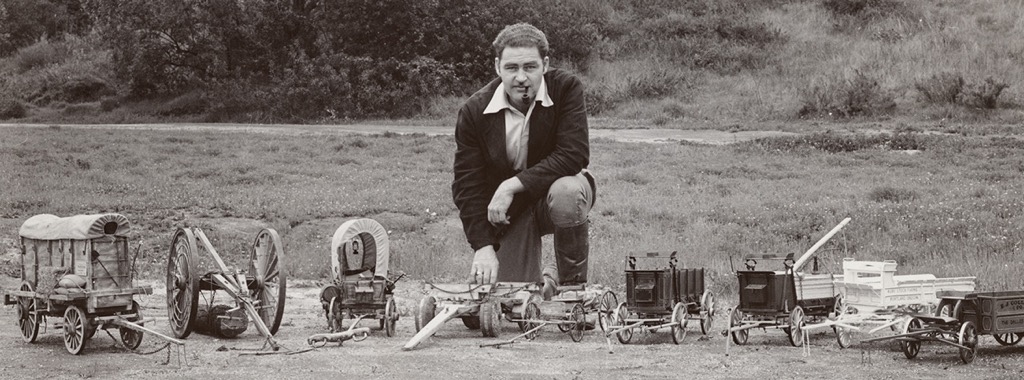
The Ivan L. Collins Collection of Historic Vehicles in Miniature

Ivan L. Collins created historically accurate models of horse-drawn vehicles using painstaking research to ensure that every detail was authentic. Built at one-eighth scale, these models represent transportation technology before the automobile. Collins saw this work as more than a hobby; his models were a way to preserve history for future generations.

See and read more:

https://www.ohs.org/museum/exhibits/models-in-motion-ivan-collins-miniature-vehicles.cfm
http://www.scalemodelhorsedrawnvehicle.co.uk/(Ivan%20Collins).htm

Thanks to David Barnes.

Image: Oregon Historical Society.

Back to the Future of the Internet

Earlier this year we organised an event in Barcelona, “Back To The Future Of The Internet”, in which we explored concepts from the Internet’s history that can help create a more sustainable future network. The video is now online:


The SmolPhone

“The SmolPhone project is an action research on the topic of low-tech in the domain of IT systems. Its practical aspects consist in designing a sort of low-tech smartphone offering some services of a classical smartphone with a one-week battery lifetime. The goal is not to optimize a typical smartphone but rather to reconsider the smartphone design space, exploring unusual architectures and evaluating the set of features that should be part of long-lasting smartphones.”

Quoted from: Rautureau, Aloïs, et al. “Quantifying the tiny-Small design of the SmolPhone.” ICT For Sustainability (ICT4S). 2024. Related articles.

After Comfort: A User’s Guide

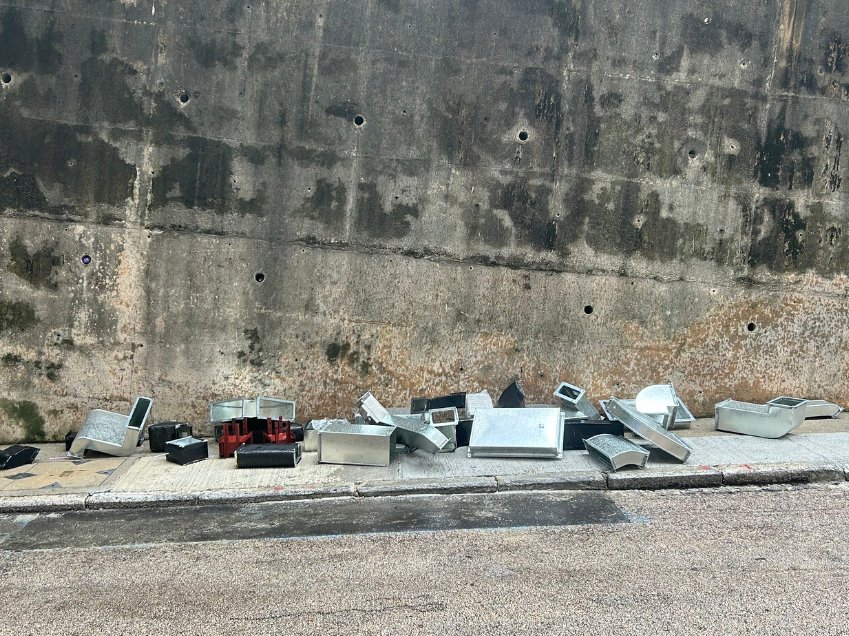
Image: Ducts in a row. Photo: Daniel A. Barber. Taken from: After Comfort: A User’s Guide.

Comfort is a construct. Many new commercial and institutional buildings built over the past few decades rely so heavily on fossil-fueled mechanical HVAC systems that they would be uninhabitable without them. Many of the stylistic and programmatic debates in architecture in these same decades similarly relied on HVAC for their explorations and innovations. In other cases, often at the residential scale, buildings have been produced with an expectation of cheap energy, which has meant that adequate insulation, cross ventilation, and other design-based passive thermal measures have not been considered. Our determinedly slow, casual move away from fossil fuels, with limited political or socio-economic support, is already resulting in “green inequity” and novel forms of thermal violence. Over the decades to come, enclaves where upper-class neighborhoods engage with expensive “green tech” such as electric vehicles and heat pumps will coexist alongside poorer areas that cannot afford to make any transition from the carbon-fueled lifestyles they need to get by.

After Comfort: A User’s Guide is a project by e-flux Architecture in collaboration with the University of Technology Sydney, the Technical University of Munich, the University of Liverpool, and Transsolar.

The Shrinking City

In Europe alone, there are more than 500 cities with continuous demographic shrinkage, which in many cases concern small‐ to medium‐sized, peripherally situated, former industrial cities. The surplus of space (land, buildings) in these cities and the diminished role of market parties might create favorable conditions for experimentation with alternative types and ways of urban development and land use. Moreover, in shrinking cities, there is also a need for urban development solutions that improve the quality of life in the absence of economic growth, and therefore there may also be more interest in the outcomes or lessons of urban degrowth experiments and a higher probability for larger‐scale uptake and implementation.

Read more: Hermans, Maurice, Joop de Kraker, and Christian Scholl. “The Shrinking City as a Testing Ground for Urban Degrowth Practices.” Urban Planning 9.2 (2024).

How Medieval Readers Customized their Manuscripts

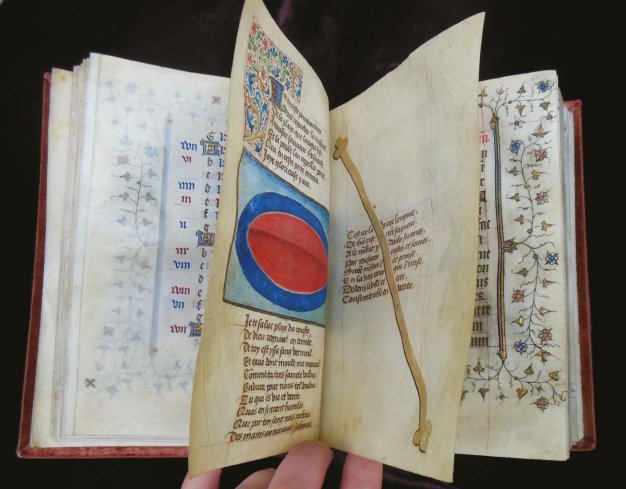
Medieval manuscripts resisted obsolescence. Made by highly specialised craftspeople (scribes, illuminators, book binders) with labour-intensive processes using exclusive and sometimes exotic materials (parchment made from dozens or hundreds of skins, inks and paints made from prized minerals, animals and plants), books were expensive and built to last. They usually outlived their owners. Rather than discard them when they were superseded, book owners found ways to update, amend and upcycle books or book parts.

These activities accelerated in the fifteenth century. Most manuscripts made before 1390 were bespoke and made for a particular client, but those made after 1390 (especially books of hours) were increasingly made for an open market, in which the producer was not in direct contact with the buyer. Increased efficiency led to more generic products, which owners were motivated to personalise. It also led to more blank parchment in the book, for example, the backs of inserted miniatures and the blanks ends of textual components. Book buyers of the late fourteenth and throughout the fifteenth century still held onto the old connotations of manuscripts—that they were custom-made luxury items—even when the production had become impersonal.

Owners consequently purchased books made for an open market and then personalised them, filling in the blank spaces, and even adding more components later. This would give them an affordable product, but one that still smacked of luxury and met their individual needs. They kept older books in circulation by amending them, attached items to generic books to make them more relevant and valuable, and added new prayers with escalating indulgences as the culture of salvation shifted.

From: M Rudy, Kathryn. Piety in pieces: how medieval readers customized their manuscripts. Open Book Publishers, 2016.

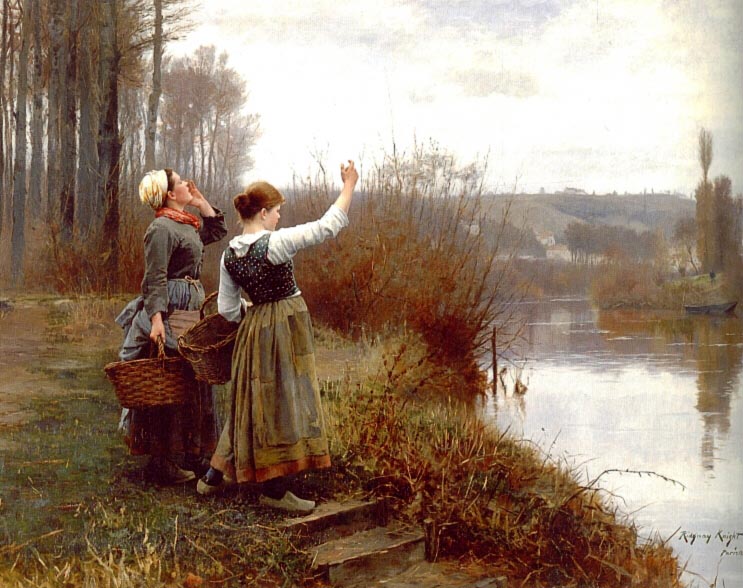
Image: Parchment diptych with the measurements of Christ’s length and side wound, inserted into a French book of hours. Paisley, Renfrew District Museum and Art Gallery, Ms. 1, fol. 13–14 forming a diptych. Photo © Author, CC BY 4.0.

No Tech Reader #48: Digital Technology

Ironwood Bicycles

The Ironwood bicycle is a wooden framed bike that people could make themselves with commonly available materials. It has a laminated wooden frame and fork to which standard bicycle components are bolted. The frame can be made with basic carpentry and metalwork skills, without the need for welding or soldering. The design is intended for small scale bicycle production that would support local employment as an alternative to importing bicycles from around the world. More: http://www.ironwoodbicycle.com.

New developments at Opensource.com

New developments at Opensource.com admin

You may have noticed that it's been quiet here on Opensource.com lately. That's because there's a new project in the works, and while there aren't many specific details to announce yet, there's plenty to talk about. What better way to start than with the entire internet?

The internet, and top-level domains

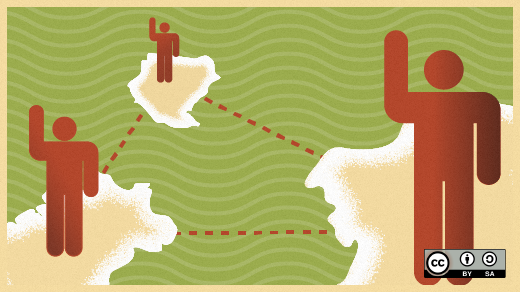
You may know that the internet is a network. A network, by definition, is a group of connections. The term "internet" is in fact a portmanteau of "interconnected" and "network". The internet is a network of interconnected networks, and originally it consisted of two: The military network and the academic network. Once the internet got popular outside those two groups, it became apparent that different designations were needed to differentiate, say, a commercial entity from a charitable organization from a university or a governmental department.

These designations are called top-level domains (TLD). There are many available today, but for a long time there were only a handful. The original TLDs remain popular, and you probably know that when you go to, for instance, a .com address, you're visiting a commercial site, but when you visit a .org address you're going to a non-profit website.

Open source is a network

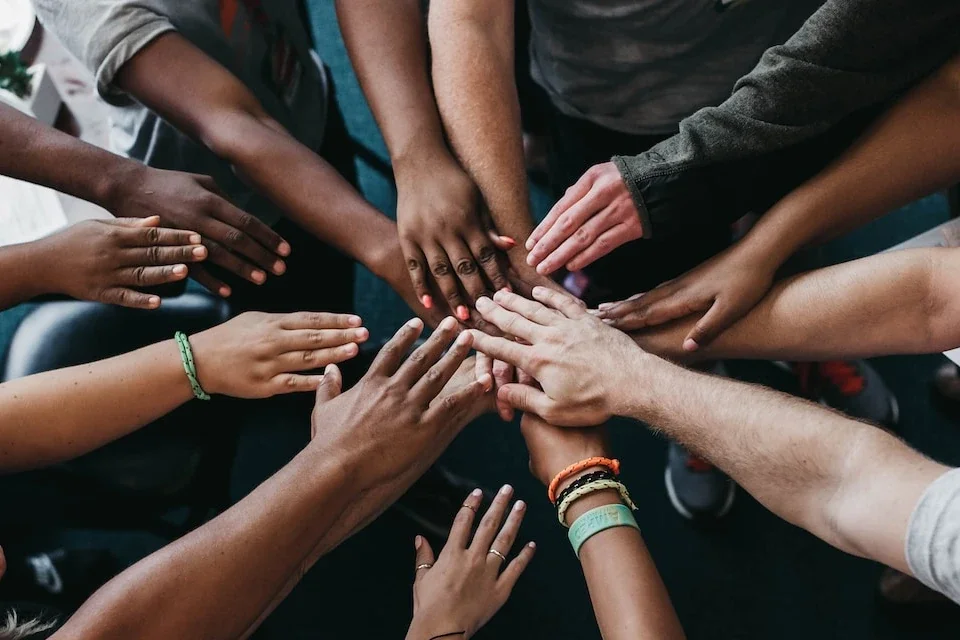
Open source can be many things. It can be commercial, it can be non-profit, it can be academic, it can be cultural. No matter what form it takes, though, it's always a network. Sometimes (but not always) it's a network of computers, but most importantly it's a network of people. Whether people are gathering at a conference or a pub or in an online chat room, open source is a community of people.

The website Opensource.com has been supported by a commercial entity for 12 years. But the people (that's you and me) that make up the Opensource.com community aren't commercial entities, we're people.

In one month, Opensource.com is going to resolve that bug. Stay tuned!

The community is hard at work on something new.

What to read next
Creative Commons LicenseThis work is licensed under a Creative Commons Attribution-Share Alike 4.0 International License.

4 Comments

These comments are closed.
Avatar
Don Watkins | June 9, 2023
1 reader likes this.

I agree with Bryan! Glad for the opportunity to grow this community and appreciative of your efforts.

Avatar
Donna Benjamin | June 12, 2023
1 reader likes this.

Colour me intrigued! Where might the curious learn more, or perhaps even contribute?

Avatar
Greg Pittman | June 12, 2023
No readers like this yet.

It's a nice thought that maybe opensource.com might be able to paraphrase Mark Twain and say, "The reports of my death are greatly exaggerated."

Tips for running virtual, in-person, and hybrid events

Tips for running virtual, in-person, and hybrid events rpaik

Over the past few years, virtual events have thrived. In-person events are back now, but it's important to keep in mind that virtual events didn't just come out of nowhere. Many of us were actually doing a lot of different online events even before they became popular. Many communities held hackathons, bug and issue triaging, webinars, and so on, as virtual events. They brought community members together for collaboration and education. Virtual events have improved since then, largely out of necessity, and I think we've all learned a lot. In this article, I consider how virtual and physical events can co-exist to render an improved event experience for everyone.

Costs and crowds

I don't think anyone wants to go back to the days when all events were happening on screens. But virtual events do have important advantages compared to in-person events. To begin with, it is relatively easy to start a virtual event as you often don't need much beyond meeting and streaming platforms. It can be as basic as live streaming from a video chat platform. This is especially useful for small communities that don't have a large events budget. In fact, a virtual event platform provides an opportunity to build an audience before you start making significant investments in in-person events.

The lower cost and logistical hurdles of virtual meetings don't just apply to the event organizer. It matters to attendees and community members too. A typical meetup is likely to last for 60 to 90 minutes. Is everyone always happy to commute 30 minutes each way to get to the meeting venue? A meetup in a virtual format can lower the participation barrier for attendees. I think this is one of the reasons that many meetups are continuing in virtual formats today.

The cost of doing virtual events is much lower, so there's low-risk of experimenting with different content, format, target audiences, and so on. Even if a new event isn't a huge success, you won't have to invest a large budget on the venue, equipment, people, travel, and so on. And you're able to get some valuable learning from the event no matter what.

Practical events

In addition, there are some activities that are just well-suited for virtual events. Things like documentation and bug triaging are crucial in open source communities. Despite this most people see them more like chores that they'd rather avoid. Why not have a short one to two day window where community members come together online so they can work on these chores together while supporting each other?

Hybrid events

Many events are going hybrid now, with both in-person and virtual components. By hybrid, I don't mean just broadcasting in-person sessions from conference facilities. Many have separate tracks for in-person and virtual participants. FOSDEM 2023 is a great example of a hybrid event, with separate online rooms.

Some utilize virtual tracks for "Day 0" events (orientation, project team meetings, meetups, and so on). This way, people who aren't able to travel to the in-person conference can still participate in the earliest events. By having a separate virtual track, you can potentially reduce the total length of the in-person conference. This means people don't have to be away from home as long as a 100% in-person event.

The dos and don'ts

Here are some tips based on my experience of attending and organizing virtual events.

  • DON'T have the same structure as in-person events. When you have an event online, you wouldn't want to ask the audience to sit through a full day of presentations. It's difficult for most people to stare at their screens for a long period of time. If you have more than four hours of content, consider spreading the event over a few days so that attendees only need to sit through a maximum of a couple of hours of presentations each day. You also don't always need to add breaks between sessions in virtual events because people aren't moving to different rooms. As a matter of fact, by hot switching to the next session, you're less likely to lose attendees between presentations.

  • DON'T put a wall around the content after the event. I recently registered and attended an event and was told that slides and recordings would be available a few weeks after the event. When I returned to the event page a few weeks later, it asked me to register with my email address to get access to the content! I understand people's desire to collect leads. But if people had to register for the event already, or the event was live-streamed, it's not appropriate to ask them to share their contact information. Instead, make the content accessible to anyone.

  • DON'T force synchronous participation from attendees. One of the key benefits of virtual events is that it's easier for everyone to attend or participate. If a person cannot watch a presentation live, provide ways for them to interact with presenters and other attendees asynchronously.

  • DO make content available prior to events. Online events make it easier for community members to participate asynchronously. Things like publishing slides or Q&A pages ahead of time allow attendees to review content and post questions that presenters can address during and after the session. Also, if you're doing a hands-on workshop, publishing a prep guide before the event allows attendees to set up their environment so that it's easier to follow along during the presentation and play around in their sandbox.

  • DO have presenters available for asynchronous Q&A sessions. Some of the virtual events I enjoyed had dedicated Q&A channels (Mattermost or Discourse are great open source options) where you could interact with presenters well after their session ended. At an in-person conference, you're often limited to a 10 or 15 minute break after a session to talk to the presenter. Virtual events allow you to have a Q&A channel available for a few days after the event.  This let's both synchronous and asynchronous attendees communicate with presenters.

Best of both worlds

I'm definitely glad that in-person events are back and I'm able to see my open source friends again in real life. However, I don't think we need to completely put virtual events behind us. In particular, hybrid events with "virtual tracks" can make events accessible to more community members and help you reach a wider audience. I think society has learned some important lessons, so let's put them to good use.

Create the perfect blend of virtual and in-person events.

Remote people connected on clouds
Image by:

Opensource.com

What to read next
Creative Commons LicenseThis work is licensed under a Creative Commons Attribution-Share Alike 4.0 International License.

Comments are closed.

These comments are closed.

Generate web pages from Markdown with Docsify-This

Generate web pages from Markdown with Docsify-This paulhibbitts

Are you interested in leveraging Markdown for online content without any website setup or build process? How about seamlessly embedding constraint-free Markdown or HTML into multiple platforms (such as a content management system or learning management system)? The open source project Docsify-This, built with Docsify.js, provides an easy way to publish, share, and reuse Markdown content.

[ Get the Markdown cheat sheet ]

What is Docsify-This?

With Docsify-This, you can instantly turn any publicly available Markdown file into a responsive standalone web page. You can also link multiple Markdown files to create a simple website. Designers can alter the visual appearance of displayed pages with the point-and-click Web Page Builder interface or URL parameters. You can also use a set of provided Markdown CSS classes when creating your own Markdown content. In addition, if you use Codeberg or GitHub to store your Markdown files, an Edit this Page link can be automatically provided for each page to support collaborative authoring.

It's open source, so you can host a Docsify-This instance using your own custom domain without the risk of platform lock-in.

Use the Docsify-This Web Page Builder

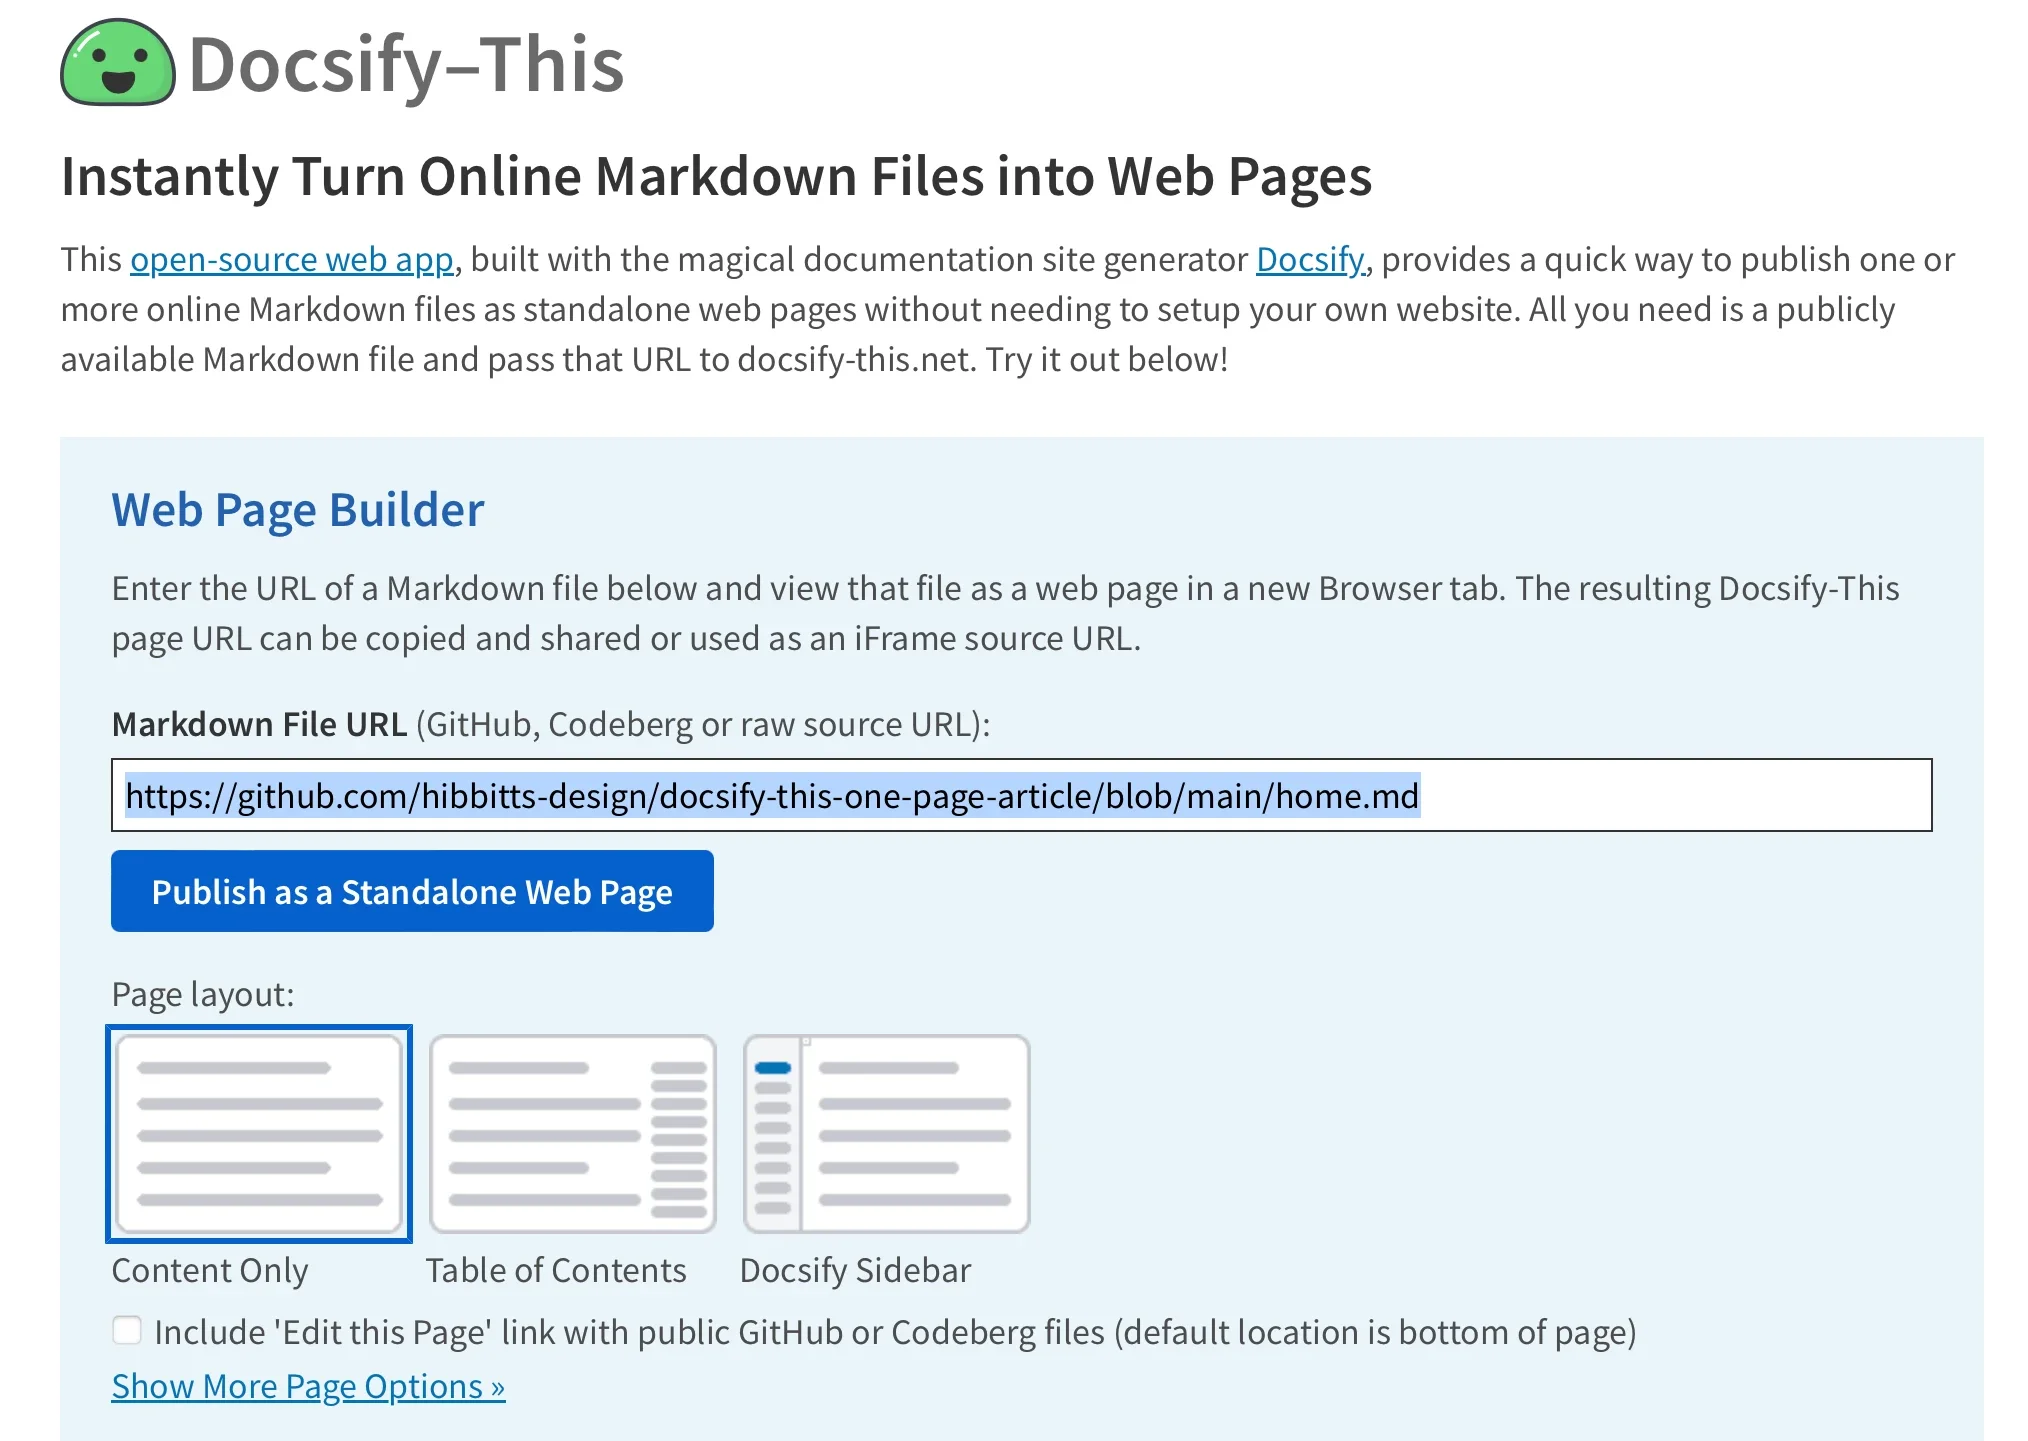
To use the Web Page Builder, open a browser and navigate to the Docsify-This website or your local instance. In the Web Page Builder section, enter the URL of a Markdown file in a public repo of Codeberg or GitHub (other Git hosts can also be used via Docsify-This URL parameters but not in the Web Page Builder), and then click the Publish as Standalone Web Page button.

The Docsify-This web page builder interface
Image by:

(Paul Hibbitts, CC BY-A 4.0)

The Markdown file is rendered as a standalone web page with a URL you can copy and share. Here's an example URL:

https://docsify-this.net/?basePath=https://raw.githubusercontent.com/hibbitts-design/docsify-this-one-page-article/main&homepage=home.md

Docsify-This rendered web pages are perfect for embedding, with the ability to visually style Docsify-This pages to the destination platform.

Docsify-This rendered Markdown file
Image by:

(Paul Hibbitts, CC BY-A 4.0)

Render other files in the same repository

You can render other Markdown files in the same repository by directly editing the Docsify-This URL parameter homepage. For example:

https://docsify-this.net/?basePath=https://raw.githubusercontent.com/hibbitts-design/docsify-this-one-page-article/main&homepage=anotherfile.md

Modify the web page's appearance

You can change the appearance of any Markdown file displayed in Docsify-This by using URL parameters. For example, font-family, font-size, link-color, and line-height are all common CSS attributes and are valid parameters for Docsify-This:

https://docsify-this.net/?basePath=https://raw.githubusercontent.com/hibbitts-design/docsify-this-one-page-article/main&homepage=home.md&font-family=Open%20Sans,sans-serif

You can also alter the visual appearance using a set of special Markdown CSS classes. For example, you can add the button class to a link:

[Required Reading Quiz due Jun 4th](https://canvas.sfu.ca/courses/44038/quizzes/166553 ':class=button')  

This produces a button image instead of just a text link:

A button rendered by Docsify-This
Image by:

(Paul Hibbitts, CC BY-A 4.0)

In addition to the Markdown CSS classes supported by Docsify-This, you can define your own custom classes within your displayed Markdown files. For example:

<style>
.markdown-section .mybutton, .markdown-section .mybutton:hover {
  cursor: pointer;
  color: #CC0000;
  height: auto;
  display: inline-block;
  border: 2px solid #CC0000;
  border-radius: 4rem;
  margin: 2px 0px 2px 0px;
  padding: 8px 18px 8px 18px;
  line-height: 1.2rem;
  background-color: white;
  font-family: -apple-system, "Segoe UI", "Helvetica Neue", sans-serif;
  font-weight: bold;
  text-decoration: none;
}
</style>

[Custom CSS Class Button](# ':class=mybutton')

Produces this:

A custom button image rendered with Docsify-This
Image by:

(Paul Hibbitts, CC BY-A 4.0)

Include HTML snippets

As supported by standard Markdown, you can include HTML snippets. This allows you to add layout elements to your HTML render. For example:

<div class="row">
<div class="column">

Lorem ipsum dolor sit amet, consectetur adipiscing elit.

</div>
<div class="column">

Lorem ipsum dolor sit amet, consectetur adipiscing elit.

</div>
</div>

Embed Docsify-This as an iFrame

You can embed Docsify-This web pages using an iFrame in almost any platform. You can also use URL parameters to ensure your embedded content matches your destination platform:

<p><iframe style="overflow: hidden; border: 0px #ffffff none; margin-top: -26px; background: #ffffff;" src="https://docsify-this.net/?basePath=https://raw.githubusercontent.com/paulhibbitts/cmpt-363-222-pages/main&homepage=home.md&font-family=Lato%20Extended,Lato,Helvetica%20Neue,Helvetica,Arial,sans-serif&font-size=1&hide-credits=true" width="800px" height="950px" allowfullscreen="allowfullscreen"></iframe></p>
A Docsify-This page embedded in an LMS
Image by:

(Paul Hibbitts, CC BY-A 4.0)

Embed Docsify-This with an external URL

In certain learning management systems (LMS), including the open source Moodle and even the proprietary Canvas, you can link external web pages to a course navigation menu and sometimes more. For example, you can use the Redirect Tool in Canvas to display Docsify-This web pages.

url=https://docsify-this.net/?basePath=https://raw.githubusercontent.com/paulhibbitts/cmpt-363-222-pages/main&homepage=resources.md&edit-link=https://github.com/paulhibbitts/cmpt-363-222-pages/blob/main/resources.md&font-family=Lato%20Extended,Lato,Helvetica%20Neue, Helvetica,Arial,sans-serif&font-size=1&hide-credits=true

Integrate Docsify-This and Git

To fully leverage the benefits of version control and potentially collaboration using an optional Edit this Page link, store your Docsify-This Markdown pages in a Git repository on either Codeberg or GitHub. Several open source tools provide a graphical interface for Git, including GitHub Desktop (recently released as open source), Git-Cola, and SparkleShare. The text editors VSCode and Pulsar Edit (formerly Atom.io) both feature Git integration, too.

[ Get the Git tips and tricks eBook ]

Markdown publishing made easy

The benefits of Markdown-based publishing are available to everyone, thanks to Docsify. And thanks to Docsify-This, it's easier than ever. Try it out at the Docsify-This website.

This open source tool makes it easier than ever to convert Markdown to web pages.

Digital creative of a browser on the internet
What to read next
Creative Commons LicenseThis work is licensed under a Creative Commons Attribution-Share Alike 4.0 International License.

Comments are closed.

These comments are closed.

How I used guilt as a motivator for good

How I used guilt as a motivator for good its-surya

Recently, I was asked by a friend and colleague if I were interested in speaking together at a conference. I was pleasantly surprised because I hadn't contributed much to the project they were presenting, but I expressed interest. We met to discuss the presentation, and that's when I learned the real reason I was asked to participate: The conference's diversity, equity, and inclusion (DEI) initiatives required there to be at least one speaker that does not identify as a man. I was offended; it felt like I was approached only because of my gender, not based on merit.

My friend assured me that wasn't the only reason I'd been asked. They needed new contributors to the project because there was a lot of work to be done, and they were hoping I could help fill that gap.

[ Want to create your own event? Read the 10-step guide for a successful hackathon ]

I gave it some thought and tried to understand why the DEI initiatives were in place.  I also thought about the other side of the coin, where the people who wanted to present couldn't, unless they found someone from a minority group to present alongside them.

As I thought about the bigger picture and the benefits this opportunity would bring to me, I decided to forego my ego being hurt. Once I let go of feeling offended, I realized that I was also feeling very uncomfortable presenting something that I hadn't contributed directly to. My ethics didn't agree with that. How could I possibly step onto a stage and act as the face of something I hadn't worked on?

Resolving to help more

I did some research on the project. The technology was not totally alien to me, and I had a good grasp of the fundamentals it was trying to achieve. In fact, its overall goal made me feel excited to contribute. If done well, it would be super useful to users.

I made a resolution that I would go ahead with this speaking opportunity only if I got the opportunity to give back to the community tenfold and become a key contributor. My friend was more than willing to help me on that journey.

With that resolve, we submitted our talk. My co-presenters were supportive and made me feel welcome. They said that as long as I was interested and had a passion for the project, nothing else mattered.

[ Also read How I returned to open source after facing grief ]

Participating in the conference was a huge opportunity, and it had such a positive impact on me. I met a lot of experienced people across the open source community and I felt inspired! I learned a lot of new things from the people and the various panels, sessions, and discussions at the conference. Our presentation went well, and I consider giving a talk at such a big conference quite an achievement.

However, once the conference was over the guilt started kicking in.

Guilt as a motivator

I felt like I owed the community and the people who had given me this chance. I wanted to focus on the promise I'd made, but it was hard with other higher-priority things getting in the way. Whenever I deviated from my plan, the guilt kept me on track. It reminded me that I had to give back to the community that had given me such a good opportunity. After a few months of struggling and juggling, I can proudly say that I didn't give up. Today, I'm an active contributor to that project.

I love the challenges it presents, and I enjoy solving some of the key issues in the project's area. I also have been able to take the lead in implementing this upstream project in our downstream ecosystem. As icing on the cake, I was again invited to present with the team and give the community updates for the project. This time, it was not because of a DEI initiative, as the ratio was already balanced.

Feeling guilt isn't so bad after all!

I'm glad that I took the opportunity, and I'm glad it turned out to be a win-win situation for everyone involved. If I hadn't been approached about being a co-presenter, I probably would have never gotten involved in this project, and that would have been such a miss! I'm grateful to the people who gave me this chance and supported me.

I'm probably not the only woman who has faced this. I want to tell all the women out there if such an opportunity presents itself, there's no need to feel guilt, or that you "owe" anyone or any kind of pressure. If you feel such pressure, turn that emotion into a weapon and do good with it! I encourage you to take the opportunity if it will benefit you and make the most out of it. Later on, if you can do the same for another person and uplift them, that’s how you can really pay back to the community. After all, this is what open source community is all about. It's as much about the people as is about the technology being built!

[ Ready to level up your communication skills? Get advice from IT leaders. Download 10 resources to make you a better communicator. ]

Guilt is usually considered a negative emotion, but by steering it well, you can achieve surprising success.

What to read next
Creative Commons LicenseThis work is licensed under a Creative Commons Attribution-Share Alike 4.0 International License.

Comments are closed.

These comments are closed.

3 reasons to host a docathon for your open source project

3 reasons to host a docathon for your open source project lmalivert

Your open source project's documentation is essential to your customers. Your target audience must understand the purpose of your project and how to use it, and documentation is what bridges that gap. A project is rarely ever truly done, so it's equally important for resources to be maintained and updated with your project's continuous improvement.

But what happens when you have lots of documentation to maintain but lack the resources to keep it current? The answer is pretty simple: Host a docathon!

What is a docathon?

A docathon is like a hackathon. A hackathon is an event where engineers and community leaders gather to improve or add new features to an existing application. In a docathon, the same kind of collaboration focuses on improving documentation.

[ Learn about writing Docs as Code. ]

A docathon can fill gaps within content, restructure large documentation sets, fix broken links, or just correct typos. The intent behind hosting a docathon is to improve a large amount of documentation in a relatively brief timeframe.

Some examples of product documentation include:

  • Training manuals
  • User manuals
  • Installation guides
  • Troubleshooting guides
  • Quickstart guides
  • API documentation
  • Tutorials

At my organization, our documentation team hosted a docathon and successfully revamped a 102-page installation guide. The docathon enabled us to focus on the project's scope, which was reorganizing for simplicity, removing duplicate content, and following the customer journey. Hosting a docathon left a lasting impression on my team and improved customer success.

[ Read Write documentation that actually works for your community ]

3 things you can achieve with a docathon

Here are my top three reasons to host a docathon:

1. No more backlog

Most documentation must evolve along with the product it supports. As the product changes or updates, so must the documentation. In some cases, documentation teams release new versions of their documentation alongside the engineering team's release cycle. As priorities within a team change and GA releases continue, documentation teams face the challenge of keeping up with new features, bug fixes, and tasks to complete. The changes that get left behind become part of a backlog—an accumulation of work that needs to be completed at a later time.

Docathon tip: During a docathon, participants can triage backlog items and complete them as they progress through the list. Non-technical participants can work on fixes related to typos, broken links, and other text-related issues.

2. Revamp large-scale guides

By the time your documentation team realizes it's time to revamp a guide, it's probably several chapters in and hundreds of pages deep. Once the content plan has been developed, the complexity of restructuring begins. Restructuring a large amount of documentation is not for the faint of heart.

Docathon tip: Assemble a team to lead the docathon and provide incentives for organization-wide participation from different teams or departments. Depending on the scope of work and time constraints, your team can successfully restructure an entire guide in less time than you probably expect.

3. Collaboration between cross-functional teams

It is common for different groups within an organization to work in isolation. Engineering, product, customer support, marketing, and documentation teams may not collaborate on projects as often as they should.

Imagine hosting an event where each team member can use their expertise to improve product documentation. Docathons foster subject matter expert (SME) diversity, real-time collaboration, and communication. They also allow for an inclusive environment where individuals residing in different geographical locations can participate in person or remotely. Your documentation receives the undivided attention of experts with different viewpoints and specializations, minimizing isolated siloes, unconscious bias, and burnout.

Docathon tip: Enable cross-functional teams to come together for a common cause.

[ Learn what it takes to build a resilient IT culture ]

Documentation marathon

The next time your team has a seemingly insurmountable backlog or is tasked with restructuring a huge documentation project, consider hosting a docathon. It's easy, and its productivity may surprise you. For more information on hosting an event like this, read Tiffany Long's excellent 10-step guide to hosting a hackathon.

A marathon for documentation is a great way to produce or improve the docs for your open source project.

Files in a folder
What to read next
Creative Commons LicenseThis work is licensed under a Creative Commons Attribution-Share Alike 4.0 International License.

Comments are closed.

These comments are closed.

Run a virtual conference using only open source tools

Run a virtual conference using only open source tools mairin

The Fedora Design Team discovered that using open source tools to run a virtual conference can be quite effective by hosting the first Creative Freedom Summit in January 2023.

In this article, I'll share some background on the conference, why using open source tools to run it was important to us, and the specific tools and configurations our team used to make it all work. I'll also talk about what worked well and what will need improvement at our next summit in 2024.

What is Creative Freedom Summit?

The Creative Freedom Summit was an idea Marie Nordin came up with after reviewing talk submissions for Flock, the annual Fedora users and contributors conference. She received many talk submissions for the August 2022 Flock relating to design and creativity in open source—far more than we could possibly accept. With so many great ideas for open source design-related talks out there, she wondered if there would be space for a separate open source creativity conference focused on creatives who use open source tools to produce their work.

Marie brought this idea to the Fedora Design Team in the fall of 2022, and we started planning the conference, which took place January 17-19, 2023. Since it was our first time running a new conference like this, we decided to start with invited speakers based on some of the Flock submissions and our own personal network of open source creatives. Almost every speaker we asked gave a talk, so we didn't have room to accept submissions. We will need to figure out this next year, so we don't have an open source CFP (Call for Papers) management tool for that to tell you about yet.

Using open source for open source conferences

Since the initial COVID pandemic lockdowns, Fedora's Flock conference has been run virtually using Hopin, an online conference platform that isn't open source but is friendly to open source tools. Fedora started using it some years ago, and it definitely provides a professional conference feel, with a built-in sponsor booth/expo hall, tracks, hallway chat conversations, and moderation tools. Running the Creative Freedom Summit using Hopin was an option for us because, as a Fedora-sponsored event, we could access Fedora's Hopin setup. Again, Hopin is not open source.

Now, as a long-term (~20 years) open source contributor, I can tell you that this kind of decision is always tough. If your conference focuses on open source, using a proprietary platform to host your event feels a little strange. However, as the scale and complexity of our communities and events have grown, the ability to produce an integrated open source conference system has become more challenging.

There is no right or wrong answer. You have to weigh a lot of things when making this decision:

  • Budget
  • People power
  • Infrastructure
  • Technical capability
  • Complexity/formality/culture of the event

We didn't have any budget for this event. We did have a team of volunteers who could put some work hours into it. We had the Fedora Matrix Server as a piece of supported infrastructure we could bring into the mix and access to a hosted WordPress system for the website. Teammate Madeline Peck and I had the technical capability/experience of running the live, weekly Fedora Design Team video calls using PeerTube. We wanted the event to be low-key, single-track, and informal, so we had some tolerance for glitches or rough edges. We also all had a lot of passion for trying an open source stack.

Now you know a little about our considerations when making this decision, which might help when making decisions for your event.

An open source conference stack

Here is how the conference tech stack worked.

Overview

Live components

  • Livestream: We streamed the stage and the social events to a PeerTube channel. Conference attendees could watch the stream live from our PeerTube channel. PeerTube includes some privacy-minded analytics to track the number of livestream viewers and post-event views.
  • Live stage + social event room: We had one live stage for speakers and hosts using Jitsi, ensuring only those with permission could be on camera. We had an additional Jitsi meeting room for social events that allowed anyone who wanted to participate in the social event to go on camera.
  • Backstage: We had a "Backstage" Matrix channel to coordinate with speakers, hosts, and volunteers in one place while the event was going on.
  • Announcements and Q&A: We managed Q&A and the daily schedule for the conference via a shared Etherpad (which we later moved to Hackmd.io).
  • Integrated and centralized conference experience: Using Matrix's Element client, we embedded the livestream video and an Etherpad into a public Matrix room for the conference. We used attendance in the channel to monitor overall conference attendance. We had a live chat throughout the conference and took questions from audience members from the chat and the embedded Q&A Etherpad.
  • Conference website: We had a beautifully-designed website created by Ryan Gorley hosted on WordPress, which had the basic information and links for how to join the conference, the dates/times, and the schedule.

Post-event components

  • Post-event survey: We used the open source LimeSurvey system to send out a post-event survey to see how things went for attendees. I use some of the data from that survey in this article.
  • Post-event video editing and captioning: We didn't have a live captioning system for the conference, but as I was able, I typed live notes from talks into the channel, which attendees greatly appreciated. Post-event, we used Kdenlive (one of the tools featured in talks at the event) to edit the videos and generate captions.
  • Event recordings: PeerTube automagically posts livestream recordings to channels, making nearly instant recordings available for attendees for talks they may have missed.

I'll cover some details next.

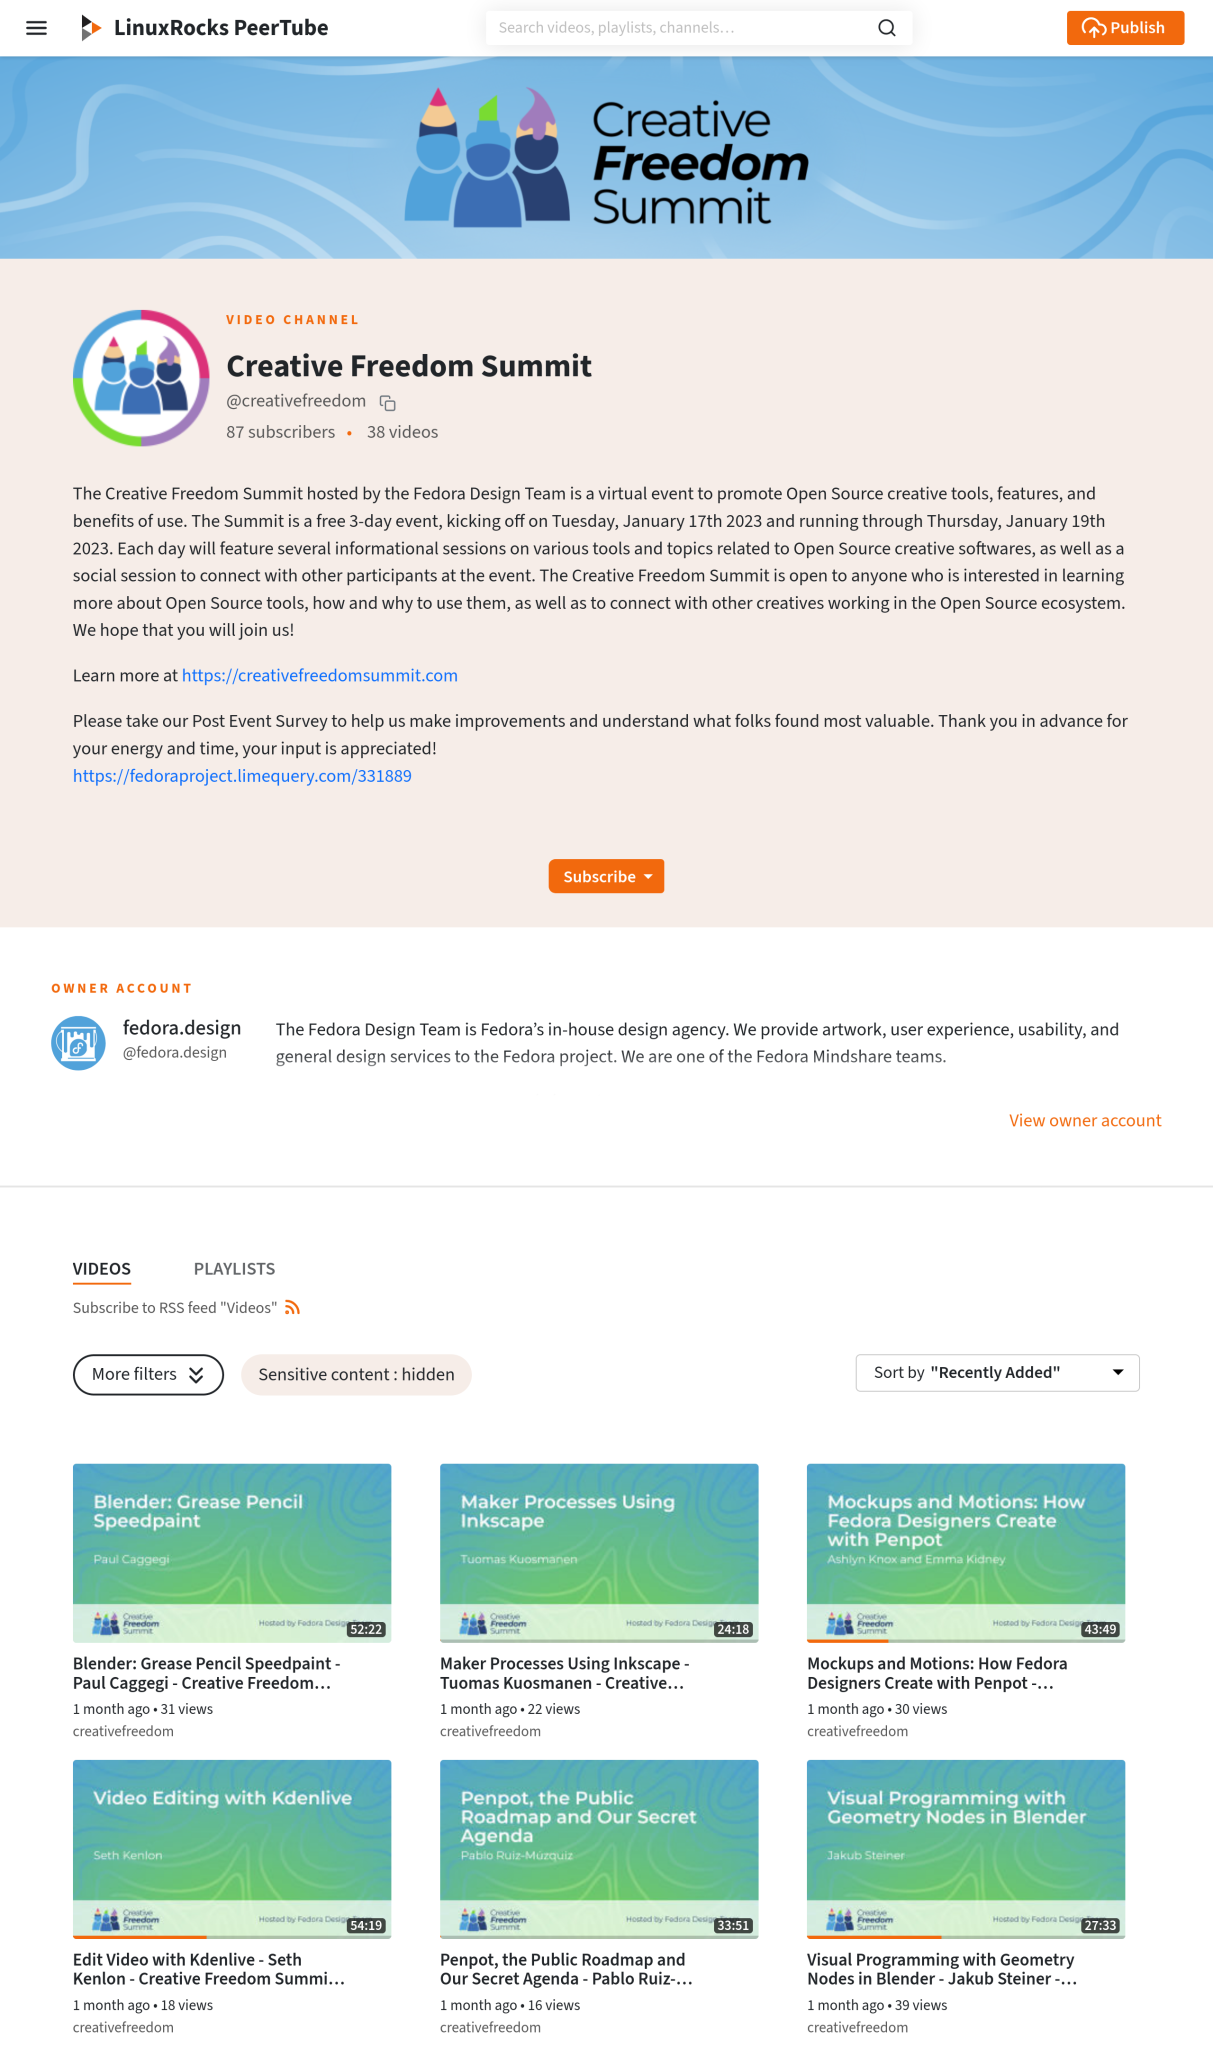
Livestream with PeerTube

Screenshot showing the Creative Freedom Summit PeerTube channel, with the logo, a description of the event, and a set of video thumbnails
Image by:

(Máirín Duffy, CC BY-SA 4.0)

We used the LinuxRocks PeerTube platform generously hosted by LinuxRocks.online for the Creative Freedom Summit's livestream. PeerTube is a free and open source decentralized video platform that is also part of the Fediverse.

One of the best features of PeerTube (that other platforms I am aware of don't have) is that after your livestream ends, you get a near-instant replay recording posted to your channel on PeerTube. Users in our chatroom cited this as a major advantage of the platform. If an attendee missed a session they were really interested in, they could watch it within minutes of that talk's end. It took no manual intervention, uploading, or coordination on the part of the volunteer organizing team to make this happen; PeerTube automated it for us.

Here is how livestreaming with PeerTube works: You create a new livestream on your channel, and it gives you a livestreaming URL + a key to authorize streaming to the URL. This URL + key can be reused over and over. We configured it so that the recording would be posted to the channel where we created the livestreaming URL as soon as a livestream ended. Next, copy/paste this into Jitsi when you start the livestream. This means that you don't have to generate a new URL + key for each talk during the conference—the overhead of managing that for organizers would have been pretty significant. Instead, we could reuse the same URL + key shared in a common document among conference organizers (we each had different shifts hosting talks). Anyone on the team with access to that document could start the livestream.

How to generate the livestream URL + key in PeerTube

The following section covers generating the livestream URL + key in PeerTube, step-by-step.

1. Create stream video on PeerTube

Log into PeerTube, and click the Publish button in the upper right corner:

Screenshot of the PeerTube Publish button
Image by:

(Máirín Duffy, CC BY-SA 4.0)

2. Set options

Click on the Go live tab (fourth from the left) and set the following options:

  • Channel: (The channel name you want the livestream to publish on)
  • Privacy: Public
  • Radio buttons: Normal live

Then, select Go Live. (Don't worry, you won't really be going live quite yet, there is more data to fill in.)

Screenshot of the Go Live button in PeerTube
Image by:

(Máirín Duffy, CC BY-SA 4.0)

3. Basic info (don't click update yet)

First, fill out the Basic Info tab, then choose the Advanced Settings tab in the next step. Fill out the name of the livestream, description, add tags, categories, license, etc. Remember to publish after the transcoding checkbox is turned on.

This ensures once your livestream ends, the recording will automatically post to your channel.

4. Advanced settings

You can upload a "standby" image that appears while everyone is watching the stream URL and waiting for things to start.

Screenshot of PeerTube Advanced Settings
Image by:

(Máirín Duffy, CC BY-SA 4.0)

This is the standby image we used for the Creative Freedom Summit:

Screenshot of the Creative Freedom Summit banner
Image by:

(Máirín Duffy, CC BY-SA 4.0)

5. Start livestream on PeerTube

Select the Update button in the lower right corner. The stream will appear like this—it's in a holding pattern until you start streaming from Jitsi:

Screenshot of starting the live stream on PeerTube
Image by:

(Máirín Duffy, CC BY-SA 4.0)

6. Copy/paste the livestream URL for Jitsi

This is the final step in PeerTube. Once the livestream is up, click on the icon under the video and towards the right:

Copy and paste the URL
Image by:

(Máirín Duffy, CC BY-SA 4.0)

Select Display live information. You'll get a dialog like this:

Screenshot of Display live information option
Image by:

(Máirín Duffy, CC BY-SA 4.0)

You must copy both the live RTMP URL and the livestream key. Combine them into one URL and then copy/paste that into Jitsi.

The following are examples from my test run of these two text blocks to copy:

  • Live RTMP Url: rtmp://peertube.linuxrocks.online:1935/live
  • Livestream key: 8b940f96-c46d-46aa-81a0-701de3c43c8f

What you'll need to paste into Jitsi is these two text blocks combined with a / between them, like so:

rtmp://peertube.linuxrocks.online:1935/live/8b940f96-c46d-46aa-81a0-701de3c43c8f

Live stage + social event room: Jitsi

We used the free and open source hosted Jitsi Meet video conferencing platform for our "live stage." We created a Jitsi meeting room with a custom URL at https://meet.jit.si and only shared this URL with speakers and meeting organizers.

We configured the meeting with a lobby (this feature is available in meeting settings once you join your newly-created meeting room) so speakers could join a few minutes before their talk without fear of interrupting the presentation before theirs. (Our host volunteers let them in when the previous session finished.) Another option is to add a password to the room. We got by just by having a lobby configured. It did seem, upon testing, that the moderation status in the room wasn't persistent. If a moderator left the room, they appeared to lose moderator status and settings, such as the lobby setup. I kept the Jitsi room available and active for the entire conference by leaving it open on my computer. (Your mileage may vary on this aspect.)

Jitsi has a built-in livestreaming option, where you can post a URL to a video service, and it will stream your video to that service. We had confidence in this approach because it is how we host and livestream weekly Fedora Design Team meetings. For the Creative Freedom Summit, we connected our Jitsi Live Stage (for speakers and hosts) to a channel on the Linux Rocks PeerTube.

Jitsi lets speakers share their screens to drive their own slides or live demos.

Livestreaming Jitsi to PeerTube

1. Join the meeting and click the icon next to the red hangup button at the bottom of the screen.

Join the Jitsi meeting
Image by:

(Máirín Duffy, CC BY-SA 4.0)

2. Select Start live stream from the pop-up menu.

Screenshot of starting the live stream in Jitsi
Image by:

(Máirín Duffy, CC BY-SA 4.0)

3. Copy/paste the PeerTube URL + key text

Screenshot of copying and pasting the livestream key
Image by:

(Máirín Duffy, CC BY-SA 4.0)

4. Listen for your Jitsi Robot friend

A feminine voice will come on in a few seconds to tell you, "Live streaming is on." Once she sounds, smile! You're livestreaming.

5. Stop the livestream

This stops the PeerTube URL you set up from working, so repeat these steps to start things back up.

Jitsi tips

Managing Recordings by turning the Jitsi stream on and off

We learned during the conference that it is better to turn the Jitsi stream off between talks so that you will have one raw recording file per talk posted to PeerTube. We let it run as long as it would the first day, so some recordings have multiple presentations in the same video, which made using the instant replay function harder for folks trying to catch up. They needed to seek inside the video to find the talk they wanted to watch or wait for us to post the edited version days or weeks later.

Preventing audio feedback

Another issue we figured out live during the event that didn't crop up during our tests was audio feedback loops. These were entirely my fault (sorry to everyone who attended). I was setting up the Jitsi/PeerTube links, monitoring the streams, and helping host and emcee the event. Even though I knew that once we went live, I needed to mute any PeerTube browser tabs I had open, I either had more PeerTube tabs open than I thought and missed one, or the livestream would autostart in my Element client (which I had available to monitor the chat). I didn't have an easy way to mute Element. In some of the speaker introductions I made, you'll see that I knew I had about 30 seconds before the audio feedback would start, so I gave very rushed/hurried intros.

I think there are simpler ways to avoid this situation:

  • Try to ensure your host/emcee is not also the person setting up/monitoring the streams and chat. (Not always possible, depending on how many volunteers you have at any given time.)
  • If possible, monitor the streams on one computer and emcee from another. This way, you have one mute button to hit on the computer you're using for monitoring, and it simplifies your hosting experience on the other.

This is something worth practicing and refining ahead of time.

Backstage: Element

A screenshot showing three chat room listings in Element: Creative Freedom Summit with a white logo, Creative Freedom Summit Backstage with a black logo, and Creative Freedom Summit Hosts with an orange logo
Image by:

(Máirín Duffy, CC BY-SA 4.0)

We set up a "Backstage" invite-only chat room a week or so before the conference started and invited all our speakers to it. This helped us ensure a couple of things:

  • Our speakers were onboarded to Element/Matrix well before the event's start and had the opportunity to get help signing up if they had any issues (nobody did).
  • We started a live communication channel with all speakers before the event so that we could send announcements/updates pretty easily.

The channel served as a useful place during the event to coordinate transitions between speakers, give heads up about whether the schedule was running late, and in one instance, quickly reschedule a talk when one of our speakers had an emergency and couldn't make their original scheduled time.

We also set up a room for hosts, but in our case, it was extraneous. We just used the backstage channel to coordinate. We found two channels were easy to monitor, but three were too many to be convenient.

Announcements and Q&A: Etherpad/Hackmd.io

Screenshot of an etherpad titled "General information" that has some info about the Creative Freedom Summit
Image by:

(Máirín Duffy, CC BY-SA 4.0)

We set up a pinned widget in our main Element channel with general information about the event, including the daily schedule, code of conduct, etc. We also had a section per talk of the day for attendees to drop questions for Q&A, which the host read out loud for the speaker.

We found over the first day or two that some attendees were having issues with the Etherpad widget not loading, so we switched to an embedded hackmd.io document pinned to the channel as a widget, and that seemed to work a little better. We're not 100% sure what was going on with the widget loading issues, but we were able to post a link to the raw (non-embedded) link in the channel topic, so folks could get around any problems accessing it via the widget.

Integrated and centralized conference experience

A video feed is in the upper left corner, a hackmd.io announcement page in the upper right, and an active chat below.
Image by:

(Máirín Duffy, CC BY-SA 4.0)

Matrix via Fedora's Element server was the single key place to go to attend the conference. Matrix chat rooms in Element have a widget system that allows you to embed websites into the chat room as part of the experience. That functionality was important for having our Matrix chat room serve as the central place to attend.

We embedded the PeerTube livestream into the channel—you can see it in the screenshot above in the upper left. Once the conference was over, we could share a playlist of the unedited video replays playlist. Now that our volunteer project for editing the videos is complete, the channel has the playlist of edited talks in order.

As discussed in the previous section, we embedded a hackmd.io note in the upper right corner to post the day's schedule, post announcements, and an area for Q&A right in the pad. I had wanted to set up a Matrix bot to handle Q&A, but I struggled to get one running. It might make for a cool project for next year, though.

Conversations during the conference occurred right in the main chat under these widgets.

There are a couple of considerations to make when using a Matrix/Element chat room as the central place for an online conference, such as:

  • The optimal experience will be in the Element desktop client or a web browser on a desktop system. However, you can view the widgets in the Element mobile client (although some attendees struggled to discover this, the UI is less-than-obvious). Other Matrix clients may not be able to view the widgets.
  • Attendees can easily DIY their own experience piecemeal if desired. Users not using the Element client to attend the conference reported no issues joining in on the chat and viewing the PeerTube livestream URL directly. We shared the livestream URL and the hackmd URL in the channel topic, making it accessible to folks who preferred not to run Element.

Website

Screenshot showing the top of creativefreedomsummit.com, with the headline "Create. Learn. Connect." against a blue and purple gradient background.
Image by:

(Máirín Duffy, CC BY-SA 4.0)

Ryan Gorley developed the Creative Freedom Summit website using WordPress. It is hosted by WPengine and is a one-pager with the conference schedule embedded from sched.org.

Post-event

Post-event survey

We used the open source survey tool LimeSurvey. We sent it out within a week or two to attendees via the Element Chat channel and our PeerTube video channel to learn more about how we handled the event. The event organizers continue to meet regularly. One topic we focus on during these post-event meetings is developing the questions for the survey in a shared hackmd.io document. The following are some things we learned from the event that might be of interest to you in planning your own open source powered online conference:

  • By far, most event attendees learned about the event from Mastodon and Twitter (together, covering 70% of respondents).
  • 33% of attendees used the Element desktop app to attend, and 30% used the Element Chat web app. So roughly 63% of attendees used the integrated Matrix/Element experience. The rest watched directly on PeerTube or viewed replays after.
  • 35% of attendees indicated they made connections with other creatives at the event via the chat, so the chat experience is pretty important to events if part of your goal is enabling networking and connections.

Captioning

During the event, we received positive feedback from participants who appreciated when another attendee live-captioned the talk in the chat and wished out loud for live captioning for better accessibility. While the stack outlined here did not include live captioning, there are open source solutions for it. One such tool is Live Captions, and Seth Kenlon covered it in an opensource.com article, Open source video captioning on Linux. While this tool is meant for the attendee consuming the video content locally, we could potentially have a conference host running it and sharing it to the livestream in Jitsi. One way to do this is using the open source broadcasting tool OBS so everyone watching the livestream could benefit from the captions.

While editing the videos post-event, we discovered a tool built into Kdenlive, our open source video editor of choice, that generates and automatically places subtitles in the videos. There are basic instructions on how to do this in the Kdenlive manual. Fedora Design Team member Kyle Conway, who helped with the post-event video editing, put together a comprehensive tutorial (including video instruction) on automatically generating and adding subtitles to videos in Kdenlive. It is well worth the read and watch if you are interested in this feature.

Video editing volunteer effort

When the event was over, we rallied a group of volunteers from the conference Element channel to work together on editing the videos, including title cards and intro/outro music, and general cleanup. Some of our automatic replay recordings were split across two files or combined in one file with multiple other talks and needed to be reassembled or cropped down.

We used a GitLab epic to organize the work, with an FAQ and call for volunteer help organized by skillset, with issues attached for each video needed. We had a series of custom labels we would set on each video so it was clear what state the video was in and what kind of help was needed. All the videos have been edited, and some need content written for their description area on the Creative Freedom Summit channel. Many have auto-generated subtitles that have not been edited for spelling mistakes and other corrections common with auto-generated text.

Screenshot of the list of videos needing editing help in GitLab
Image by:

(Máirín Duffy, CC BY-SA 4.0)

We passed the videos around—the files could be quite large—by having volunteers download the raw video from the unedited recording on the main PeerTube channel for the Creative Freedom Summit. When they had an edited video ready to share, we had a private PeerTube account where they could upload it. Admins with access to the main channel's account periodically grabbed videos from the private account and uploaded them to the main account. Note that PeerTube doesn't have a system where multiple accounts have access to the same channel, so we had to engage in a bit of password sharing, which can be nerve-wracking. We felt this was a reasonable compromise to limit how many people had the main password but still enable volunteers to submit edited videos without too much hassle.

Ready to give it a try?

I hope this comprehensive description of how we ran the Creative Freedom Summit conference using an open source stack of tools inspires you to try it for your open source event. Let us know how it goes, and feel free to reach out if you have questions or suggestions for improvement! Our channel is at: https://matrix.to/#/#creativefreedom:fedora.im


This article is adapted from Run an open source-powered virtual conference and is republished with permission.

Here's how to use open source tools to run your next virtual event.

Two people chatting via a video conference app
Image by:

Opensource.com

What to read next
Creative Commons LicenseThis work is licensed under a Creative Commons Attribution-Share Alike 4.0 International License.

Comments are closed.

These comments are closed.
❌