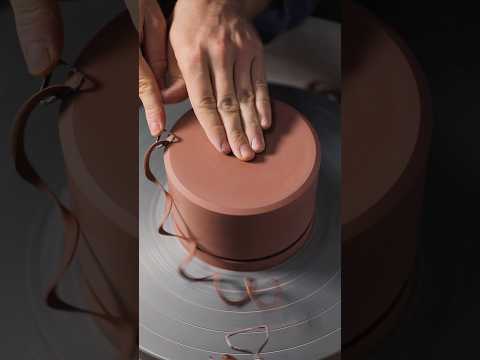
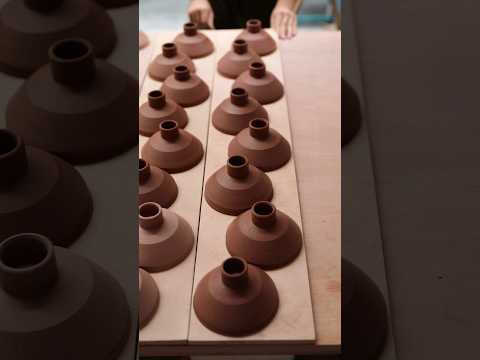
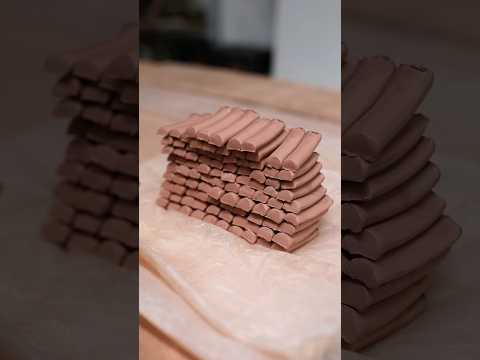
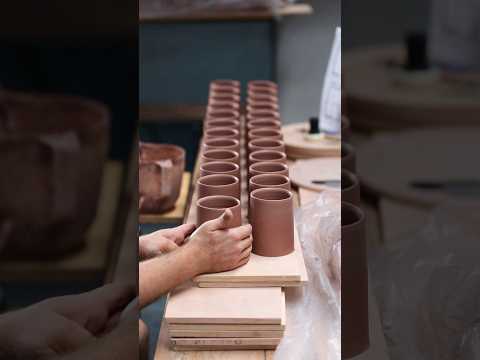
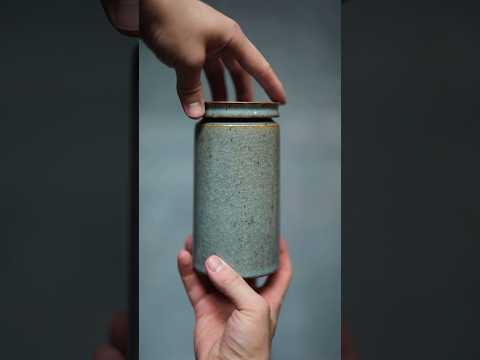
These are lovely things to trim provided the throwing was accurate, if not, well, there’s a whole other kettle of fish and it’s one I’ve tackled a lot. It’s not often that you have to attempt to throw leather hard clay in order to make a gallery smaller, but it happens.
The key with these, when it comes to trimming them, is making sure lid and body are exactly the same consistency in terms of how leather hard they are. Normally, this means drying the lids out for longer than the bodies, as they’re more thickly thrown, whereas I’ll wrap the body segments up in plastic well before that, as if they dry out too much, they become brittle and I actually need a little bit of flexibility in the rim to make sure I can keep them perfectly round.
Lots of issues arise if you turn the parts to fit when they’re noticeable different consistencies. For instance, if your lids are still really sopping wet in comparison to the body, if even you’re able to trim the piece to fit, the lid still has much more drying out to do comparatively, which means even if the components slot together beautifully, once dry the lids can end up being too loose.
All of that is to say, that drying your lids and bodies out is part of the process itself, it’s a skill, and if you compromise, or let somebody else do it for you, it may mean you’re trimming the clay when it’s in the wrong condition.
I’m embarking on a new round of material tests. This time, I’m seeing what molybdenum, volcanic sand, carborundum, titanium siliconite, peridot, lapis lazuli and finally, some red garnet, will do. All of which have different textures and consistencies and change how the stoneware clay throws and trims.
This is the subject of my YouTube video this weekend, (a link to which you can find in the Linktree in my profile’s biography), and it’s worth noting, that this is part one of a series I’ll be producing over the next couple of weeks or month—meaning the results will come, just not quite yet.
I always have a rough idea about what some of these additions will do, and in truth, it’s never quite as exciting as what you might be picturing in your mind. Often, glass and minerals melt, metals bloom and flow, and more commonly than not, things turn brown or black and are underwhelming. Yet, sometimes there’s some real gems, there are oddities that create beautiful bursts of colour, like the bronze I’ve used a lot in the past.
I know that testing these on small test tiles would be “better” technique. They take up less space in the kiln and are faster to produce, yet then I wouldn’t have what’s a growing collection of somewhat unusual bowls. These are pots encrusted in glass beads or rivulets of metal, some have collapsed and others are simply fascinating to look at, not that they’ll ever be used practically for food.
As always, if you have any material suggestions, I’m all ears and a huge thanks to Alan and Thomas, who sent me some of what’s seen in this weekend’s video. Thanks for watching!
It's time for yet another round of exciting raw material experiments. This time I'm wedging all kinds of things into the clay I use. There's molybdenum, volcanic sand, carborundum, titanium siliconite, peridot, lapis lazuli and finally, some red garnet. All of which have different textures and consistencies and change how the stoneware clay throws and trims.
With these, I'll be throwing and trimming a batch of test bowls and I apologise in advance for the 'teaser', as this is only the first step in the creation process, the initial wedging, throwing and turning of the bowls once they're leather hard.
My YouTube channel closely follows the day-to-day activities in the workshop, which often means I don't get to immediately see the results but that's working with clay, it's a slow process full of long periods of waiting for pots to dry, accumulate and then finally cool down in the kiln.
Rest assured, I will share the finished results when the time comes, when they've been reduction fired to cone ten, (1290ºC), but it may be a few weeks yet!
⚙️ • How to attach pots onto the wheel: https://youtu.be/mfTZU3lQsLY
📚 • You'll find many more guides on how to centre and pull up the walls of clay here: https://www.youtube.com/playlist?list=PL2WJhtTF0eGhQwf8g2LHcom_KrvJpH_JT
📖 • ORDER MY BOOK: https://geni.us/bymyhands
📢 • Find out much more about my work here: https://linktr.ee/floriangadsby
⏱ • Timestamps:
0:00 - Introduction & mixing the raw materials into my clay
0:22 - The materials I'll be using
4:15 - Preparing the clay
8:22 - Throwing the bowls
11:55 - Drying the bowls slowly & evenly overnight
12:25 - Trimming the bowls
21:26 - A failed attempt
22:15 - The 7 bowls
23:45 - Clean up
*I throw using both a Rohde HMT 500 & 600 potter's wheel and fire using Rohde kilns too, the electric is a TE-200 and the gas kiln is a KG-340.
____
I use these types of boxes for a variety of things at home. There’s one in the kitchen for the large, flaky salt, and there’s another one into which my few precious rings and other trinkets find a home in, too.
Unlike many of my other lidded forms, these you can actually easily reach a hand inside, whereas with many other of my storage vessels, they work better if you tip things into them and then pour the contents out.
But if I’m honest, nowadays I can’t say how many of my storage vessels end up being used on a daily basis. Truthfully, I don’t always make them with function in mind, pots that could be in the kitchen line shelves at home as decorative objects and I couldn’t care less. It’s the artistry and skill in these pots that keep me coming back to them and perhaps eventually they’ll be pulled back into circulation in the kitchen, or plucked off of the shelf to celebrate a special day.
For much of my angular work, it’s often easier to start out with a bulbous shape.
The problem is, if you start by throwing these straighter planes immediately, altering the form thereafter becomes much harder. It’s not impossible to go from straight surfaces to curves, but if the change in angle is too severe it can make things complicated.
So, for the most part, with a form like this, a “bulbous” bud vase with a narrow opening and inward sloping rim-section, despite ultimately having a sectioned off, angular exterior, the vessel is initially thrown as rounded.
Another important thing to remember is clay allocation. This wasn’t something I thought about in the slightest when first learning to throw, I’d just pull up the walls and attempt to fashion whatever shape I was after with what clay there was. The thing is, if you know the topmost part will be complex, like this pot’s opening, it’s a good idea to leave those upper portions of the wall purposefully thick, this way you’ve got enough material to work with in throwing the almost enclosed shape. There’s nothing worse than getting around 90% there, only to realise you’ve run out of usable clay, or perhaps there’s just enough material but in throwing it you’ll end up with wafer thin, flimsy walls.
Nonetheless, the piece is a challenging form to make as all the above is compounded by the fact that once the narrow opening is made and lowered, you can’t easily reach a hand inside again to alter the shape from the inside. You have to commit.
This short video is just a snippet from my film length YouTube video this weekend that shows the entire creation of these mugs from beginning to end in excruciating detail. It’s an hour and ten-minutes long and you can find a link to the fully narrated video via the Linktree in my profile’s biography.
It might be the longest film I’ve created yet, stitched together from footage filmed and accumulated over the past two-years. It shows how I create one of my simple, handmade ceramic mugs, from beginning to end, with every single fleeting step in that process included. These vessels are amongst the pots I’ve made the most of yet there’s still subtle variations that creep into each batch.
Despite the form being immensely simple, there's endless minute details that go into creating any pot thousands of times. Over the years a potter will finesse their practice, figuring out new efficiencies, improvements and ways of speeding up the making process. I’ve always found chatting about these seemingly unnoticeable actions with other craftspeople fascinating and so I hope some of what I’ve learnt over the past fifteen years is helpful to anybody who decides to sit through this.
Ultimately, being a production potter isn't all about speed, as quality can't be sacrificed for haste. This means there's a point if you're making repetitively, or learning to, when your speed will lessen as you focus on keeping the quality of the thrown items top-notch. Then, as you sink hundreds of hours into practicing a particular shape, the faster you'll become whilst being able to retain a certain level of quality. It's this tireless persistence that many potters I know have, which helps them become really fluid throwers, trimmers and handlers of pots.
Beyond those steps, I've tried to discuss the glazing, firing and the steps taken after the vessels have been plucked out of the kiln in greater detail, as I really want to try and paint a thorough picture of what it really means to make pottery like this and on this scale.
If you happen to watch the full video, please do let me know! Enjoy!
Here's the video I've been promising I'd make. It might be the longest one yet and it shows how I create one of my simple, handmade ceramic mugs, from beginning to end, with every single fleeting step in that process included.
This might be the longest film I’ve created yet, stitched together from footage filmed and accumulated over the past two-years. It shows how I create one of my simple, handmade ceramic mugs, from beginning to end, with every single tiny step in that process included. These vessels are amongst the pots I’ve made the most of yet there’s still subtle variations that creep into each batch.
Despite the form being immensely simple, there's endless minute details that go into creating any pot thousands of times. Over the years a potter will finesse their practice, figuring out new efficiencies, improvements and ways of speeding up the making process. I’ve always found chatting about these seemingly unnoticeable actions with other craftspeople fascinating and so I hope some of what I’ve learnt over the past fifteen years is helpful to anybody who decides to sit through this.
Ultimately, being a production potter isn't all about speed, as quality can't be sacrificed for haste. This means there's a point if you're making repetitively, or learning to, when your speed will lessen as you focus on keeping the quality of the thrown items top-notch. Then, as you sink hundreds of hours into practicing a particular shape, the faster you'll become whilst being able to retain a certain level of quality. It's this tireless persistence that many potters I know have, which helps them become really fluid throwers, trimmers and handlers of pots.
Beyond those steps, I've tried to discuss the glazing, firing and the steps taken after the vessels have been plucked out of the kiln in greater detail, as I really want to try and paint a thorough picture of what it really means to make pottery like this and on this scale.
⚪️ • How to make and use wadding: https://youtu.be/KCI_LQL3JIs (I skipped over this part a little bit—apologies)
📚 • You'll find many more guides on how to centre and pull up the walls of clay here: https://www.youtube.com/playlist?list=PL2WJhtTF0eGhQwf8g2LHcom_KrvJpH_JT
📖 • ORDER MY BOOK: https://geni.us/bymyhands
📢 • Find out much more about my work here: https://linktr.ee/floriangadsby
⏱ • Timestamps:
0:00 - Introduction
0:27 - Preparing and wedging the clay, (300 gram lumps)
2:10 - The simple design of the mug
4:17 - Throwing the mugs
8:37 - The type of wire I use
12:44 - The importance of drying the cups carefully & slowly
14:05 - Trimming the bodies of the mugs on a chuck
18:42 - Attaching & pulling the handles for the mugs
37:08 - Quality control, double checking their bases
39:54 - Biscuit firing the mugs to 1000ºC
42:34 - Waxing the bases of the mugs
44:17 - Glazing the mugs
49:18 - Cleaning over the glazed surfaces
53:32 - Loading & reduction firing the gas kiln to 1290ºC, (cone ten)
58:52 - Unpacking the kiln
59:54 - Sanding the bases of the mugs
1:01:35 - Grinding away fluid glaze
1:03:45 - The finished mugs
1:05:21 - How I package the mugs for shipping
1:10:28 - Clean up
*I throw using both a Rohde HMT 500 & 600 potter's wheel and fire using Rohde kilns too, the electric is a TE-200 and the gas kiln is a KG-340.
____
Some of the peskiest things to draw, in my opinion, are handles. A cylinder is one thing but attaching a protrusion onto that, which extends outwards at sometimes an unusual angle, is altogether another kettle of fish. Sometimes I like the handles I draw and there are other times where I simply cannot stand them but they’re slowly getting better, or I go through periods when drawing such three-dimensional shapes simply makes more sense.
One thing I’ve started to do when I feel a little bit unsure, is to first sketch them out with a pencil in an attempt to see where they exist within three dimensions. Then, once I’m happy with that little addition, I can solidify them in ink.
Lastly, and I think really importantly, it’s rare that the handles drawn truly reflect the pulled, glazed versions that I end up creating. In this moment on the paper, they are simply a guide so that I can see their approximate placement on the cup, or to see how thick or thin they should be. They’re never features I copy perfectly, in fact, it’s rare that the entire drawn vessels end up being recreated perfectly in clay. Normally they’re simply a way of rapidly exploring new shapes and ideas without the need for attempting to make everything physically.
It’s faster to fill up a few pages worth with ideas than to make them all in stoneware, and thus, from these quickly drawn ideas, I can pick and choose my favourite.
Packing up a collection of pots that’ll be part of an exhibition with @joanna_bird soon, (9 to 26 September), called “A Sense of Perspective”.
As you know, I normally sell my work via shop restocks on my website that occurs 2-3 times a year. They can be rushed affairs and so, if you’d like the chance to purchase work in perhaps a slightly more tranquil manner, these occasional exhibitions I’m a part of are generally a better, calmer way of going about it.
Wrapping pots for transit is a task I secretly quite like, provided I have the materials in stock and the studio is relatively organised and clean. It means gaining space back in the workshop and on the shelves and there’s a methodical approach to it. The great thing with parcels like this is that I don’t have to be as “careful” as compared to when I’m packing individual boxes for customers. This is for a gallery in London and so I’ll have it couriered to the space, which means the parcel is being delivered with more care and attention.
Still, the pots are wrapped in such a way that even if thrown around in the back of a van, they’d survive the journey and this short video demonstrates how I protect vessels for transit. The hardest thing about all of this is finding a box that’s the right damn size.
Sometimes, it’s easier to make a bit of a mess, if it means properly securing the handle in place.
I hate to do it but the effort required to join the end of the handle without creating any mess simply isn’t worth it. In this instance, as it attaches so closely to the bottom of the cup, it would take some real finesse and care to avoid smearing any excess over the trimmed base, thus I simply let the clay smudge over, then I’ll tidy all of them up a day later, after the soft handles have turned leather hard.
The thing is, throughout the handling process itself, as the cup is moved around on the workbench or when it’s picked up and put down, it’s actually quite difficult to avoid marking the base in some way shape or form. Clay is soft, even when it’s leather hard, and so avoiding any kind of indentation or scratch is nearly impossible.
All of this is to say, that sometimes it makes things easier if you allow the chaos to occur if it speeds things up, only to then tidy any scruffiness up later in a more dedicated and purposeful manner.
Here’s the making of this teapot, from beginning to end.
There aren’t many forms that require as many steps as a teapot, not only do you need to throw and trim the parts, but you need to assemble them in such a way that the vessel functions properly. I’ve made some poor versions in my time. Pots that poured terribly, sputtering and glugging, some I’ve only been able to fill up half way due to incorrect spout placement and others have been fashioned with lids rattle in place and fall out as they’ve been trimmed too narrow for the opening. The thing is, you often have to make these unsatisfactory iterations before you figure out how to move on and improve them.
The other heinous thing to realise is that this improvement occurs very slowly, as comparatively, the number you’ll make will be far less than the mugs or bowls you throw and trim, and given how complex they are, the chances are you’ll ruin more when glazing them. Perhaps that’s simply my journey with them though, they are becoming finer with time but I genuinely feel as if each batch I make is better than the last and every time I make a few I know what alterations I have to make when I next assemble them.
Maybe, that’s what has kept me so intrigued over the years, it’s like slowly learning a language and becoming more fluent.
Somebody left a comment recently that made me think.
It was a reel about making pots repetitively and “identically”, I’ve put those in quotations as whilst the pots look the same, of course, as they’re handmade, there are subtitles, it just takes a trained eye to see them.
Essentially, the comment said:
“Why makes pots that are so identical and similar? It makes them look as if they were produced by a machine?”
I can see where somebody saying this is coming from, yet at the same time, weren’t we, as a human race making things that were seemingly identical with our hands, well before the advent of machines.
I think it’s for this reason that I’m always in awe of people who are capable of creating work that’s refined and “identical”. A woodworker that’s able to craft a dozen cabinets by hand that are the same, or a basket weaver producing the same forms time and time again are simply incredible sights to witness as it demonstrates the sheer length some people are willing to go to in terms of honing their practical abilities.
I’m blown away by potters that create work that’s so carefully crafted and precise as I understand the amount of effort that’s gone into getting them to that point, and for me, and perhaps it helps having practical knowledge of how the craft works, I’m always in awe by those who push themselves in this direction. It doesn’t make the work any less handmade and it makes me think about how precise we can become with our hands and how we’re able to spot such minuscule differences in form and finish with enough practice.
I spent a good 12-hours last week stood up pulling handles. I have to say, it makes a nice change from being hunched over the wheel, mentally and physically it’s also vastly different, I’m not working clay as it rapidly spins, instead it’s more like hand-building. Despite that, there are many similarities between throwing pots and pulling handles.
For instance, when lifting up the walls of a pot, it’s very helpful if you’re consistent with your movements, stopping and starting or changing the pressure as you pull results in walls that mirror those inconsistencies. The exact same premise applies to pulling these lengths of clay. It’s all about quick, confident and consistent movements.
Secondly, there’s water usage. Whenever you’re throwing pottery, you need your hands to be lubricated, this way your hands don’t stick to the spinning clay, nor does the clay stick to your hands. The same is true when pulling handles. If you’re hands become too dry, they’ll stick to the length and it’ll tear off.
Lastly, there’s the clay’s strength. If you overwork the stoneware, it weakens as it over-saturates with water. You’ll struggle to lift up the walls the you will have a much more difficult time getting the pot to hold its shape. With handles, if the clay softens too much as you’ve been pulling it for longer than you should, once you go to set the handle in its final position, it’ll simply want to sag or flop as the clay no longer has any strength.
This, in a way, makes me think that there are probably some transferable skills, or rather, whilst the skills are different in a way, the theory behind them remains the same.
For the longest time I struggled to come up with a bud vase form I liked. In years past, I threw shapes that were more quintessential, they were rounded with a small belly and a narrow, tall neck, perfect for slotting in a stem or two, a budding branch of a single flower, yet as my overall style became sharper, more angular and precise, those ballooned vessels begun to feel out of place.
I needed something that felt sleek in comparison, something slightly unusual and more architectural and eventually I settled on these, shapes with an inward sloping rim and a narrow opening that’s hidden when viewed from the side, or if overly filled. The small opening keeps everything pinned upright and it makes for a relatively interesting form to throw as at some point, you have to fold the rim portion inward and somehow keep it stabilised without it collapsing any further.
What you’re watching here, the trimming once the parts have turned leather hard, is arguably the easiest part of the entire process, as there’s no risk of the vessel collapsing, (unless you trim that top angular change too thinly), rather it’s a process of refinement. The thrown forms themselves are relatively neat but it’s always quite surprising just how much further you can take them at this point.
Yes, getting turnings out of them is a pain, as is shaking out excess glaze when coating the interior forms and I recommend using dried foliage for these, or at least being attentive with emptying them and using fresh water, otherwise they can be quite hard to clean out properly.
When I’m making mugs, I like to make lots at once. Generally, this means spending a week or two producing 100-200 pieces, whilst juggling a number of other tasks, mainly, as I feel as if by working on so many at once, they end up being more consistent and I become faster as I’m repeating the creation process so many times in a row. It sort of feels like practice and I can always sense a difference in my ability at the beginning of a mug making session, versus how naturally they are formed and handled towards the end, after I’ve warmed up, essentially.
I throw mine from 300 grams of clay, (plus or minus 10 for speedier weighing out), to 11 cm tall by 8.5 cm wide, give or take a few millimetres. I don’t mind if one is a smidge below my throwing gauge’s pointer as I pull up the walls, or if one is fractionally too wide, as these minute discrepancies will barely be noticeable once the pot has been trimmed, handled, glazed and fired.
What I do care about though are the proportions and the slightly tapering shape. It can hard to see, but these pots are marginally wider at the base and then they slope inwards ever so slightly as they reach upwards. It’s subtle but it makes a big difference and so, if I notice that a mug is too straight, or that it flared out towards the top, it’ll be instantly destroyed if I can’t fix that during the throwing process itself. It’s good to be brutal, you can never be too precious, essentially with vessels as simple as these are.
Lifting off these thinly walled pots in the perhaps the trickiest part. There’s a bit of a knack to it, (that’s better explained in my YouTube video that specifically covers this step), but it means I can heap more onto each ware board, which means I don’t have to use batts and for a pot like this that means I end up saving a bit more space in the studio.
Space, as you quickly realise, is perhaps one of the most importance things about a potter’s studio. It’s a bottleneck you’ll often run into and you need more space during the production stage, as pots need room to dry and components eat up shelves before they’re assembled.
One way to add a certain amount of cohesion to a body of work, is to have one aesthetic feature that appears in some way shape or form on a vast majority of the pots you make. So recently, I’ve been trying to incorporate this very simple angular section into more of my vessels and in this particular case, it actually makes the lid slightly more ergonomic to use, as the groove around the outside makes it easier to lift away.
Like mentioned in the video, I went from really disliking this pot, to the point where I considered destroying it at the bone-dry stage, to absolutely loving it, which is a rare event in many ways as typically, if I dislike a pot after it’s been trimmed, the chances are I’ll continue to shun it even when it has been glazed and reduction fired.
I like a pleasant surprise though, as this pot has made it onto my current “favourites” shelf, what do you think?
This week I’m taking you through the making of one of my larger urns, made as a commission for Sarah, a longtime follower who I’ve exchanged emails with over the years. I don’t often take on commissions, but occasionally something comes along that feels particularly meaningful, and this was one of those pieces.
The form grew naturally from my existing lidded pots, with its narrow base, wider body and prominent lid giving it an almost figurative, ceremonial quality. Alongside throwing and trimming the urn, I’m also talking about something I’m asked about surprisingly often: chattering, particularly when using tungsten carbide tools. What causes it, why does it happen, and how do I deal with it?
Despite having tens of thousands of hours of trimming behind me, chattering still happens. I’ve learned that rather than trying to eliminate it completely, it’s more useful to understand how to correct it. Tungsten carbide tools do most of my shaping, with steel tools and scrapers used for that final refinement and removing any remaining chatter marks. And if you actually like the texture, I think it can be beautiful when used deliberately.
More than anything, making this urn reminded me that behind all the photographs and videos are real people who have followed along for many years. It was a real honour to make this for Sarah, and I’m very grateful to have been trusted with something so meaningful.
I hope you enjoy the video, and as always, thank you for watching.
⚙️ • How to attach pots onto the wheel: https://youtu.be/mfTZU3lQsLY
⚪️ • How to make and use wadding: https://youtu.be/KCI_LQL3JIs
📚 • You'll find many more guides on how to centre and pull up the walls of clay here: https://www.youtube.com/playlist?list=PL2WJhtTF0eGhQwf8g2LHcom_KrvJpH_JT
📖 • ORDER MY BOOK: https://geni.us/bymyhands
📢 • Find out much more about my work here: https://linktr.ee/floriangadsby
⏱ • Timestamps:
0:00 - Introduction
0:49 - Talking about the urn I'm planning on making, (and throwing it)
2:30 - Throwing the lid
5:24 - Trimming the lid to fit the body
6:55 - How to fix a slight wobble in the rim
7:37 - Some information about tungsten carbide trimming tools
10:28 - Trimming the lid to be in-line with the body
13:55 - The infamous chin-trimming technique
17:13 - Packing the electric kiln for a biscuit firing
17:50 - Waxing the urn
18:09 - Glazing the urn
20:05 - Tidying up the glazed surface
22:10 - Wadding the lid for the reduction firing
22:42 - Loading & reduction firing the gas kiln
24:38 - Unpacking the kiln
26:04 - Grinding the lid smooth
27:53 - The finished urn
29:30 - Clean up
*I throw using both a Rohde HMT 500 & 600 potter's wheel and fire using Rohde kilns too, the electric is a TE-200 and the gas kiln is a KG-340.
____
I’ve been on the fence about fixing this coffee dripper.
Stylistically, it was my favourite from my second batch of these, it was thrown and trimmed with a sharper funnel, to direct the coffee into the cup this time instead of all over the table like those from my first batch… Likewise, the steps on the outside lend it character and the mossy green glaze coated the vessel in quite a beautiful way, although due to how much this particular glaze moves at top temperatures during the reduction firing, it plugged the drainage hole.
The result being perhaps the most useless coffee dripper that has ever been made, so, in this short video I demonstrate how I fix the issue.
The key is to keep the area drilled covered in water, this keeps dusts to a minimum and helps the diamond drill-bits to glide more smoothly. I started by piercing a hole right through the centre of the thick pane of glaze, then I carefully, and slowly, worked my way outward, widening then hole until it was almost back to its original width. Lastly, the ground area is polished smooth using very fine wet and dry sandpaper; to remove any sharp scratchiness and finally, the V60 style coffee dripper can be taken for its maiden voyage.
I do wonder though, whether I should have kept it as is, as a one-off anomaly, you’ll have to let me know what you think.

 Login
Login