I don’t ever do this normally, but you’ve got to start somewhere, right?
It’s my long-term desire to be able to hold a PIXLS meetup/event every year where the community can get together.
Where we can hold workshops, photowalks, and generally share knowledge and information.
For free, for anyone.
For now though, we need support.
LGM is a great opportunity for us to meet with many different projects usually having representatives there.
Donations will help us to offset travel costs to attend LGM as well as a pre-LGM meetup we are holding (more below).
Anything further will go to creating new content and to cover hosting costs for the site.
Here’s the fancy little widget they make available:
If you want to help by adding this button places, here’s the code to do it:
<a href='https://pledgie.com/campaigns/30905'>
<img alt='Click here to lend your support to: PIXLS.US at Libre Graphics Meeting 2016 and make a donation at pledgie.com !' src='https://pledgie.com/campaigns/30905.png?skin_name=chrome' border='0' style='width: initial;'>
</a>
Feel free to use it wherever you think it might help. :)
I realize that not everyone will be able to donate funds. No sweat!
If you’d still like to help out then perhaps you can help us raise awareness for the campaign?
The more folks that know about it the better!
Re-tweeting, blogging, linking, yelling on a street corner all help to raise awareness of what we are doing here.
Heck, just invite folks to come read and participate in the community. Let’s help even more people learn about free software!
I am going to arrive a day early so that we can have a gathering of PIXLS community folks and anyone else who wants to join us for some photographic fun!
Thanks to the local organizers in London (yay Lara!), we have facilities for us to use.
We will be meeting on Thursday, April 14th at the Furtherfield Commons.
The facilities will be available from 1000 – 1800 for us to use.
Furtherfield Commons
Finsbury Gate – Finsbury Park
Finsbury Park, London, N4 2NQ
As near as I can tell, here’s a street view of the Finsbury Gate:
I believe the Commons building is just inside this gate, and on the left.
In 2014 I held a photowalk with LGM attendees in Leipzig the day before the event that was great fun.
Let’s expand the idea and do even more!
Nikolaikirche, Leipzig, from the 2014 LGM photowalk.
(That’s houz in the bottom right)
This year I plan on bringing a model along to shoot while we are out and about (my friend Mairi if she’s available - or a local model if not).
I will also be doing a photowalk again, either in the morning or afternoon.
I am also looking for folks from the community to suggest holding their own photoshoots or workshops, so please step forward and let me know if you’d be interested in doing something!
The facilities have bench seating for approximately 20 people, a big desk, and a projector as well.
Three things that I personally will be doing are (in no particular order):
Natural + flash portraits and model shooting workshop.
Photowalk around the park + surrounding environs.
Portraits + architectural photos for Furtherfield (the hosts).
I am hoping to possibly record some of these workshops and interactions for posterity and others that might not be able to make it to London.
It might be fun to record some shoots for the community to be able to use!
I am also 100% open to suggestions for content that you, the community, might be interested in seeing.
If you have something you’d like me to try (and record), please let me know!
Hopefully Mairi will be able to make it to London to model for us!
Sneaking a release out on Christmas Eve, the darktable team have announced their feature release of darktable 2.0!
After quite a few months of Release Candidates the 2.0 is finally here.
Please join me in saying Congratulations and a hearty Thank You! for all of their work bringing this release to us.
Alex Prokoudine of Libre Graphics World has a more in-depth look at the release including a nice interview with part of the team: Johannes Hanika, Tobias Ellinghaus, Roman Lebedev, and Jeremy Rosen. My favorite tidbit from the interview:
There is a lot less planning involved than many might think.
I finally got off my butt to get a process in place to obtain and update security certificates using Let’s Encrypt for both pixls.us and discuss.pixls.us.
I also did some (more) work with Victor Grigas and Wikipedia to support their #Edit2015 video this year.
So it was an honor to hear from Victor Grigas again this year!
This time around there was a neat new crop of images he wanted to animate for the video.
Below you’ll find my contributions (they were all used in the final edit, just shortened to fit appropriately):
Here is the final cut of the video, just released today:
Victor chose some really neat images that were fun to work on!
Of course, all free software was used in this creation (GIMP for cutting up the images into sections and rebuilding textures as needed and Blender for re-assembling the planes and animating the camera movements).
I had previously written a tutorial on doing this with free software on my blog.
Free: Anyone who owns a domain name can use Let’s Encrypt to obtain a trusted certificate at zero cost.
Automatic: Software running on a web server can interact with Let’s Encrypt to painlessly obtain a certificate, securely configure it for use, and automatically take care of renewal.
Secure: Let’s Encrypt will serve as a platform for advancing TLS security best practices, both on the CA side and by helping site operators properly secure their servers.
Transparent: All certificates issued or revoked will be publicly recorded and available for anyone to inspect.
Open: The automatic issuance and renewal protocol will be published as an open standard that others can adopt.
Cooperative: Much like the underlying Internet protocols themselves, Let’s Encrypt is a joint effort to benefit the community, beyond the control of any one organization.
It was relatively painless to obtain the certs.
I only had to run their program to use ACME to verify my domain ownership through placing a file on my web root.
Once the certs were generated I only had to make some small changes for it to work automatically on https://discuss.pixls.us.
(And to automatically get picked up when I update the certs within 90 days).
I still had to manually copy/paste the certs into cpanel for https://pixls.us, though.
Not automated (or elegant) but it works and only takes an extra moment to do.
John Donne was the greatest English dramatic poet who never wrote a play. Here, Alan Jenkins reads a selection of his works. Find out more: www.the-tls.co.uk
Vertigo special: Toby Lichtig of The TLS introduces David Collard who compares Alfred Hitchcock's film interpretation to the original novel.The film was recently voted 'the best of all time' by 846 critics, programmers, academics and distributors. Find out more: www.the-tls.com
Linearized sRGB channel values and radiometrically correct editing
One goal for GIMP 2.10 is to make it easy for users to produce radiometrically correct editing results. “Radiometrically correct editing” reflects the way light and color combine out there in the real world, and so requires that the relevant editing operations be done on linearized RGB.
Like many commonly used RGB working spaces, the sRGB color space is encoded using perceptually uniform RGB. Unfortunately colors simply don’t blend properly in perceptually uniform color spaces. So when you open an sRGB image using GIMP 2.9.2 and start to edit, in order to produce radiometrically correct results, many GIMP 2.9 editing operations will silently linearize the RGB channel information before the editing operation is actually done.
GIMP 2.9.2 editing operations that automatically linearize the RGB channel values include scaling the image, Gaussian blur, UnSharp Mask, Channel Mixer, Auto Stretch Contrast, decomposing to LAB and LCH, all of the LCH blend modes, and quite a few other editing operations.
The GIMP 2.9.2 editing operations that automatically linearize the RGB channel values do this regardless of whether you choose “Perceptual gamma (sRGB)” or “Linear light” precision. The only thing that changes when you switch between the “Perceptual gamma (sRGB)” and “Linear light” precisions is how colors blend when painting and when blending different layers together.
(Well, what the Gamma hack actually does changes when you switch between the “Perceptual gamma (sRGB)” and “Linear light” precisions, but the way it changes varies from one operation to the next, which is why I advise to not use the Gamma hack unless you know exactly what you are doing.)
Using the “Linear light” option in the “Image/Precision” menu
Large soft disks painted on a cyan background.
Top row: Painted using “Perceptual gamma (sRGB)” precision. Notice the darker colors surrounding the red and magenta disks, and the green surrounding the yellow disk: those are “gamma” artifacts.
Bottom row: Painted using “Linear Light” precision. This is how light waves blend to make colors out there in the real world.
Circles painted on a red background.
Top row: Painted using “Perceptual gamma (sRGB)” precision. The dark edges surrounding the paint strokes are “gamma” artifacts.
Bottom row: Painted using “Linear Light” precision. This is how light waves blend to make colors out there in the real world.
In GIMP 2.9.2, when using the Normal, Multiply, Divide, Addition, and Subtract painting and Layer blending:
For radiometrically correct Layer blending and painting, use the “Image/Precision” menu to select the “Linear light” precision option.
When “Perceptual gamma (sRGB)” is selected, layers and colors will blend and paint like they blend in GIMP 2.8, which is to say there will be “gamma” artifacts.
The LCH painting and Layer blend modes will always blend using Linear light precision, regardless of what you choose in the “Image/Precision” menu.
What about all the other Layer and painting blend modes? The concept of “radiometrically correct” doesn’t really apply to those other blend modes, so choosing between “Perceptual gamma (sRGB)” and “Linear light” depends entirely on what you, the artist or photographer, actually want to accomplish. Switching back and forth is time-consuming so I tend to stay at “Linear light” precision all the time, unless I really, really, really want a blend mode to operate on perceptually uniform RGB.
A note on interoperability between Krita and GIMP
Many digital artists and photographers are switching to linear gamma image editing. Let’s say you use Krita for digital painting in a true linear gamma sRGB profile, specifically the “sRGB-elle-V4-g10.icc” profile that is supplied with recent Krita installations, and you want to export your image from Krita and open it with GIMP 2.9.2.
Upon opening the image, GIMP will automatically detect that the image is in a linear gamma color space, and will offer you the option to keep the embedded profile or convert to the GIMP built-in sRGB profile. Either way, GIMP will automatically mark the image as using “Linear light” precision.
For interoperability between Krita and GIMP, when editing a linear gamma sRGB image that was exported to disk by Krita:
Upon importing the Krita-exported linear gamma sRGB image into GIMP, elect to keep the embedded “sRGB-elle-V4-g10.icc” profile.
Keep the precision at “Linear light”.
Then assign the GIMP built-in Linear RGB profile (“Image/Color management/Assign”). The GIMP built-in Linear RGB profile is functionally exactly the same as Krita’s supplied “sRGB-elle-V4-g10.icc” profile (as are the GIMP built-in sRGB profile and Krita’s “sRGB-elle-V4-srgbtrc.icc” profile).
Once you’ve assigned the GIMP built-in Linear RGB profile to the imported linear gamma sRGB Krita image, then feel free to change the precision back and forth between “Linear light” and “Perceptual gamma (sRGB)”, as suits your editing goal.
When you are finished editing the image that was imported from Krita to GIMP:
Convert the image to one of the “Perceptual gamma (sRGB) precisions (“Image/Precision”).
Convert the image to the Krita-supplied “sRGB-elle-V4-g10.icc” profile (“Image/Color management/Convert”).
Export the image to disk and import it into Krita.
If your Krita image is in a color space other than sRGB, I would suggest that you simply not try to edit non-sRGB images in GIMP 2.9.2 because many GIMP 2.9.2 editing operations do depend on hard-coded sRGB color space parameters.
GIMP 2.9.2’s unbounded floating point ICC profile conversions (handle with care!)
The sRGB (the gray blob) and ProPhotoRGB (the multicolored wire-frame) color spaces as seen from different viewing angles inside the CIELAB reference color space.(Images produced using ArgyllCMS and View3DScene).
Every time you convert saturated colors from larger gamut RGB working spaces to GIMP’s built-in sRGB working space using floating point precision, you run the risk of producing out of gamut RGB channel values. Rather than just explaining how this works, it’s better if you experiment and see for yourself:
Open “saturated-colors.png” with GIMP 2.9.2. GIMP will report the color space profile as “LargeRGB-elle-V4-g18.icc” — this profile is functionally equivalent to ProPhotoRGB.
Immediately change the precision to 32-bit floating point precision (“Image/Precision/32-bit floating point) and check the “Perceptual gamma (sRGB)” option.
Using the Color Picker Tool, make sure the Color Picker is set to “Use info Window” in the Tools dialog. Then eye-dropper the color squares, and make sure to set one of the columns in the Color Picker info Window to “Pixel”. The red square will eye-dropper as (1.000000, 0.000000, 0.000000). The cyan square will eyedropper as (0.000000, 1.000000, 1.000000), and so on. All the channel values will be either 1.000000 or 0.000000.
While still at 32-bit floating point precision, and still using the “Perceptual gamma (sRGB)” option, convert “saturated-colors.png” to GIMP’s built-in sRGB.
Eyedropper the color squares again. The red square will now eyedropper as approximately (1.363299, -2.956852, -0.110389), the cyan square will eyedropper as approximately (-13.365499, 1.094588, 1.003746), and so on.
For extra credit, change the precision from 32-bit floating point “Perceptual gamma (sRGB)” to 32-bit floating point “Linear light” and eye-dropper the colors again. I will leave it to you as an exercise to figure out why the eye-droppered RGB “Pixel” values change so radically when you switch back and forth between “Perceptual gamma (sRGB)” and “Linear light”.
Where did the funny RGB channel values come from? At floating point precision, GIMP uses LCMS2 to do unbounded ICC profile conversions. This allows an RGB image to be converted from the source to the destination color space without clipping otherwise out of gamut colors. So instead of clipping the RGB channels values to the boundaries of the very small sRGB color gamut, the sRGB color gamut was effectively “unbounded”.
When you do an unbounded ICC profile conversion from a larger color space to sRGB, all the otherwise out of gamut colors are encoded using at least one sRGB channel value that is less than zero. And you might get one or more channel values that are greater than 1.0. Figure 11 below gives you a visual idea of the difference between bounded and unbounded ICC profile conversions:
Unbounded (unclipped floating point) and bounded (clipped integer) conversions of a very colorful red flower from the original ProPhotoRGB color space to the much smaller sRGB color space.(Images produced using ArgyllCMS and View3DScene).
Top row: Unbounded (unclipped floating point) and bounded (clipped integer) conversions of a very colorful red flower from the original ProPhotoRGB color space to the much smaller sRGB color space. The unclipped flower is on the left and the clipped flower is on the right.
Middle and bottom rows: the unclipped and clipped flower colors in the sRGB color space. The unclipped colors are shown on the left and the clipped colors are shown on the right:
The gray blobs are the boundaries of the sRGB color gamut.
The middle row shows the view inside CIELAB looking straight down the LAB Lightness axis.
The bottom row shows the view inside CIELAB looking along the plane formed by the LAB A and B axes.
The unclipped sRGB colors shown on the left are all encoded using at least one sRGB channel value that is less than zero, that is, using a negative RGB channel value.
When converting saturated colors from larger color spaces to sRGB, not clipping would seem to be much better than clipping. Unfortunately a whole lot of RGB editing operations don’t work when performed on negative RGB channel values. In particular, multiplying such colors produces meaningless results, which of course applies not just to the Multiply and Divide blend modes (division and multiplications are inverse operations), but to all editing operations that involve multiplication by a color (other than gray, which is a special case).
So here’s one workaround you can use to clip the out of gamut channel values: Change the precision of “saturated-colors.png” from 32-bit floating point to 32-bit integer precision (“Image/Precision/32-bit integer”). This will clip the out of gamut channel values (integer precision always clips out of gamut RGB channel values). Depending on your monitor profile’s color gamut, you might or might not see the displayed colors change appearance; on a wide-gamut monitor, the change will be obvious.
When switching to integer precision, all colors are clipped to fit within the sRGB color gamut. Switching back to floating point precision won’t restore the clipped colors.
As an important aside (and contrary to a distressingly popular assumption), when doing a normal “bounded” conversion to sRGB, using “Perceptual intent” does not “keep all the colors”. The regular and linear gamma sRGB working color space profiles are matrix profiles, which don’t have perceptual intent tables. When you ask for perceptual intent and the destination profile is a matrix profile, what you get is relative colorimetric intent, which clips.
Using GIMP 2.9.2’s floating point precision for unclamped editing
High bit depth GIMP’s unclamped editing: a whole realm of new editing possibilities
I’ve warned you about the bad things that can happen when you try to multiply or divide colors that are encoded using negative sRGB channel values. However, out of gamut sRGB channel values can also be incredibly useful.
GIMP 2.9.2 does provide a number of “unclamped” editing operations from which the clipping code in the equivalent GIMP 2.8 operation has been removed. For example, at floating point precision, the Levels upper and lower sliders, Unsharp Mask, Channel Mixer and “Colors/Desaturate/Luminance” do not clip out of gamut RGB channel values (however, Curves does clip). Also the Normal, Lightness, Chroma, and Hue blend modes do not clip out of gamut channel values.
Unclamped editing operations might sound more arcane than interesting, but especially for photographers this is a really big deal:
Automatically clipped RGB data produces lost detail and causes hue and saturation shifts.
Unclamped editing operations allow you, the photographer, to choose when and how to bring the colors back into gamut.
Of interest to photographers and digital artists alike, unclamped editing sets the stage for (and already allows very rudimentary) HDR scene-referred image image editing.
Having used high bit depth GIMP for quite a while now, I can’t imagine going back to editing that is constrained to only using clipped RGB channel values. The Autumn colors tutorial provides a start-to-finish editing example making full use of unclamped editing and the LCH blend modes, with a downloadable XCF file so you can follow along.
If the thought of working with unclamped RGB data is unappealing, use integer precision
If working with unclamped RGB channel data is simply not something you want to do, then use integer precision for all your image editing. At integer precision all editing operations clip. This is a function of integer encoding and so happens regardless of whether the particular editing function includes or doesn’t include clipping code.
Looking to the future: GIMP 3.0 and beyond
Even though GIMP 2.10 hasn’t yet been released, high bit depth GIMP is already an amazing image editor. GIMP 3.0 and beyond will bring many more changes, including the port to GTK+3 (for GIMP 3.0), full color management for any well-behaved RGB working space (maybe by 3.2?), plus extended LCH processing with HSV strictly for use with legacy files. Also users will eventually have the ability to choose “Perceptual” encodings other than the sRGB TRC.
If you would like to see GIMP 3.0 and beyond arrive sooner rather than later, GIMP is coded, documented, and maintained by volunteers, and GIMP needs more developers. If you are not a programmer, there are many other ways you can contribute to GIMP development.
Also, wallpapers and darktable 2.0 creeps even closer!
I got busy building a birthday present for a project I work with and all sort of neat things happened in my absence!
The UbuntuFree Culture Showcase chose winners for it’s wallpaper contest for Ubuntu 15.10 ‘Wily Werewolf’ (and quite a few community members were among those chosen).
Back in early September I posted on discuss about the Ubuntu Free Culture Showcase that was looking for wallpaper submissions from the free software community to coincide with the release of Ubuntu 15.10 ‘Wily Werewolf’.
The winners were recently chosen from among the submissions and several of our community members had their images chosen!
A big congratulations to you all for some amazing images being chosen!
If you’re running Ubuntu 15.10, you can grab the ubuntu-wallpapers package to get these images right here!
This past weekend GIMP celebrated it’s 20th anniversary!
It was twenty years ago on November 21st that Peter Mattis announced the availability of the “General Image Manipulation Program” on comp.os.linux.development.apps.
Twenty years later and GIMP doesn’t look a day older than a 1.0 release!
(Yes, there’s a double entendre there).
To celebrate, I’ve been spending the past couple of months getting a brand new website and infrastructure built for the project!
Just in case anyone was wondering where I was or why I was so quiet.
I like the way it turned out and is shaping up so go have a look if you get a moment!
To coincide with the 20th anniversary, the team also released a new stable version in the 2.8 series: 2.8.16.
Head over to the downloads page to pick up a copy!!
Still working hard and fast on PhotoFlow, Andreas took some time to record a new video tutorial.
He walks through some basic usage of the program, in particular opening an image, adding layers and layer masks, and saving the results.
Have a look and if you have a moment give him some feedback!
Andreas is working on PhotoFlow at a very fast pace, so expect some more news about his progress very soon!
Some awesome updates from the community and activity over on the forums!
People have been busy doing some really neat things (that really never fail to astound me).
The level of expertise we have floating around on so many topics is quite inspiring.
A nice Halloween weekend gift for the F/OSS photo community from darktable: a first Release Candidate for a 2.0 release is now available!
Houz made the announcement on the forums this past weekend and includes some caveats. (Edits will be preserved going up, but it won’t be possible to downgrade back to 1.6.x).
Because apparently David Tschumperlé doesn’t sleep, a new release of G’MIC was recently announced as well!
This release includes a really neat new patch-based texture resynthesizer that David has been playing with for a while now.
Re-synthesizing an input texture to an output of arbitrary size.
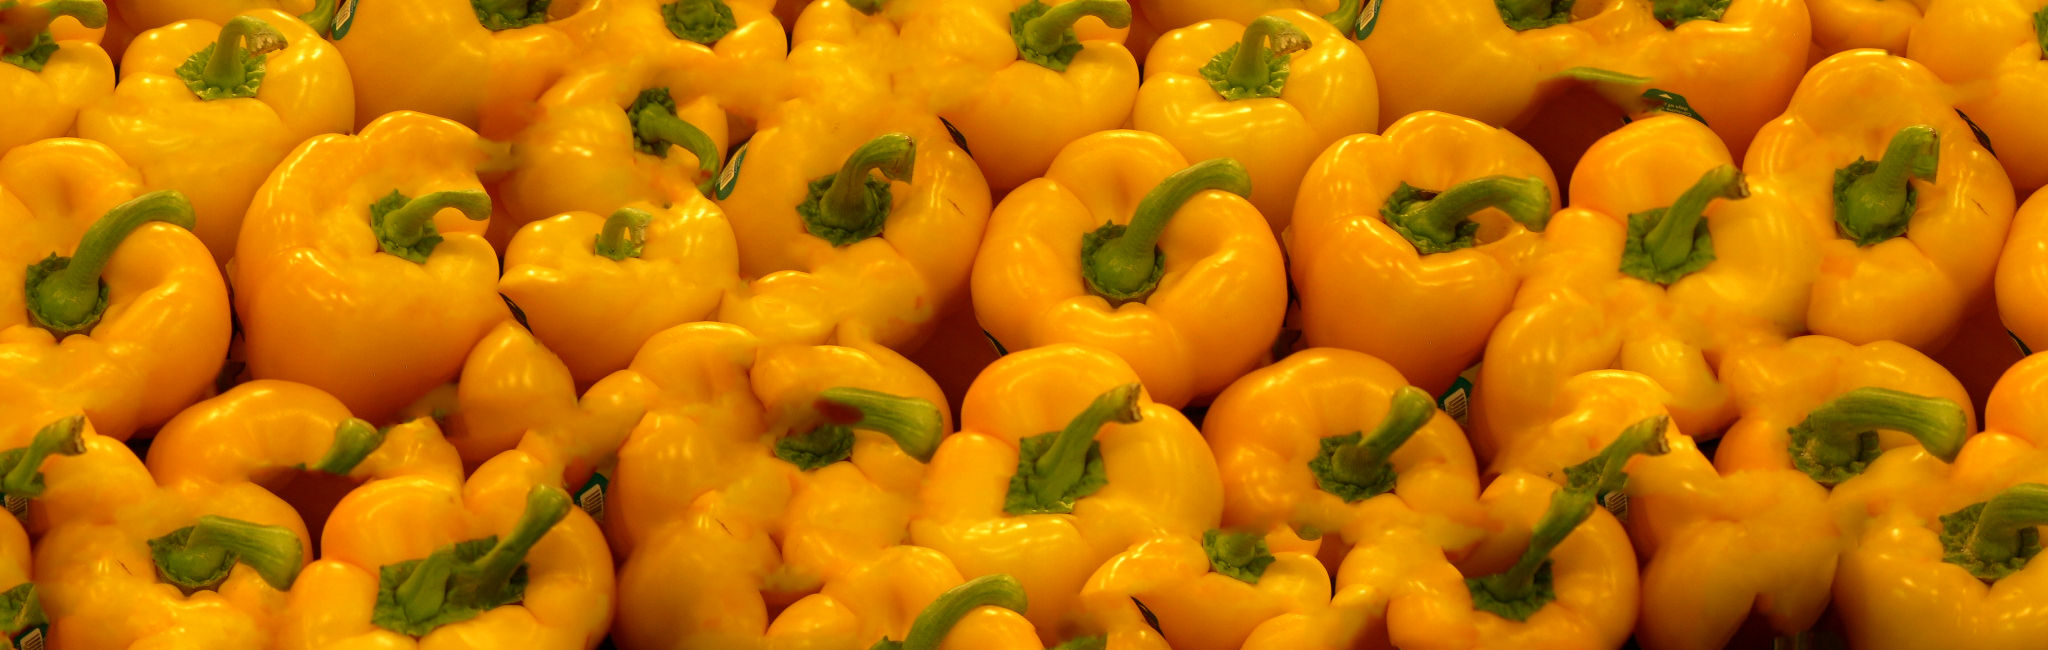
It will build an output texture of arbitrary size based on an input texture (and can result in some neat looking peppers apparently).
Yes, I know it’s Adobe.
Still, I can’t help but think that this might be an awesome way to introduce some people to the amazing work being done by so many F/OSS creators.
Tobias Fleischer announced on this post that he has managed to get G’MIC working with After Effects and Premier Pro.
Even some of the more intensive filters like skeleton and Rodilius appear to be working fine (if a bit sluggish)!
You might remember PhotoFlow as the project that creator Andrea Ferrero used when writing his Blended Panorama Tutorial from a few months ago.
What you might not realize is that Andrea has also been working at a furious pace improving PhotoFlow (indeed it feels like every few days he is announcing new improvements - almost as fast as G’MIC!).
Example of PhotoFlow perspective correction.
His latest release was announced a few days ago as 0.2.3.
He’s incorporated some nice new improvements in this version:
the additon of the LMMSE demosaicing method, directly derived from the algorithm implemented in RawTherapee
an impulse noise (also known as salt&pepper) reduction tool, again derived from rawTherapee. It effectively reduces isolated bright and dark pixels.
a perspective correction tool, derived from Darktable. It can simultaneously correct horizontal and vertical perspective as well as tilting, and works interactively.
We don’t hear as often from folks using LightZone, but that doesn’t mean they’re not working on things!
In fact, Doug Pardee just stopped by the forums a while ago to announce a new release is available, 4.1.3.
(Bonus fun - read that topic to see the Revised BSD License go flying right over my head!)
Damon is working hard on the next release of RPD (apparently the biggest update since the projects inception in 2007!), so go show some support and provide some feedback for him.
The RawTherapee team is testing out having a forum over here on discuss as well (we welcomed the G’MIC community a little while ago).
This is currently an alternate forum for the project (which may become the official forum in the future).
The category is quiet as we only just set it up, so drop by and say hello!

 Login
Login