With Stig Abell and Thea Lenarduzzi – Caryl Emerson on poetry and prose forged in the immediacy of the Russian Revolution of 1917; Phil Baker considers the strange split legacy of British writer Colin Wilson, a curious and often hateful figure with an extreme superiority complex; finally, Clive James reads his beautiful new poem "Anchorage International"
Welcome to the second installment of From the Community, a (hopefully) quarterly-ish blog post to highlight a few of the things our community members have been doing!
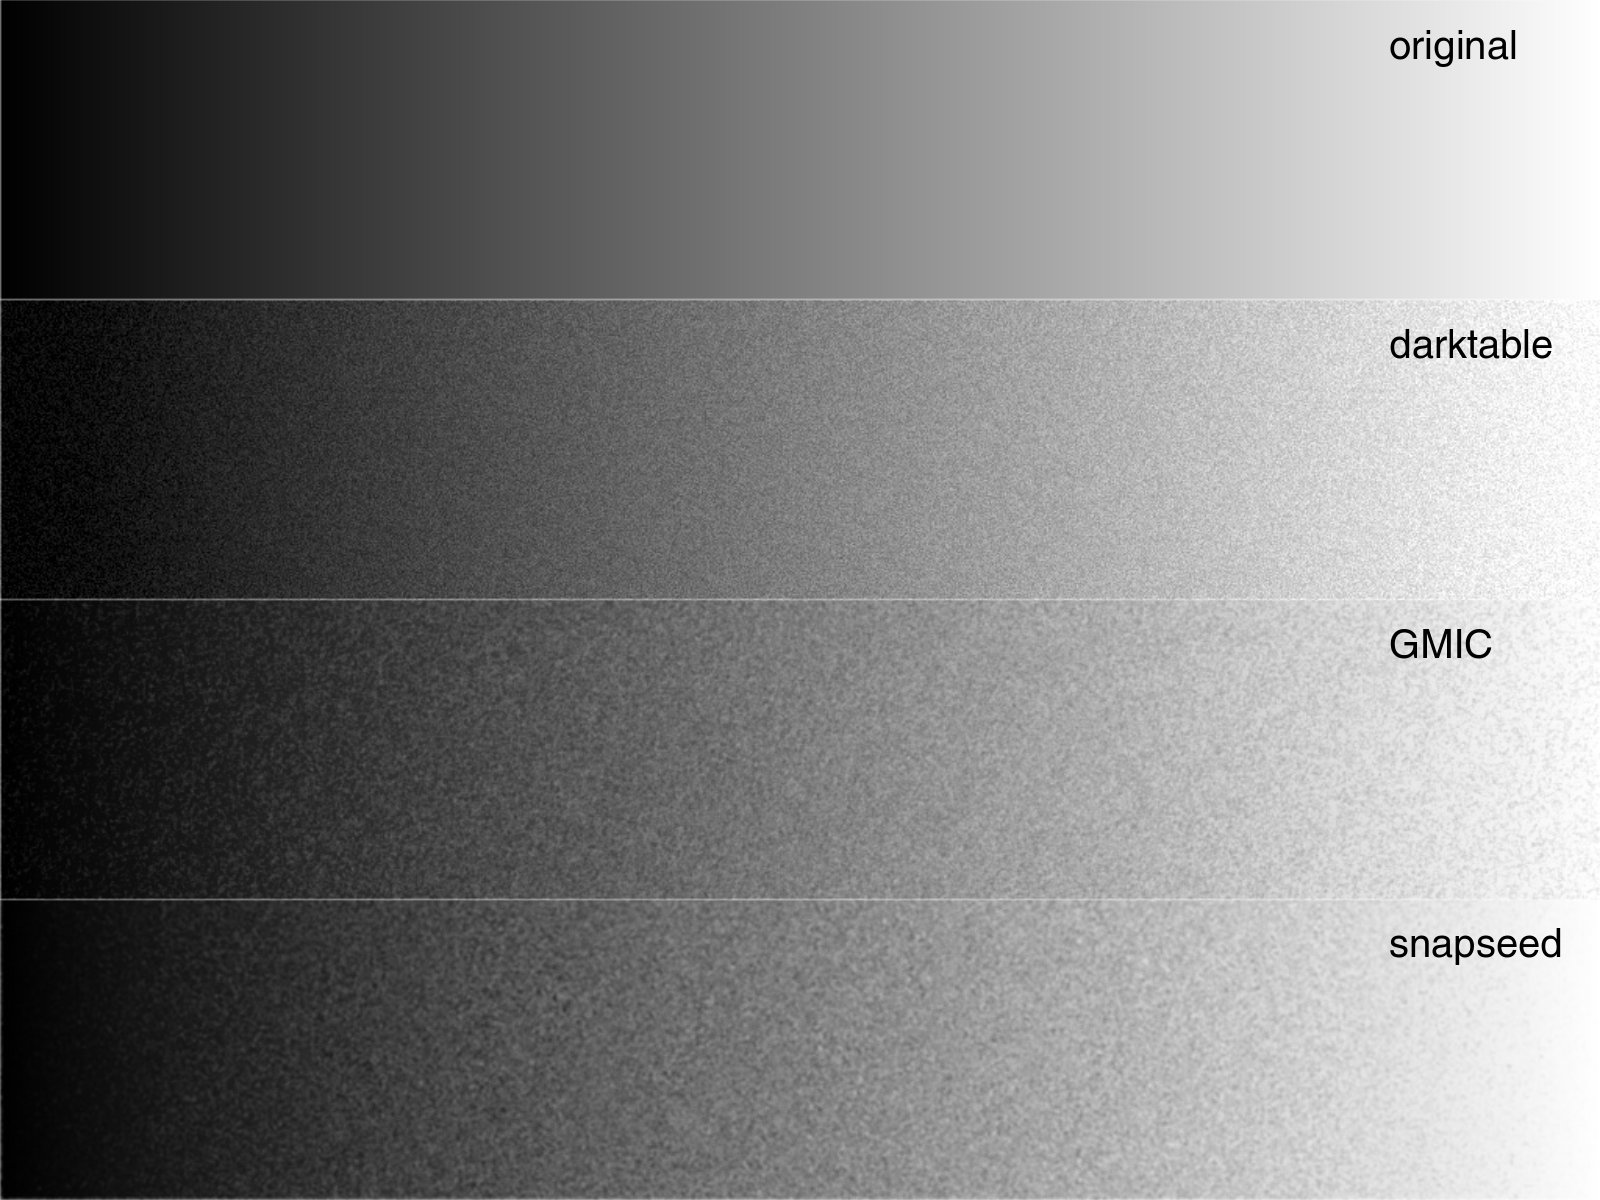
@arctic has posted some research about how to better simulate grain in our digital images and the ensuing conversation is both fascinating and way above my head! This discussion is thus far raw processor independent and more input and code is welcome!
We’ve somewhat recently welcomed the painters into the fold on the pixls’ forum and @Elle rewarded us all with a tutorial RGB color mixing. She delves into subjects such as mixing color pigments like a traditional painter and how to handle that in the digital darkroom. You can read the whole article here.
There has been a lot of on-going work to bring support for Pentax Pixel Shift files in RawTherapee; the thread has now reached 234 posts and it is inspiring to see the community and developers coming together to bring support for an interesting technology. The feature set has been evolving pretty rapidly and it will be exiting when it makes it to a stable release.
Some preliminary work has begun to bring generic midi controller support to darktable. The funding for the midi controller to spur the development of this feature is a direct result of the members of the forum directly giving to further community causes. Once the darktable developers are finished with the midi controller, it’ll be offered to other developers to use to help implement support!
With Stig Abell and Thea Lenarduzzi – Gerri Kimber on the role of women in the rise of the Western (plus the notorious case of Mrs Clem); as Tate Britain unveils the most extensive David Hockney retrospective yet, one of the show's curators talks us though some key moments, and themes, in a long and eclectic career; what makes a bestseller? Daisy Hildyard considers four new books that purport to tell us why some books succeed while others flop.
Clive Stafford Smith, lawyer and campaigner against miscarriages of justice, joins us in the studio to discuss his time defending death-row prisoners in Guantánamo and elsewhere, the "integrity" of the system, why torture doesn't work, and whether the age of mass incarceration might finally be drawing to a close. We end with Helen Mort reading her new poem, "Glasgow".Presented by Stig Abell and Thea Lenarduzzi. Discover more at www.the-tls.co.uk
With Stig Abell and Thea Lenarduzzi – Paul Collier on the new "hard" pragmatism and the future of capitalism; Michael Chabon discusses his invigorating new novel, Moonglow; Mary Beard on women in academia (the troubles and the triumphs, past and present), and why the Trump inauguration protests were a step in the right direction.Discover more at www.the-tls.co.uk
With Stig Abell and Thea Lenarduzzi – Devoney "Stone Cold Jane Austen" Looser on the slew of Jane Austen reincarnations (and why it's nothing to worry about); David Wheatley on the long-awaited final volume of Samuel Beckett's letters and its "black diamonds of pessimism"; and J. Michael Lennon on the titan of publishing Robert Gottlieb, and the writer-editor relationship. Discover more at www.the-tls.co.uk
Happy New Year, and I hope everyone has had a wonderful holiday!
We’ve been busy working on various things ourselves, including migrating RawPedia to a new server as well as building a replacement raw sample database/website to alleviate the problems that rawsamples.ch was having…
…provide RAW-Files of nearly all available Digitalcameras mainly to software-developers. [sic]
It was created by Jakob Rohrbach and had been running since March 2007, having amassed over 360 raw files in that time from various manufacturers and cameras. Unfortunately, back in 2016 the site was hit with a SQL-injection that ended up corrupting the database for the Joomla install that hosted the site. To compound the pain, there were no database backups… :(
On the good side, the PIXLS.US community has some dangerous folks with idle hands. Our friendly, neighborhood @andabata (Kees Guequierre) had some time off at the end of the year and a desire to build something. You may know @andabata as the fellow responsible for the super-useful dtstyle website, which is chock full of darktable styles to peruse and download (if you haven’t heard of it before – you’re welcome!). He’s also my go-to for macro photography and is responsible for this awesome image used on a slide for the Libre Graphics Meeting:
Luckily, he decided to build a site where contributors could upload sample raw files from their cameras for everyone to use – particularly developers. We downloaded the archive of the raw files kept at rawsamples.ch to include with files that we already had. The biggest difference between the files from rawsamples.ch and raw.pixls.us is the licensing. The existing files, and the preference for any new contributions, are licensed as Creative Commons Zero - Public Domain (as opposed to CC-BY-NC-SA).
After some hacking, with input and guidance from darktable developer Roman Lebedev, the site was finally ready.
The repository for it can be found on GitHub: raw.pixls.us repo.
In addition to browsing the archive, it would be fantastic if you were able to supplement the database by uploading sample images. Many of the files from the rawsamples.ch archive are licensed CC-BY-NC-SA, but we’d rather have the files licensed Creative Commons Zero - Public Domain. CC0 is preferable because if the sample raw files are separated from the database, they can safely be redistributed without attribution. So if you have a camera that is already in the list with the more restrictive license, then please consider uploading a replacement for us!
With Stig Abell and Thea Lenarduzzi – Eimear McBride on the dark side of bad sex writing and why a new anthology is nothing to be snickered at; Diana Darke on the stories of two young women who have fled war in the Middle East and the new pressures they face; and Jenny Hendrix joins us from New York to discuss new works of imaginative cartography that portray that city – indeed any city – in full, kaleidoscopic complexity.Discover more at www.the-tls.co.uk
With Stig Abell and Thea Lenarduzzi – Andrew Scull on the deeply unsettling – and surprisingly recent – history of lobotomy, and the sorry tale of Patient H. M.; Lisa Hilton on the sometimes mystifying appeal of the French Riviera and the vapid aristocrats who holidayed there; Kate Symondson on an all but forgotten novel by Joseph Conrad and a clutch of new books that scrutinize his philosophical and political scepticism – a man for our times?
A recording from the TLS’s 2016 London Lit Weekend at King’s Place, London: Historians Simon Bradley and Rosemary Ashton and the architect Paul Williams (of Stanton Williams Architects) discuss the literary and architectural heritage of King’s Cross, London, an area which has seen tremendous upheaval in the past century.Discover more at www.the-tls.co.uk
A recording from the TLS’s 2016 London Lit Weekend at King’s Place, London: 2016 was the 200th anniversary of a dark and stormy night with an extraordinary literary legacy: Frankenstein. Frances Wilson and Benjamin Markovits recount the three days in June, 1816, at the Villa Diodati near Lake Geneva, when a group of young writers – among them Mary Godwin – sheltered from the gloom.Find out more at www.the-tls.co.uk
A recording from the TLS’s 2016 London Lit Weekend at King’s Place, London: Cinema and television are brimming with literary adaptations. But how does the page translate to the screen? To discuss the ins and outs, successes and failures, we brought together Mary Beard, David Farr (whose screenwriting credits include The Night Manager), and the novelist and literary adaptee Alan Hollinghurst. Discover more at www.the-tls.co.uk
A recording from the TLS’s 2016 London Lit Weekend at King’s Place, London: Overrated/Underrated, a favourite TLS game in which a panel of critics (David Collard, Alex Clark and Michael Caines) select the esteemed writers they would like to build up or knock down a peg or two. Discover more at www.the-tls.co.uk
With Stig Abell and Thea Lenarduzzi – James O'Brien on Brexit and the battle for Britain's soul; a (rather idiosyncratic) round-up of the best arts of 2016 with Arts editor Lucy Dallas; finally, in honour of the season, Philosophy editor and oenophile Tim Crane on the "champagne phenomenon"; see you in 2017.
With Stig Abell and Thea Lenarduzzi – Rupert Shortt on why Christianity has been more help than hindrance to social and intellectual progress; Fiction editor Toby Lichtig meets Emily Witt to discuss sex, drugs and a new novel by Dana Spiotta; Terri Apter on new essays by Siri Hustvedt, the (narrowing?) gap between art and science, and the persistent gender biases that underpin experience. Discover more at www.the-tls.co.uk
With Stig Abell and Thea Lenarduzzi – Frances Wilson on the eccentric life of Lady Anne Barnard, loved by men and bad girls alike; Michael Caines on death and women, and indeed, dead women, on the Shakespearean stage; Scott Esposito on Mexico's violence transmogrified into art, including music made using human vertebrae; finally, seven new (and rare) poems from the critic Barbara Everett. Discover more at www.the-tls.co.uk
The history and evolution of painting has undergone a similar transformation as most things adapting to a digital age. As photographers, we adapted techniques and tools commonly used in the darkroom to software, and found new ways to extend what was possible to help us achieve a vision. Just as we tried to adapt skills to a new environment, so too did traditional artists, like painters.
These artists adapted by not only emulating the results of various techniques, but by pushing forward the boundaries of what was possible through these new (Free Software) tools.
Digital painting discussions with Free Software lacks a good outlet for collaboration that can open the discussion for others to learn from and participate in. This is a similar situation the Free Software + photography world was in that prompted the creation of pixls.us.
Due to this, both Americo Gobbo and Elle Stone reached out to us to see if we could create a new category in the community about Digital Painting with a focus on promoting serious discussion around techniques, processes, and associated tools.
Both of them have been working hard on advancing the capabilities and quality of various Free Software tools for years now. Americo brings with him the interest of other painters who want to help accelerate the growth and adoption of Free Software projects for painting (and more) in a high-quality and professional capacity. A little background about them:
Americo Gobbo studied Fine Arts in Bologna, Italy. Today he lives and works in Brazil, where he continues to develop studies and create experimentation with painting and drawing mainly within the digital medium in which he tries to replicate the traditional effects and techniques from the real world to the virtual.
Elle Stone is an amateur photographer with a long-standing interest in the history of photography and print making, and in combining painting and photography. She’s been contributing to GIMP development since 2012, mostly in the areas of color management and proper color mixing and blending.
Leaves in May, GIMP-2.9 (GIMP-CCE) Elle Stone, 2016.
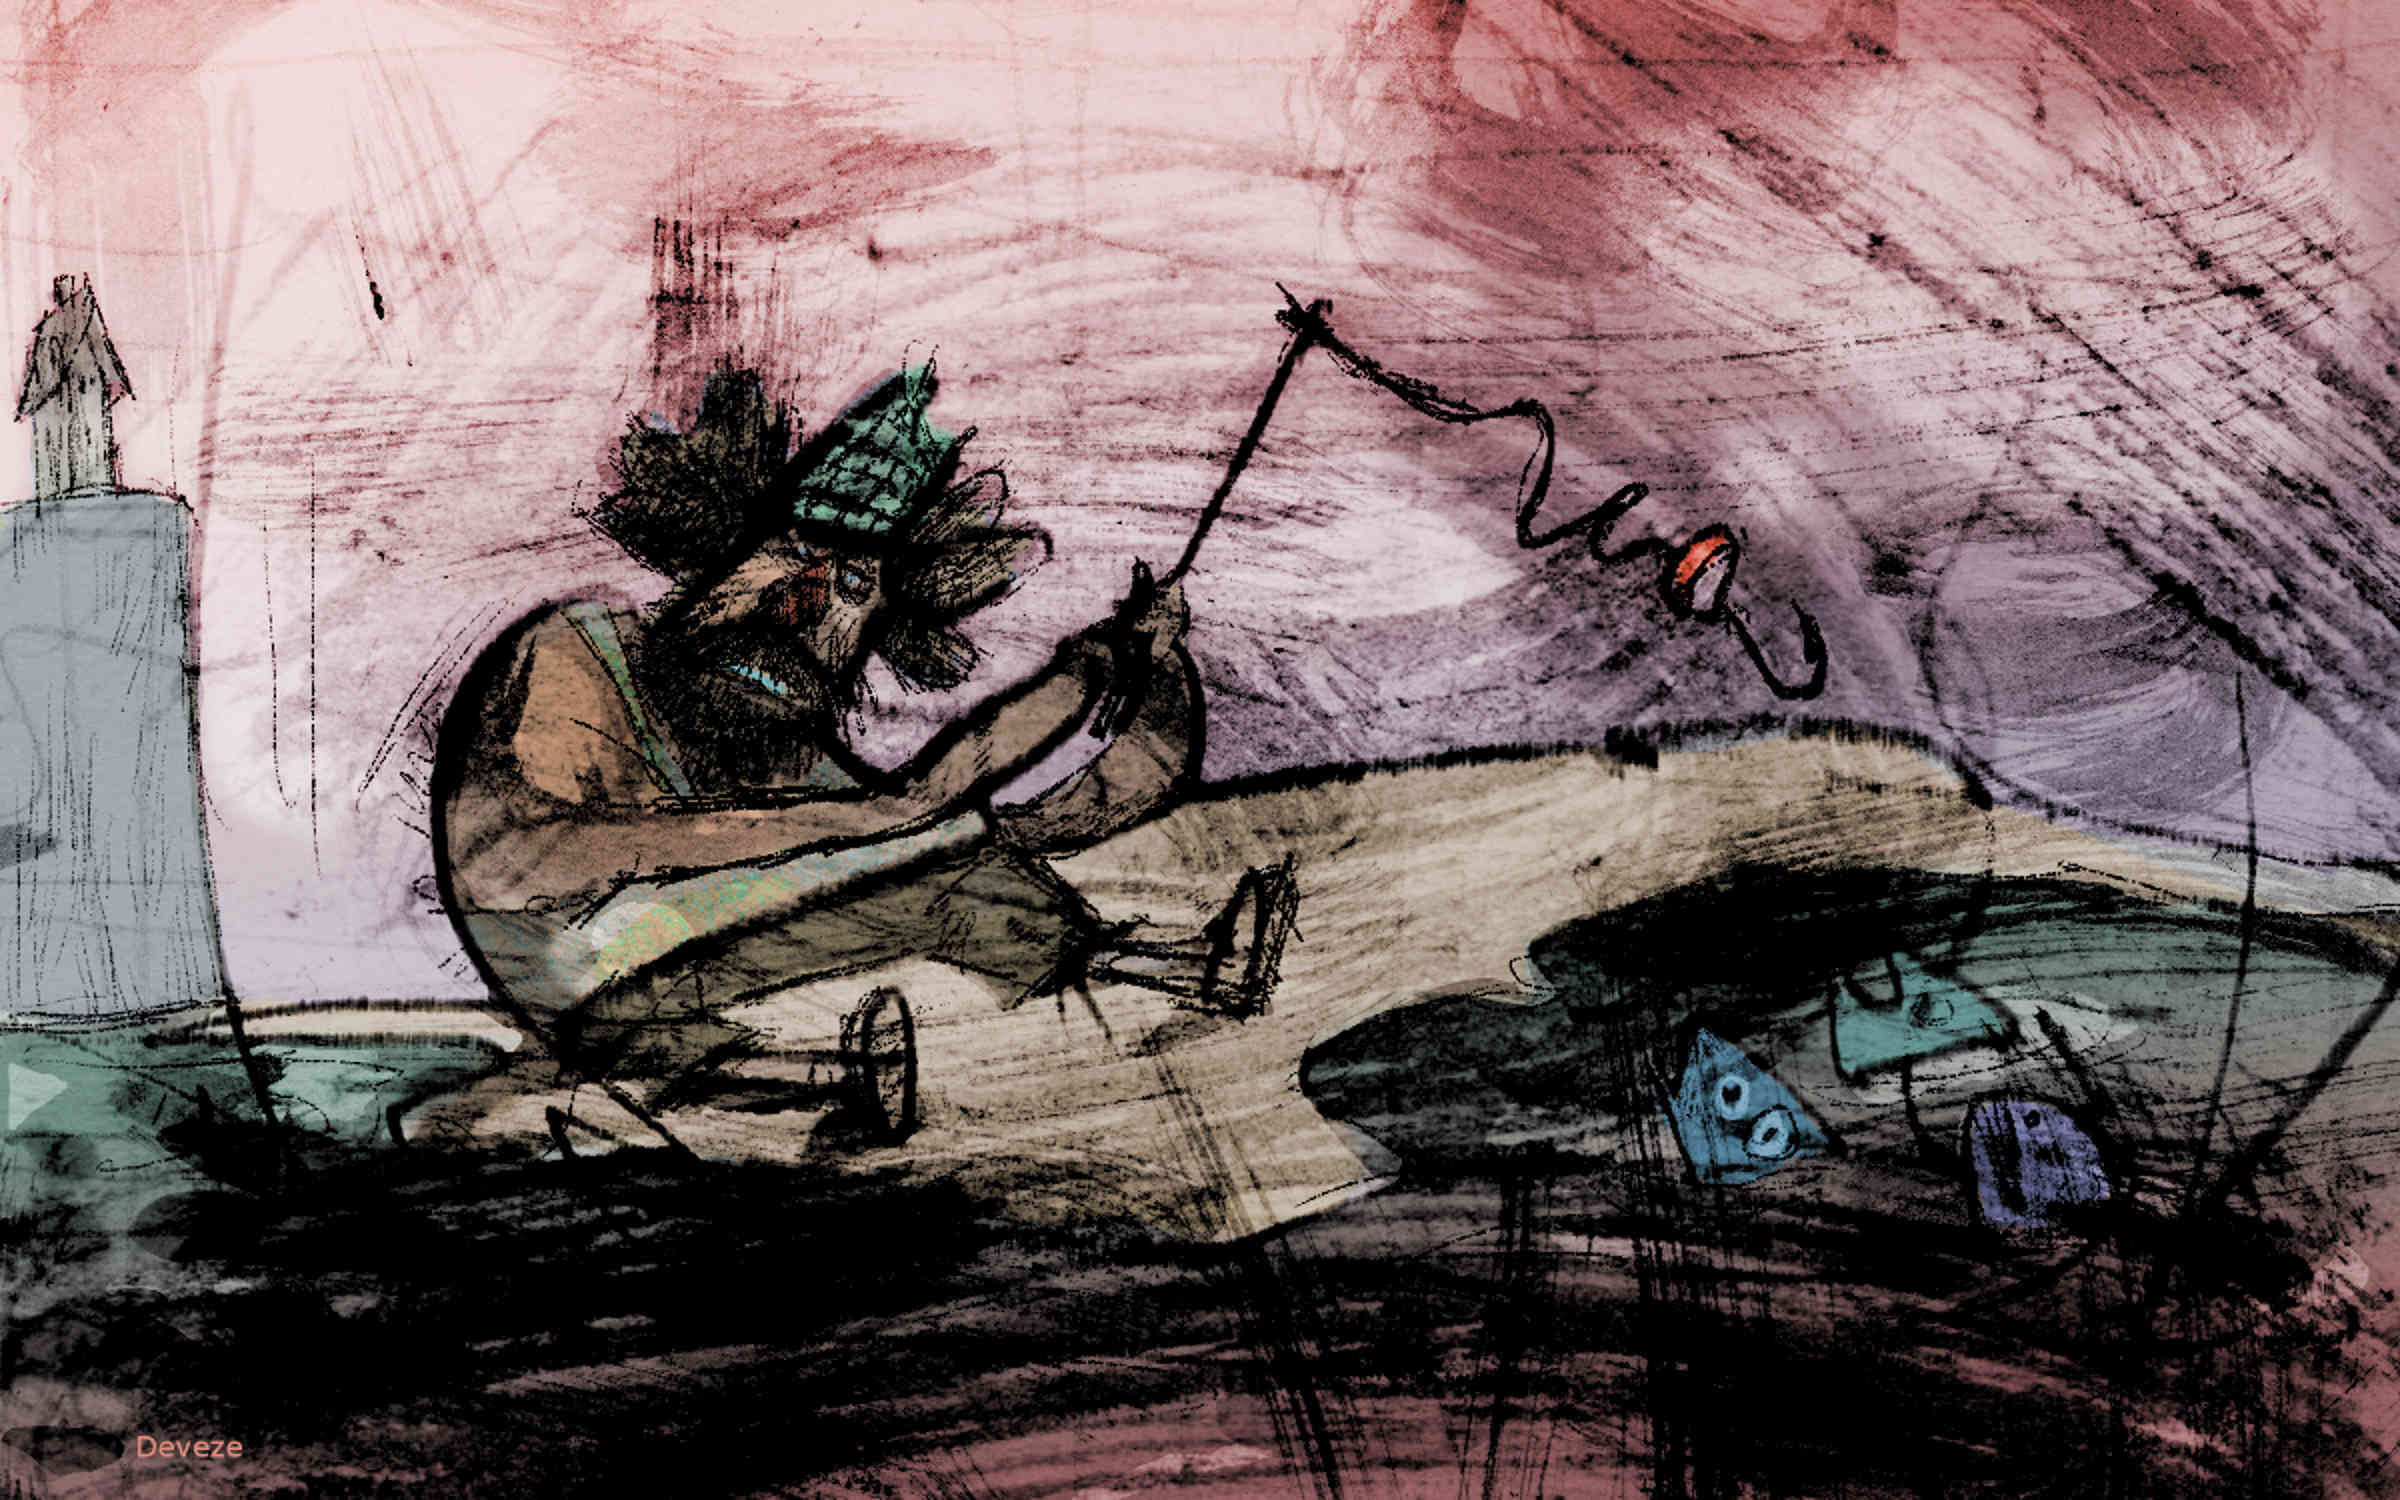
With this introductory post to the new Digital painting category forum we feature Gustavo Deveze, who is a Visual Artist using free software. Deveze’s work is characterized by mixing different medias and techniques. With future posts we want to continue featuring artists using free software.
Gustavo Deveze is a visual artist and lives in Buenos Aires. He trained as a draftsman at the National School of Fine Arts “Manuel Belgrano”, and filmmaker at IDAC - Instituto de Arte Cinematográfica in Avellaneda, Argentina.
His works utilize different materials and supports and he is published by different publishers. Although in the last years he works mainly in digital format and with free software.
He has participated in national and international shows and exhibitions of graphics and cinema with many awards. His last exposition can be seen on issuu.com:
https://issuu.com/gustavodeveze/docs/inadecuado2edicion
The new Digital Painting category is for discussing painting techniques, processes, and associated tools in a digital environment using Free/Libre software. Some relevant topics might include:
Emulating non-digital art, drawing on diverse historical and cultural genres and styles of art.
Emulating traditional “wet darkroom” photography, drawing on the rich history of photographic and printmaking techniques.
Exploring ways of making images that were difficult or impossible before the advent of new algorithms and fast computers to run them on, including averaging over large collections of images.
Discussion of topics that transcend “just photography” or “just painting”, such as composition, creating a sense of volume or distance, depicting or emphasizing light and shadow, color mixing, color management, and so forth.
Combining painting and photography: Long before digital image editing artists already used photographs as aids to and part of making paintings and illustrations, and photographers incorporated painting techniques into their photographic processing and printmaking.
An important goal is also to encourage artists to submit tutorials and videos about Digital Painting with Free Software and to also submit high-quality finished works.
Please feel free to stop into the new [Digital Painting category][dp-forum], introduce yourself, and say hello! I look forward to seeing what our fellow artists are up to.
With Stig Abell and Thea Lenarduzzi: – Jennifer Howard on the threats and thrills of the internet: what price for online freedom?; Rebecca Lemov considers the neurological effects of torture, plus the chilling account of a man who survived Guantanamo; Tom Shippey on the liberated and oppressed societies of Scandinavia, where light meets dark.Find out more at www.the-tls.co.uk
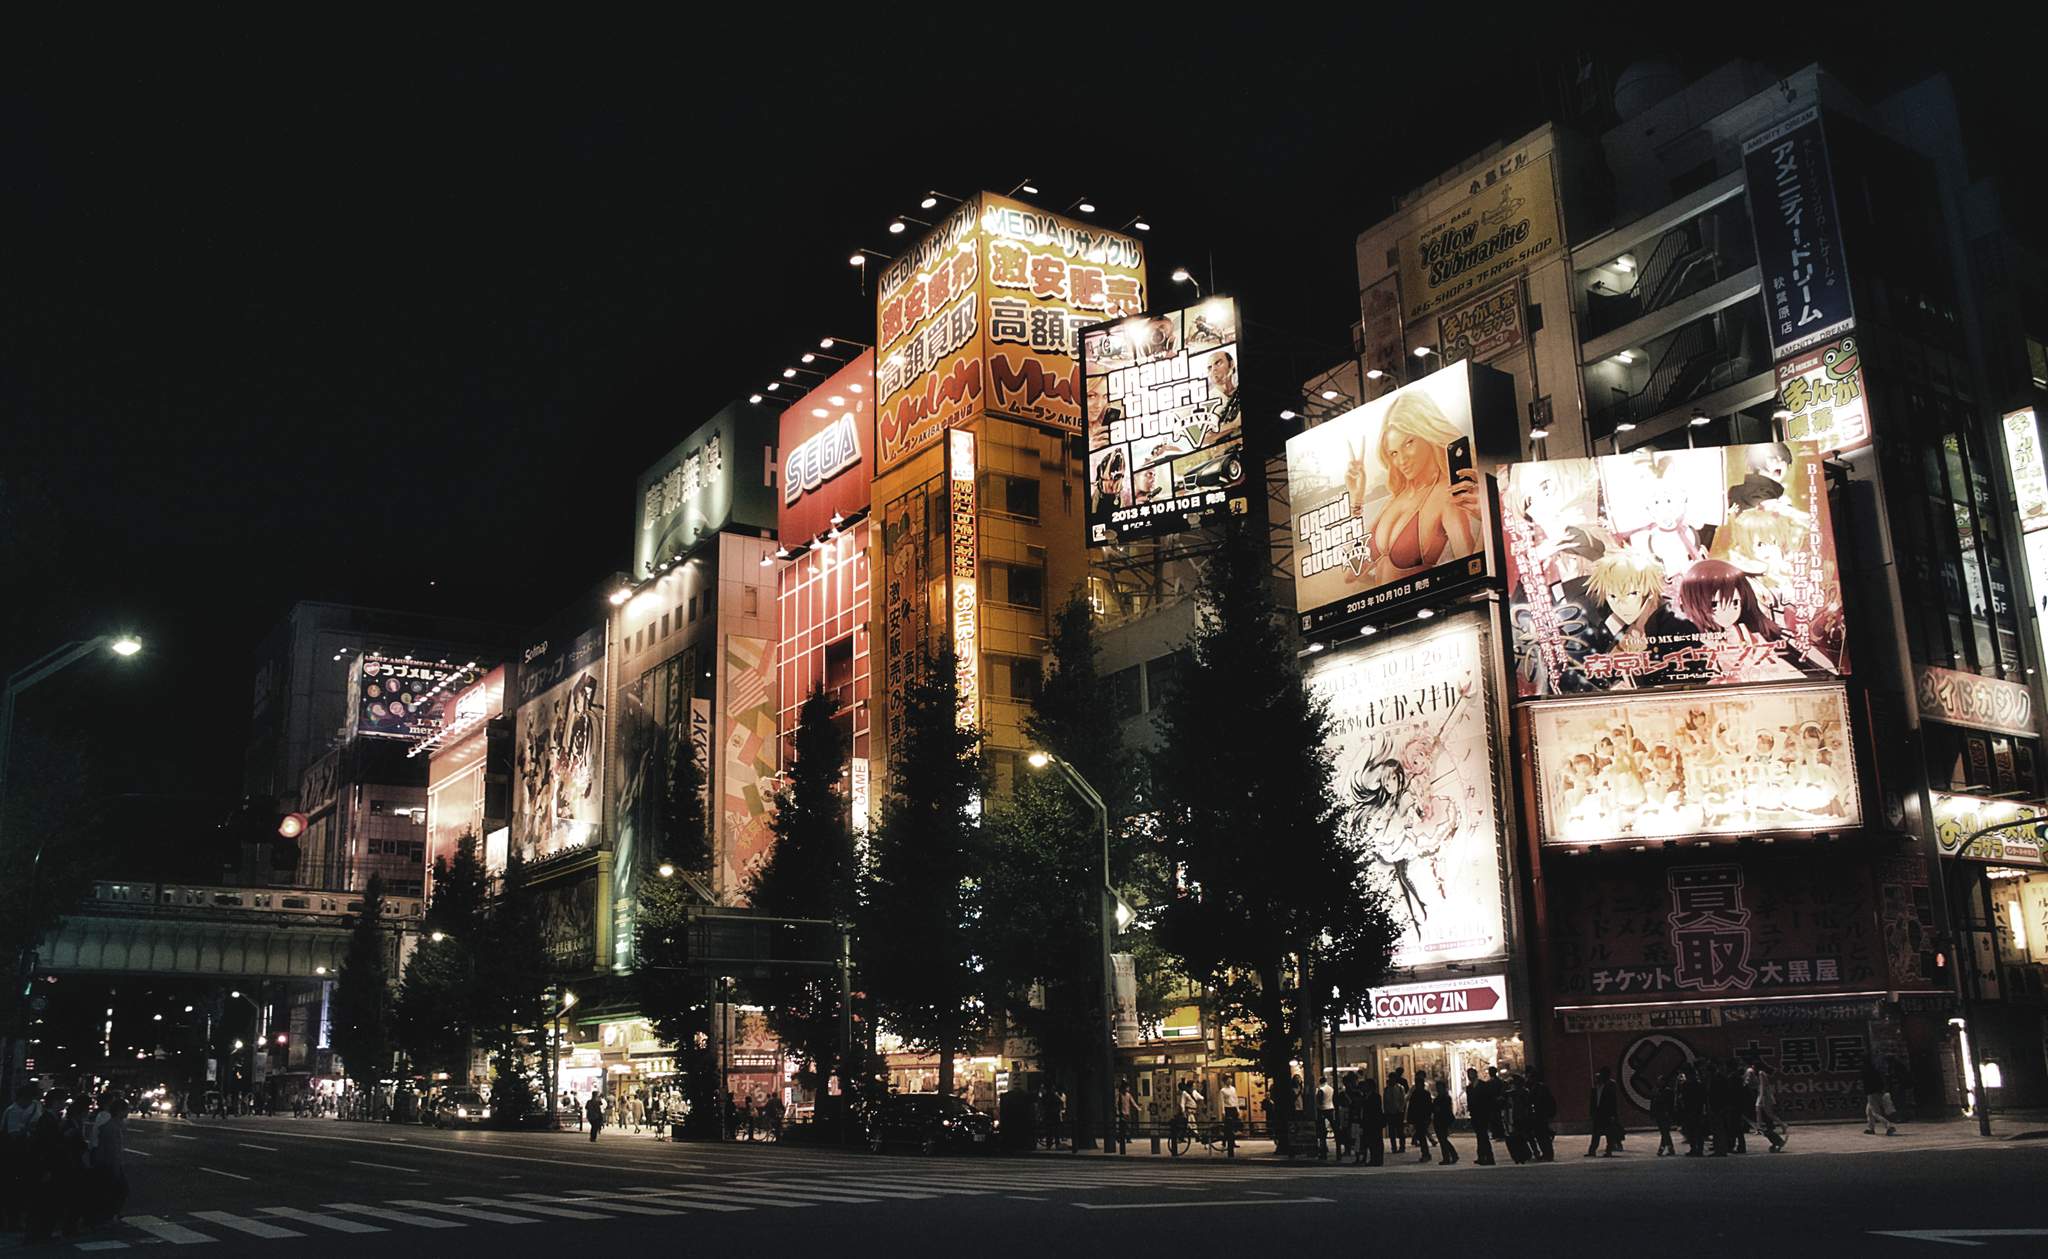
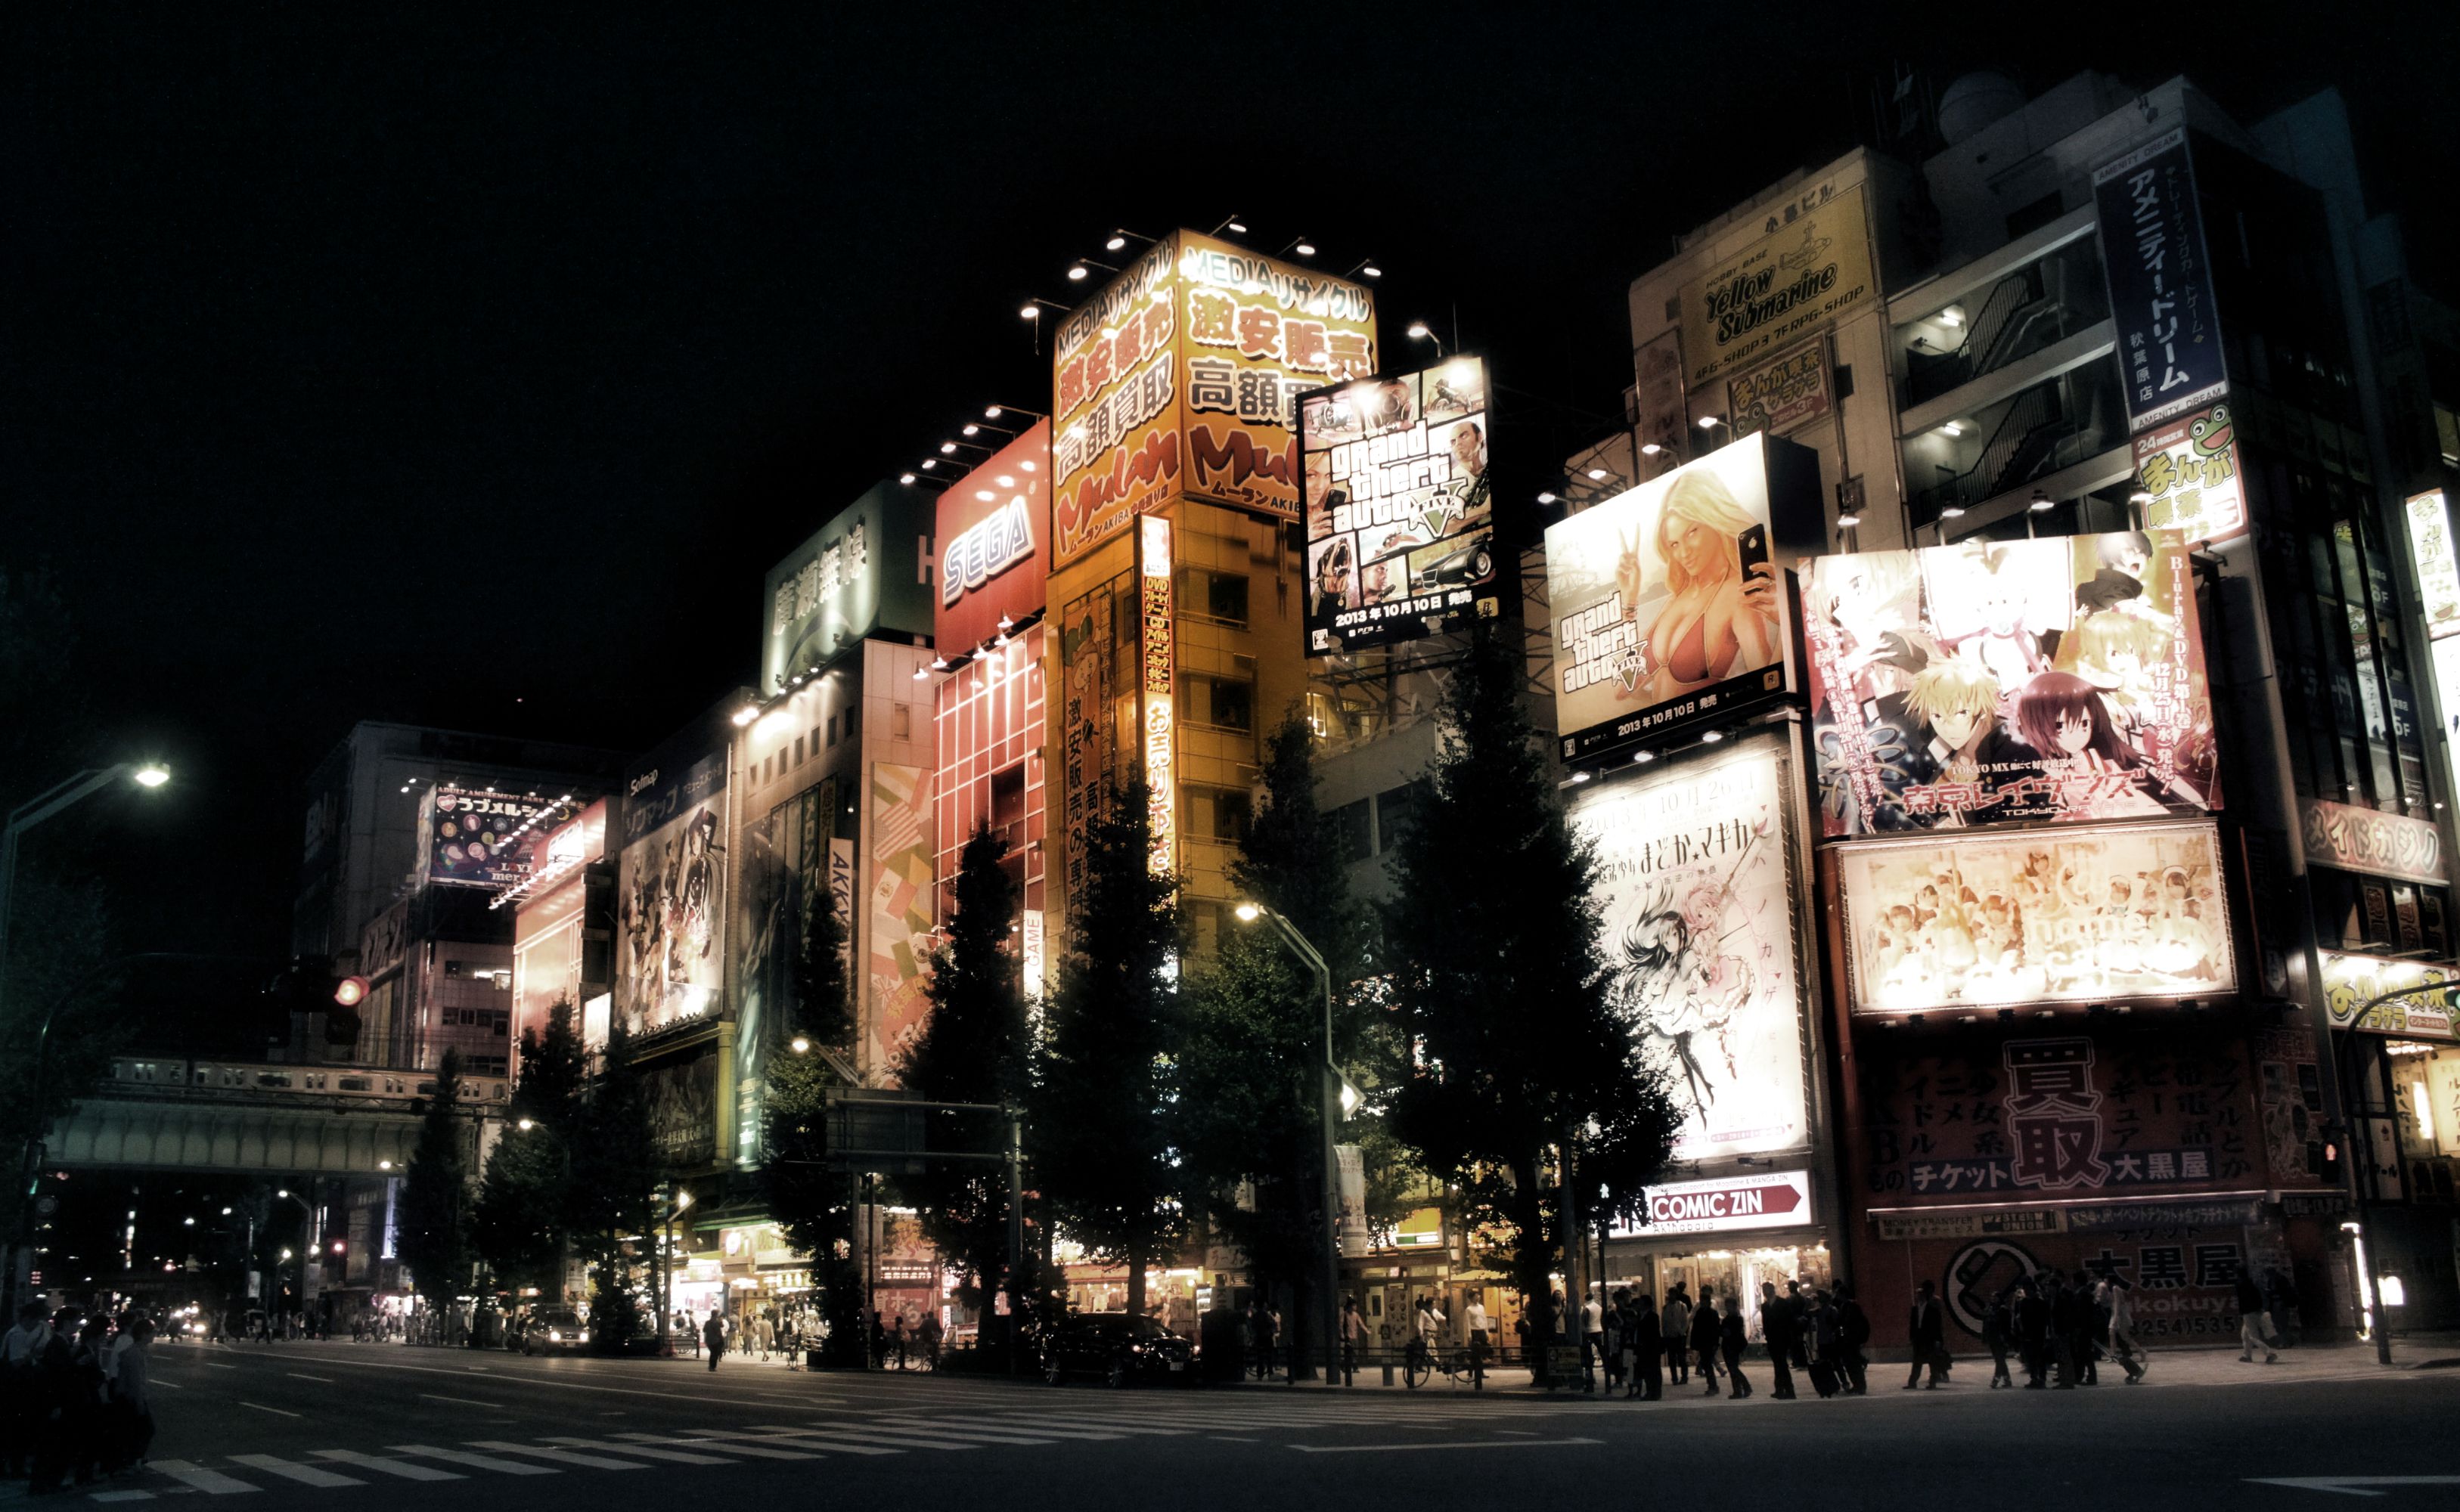
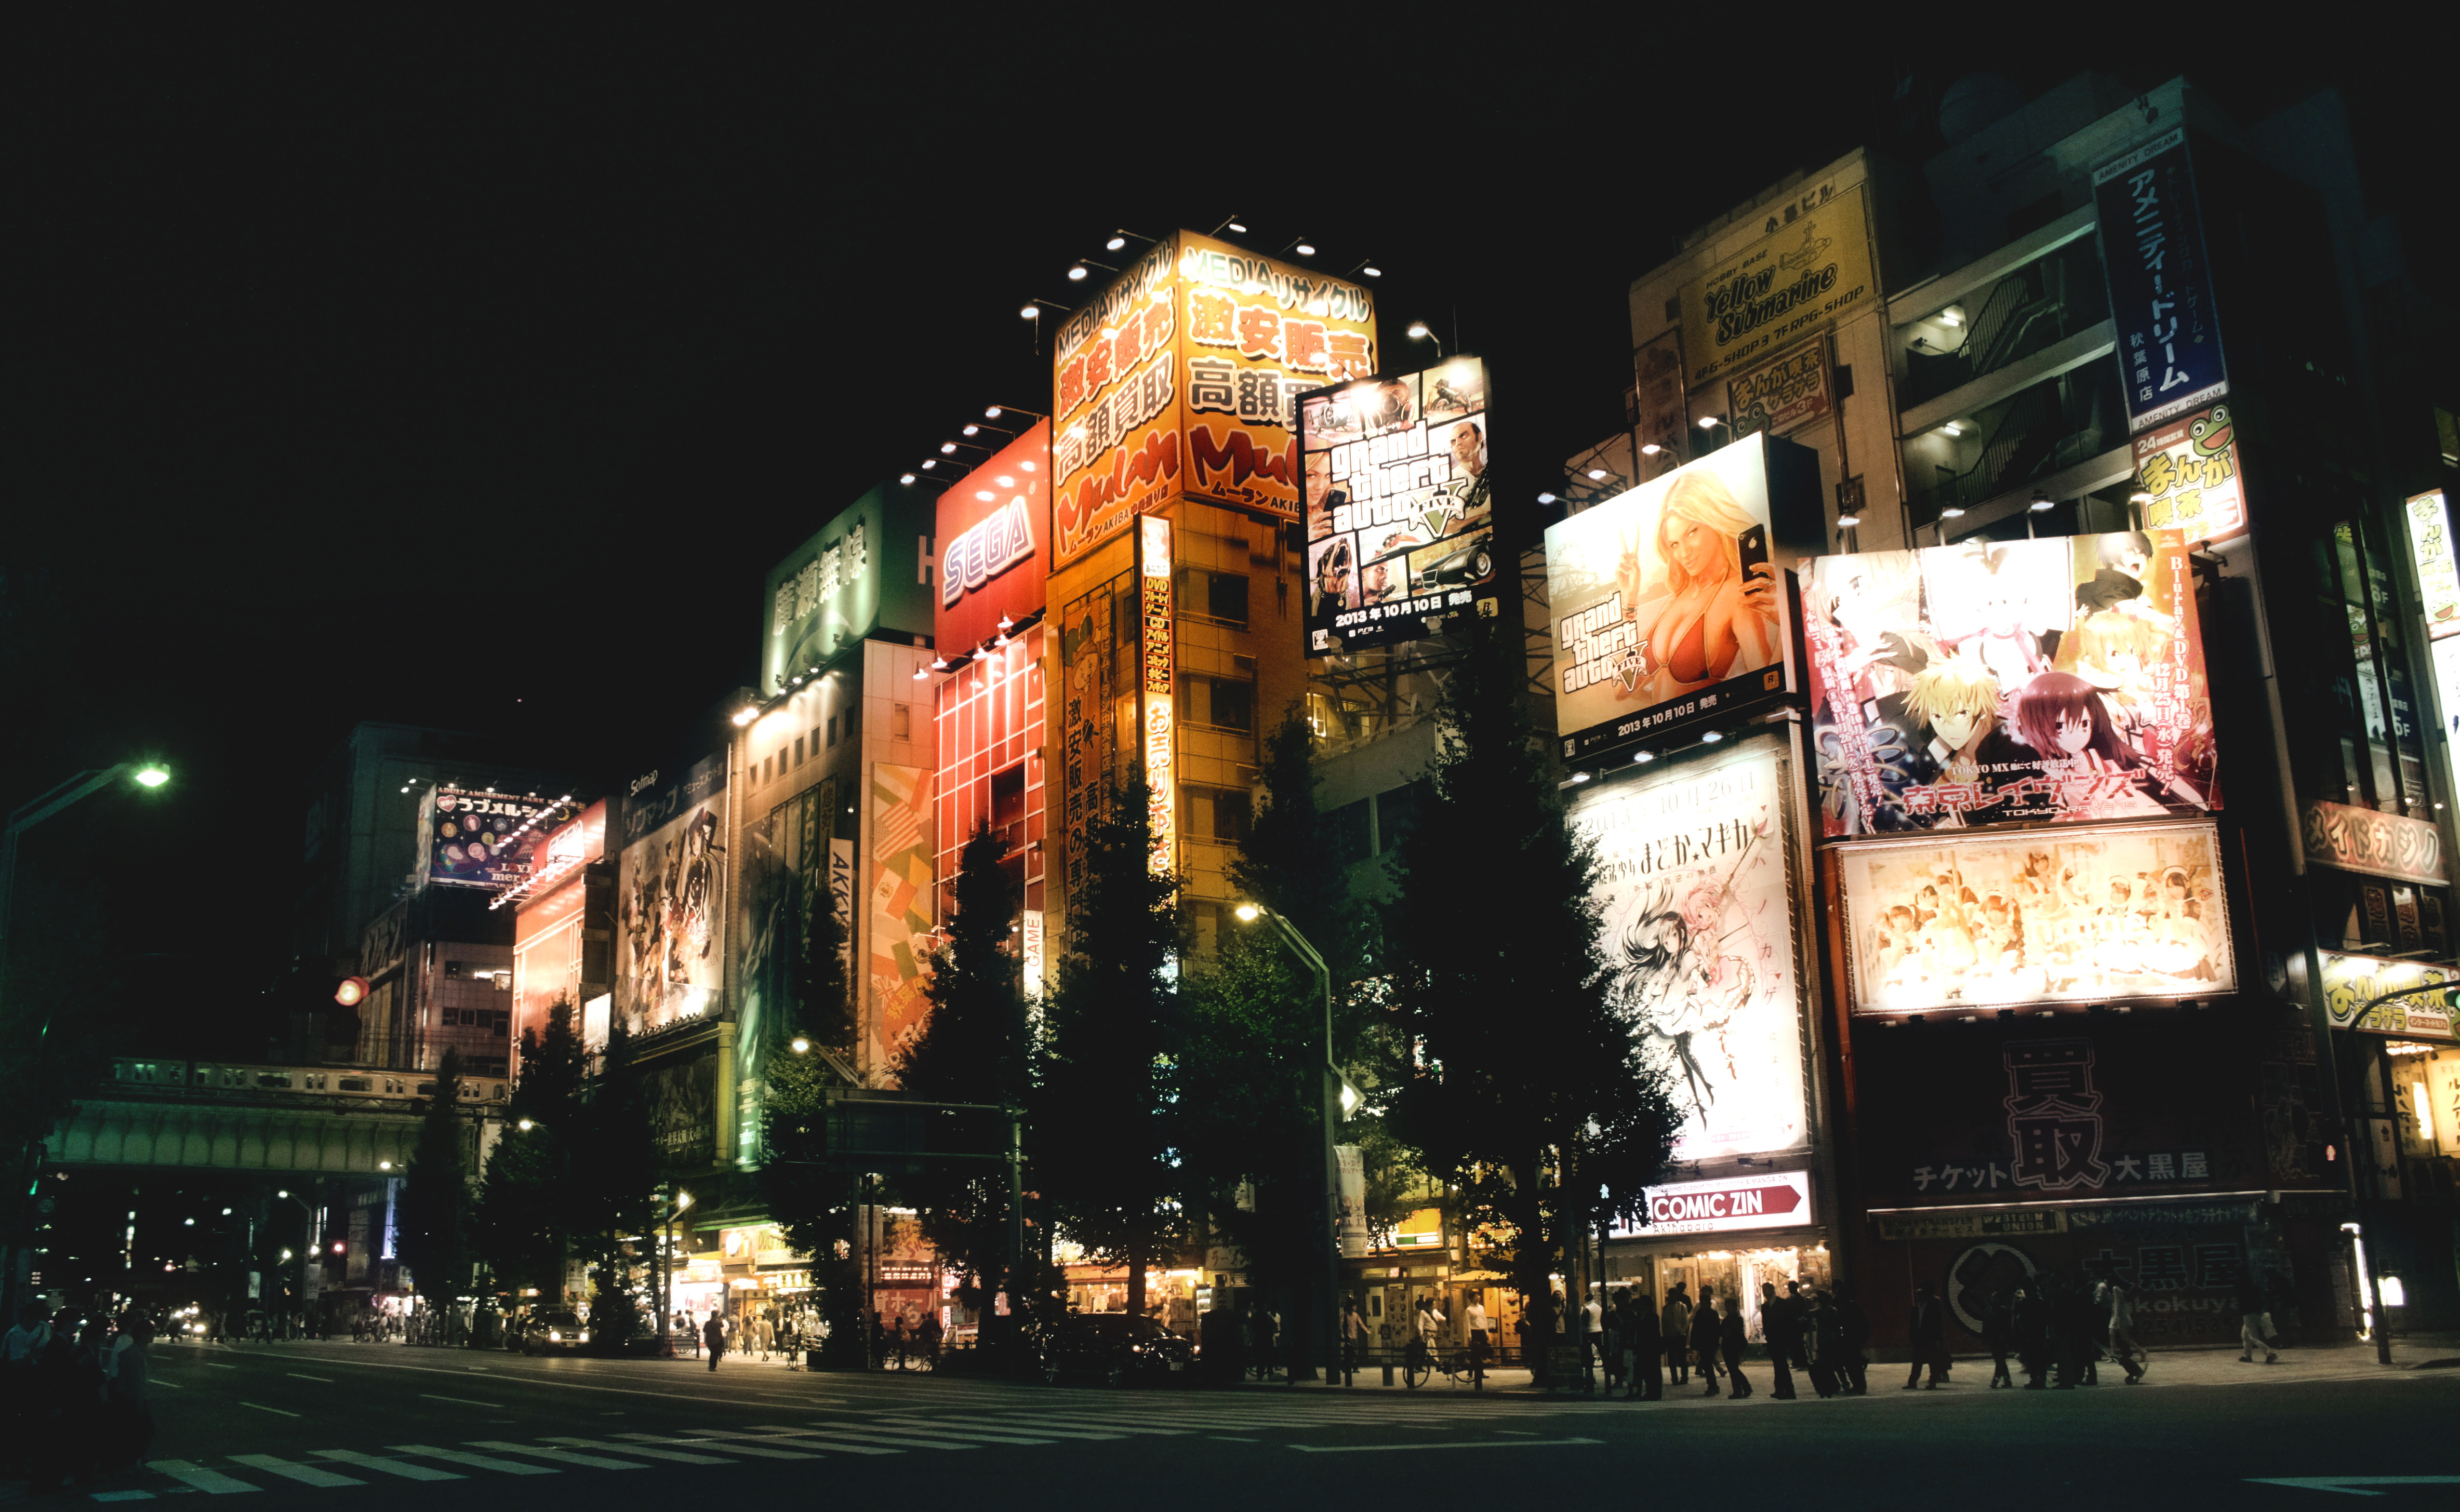
This tutorial explains how to achieve an effect based on the post processing by photographer Masashi Wakui. His primary subjects appear as urban landscape views of Japan where he uses some pretty and aggressive color toning to complement his scenes along with a soft ‘bloom’ effect on the highlights. The results evoke a strong feeling of an almost cyberpunk or futuristic aesthetic (particularly for fans of Bladerunner or Akira!).
This tutorial started its life in the pixls.us forum, which was inspired by a forum post seeking assistance on replicating the color grading and overall look/feel of Masashi’s photography.
Prerequisites
To follow along will require a couple of plugins for GIMP.
You will also need the Wavelet decompose plugin. The easiest way to get this plugin is to use the one available in G’MIC. As a bonus you’ll get access to many other incredible filters as well! Once you’ve installed G’MIC the filter can be found under Details → Split details [wavelets].
We will do some basic toning and then apply Gimp’s wavelet decompose filter to do some magic.
Two things will be used from the wavelet decompose results:
the residual
the coarsest wavelet scale (number 8 in this case)
The basic idea is to use the residual of the the wavelet decompose filter to color the image. What this does is average and blur the colors. The trick strengthens the effect of the surroundings being colored by the lights. The number of wavelet scales to use depends on the pixel size of the picture; the relative size of the coarsest wavelet scale compared to the picture is the defining parameter. The wavelet scale 8 will then produce overemphasised local contrasts, which will accentuate the lights further. This works nicely in pictures with lights as the brightest areas will be around lights. Used on daytime picture this effect will also accentuate brighter areas which will lead to a kind of “glow” effect. I tried this as well and it does look good on some pictures while on others it looks just wrong. Try it!
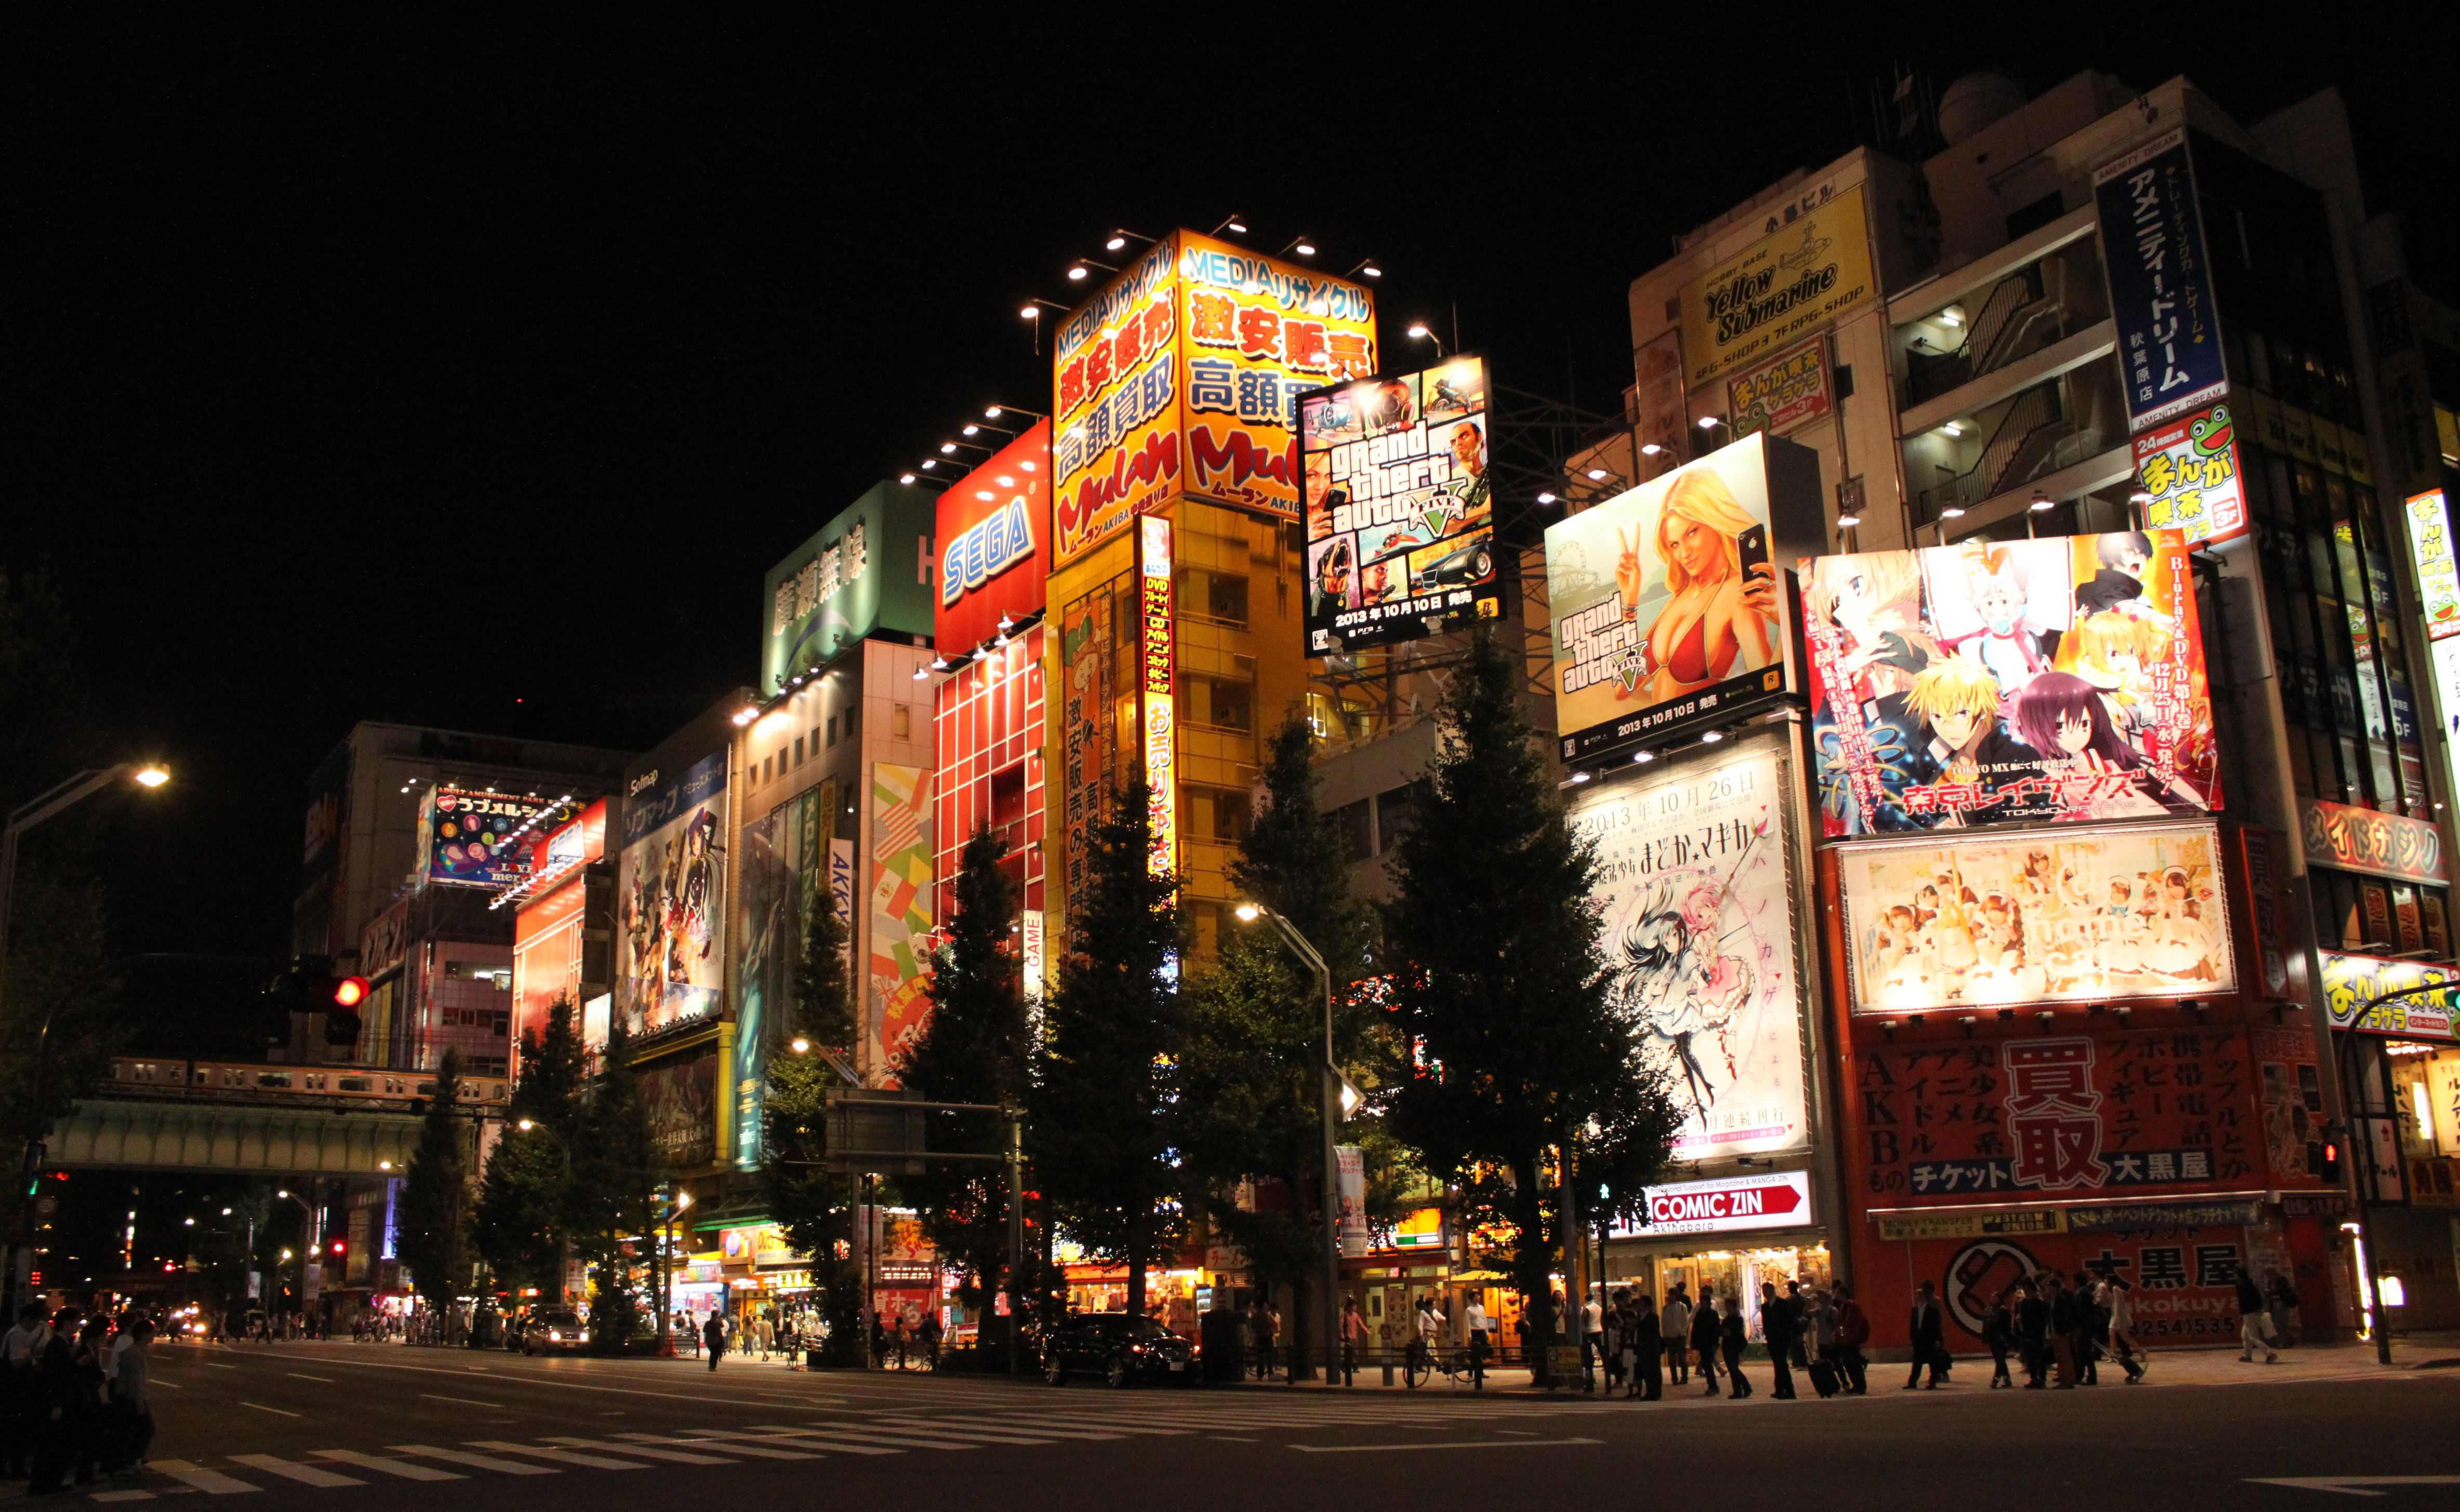
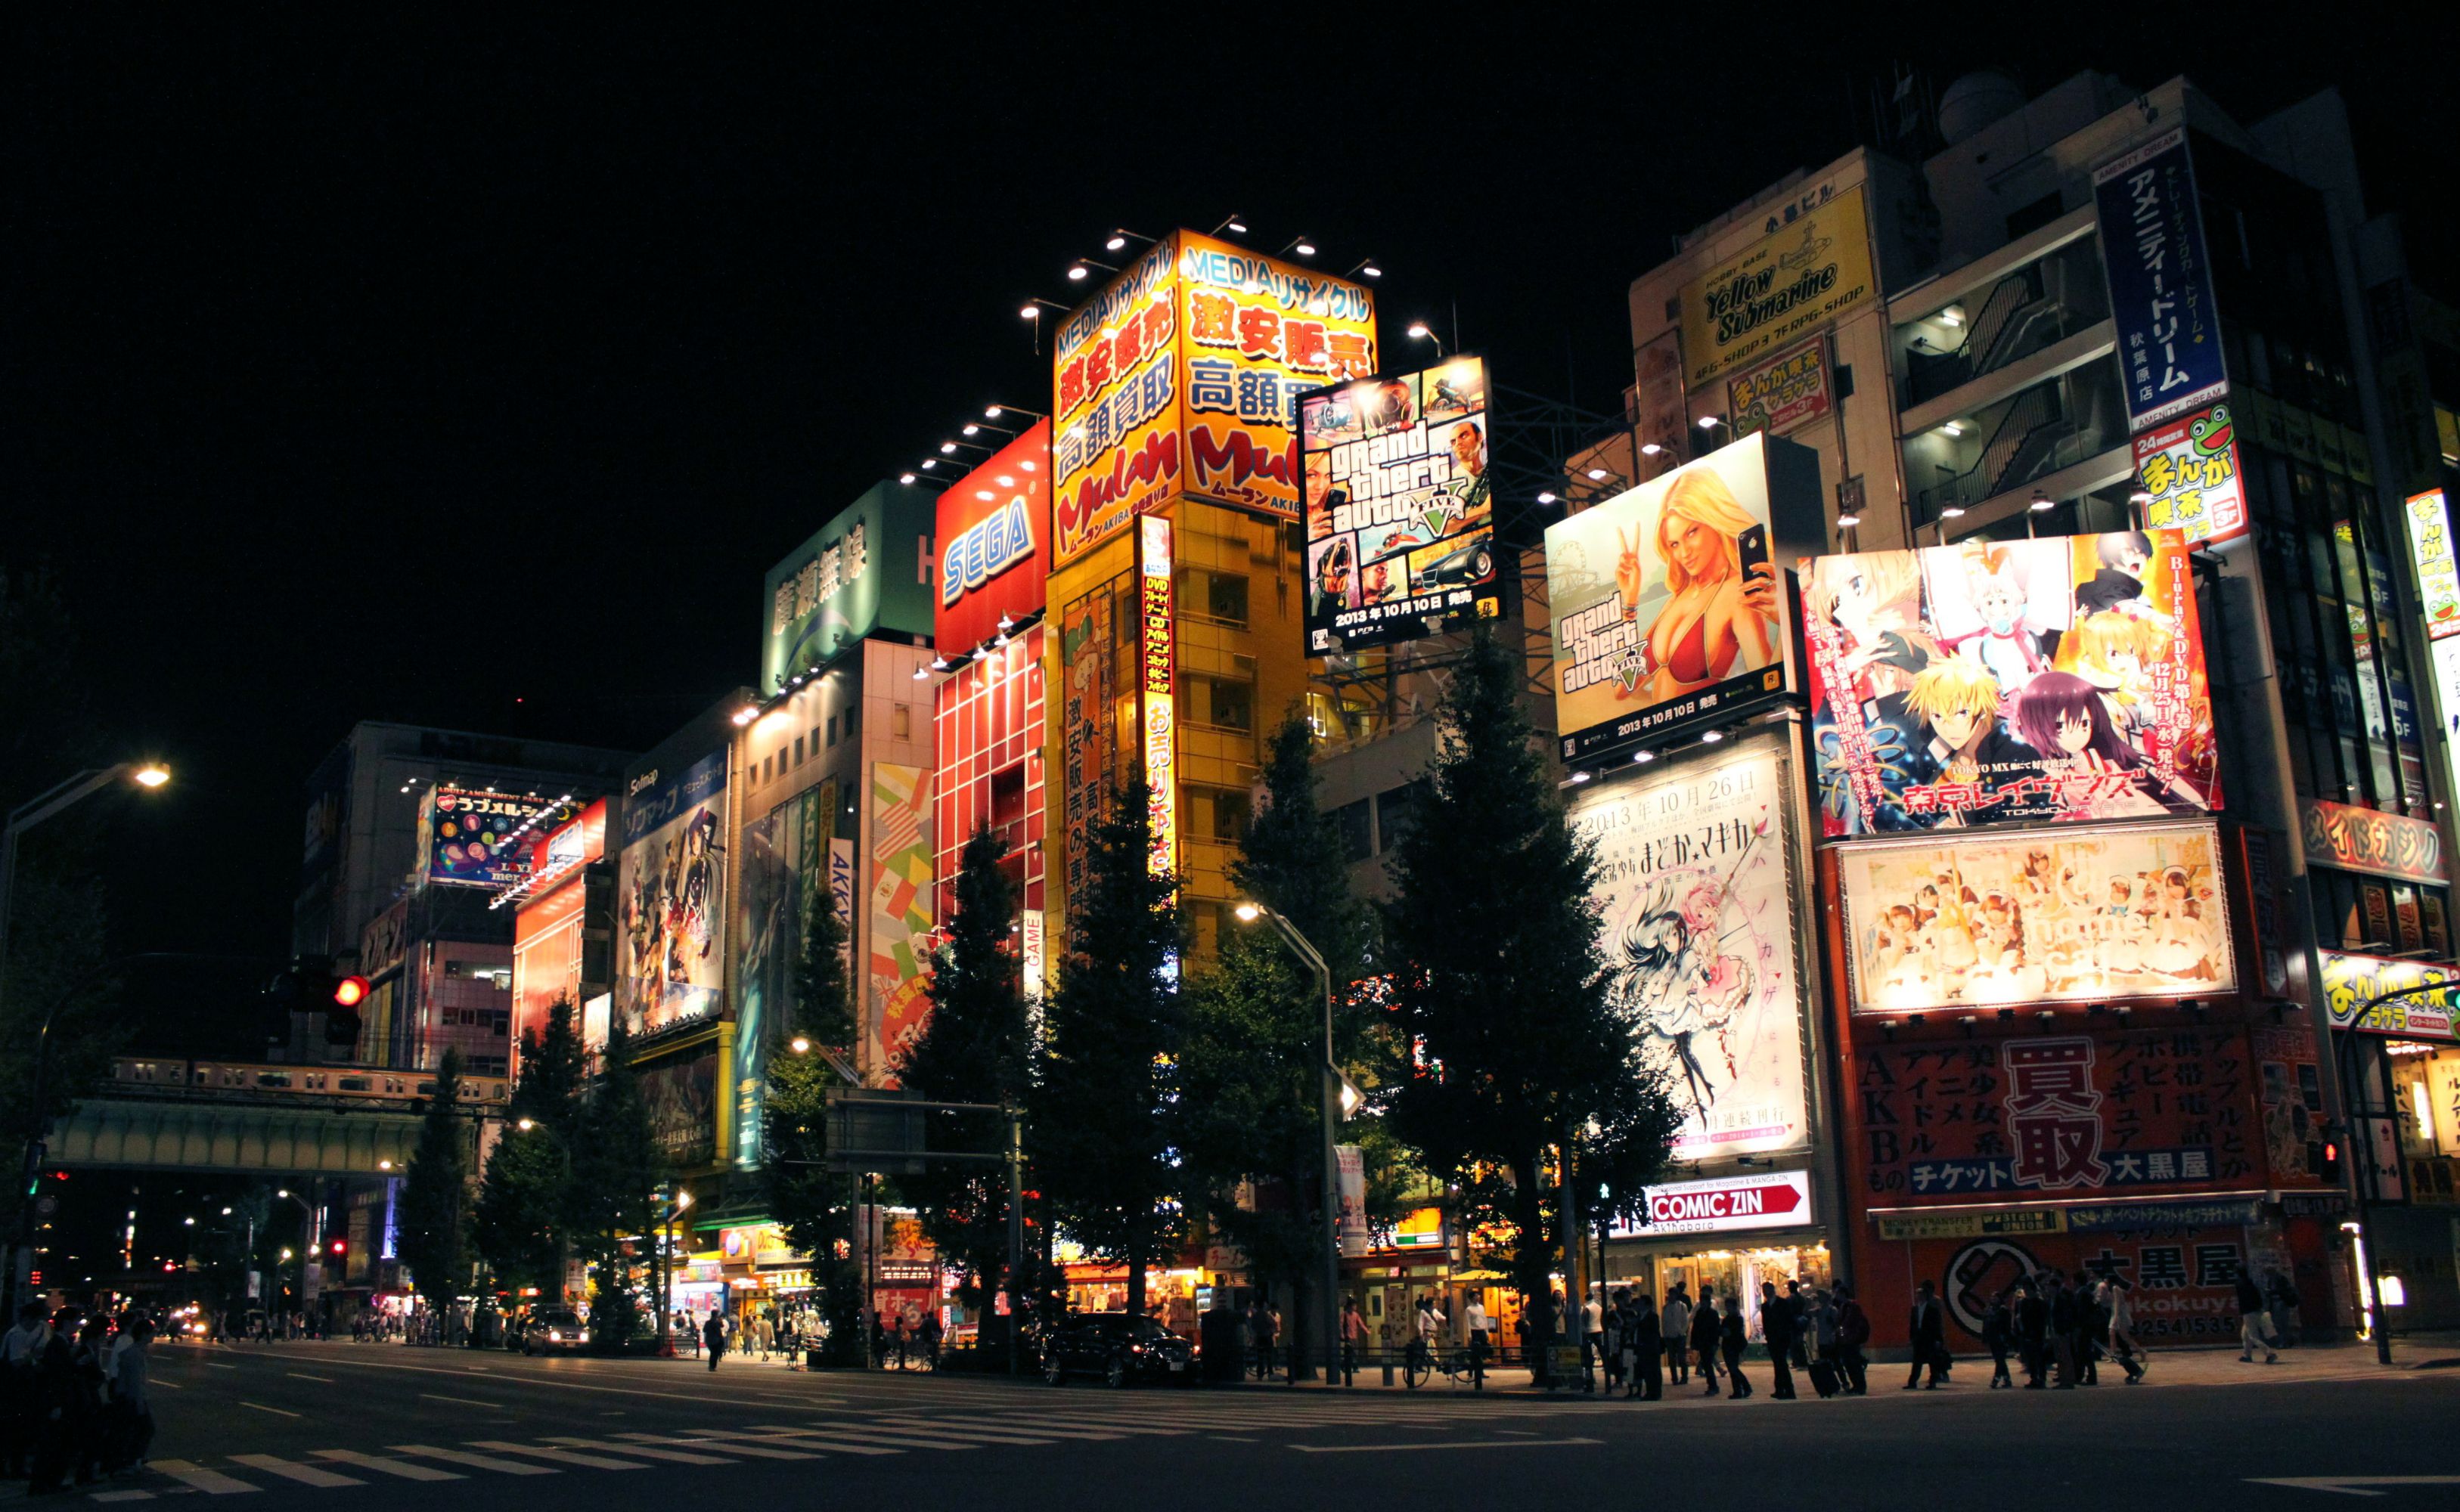
We will be applying all the following steps to this picture, taken in Akihabara, Tokyo.
Apply the luminosity mask filter to the base picture. We will use this later.
Filters → Generic → Luminosity Masks
Duplicate the base picture (Ctrl+Shift+D).
Layer → Duplicate Layer
Tone the shadows of the duplicated picture using the tone curve by lowering the reds in the shadows. If you want your shadows to be less green, slightly raise the blues in the shadows.
Colors → Curves
Apply a layer mask to the duplicated and toned picture. Choose the DD luminosity mask from a channel.
Layer → Mask → Add Layer Mask
With both layers visible, create a new layer from what is visible. Call this layer the “blended” layer.
Layer → New from Visible
Apply the wavelet decompose filter to the “blended” layer and choose 9 as number of detail scales. Set the G’MIC output mode to “New layer(s)” (see below).
Remember to set G’MIC to output the results on New Layer(s).
Make the blended and blended [residual] layers visible. Then set the mode of the blended [residual] layer to color. This will give you a picture with averaged, blurred colors.
Turn the opacity of the blended [residual] down to 70%, or any other value to your taste, to bring back some color detail.
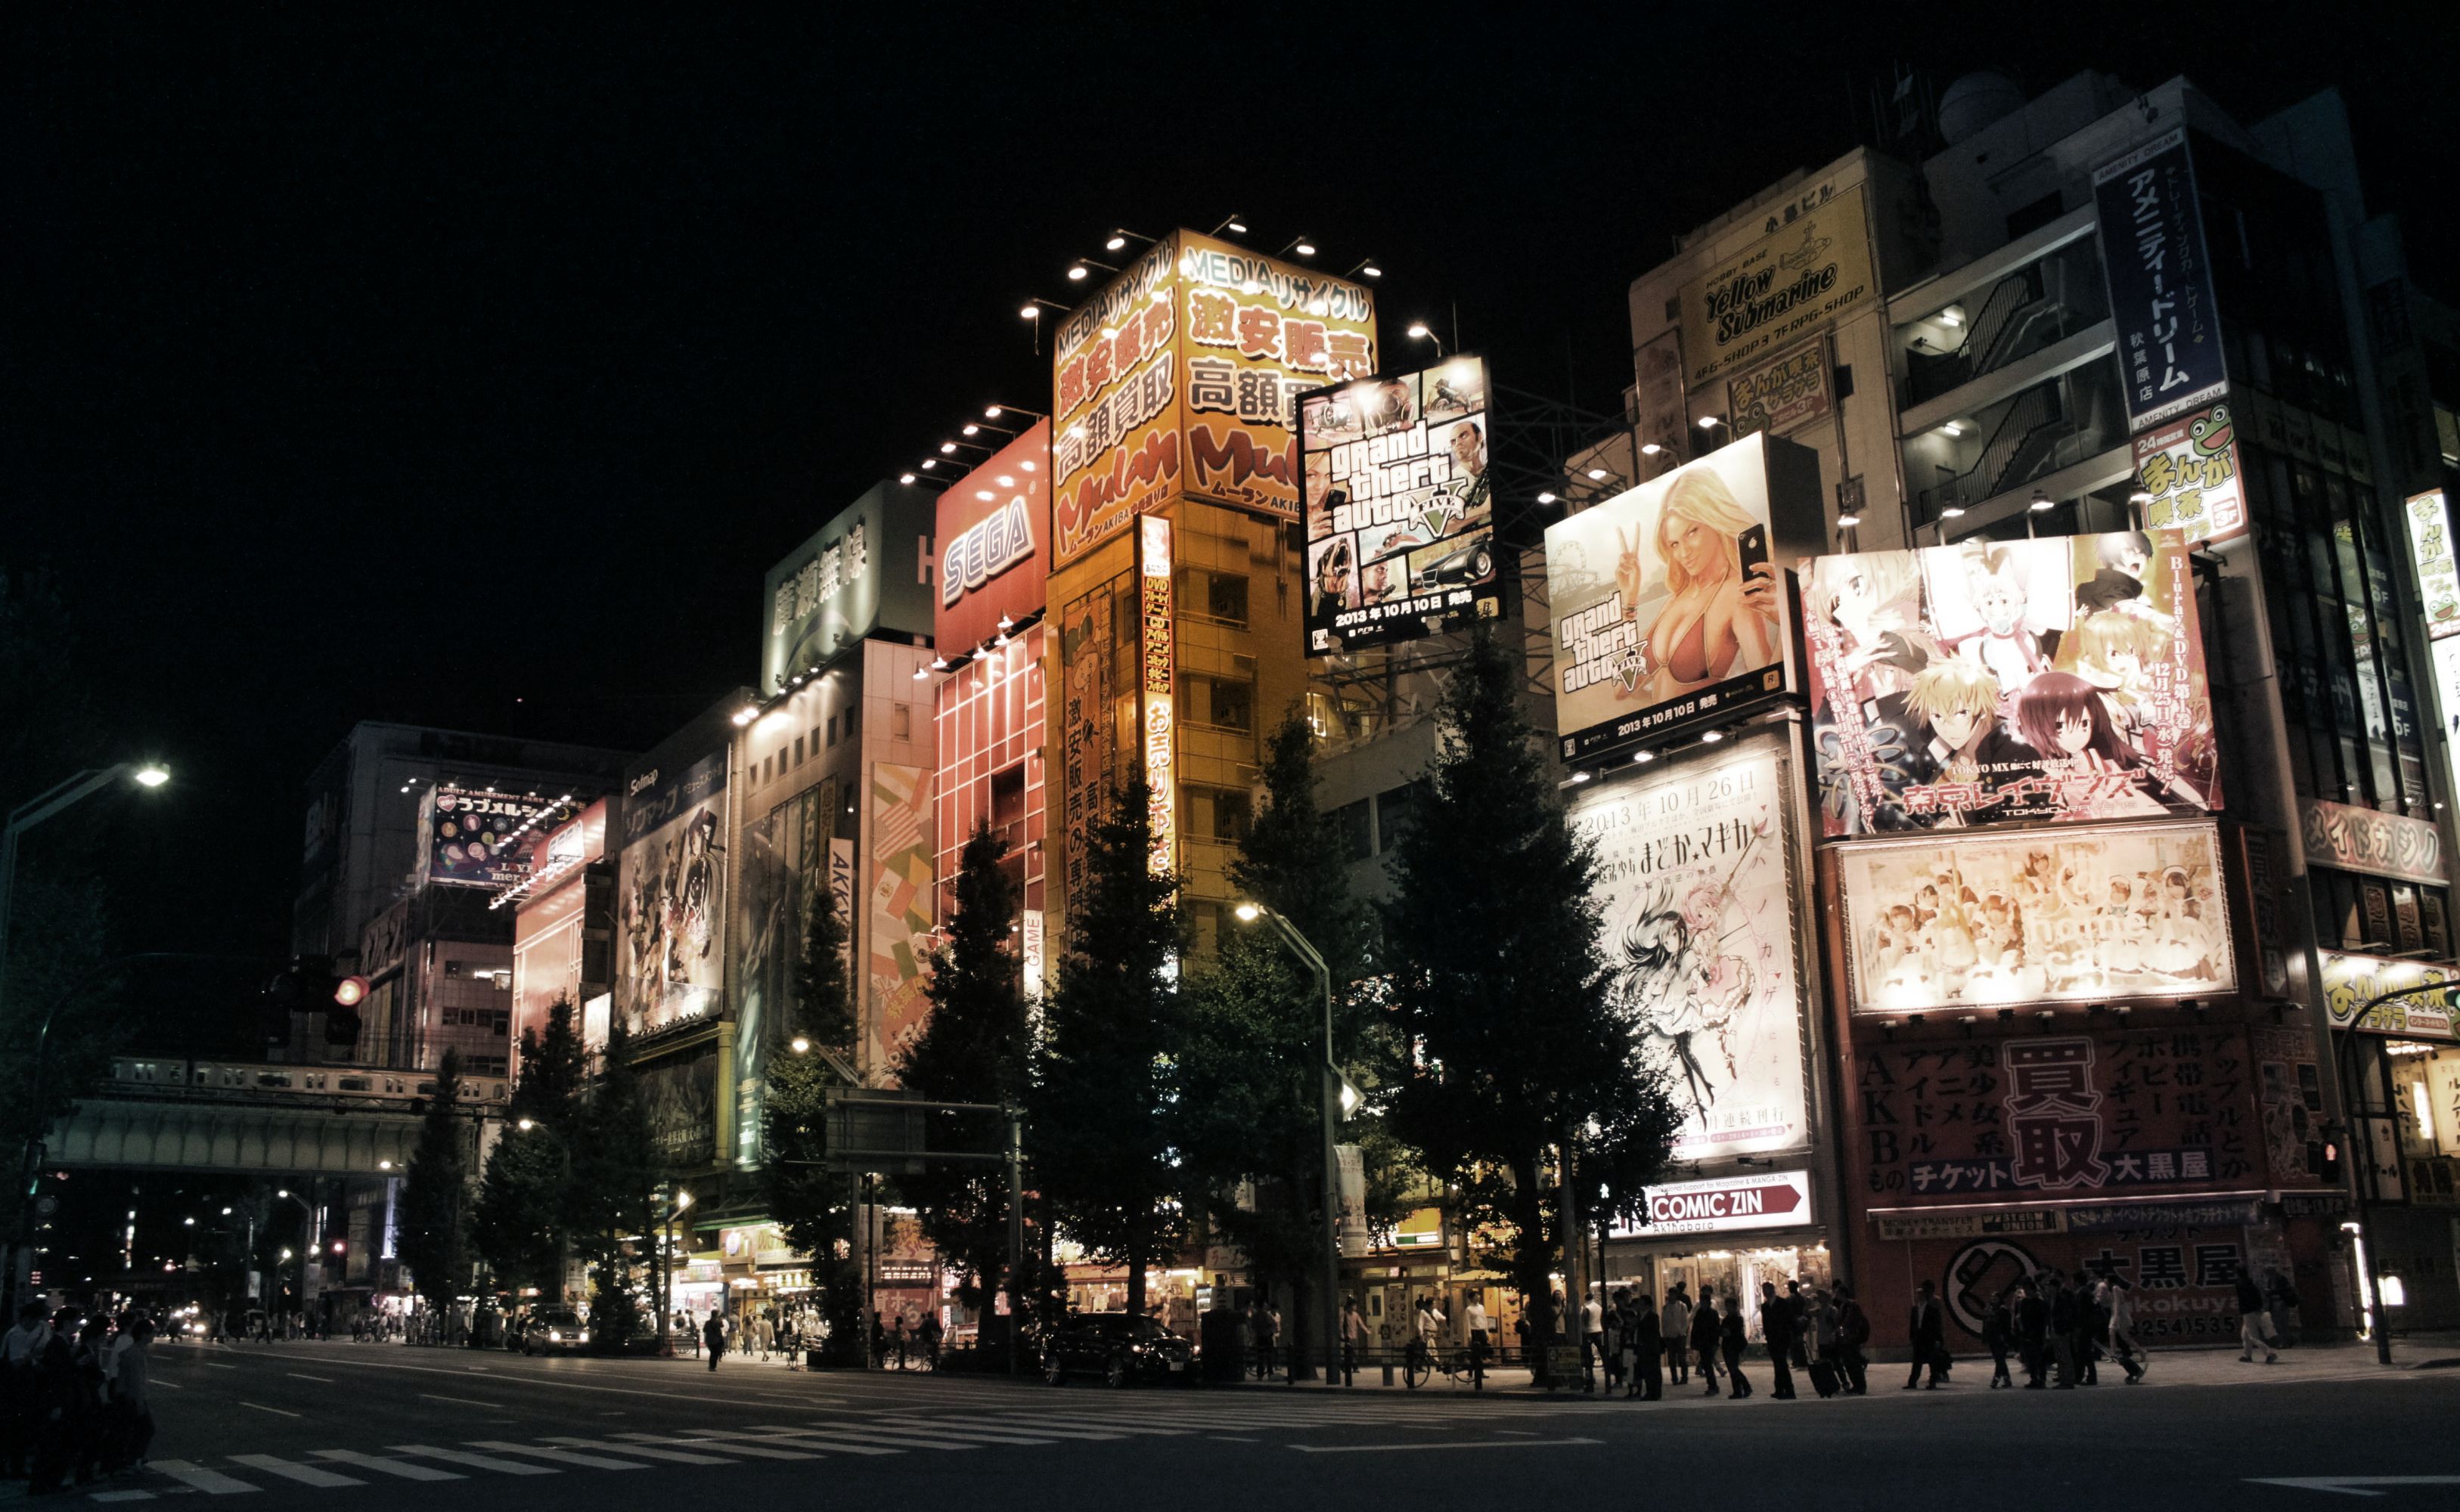
Turn on the blended [scale #8] layer, set the mode to grain merge, and see how the lights start shining. Adjust opacity to taste.
Optional: Turn the wavelet scale 3 (or any other) on to sharpen the picture and blend to taste.
Make sure the following layers are visible:
blended
residual
wavelet scale 8
Any other wavelet scale you want to use for sharpening
Make a new layer from visible
Layer → New from Visible
Raise and slightly crush the shadows using the tone curve.
Optional: Adjust saturation to taste. If there are predominantly white lights and the
colors come mainly from other objects, the residual will be washed out, as is
the case with this picture.
I noticed that the reds and yellows were very dominant compared to greens and blues. So using the Hue-Saturation dialog I raised the master saturation by +70 and lowered the yellow saturation by -50 and lowered the red saturation by -40 all using an overlap of _60_.

 Login
Login