Last year I got an amazing surprise in the mail.
It was an awesome calendar of a handpicked selection of results from the years PlayRaw images.
Chris (@chris) put together another fantastic calendar for this year (while juggling kids, too) and it’s too nice to not have a post about it!
Yep, that’s the back side. Monkey Business by Dimitrios Psychogios (cba)
It was a really awesome surprise to recieve my calendar last year - and I wish I would have planned a little better to be able to grab a photo of the calendar hanging in my office (it’s my work desk calendar - it never fails to remind me that there’s more fun things to life than work - also that I need to up my processing game… ).
This year Chris has done it again by assembling a wonderfully curated collection of images and edits from the various Play Raws that were posted this year.
I’ve plagiarized his post on the forums to put together this post and get some more publicity for his time and effort!
If you get a moment, please thank Chris for his work putting this together!
A preview (also shamelessly lifted from Chris’s forum post):
These Play Raws are a ton of fun and one of the great aspects of having such a generous community to share the images and allowing everyone to practice and play.
I am constantly humbled by the amazing work our community produces and shares with everyone.
Thank you to everyone who shared image and participated in processing (and sharing how you achieved your results)! I have really learned some neat things based on others work and look forward to even more opportunities to play (pun intended).
Fun side note: the Play Raws are actually something that began on the old RawTherapee forums. When they moved their official forums here with us it was one of those awesome things I’m glad they brought over with them (the people were pretty great too… :)).
It is a yearlytradition for us to post something giving thanks around this holiday.
I think it’s because this community has become such a large part of our lives.
Also, I think it helps to remind ourselves once in a while of the good things that happen to us. So in that spirit…
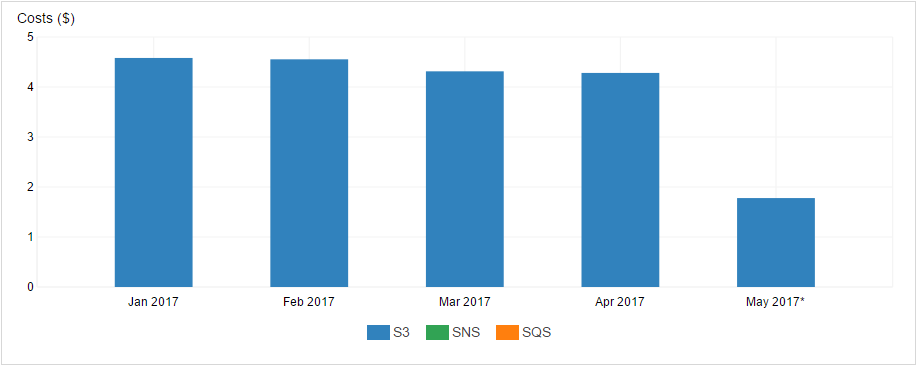
We are lucky enough (for now) to not have huge costs, but they are costs none-the-less. We have been very fortunate that so many of you have stepped up to help pay those costs.
For the last several years, Dimitrios Psychogios has graciously covered our server expenses (and then some). On behalf of the community, thank you so much! You keep the servers up and running.
Your generosity will cover infrastructure costs for the year and give us room to grow as the community does.
We also have some awesome folks who support us through monthly donations (which are nice because we can plan better if we need to). Together they cover the costs of data storage + transfer in/out of Amazon AWS S3 storage (basically the storage and transfer of all of the attachments and files in the forums).
So thank you, you cool friends, you make the cogs turn:
Jonas Wagner
elGordo
Chris
Christian
Claes
Thias
Stephan Vidi
ukbanko
Bill Z
Damon Hudac
Luka Stojanovic (a multi-year contributor!)
Moises Mata
WoodShop Artisans
Barrie Minney (He’s a long time monthly contributor!)
Mica
It is so amazing not to have to worry about finding the capital to support our growing community; we just expand things as necessary. It is super great.
If you’d like to join them in supporting the site financially, check out the support page.
This year we added the gphoto project to our list of supported applications! gPhoto is an awesome library for interfacing with your camera. It is used by darktable and entangle to allow you to shoot with your camera attached to your laptop or other device. We’re thrilled that they’ve joined us on the forums!
Natron is a compositing application mostly used in 3D/video compositing. The main developer was looking to give the project more of a community focus, so of course we were happy to provide them their own spot in the forum for their users to communicate and collaborate.
For another year, @darix continues to keep our stuff up and running! Do you ever notice outages? No?! Me either, and that is due to his daily diligence. We can’t thank him enough for his dedication to our community.
The originator of it all, thank you for the initial push to create this community where we are not divided by which application we use. And for your continued good will towards everyone here, your welcoming spirit, and passion. We’d never have done it without you! And for all the great things to come!
The community is the sum of parts + all the extra love that comes from all of you! Thank you so much continuing to stick around, share you knowledge, and spread the great community. It keeps me motivated, creative, and challenged and for that I am very thankful.
All photographic lenses have several types of errors. Three of them can be
corrected by software almost losslessly:
distortion, transverse
chromatic aberration (TCA),
and vignetting. The
Lensfun library provides code to do these
corrections. Lensfun is not used by the photographer directly. Instead, it is
used by a photo raw development software such as darktable or RawTherapee. For
example, if you import a RAW into darktable, darktable detects the lens model,
focal length, aperture and focal distance used for the picture, and it then
calls Lensfun to automatically correct the photograph.
Figure 1: 16mm lens showing distortion (click on the image to show the distortion corrected image)
Lensfun uses a database to know all the parameters needed to do the lens
corrections. This database is filled by photographers like you, who took time
to calibrate their lenses and to submit their findings back to the Lensfun
project. If you’re lucky, your lens models are already included. If not, please
use this tutorial to do the calibration and contribute your results.
Let us assume your lens isn’t covered by Lensfun yet, or the corrections are
either not good enough or incomplete. The following sections will explain how
to take pictures for calibration. It will also show you how to create an entry
of your own. The best is to provide information for all three errors but maybe
you only need distortion then this is fine too.
Checking if your lens is already supported
Before you start to calibrate new lenses or report missing cameras please check
the lens database first!
The list is updated daily. If your lens is already support then everything is
fine and you just have to update your database.
If the lens is not supported or doesn’t provide all corrections you could add
the missing data following this tutorial.
Taking pictures
Before we start you need to take a lot of images for the three errors we are
able to correct. This section will explain how to take them and what you need
to pay attention to.
For all pictures you should use a tripod, turn off all image correction and
disable image stabilization in the camera and in the lens itself! Also make
sure to that all High Dynamic Range (HDR) or Dynamic Range Optimizer (DRO)
features are turned off. All those options could mess up your calibration.
Distortion
For distortion you can to take pictures of a building with several parallel
straight lines. You need at least two lines, one should be at the top of the
image (Nearly touching the top of frame) and the other line at about a third
down from the first line. The following example demonstrates this.
Figure 2: Parking house with straight lines
The lines must be perfectly straight and aligned. You can twist and rotate
the camera, but the lines must have no imperfections. Common mistakes are using
tiles or bricks: to your eye they may be “straight”, but it will cause
calibration defects. The best buildings turn out to be parking houses (US:
parking lot, EN: garages, car parks) or modern glass buildings like
fruit-technology stores.
For a fixed focal length lens, you only will require one image. For a zoom lens
it is recommended to take 5 to N pictures where N is max focal length minus min
focal length. You must take an image at the minimum focal length, and the
maximum focal length. You can move (step backward on forward) between shots to
keep the 1/3rd rule above consistent.
You should shoot at your lenses sharpest aperture - this is often f/8 to f/11.
Setup your camera on a tripod. Shoot at the lowest ISO (without extended
values). This will be 100 or 200. Disable any inbody lens corrections. Every
vendor has a different name for this process (Fuji is modular lens optimization
for example). Check your camera manual and menus.
Chromatic aberrations (TCA)
For TCA images look for a large object with sharp high-contrast edges
throughout the image. Preferably, the edges should be black–white but anything
close to that is sufficient. Make sure that you have hard edges from the center
throughout to one of the edges. The best buildings, for taking photos, have dark
windows with white or gray frames.
Here are some example pictures:
Figure 4: Building with gray framed windows
You should take your pictures being at least 8 meters away. For zoom lenses,
take pictures at the same focal lengths as for distortion (5 to N). Make sure
to capture really sharp photos using at least f/8. The best is to use aperture
control, f/8 and ISO 100 on a tripod to avoid any color noise.
You can use e.g. a streetview service to find the right building in your town
(big buildings, dark windows with white or grey frames).
Vignetting
To create pictures for vignetting you need a diffuser in front of the lens. This
may be translucent milk glass, or white plastic foil on glass. Whatever, as
long as it is opaque enough so that nothing can be seen through it, yet
transparent enough so that light can pass through it. It must not be thicker
than 3 mm and shouldn’t have a noticeable texture. It must be perfectly flush
with the lens front, and it mustn’t be bent. It must be illuminated
homogeneously.
However white plastic foil taped on a piece of ordinary glass for stability
might be enough, if the plastic doesn’t have any texture.
I normally wait for a cloudy day with no sun, then the sky is homogeneously
lit. Put the camera on a tripod and point it to the sky. Put the glass directly
on the lens (remove any filters). In some places where sunlight is different
you may need to shoot indoors. You should experiment to make sure your images
are evenly lit (except for vignetting obviously).
Figure 6: Camera setup to take pictures for vignetting correction
Figure 6: Image showing vignetting of a wide angle lens at 16mm
Make sure that no corrections are applied by the camera (some models do
this even for RAWs). Set the camera to aperture priority and the
lowest real ISO (this is normally 100 or 200, don’t use extended ISO values).
Switch to manual focus and focus to infinity. This is the most critical step!
For zoom lenses, you need to take pictures at five different focal lengths. You
only need pictures for five focal lengths because for the other steps it gets
interpolated. For a prime lens you need to take only pictures for the single
focal length.
Take the pictures as RAW at the fastest aperture (e.g. f/2.8) and at three more
closed apertures at 1 EV distance, and also at the most closed aperture (e.g.
f/22.0). These are often marked on your lens’ aperture ring, or on your
electronic display.
If you have for example a 16-35mm lens with aperture f/2.8 - f/22, you need to
take pictures at 16mm, 20mm, 24mm, 28mm and 35mm focal length (Remember you
require the min and max zoom values). For each for those focal lengths you need
to take five pictures at f/2.8, f/4.0, f/5.6, f/8.0 and f/22.0. This makes 25
pictures in total.
For a 50mm prime lens with f/1.4 - f/16 you need to take 5 pictures at f1.4, f/2.0,
f/2.8, f/4.0, and f/16.0.
**Exposing the picture correctly
For taking the picture the middle of the area needs to be as bright as
possible, but not overexposed. This can be easily +1.7 to +2.0 EV.
If your camera has a zebra setting, turn it on and set the zebra mode to ‘100’.
If you start to see the zebra, then take the picure. The profile is created on
a RAW file and the zebra is shown for a developed picture. So we aren’t
overexposed yet. In the control mode in my camera which shows overexposure
everything was fine.
Vignetting correction for the professionals
The following steps are to get really fine grained vignetting corrections. The
gain in accuracy is really very small! I probably only makes sense for prime
lenses used for portrait or macro photography. However this is not required,
the above it absolutely enough.
Lensfun is able to correct vignetting depending on focal distance. Thus, you
can achieve a bit more accuracy by shooting at different focal distances. This
means you will have to take pictures at 4 different focal distances.
The first focus on the near point (The near point is the closest distance that
can be brought in focus). The next focal distances are the near point
multiplied by 2 and by 6 and finally focus at infinity.
Example: For a 85mm prime lens with the near point at 0.8 m. You have to take
pictures at 0.8 m, 1.6 m, 4.8 m and infinity.
Create calibration data
There are two ways to perform the calibration.
Lensfun allows an upload of data to the project, and they’ll do the program
work for you. They’ll also review your images to make sure they are correctly
taken.
Or you can do it yourself with the lens calibration script from the lensfun
project.
The script needs the following dependencies to be installed on your system:
You can download the lens calibration script
HERE or get it as a package
for the major distributions
HERE.
Once you have downloaded the tool create a folder for your lens calibration
data, change to the directory and run:
$ lens_calibrate.py init
The following directory structure has been created in the local directory

1. distortion - Put RAW file created for distortion in here
2. tca        - Put chromatic abbreviation RAW files in here
3. vignetting - Put RAW files to calculate vignetting in here
Follow the instructions and copy your raw files in the corresponding
directories.
Vignetting correction for the professionals
For each focal distance you captures pictures you have to create a folder.
Lets pick up the example from above. For a 85mm prime lens we took pictures at
0.8 m, 1.6 m, 4.8 m and infinity. For this lens you would have to create the
following folder structure in the vignetting directory:
The folder inf is for the focal distance at infinity.
Distortion
Once you copied the files in place it is time to generate the pictures (tif
files) for distortion calculations. You can do this with the
‘distortion’ option:
$ lens_calibrate.py distortion
Running distortion corrections ...
Converting distortion/_7M32376.ARW to distortion/exported/_7M32376.tif ... DONE
A template has been created for distortion corrections as lenses.conf.
Once the tif files has been created, you can start Hugin.
Torsten Bronger created a screen cast to give an overview about the distortion
process in Hugin. He uses an old Hugin version in the video. The following
section of this tutorial explains how to do it with Hugin 2018. You can watch
the screen cast first if you want, you can do it
here (Vimeo).
If you start Hugin the first time, the windows you will get should look like in
Figure 8.
Figure 8: Hugin start screen
First select on the menu bar Interface -> Expert to switch to the Expert
mode. You will get a windows which should look like as in Figure 9.
Figure 9: Hugin expert mode
Once in the export mode click on Add images (Figure 10) and load the first
tiff from the distortion/exported folder.
Figure 10: Adding images and setting the focal length and crop factor
By default the lens type should be set to Normal (rectiliniar) for normal
standard lenses. Make sure that the focal length is correct and set the Focal
length multiplier, which is the crop factor of your camera. For full frame
bodies this value should be 1. If you have a crop camera you need to set the
correct crop value you can find in the specifications. Next click on the
Control Points tab (Figure 11).
Figure 11: The control points tab
This is the tab to set the control points so that we can tell the software what
are our straight lines we are interested in. In this tab you have to make sure
that auto fine-tune is disabled, auto add is enabled and auto-estimate is
disabled! If this is the case zoom the image to 200% (you can also do this by
pressing ‘2’ on the keyboard).
In the zoomed images you have start at the top edges. On the left go to the top
left corner and to the top right corner on the right. The first straight line,
from left to right, should be visible. Select the first control point on
the left edge of the picture on the left page and the right edge on the
right (Figure 12).
Figure 12: Setting the first two control points for the line to add
IMPORTANT: Once you have the first control point selected in both images.
Select Add new Line in the mode dropdown menu! This will add the two
control points as line 3! Now continue adding corresponding control points in
both pictures till you’re in the middle on both sides.
Tip: The easiest and fasted is to set control points in the middle at the
tiling line. This reduces the required mouse movements.
Now zoom out by pressing ‘0’ and check it if everything has been added
correctly (Figure 13).
Figure 13: Control points for line3
While you are zoomed out, find a line which is about 3rd into the image from
the top to repeat adding a line. Zoom to 200% again, select the first control
points and again Add a new line which will result in line4 (Figure 14)!
Figure 14: Control points for line 3 and line 4
Zoom out by pressing ‘0’ and check that you have two lines, line3 and line4. Now move on to the Stitcher tab (Figure 14).
Figure 15: The stitcher tab, select the correct projection here.
In the Stitcher tab you need to select the correct Projection for your
lens. This is Rectilinear for standard lenses. Once done switch to the
Photos tab (Figure 16).
Figure 16: Enable the Optimizer tab.
At the bottom under Optimize select Custom parameters for Geometric.
This will add an Optimizer tab. Switch to it once it appears (Figure 17).
Figure 17: Optimizer tab: Select a b c for barrel distortion correction
Select the ‘a’, ‘b’ and ‘c’ lens parameters and click on Optimize now!.
Accept the calculation with yes. Now the values for ‘a’, ‘b’ and ‘c’ will
change (Figure 18).
Figure 18: Calculated distortion correction ‘a’, ‘b’ and ‘c’.
The calculated correction values for ‘a’, ‘b’ and ‘c’ you can find in the tab
need to be added to the lenses.conf. Open The file and fill out the missing
options. Here is an example:
Example:
[FE 85mm F1.4 GM]
maker = Sony
mount = Sony E
cropfactor = 1.0
aspect_ratio = 3:2
type = normal
maker is should be the lens manufacturer e.g. Sony
mount is the mount system for the lens, check the lensfun database
cropfactor is 1.0 for full frame cameras, if you have a crop camera find out the correct crop factor for it.
aspect_ratio is the aspect ratio for the pictures which is normally 3:2.
type is the type of the lens, e.g. ‘normal’ for standard rectilinear lenses. Other values are: stereographic, equisolid, stereographic, panoramic or fisheye.
If you have e.g. a 85mm there should be an entry for the focal length which is
set to: 0.0, 0.0, 0.0. You need to change the values in the lenses.conf for
your focal length with the calculated corrections from the Optimizer tab
(Figure 16).
[FE 85mm F1.4 GM]
maker = Sony
mount = Sony E
cropfactor = 1.0
aspect_ratio = 3:2
type = normal
distortion(85mm) = 0.002, 0.001, -0.009
But I don’t want to do distortion corrections!
No problem, if you want to skip this step then you can created the lenses.conf
manually. It should look like the following example:
[lens model]
maker =
mount =
cropfactor = 1.0
aspect_ratio = 3:2
type = normal
The section name is the lens model. You can find it out by running:
exiv2 -g LensModel -pt <raw image file>
The other options are:
maker is should be the lens manufacturer e.g. Sony
mount is the mount system for the lens, check the lensfun database
cropfactor is 1.0 for full frame cameras, if you have a crop camera find out the correct crop factor for it.
aspect_ratio is the aspect ratio for the pictures which is normally 3:2.
type is the type of the lens, e.g. ‘normal’ for standard rectilinear lenses. Other values are: stereographic, equisolid, stereographic, panoramic or fisheye.
TCA
You can skip this step if you don’t want to do TCA corrections.
This step is fully automatic, all you have to do is to run the following
command and wait:
$ lens_calibrate tca
Running TCA corrections for tca/exported/_7M32375.ppm ... DONE
However it possible to calculate more complex TCA corrections. For this you
need to run the step it with an additional command line argument, like this:
You can skip this step if you don’t want to do vignetting corrections.
To calculate the vignetting corrections it is also a very simple step. All you
have to do is to run the following command and wait:
$ lens_calibrate vignetting
Generating the XML
To get corrections for lensfun you need a lenses.conf with the required options
to be filled out (maker, mount, cropfactor, aspect_ratio, type). And at least
one of the corrections steps done. If you have this you can generate the XML
file which can be consumed by lensfun. You can do it with the following
command:
You can redo this step as many times as you want. And you can just rerun it if
you add an additional correction.
Using the lensfun.xml
You may want to fine-tune the lens model name in the generated lensfun.xml
file. Lensfun normalises names before any matching, so you have some freedom.
For example, upper/lowercase can be changed arbitrarily. Any single f is
ignored, so you may change 16-35mm 2.8 into 16-35mm f/2.8. If there was a
tele converter involved, you must add “converter” into the name so that Lensfun
does not try to derive allowed focal lengths from the lens name.
Ordering of parts in the lens name is completely unimportant for matching. As
are single punctuation characters. You may even add things (e.g. 16-35 into
16-35mm) but be conservative here. Never drop anything what exiv2 reports!
If you want to use the generated lensfun.xml file to test if the calibration
you created works, you can copy to the local lensfun config folder in your home
directory.
cp lensfun.xml ~/.local/share/lensfun
Make sure your camera is recognized by lensfun or you need to add an entry to
the lensfun.xml file too.
Contributing your lensfun.xml
To contribute your calibration data data for your lens to the lensfun project,
execute the script with the following command:
$ lens_calibrate ship
Created lensfun_calibration.tar.xz
Open a bug at https://github.com/lensfun/lensfun/issues/ with the data.
This will create a tarball with all the required data. Now go to
Please add the attached lens data to the lensfun data base.
Attach the lensfun_calibration.tar.xz to the bugreport.
Feedback
Feedback for this article is very welcome. If you’re a lensfun developer and
read this please contact me. I would like to contribute the script to lensfun
and further improve the article. I still have unanswered questions.
Andrea is developing Photo Flow, GIMP AppImage, Hugin AppImage, and more!
Andrea Ferrero, or as we know him Carmelo_DrRaw, has been contributing to the PIXLS.US community since April of 2015. A self described developer and photography enthusiast, Andrea is the developer of the PhotoFlow image editor, and is producing AppImages for:
The GIMP image manipulation program - weekly AppImage packages from stable releases and development branches.
The Hugin panorama photo stitcher - AppImages for stable releases and development branches
Andrea is the best sort of community member, contributing six different projects (including his own)! He is always thoughtful in his responses, does his own support for PhotoFlow, and is kind and giving. He has finally started a Patreon page to support his all of his hard work. Support him now!
He was also kind enough to answer a few questions for us:
PX: When did you get into photography? What’s your favorite subject matter?
AF: I think I was about 15 when I got my first reflex, and I was immediately fascinated by macro-photography. This is still what I like to do the most, together with taking pictures of my kids. ;-)
By the way, you can visit my personal free web gallery on GitHub: http://aferrero2707.github.io/photorama/gallery/ (adapted from this project).
It is still a work in progress, but you are welcome to fork it and adapt it to your needs if you find it useful!
PX: What brought you to using and developing Free/Open Source Software?
AF: I started to get interested in programming when I was at the university, in the late 90’s. At that time I quickly realized that the easiest way to write and compile my code was to throw Linux into my hard drive. Things were not as easy as today but I eventually managed to get it running, and the adventure began.
A bit later I started a scientific career (nothing related to image processing or photography, so I won’t bother with more details about my daily job), and since then I have been a user of Linux-based computing clusters for almost 20 years at the time of writing… A large majority of the software tools I use at work are free and open sourced and this definitely has marked my way of thinking and developing.
PX: What are some new/exciting features you develop in Photo Flow?
AF: Currently I am mostly focusing on HDR processing and high-quality Dynamic Range compression - what is also commonly called shadows/highlights compression.
More generally, there is still a lot of work to do on the performances side. The software is already usable and quite stable, but some of the image filters are still a bit too slow for real-time feedback, especially when combined together.
The image exporting module is also currently in a state of work in progress. It is already possible to select either Jpeg or TIFF (8, 16 or floating-point 32 bits bit depth) as the output format, to resize the image and add some post-resize sharpening, and to select the output ICC profile.
What is still missing is a real-time preview of the final result, with a possibility to soft-proof the output profile. The same options need to be included in the batch processor as well.
On a longer term, and if there is some interest from the community, I am thinking about porting the code to Android in a simplified form that would be suitable for tablets and the like. The small memory footprint of the program could be an important advantage on such systems.
PX: What other applications would you like to make an AppImage for? Have you explored Snaps or Flatpaks?
AF: I am currently developing and refining AppImage packages for GIMP, RawTherapee, LuminanceHDR and HDRMerge, in addition to PhotoFlow. All packages are automatically built and deployed through Travis CI, for better reproducibility and increased security. Hugin is the next application that I plan to package as an AppImage.
All the AppImage projects are freely available on GitHub. That’s also the best place for any feedback, bug report, or suggestion.
There is an ongoing discussion with the GIMP developers about the possibility to provide the AppImage as an official download.
In addition to the AppImage packages, I am also working with the RawTherapee developers on cross-compiled Windows packages that are also automatically built on Travis CI. The goal is to help them provide up-to-date packages from the main development branches, so that more users can test them and provide feedback.
I’m also open to any suggestions for additional programs that could be packaged as AppImages, so do not hesitate to express your wishes!
Personally I am a big fan of the AppImage idea, mostly because, unlike Snap or Flatpack packages, it is not bound to any specific distribution or run-time environment. The packager has full control over the contents of the AppImage package, pretty much like MacOS bundles.
Moreover, I find the community of developers around the AppImage format very active and open-minded. I am currently collaborating to improve the packaging of GTK applications. For those who are interested in the details, the discussion can be followed here: https://github.com/linuxdeploy/linuxdeploy/issues/2
The IMAGE team of the GREYC laboratory is happy to celebrate the 10th anniversary of G’MIC with you, an open-source (CeCILL), generic and extensible framework for image processing.
GREYC is a public research laboratory on digital technology located in Caen, Normandy/France, under the supervision of 3 research institutions: the CNRS (UMR 6072), the University of Caen Normandy and the ENSICAEN engineering school.
G’MIC-Qt, the main user interface of the G’MIC project.
This celebration gives us the perfect opportunity to announce the release of a new version (2.3.6) of this free software and to share with you a summary of the latest notable changes since our last G’MIC report, published on PIXLS.US in February 2018.
G’MIC is a multiplatform framework (GNU/Linux, macOS, Windows…) providing various user interfaces for manipulating generic image data, such as 2D or 3D hyperspectral images or image sequences with float values (thus including “normal” color images). More than 1000 different operators for image processing are included, a number that is extensible at will since users can add their own functions by using the embedded script language.
It was at the end of July 2008 that the first lines of G’MIC code were created (in C++).
At that time, I was the main developer involved in CImg, a lightweight open sourceC++ library for image processing, when I made the following observation:
The initial goal of CImg, which was to propose a “minimal” library of functions to help C++ developers to develop image processing algorithms, was broadly achieved; most of the algorithms I considered as essential in image processing were integrated. CImg was initially meant to stay lightweight, so I didn’t want to include new algorithms ad vitam æternam, which would be too heavy or too specific, thus betraying the initial concept of the library.
However, this would only cater to a rather small community of people with both C++ knowledge and image processing knowledge! One of the natural evolutions of the project, creating bindings of CImg to other programming languages, didn’t appeal much to me given the lack of interest I had in writing the code. And these potential bindings still only concerned an audience with some development expertise.
My ideas were starting to take shape: I needed to find a way to provide CImg processing features for non-programmers. Why not attempt to build a tool that could be used on the command line (like the famous convert command from Imagemagick)? A first attempt in June 2008 (inrcast, presented on the French news site LinuxFR), while unsuccessful, allowed me to better understand what would be required for this type of tool to easily process images from the command line.
In particular, it occurred to me that conciseness and coherence of the command syntax were the two most important things to build upon. These were the aspects that required the most effort in research and development (the actual image processing features were already implemented in CImg). In the end, the focus on conciseness and coherence took me much further than originally planned as G’MIC got an interpreter) of its own scripting language, and then a JIT compiler for the evaluation of mathematical expressions and image processing algorithms working at the pixel level.
With these ideas, by the end of July 2008, I was happy to announce the first draft of G’MIC. The project was officially up and running!
Fig. 1.1: Logo of the G’MIC project, libre framework for image processing, and its cute mascot “Gmicky” (illustrated by David Revoy).
A few months later, in January 2009, enriched by my previous development experience on GREYCstoration (a free tool for nonlinear image denoising and interpolation, from which a plug-in was made for GIMP), and in the hopes of reaching an even larger public, I published a G’MICGTK plug-in for GIMP.
This step proved to be a defining moment for the G’MIC project, giving it a significant boost in popularity as seen below (the project was hosted on Sourceforge at the time).
Fig.1.2: Monthly downloads statistics of G’MIC, between July 2008 and May 2009 (release of the GIMP plug-in happened in January 2009).
The sudden interest in the plugin from different users of GIMP (photographers, illustrators and other types of artists) was indeed a real launchpad for the project, with the rapid appearance of various contributions and external suggestions (for the code, management of the forums, web pages, writing of tutorials and realization of videos, etc.). The often idealized community effect of free software finally began to take off! Users and developers began to take a closer look at the operation of the original command-line interface and its associated scripting language (which admittedly did not interest many people until that moment!). From there, many of them took the plunge and began to implement new image processing filters in the G’MIC language, continuously integrated them into the GIMP plugin. Today, these contributions represent almost half of the filters available in the plugin.
Meanwhile, the important and repeated contributions of Sébastien Fourey, colleague of the GREYC IMAGE team (and experienced C++ developer) significantly improved the user experience of G’MIC. Sébastien is indeed at the heart of the main graphical interface development of the project, namely:
The G’MIC Online web service (which was later re-organised by GREYC’s Development Department).
Free Software ZArt, a graphical interface - based on the _Qt_ library - for the application of G’MIC filters to video sequences (from files or digital camera streams).
And above all, at the end of 2016, Sébastien tackled a complete rewrite of the G’MIC plugin for GIMP in a more generic form called G’MIC-Qt. This component, also based on the _Qt_ library (as the name suggests), is a single plugin that works equally well with both GIMP and Krita, two of the leading free applications for photo retouching/editing and digital painting. G’MIC-Qt has now completely supplanted the original GTK plugin thanks to its many features: built-in filter search engine, better preview, superior interactivity, etc. Today it is the most successful interface of the G’MIC project and we hope to be able to offer it in the future for other host applications (contact us if you are interested in this subject!).
Fig.1.3: Different graphical interfaces of the G’MIC project, developed by Sébastien Fourey: G’MIC-Qt, G’MIC Online and ZArt.
The purpose of this article is not to go into too much detail about the history of the project. Suffice it to say that we have not really had time to become bored in the last ten years!
Today, Sébastien and I are the two primary maintainers of the G’MIC project (Sébastien mainly for the interface aspects, myself for the development and improvement of filters and the core development), in addition to our main professional activity (research and teaching/supervision).
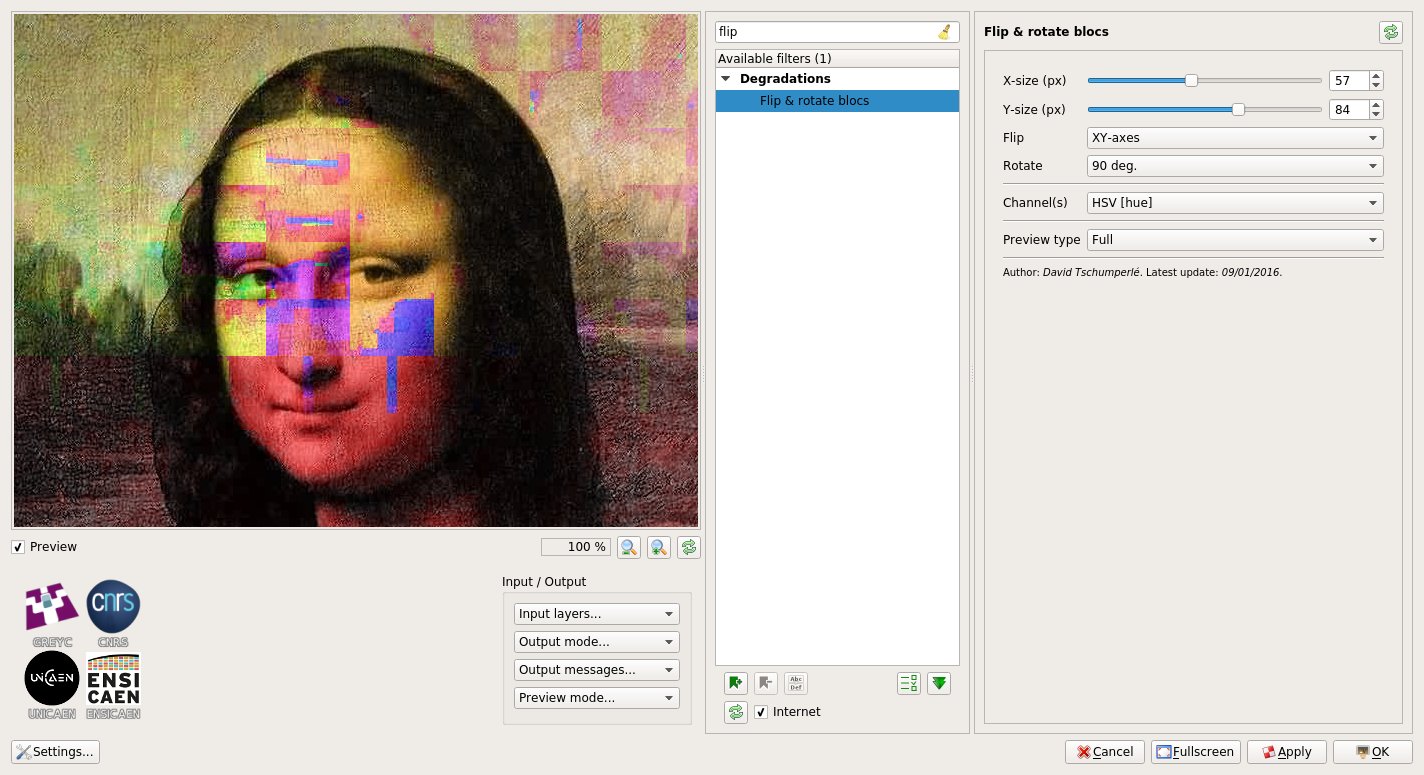
Let’s face it, managing a free project like G’MIC takes a considerable amount of time, despite its modest size (~120k lines of code). But the original goal has been achieved: thousands of non-programming users have the opportunity to freely and easily use our image processing algorithms in many different areas: image editing, photo manipulation, illustration and digital painting, video processing, scientific illustration, procedural generation, glitch art…
The milestone of 3.5 million total downloads was exceeded last year, with a current average of about 400 daily downloads from the official website (figures have been steadily declining in recent years as G’MIC is becoming more commonly downloaded and installed via alternative external sources).
It is sometimes difficult to keep a steady pace of development and the motivation that has to go with it, but we persisted, thinking back to the happy users who from time to time share their enthusiasm for the project!
Obviously we can’t name all the individual contributors to G’MIC whom we would like to thank, and with whom we’ve enjoyed exchanging during these ten years, but our heart is with them! Let’s also thank the GREYC laboratory and INS2I institute of CNRS for their strong support for this free project. A big thank you also to all the community of PIXLS.US who did a great job supporting the project (hosting the forum and publishing our articles on G’MIC).
But let’s stop reminiscing and get down to business: new features since our last article about the release of version 2.2!
G’MIC recently gained a quite impressive new filter named « Illuminate 2D shape », the objective of which is to automatically add lit zones and clean shadows to flat-colored 2D drawings, in order to give a 3D appearance.
First, the user provides an object to illuminate, in the form of an image on a transparent background (typically a drawing of a character or animal). By analyzing the shape and content of the image, G’MIC then tries to deduce a concordant 3D elevation map (“ bumpmap “). The map of elevations obtained is obviously not exact, since a 2D drawing colored in solid areas does not contain explicit information about an associated 3D structure! From the estimated 3D elevations it is easy to deduce a map of normals (“ normalmap “) which is used in turn to generate an illumination layer associated with the drawing (following a Phong Shading model).
Fig. 2.1: G’MIC’s “Illuminate 2D shape“ filter in action, demonstrating automatic shading of a beetle drawing (shaded result on the right).
This new filter is very flexible and allows the user to have a fairly fine control over the lighting parameters (position and light source rendering type) and estimation of the 3D elevation. In addition the filter gives the artist the opportunity to rework the generated illumination layer, or even directly modify the elevation maps and estimated 3D normals. The figure below illustrates the process as a whole; using the solid colored beetle image (top left), the filter fully automatically estimates an associated 3D normal map (top right). This allows it to generate renditions based on the drawing (bottom row) with two different rendering styles: smooth and quantized.
Fig. 2.2: The process pipeline of the G’MIC “Illuminate 2D shape“ filter involves the estimation of a 3D normal map to generate the automatic illumination of a drawing.
Despite the difficulty inherent in the problem of converting a 2D image into 3D elevation information, the algorithm used is surprisingly effective in a good many cases. The estimation of the 3D elevation map obtained is sufficiently consistent to automatically generate plausible 2D drawing illuminations, as illustrated by the two examples below - obtained in just a few clicks!
Fig. 2.3: Two examples of completely automatic shading of 2D drawings, generated by G’MIC
It occurs, of course, that the estimated 3D elevation map does not always match what one might want. Fear not, the filter allows the user to provide “guides” in the form of an additional layer composed of colored lines, giving more precise information to the algorithm about the structure of the drawing to be analyzed. The figure below illustrates the usefulness of these guides for illuminating a drawing of a hand (top left); the automatic illumination (top right) does not account for information in the lines of the hand. Including these few lines in an additional layer of “guides” (in red, bottom left) helps the algorithm to illuminate the drawing more satisfactorily.
Fig. 2.4: Using a layer of “guides” to improve the automatic illumination rendering generated by G’MIC.
If we analyze more precisely the differences obtained between estimated 3D elevation maps with and without guides (illustrated below as symmetrical 3D objects), there is no comparison: we go from a very round boxing glove to a much more detailed 3D hand estimation!
Fig. 2.5: Estimated 3D elevations for the preceding drawing of a hand, with and without the use of “guides”.
Finally, note that this filter also has an interactive preview mode, allowing the user to move the light source (with the mouse) and have a preview of the drawing illuminated in real time. By modifying the position parameters of the light source, it is thus possible to obtain the type of animations below in a very short time, which gives a fairly accurate idea of the 3D structure estimated by the algorithm from the original drawing.
Fig. 2.6: Modification of the position of the light source and associated illumination renderings, calculated automatically by G’MIC.
A video showing the various possible ways to edit the illumination allowed by this filter is visible here. The hope is this new feature of G’MIC allows artists to accelerate the illumation and shading stage of their future drawings!
In a completely different genre, we have also added a filter implementing stereographic projection, suitably named “Stereographic projection“. This type of cartographic projection makes it possible to project planar defined image data onto a sphere. It should be noted that this is the usual projection used to generate images of “mini-planets” from equirectangular panoramas, like the one illustrated in the figure below.
Fig. 3.1: Example of equirectangular panorama (created by Alexandre Duret-Lutz).
If we launch the G’MIC plugin with this panorama and select the filter “Stereographic projection“, we get:
Fig. 3.2: The “Stereographic projection“ filter of G’MIC in action using the plugin for GIMP or Krita.
The filter allows precise adjustments of the projection center, the rotation angle, and the radius of the sphere, all interactively displayed directly on the preview window (we will come back to this later). In a few clicks, and after applying the filter, we get the desired “mini-planet”:
Fig. 3.3: “Mini-planet” obtained after stereographic projection.
It is also intruiging to note that simply by reversing the vertical axis of the images, we transform a “mini-planet” into a “max-tunnel”!
Fig. 3.4: “Maxi-tunnel” obtained by inversion of the vertical axis then stereographic projection.
Again, we made this short video which shows this filter used in practice. Note that G’MIC already had a similar filter (called “Sphere“), which could be used for the creation of “mini-planets”, but with a type of projection less suitable than the stereographic projection now available.
Manipulating the colors of images is a recurring occupation among photographers and illustrators, and G’MIC already had several dozen filters for this particular activity - grouped in a dedicated category (the originally named “Colors“ category!). This category is still growing, with two new filters having recently appeared:
The “CLUT from after-before layers“ filter tries to model the color transformation performed between two images. For example, suppose we have the following pair of images:
Fig. 4.1: Pair of images where an unknown colorimetric transformation has been applied to the top image to obtain the bottom one.
Problem: we do not remember at all how we went from the the original image to the modified image, but we would like to apply the same process to another image. Well, no more worries, call G’MIC to the rescue! The filter in question will seek to better model the modification of the colors in the form of a HaldCLUT, which happens to be a classic way to represent any colorimetric transformation.
Fig. 4.2: The filter models the color transformation between two images as a HaldCLUT.
The HaldCLUT generated by the filter can be saved and re-applied on other images, with the desired property that the application of the HaldCLUT on the original image produces the target model image originally used to learn the transformation.
From there, we are able to apply an equivalent color change to any other image:
Fig. 4.3: The estimated color transformation in the form of HaldCLUT is re-applied to another image.
This filter makes it possible in the end to create HaldCLUT “by example”, and could therefore interest many photographers (in particular those who distribute compilations of HaldCLUT files, freely or otherwise!).
A second color manipulation filter, named “Mixer [PCA]“ was also recently integrated into G’MIC. It acts as a classic color channel mixer, but rather than working in a predefined color space (like sRGB, HSV, Lab…), it acts on the “natural” color space of the input image, obtained by principal component analysis (PCA) of its RGB colors. Thus each image will be associated with a different color space. For example, if we take the “lion” image below and look at the distribution of its colors in the RGB cube (right image), we see that the main axis of color variation is defined by a straight line from dark orange to light beige (axis symbolized by the red arrow in the figure).
Fig. 4.4: Distribution of colors from the “lion” image in the RGB cube, and associated main axes (colorized in red, green and blue).
The secondary axis of variation (green arrow) goes from blue to orange, and the tertiary axis (blue arrow) from green to pink. It is these axes of variation (rather than the RGB axes) that will define the color basis used in this channel mix filter.
Fig. 4.5: The “Mixer [PCA]“ filter is a channel mixer acting on the axes of “natural” color variations of the image.
It would be wrong to suggest that it is always better to consider the color basis obtained by PCA for the mixing of channels, and this new filter is obviously not intended to be the “ultimate” mixer that would replace all others. It simply exists as an alternative to the usual tools for mixing color channels, an alternative whose results proved to be quite interesting in tests of several images used during the development of this filter. It does no harm to try in any case…
This section is about a few other filters improved or included lately in G’MIC which deserve to be talked about, without dwelling too much on them.
Filter “Local processing” applies a color normalization or equalization process on the local image neighborhoods (with possible overlapping). This is an additional filter to make details pop up from under or over-exposed photographs, but it may create strong and unpleasant halo artefacts with non-optimal parameters.
Fig. 5.1: The new filter “Local processing” enhances details and contrast in under or over-exposed photographs.
If you think that the number of layer blending modes available in GIMP or Krita is not enough, and dream about defining your own blending mode formula, then the recent improvement of the G’MIC filter « Blend [standard] » will please you! This filter now gets a new option « Custom formula » allowing the user to specify their own mathematical formula when blending two layers together. All of your blending wishes become possible!
Fig. 5.2: The “Blend [standard]“ filter now allows definition of mathematical formulas for layer merging.
Also note the complete re-implementation of the nice “Sketch“ filter, which had existed for several years but could be a little slow on large images. The new implementation is much faster, taking advantage of multi-core processing when possible.
Fig. 5.3: The “Sketch“ filter has been re-implemented and now exploits all available compute cores.
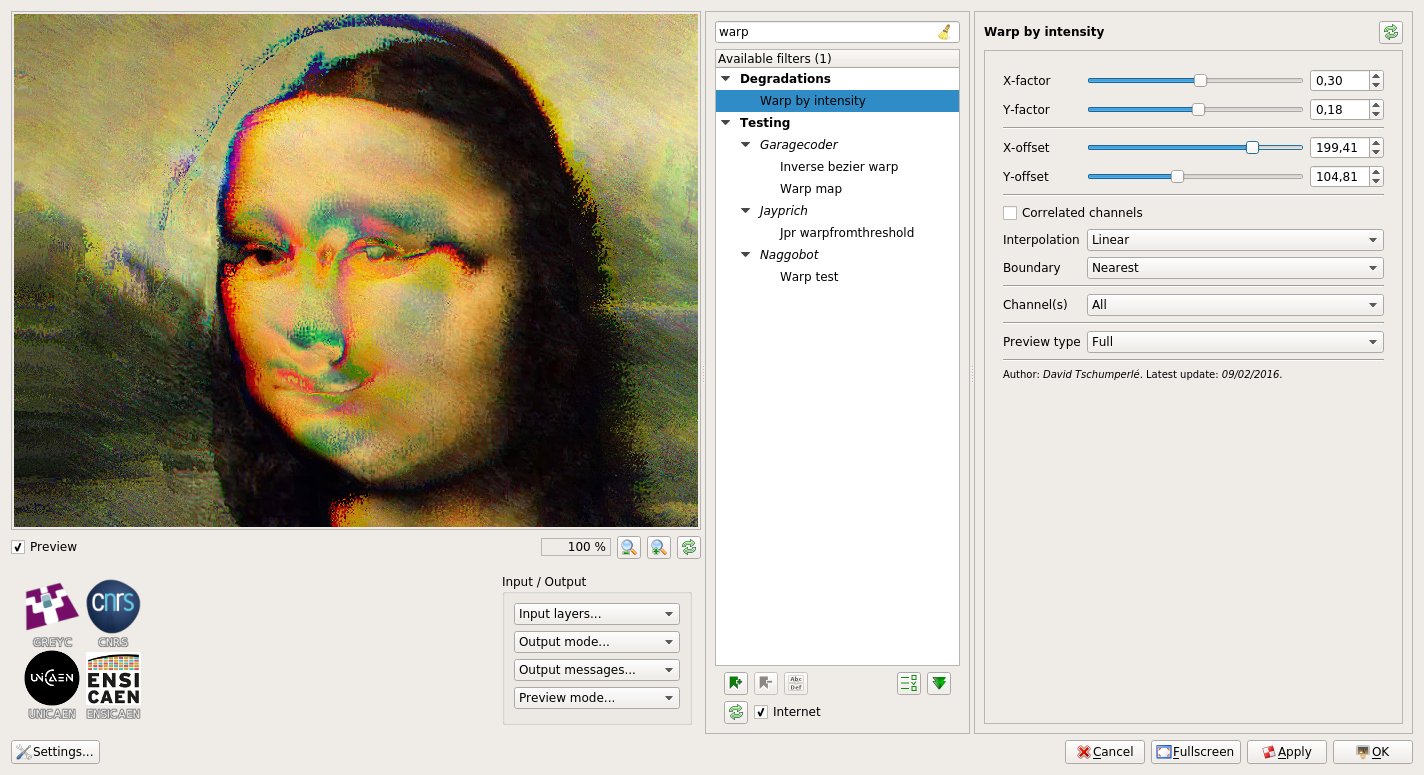
A large amount of work has also gone into the re-implementation of the “Mandelbrot - Julia sets“ filter, since the navigation interface has been entirely redesigned, making exploration of the Mandelbrot set much more comfortable (as illustrated by this video). New options for choosing colors have also appeared.
Fig. 5.4: The “Mandelbrot - Julia sets“ filter and its new navigation interface in the complex space.
In addition, the “Polygonize [Delaunay]“ filter that generates polygonized renderings of color images has a new rendering mode, using linearly interpolated colors in the Delaunay triangles produced.
Fig. 5.5: The different rendering modes of the “Polygonize [Delaunay]“ filter.
Of course, the new features in G’MIC are not limited to just image processing filters! For instance, a lot of work has been done on the graphical interface of the plug-in G’MIC-Qt for GIMP and Krita:
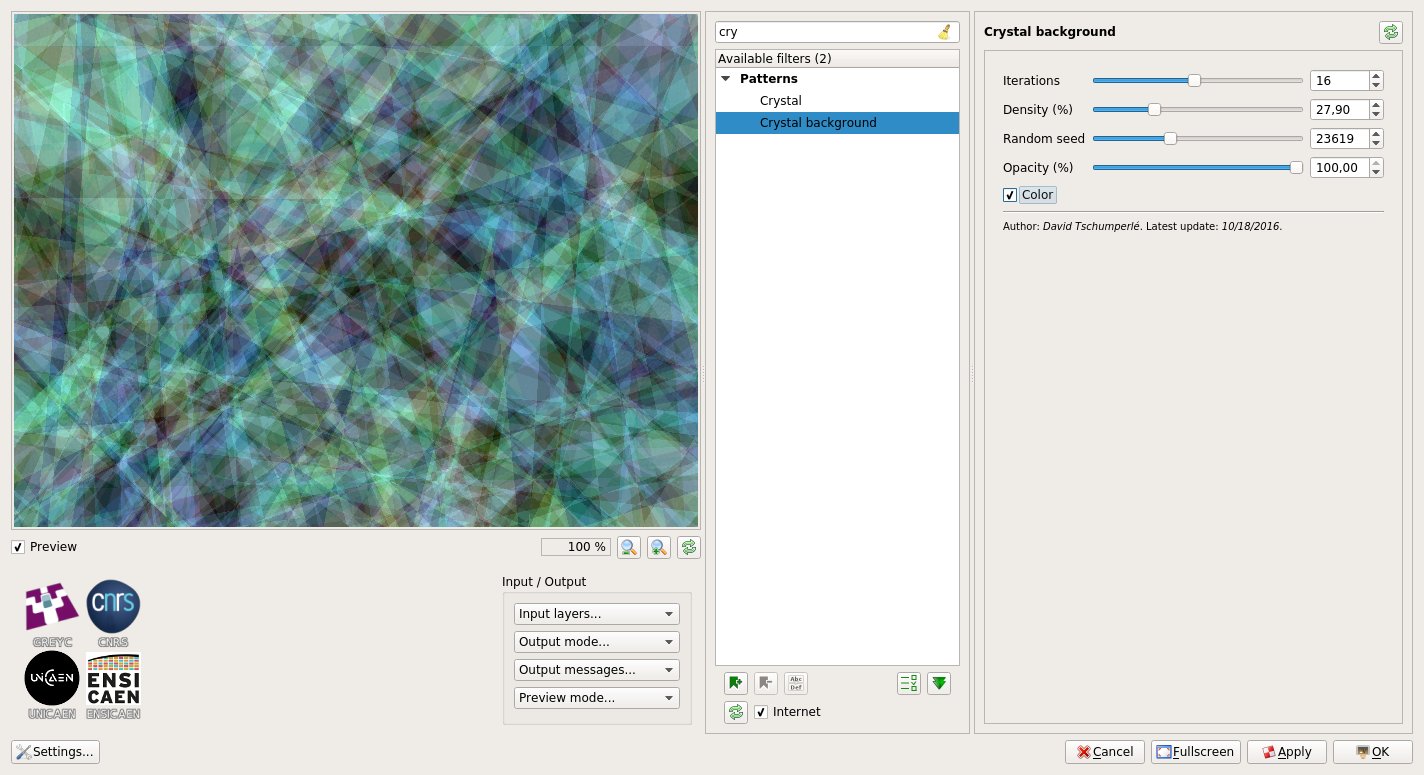
Filters of the plug-in are now allowed to define a new parameter type point(), which displays as a small colored circle over the preview window. The user can drag this circle and move it with the mouse. As a result this can give the preview widget a completely new type of user interaction, which is no small thing! A lot of filters now use this feature, making them more pleasant to use and intuitive (look at this video for some examples). The animation below shows for instance how these new interactive points has been used in the filter « Stereographic projection » described in previous sections.
Fig. 6.1: The preview window of the G’MIC-Qt plug-in gets new user interaction abilities.
In addition, introducing these interactive points has allowed improving the split preview modes, available in many filters to display the « before/ after » views side by side when setting the filter parameters in the plug-in. It is now possible to move this « before/ after » separator, as illustrated by the animation below. Two new splitting modes (« Checkered » and « Inverse checkered » ) have been also included alongside it.
Fig. 6.2: The division modes of the preview now have a moveable “before / after” boundary.
A lot of other improvements have been made to the plug-in: the support of the most recent version of GIMP (2.10), of Qt 5.11, improved handling of the error messages displayed over the preview widget, a cleaner designed interface, and other small changes have been made under the hood, which are not necessarily visible but slightly improve the user experience (e.g. an image cache mechanism for the preview widget). In short, that’s pretty good!
Some new refinements of the G’MIC computational core have been done recently:
The “standard library” of the G’MIC script language was given new commands for computing the inverse hyperbolic functions (acoss, asinh and atanh), as well as a command tsp (travelling salesman problem) which estimates an acceptable solution to the well-known Travelling salesman problem, and this, for a point cloud of any size and dimension.
Fig. 6.3: Estimating the shortest route between hundreds of 2D points, with the G’MIC command tsp.
Fig. 6.4: Estimating the shortest route between several colors in the RGB cube (thus in 3D), with the G’MIC command tsp.
The demonstration window, which appears when gmic is run without any arguments from the command line, has been also redesigned from scratch.
Fig. 6.5: The new demonstration window of gmic, the command line interface of G’MIC.
The embedded JIT compiler used for the evaluation of mathematical expressions has not been left out and was given new functions to draw polygons (function polygon()) and ellipses (function ellipse()) in images. These mathematical expressions can in fact define small programs (with local variables, user-defined functions and control flow). One can for instance easily generate synthetic images from the command line, as shown by the two examples below.
Fig. 6.7: Using the new function ellipse() from the G’MIC JIT compiler, to render a synthetic flower image.
Note also that NaN values are now better managed when doing calculus in the core, meaning G’MIC maintains coherent behavior even when it has been compiled with the optimisation -ffast-math. Thus, G’MIC can be flawlessly compiled now the maximum optimization level -Ofast supported by the compiler g++, whereas we were restricted to the use of -O3 before. The improvement in computation speed is clearly visible for some of the offered filters !
A lot of changes have also been made to the distribution channels used by the project:
First of all, the project web pages (which are now using secured https connections by default) have a new image gallery. This gallery shows both filtered image results from G’MIC and the way to reproduce them (from the command line). Note that these gallery pages are automatically generated by a dedicated G’MIC script, which ensures the displayed command syntax is correct.
Fig. 6.8: The new image gallery on the G’MIC web site.
This gallery is split into several sections, depending on the type of processing done (Artistic, Black & White, Deformations, Filtering, etc.). The last section « Code sample » is my personal favorite, as it exhibits small animations (shown as looping animated GIFs) which have been completely generated from scratch by short scripts, written in the G’MIC language. Quite a surprising use of G’MIC that shows its potential for generative art.
Fig. 6.9: Two small GIF animations generated by G’MIC_ scripts that are visible in the new image gallery._
We have also moved the main git source repository of the project to Framagit, still keeping one synchronized mirror on Github at the same place as before (to benefit from the fact that a lot of developers have already an account on Github which makes it easier for them to fork the project and write bug reports).
Voilà! Our tour of news (and the last six months of work) on the G’MIC project comes to an end.
We are happy to be celebrating 10 years with the creation and evolution of this Free Software project, and to be able to share with everyone all of these advanced image processing techniques. We hope to continue doing so for many years to come!
Note that next year, we will also be celebrating the 20th anniversary of CImg, the C++ image processing library (started in November 1999) on which the G’MIC project is based, proof that interest in free software is enduring.
As we wait for the next release of G’MIC, don’t hesitate to test the current version. Freely and creatively play with and manipulate your images to your heart’s content!
Thank you, Translators: (ChameleonScales, Pat David)
Ilya Varivchenko is a fashion and portrait photographer from Ivanovo, Russian Federation. He’s a UNIX administrator with a long-time passion for photography that has now become a second part-time job for him. Working on location and in his studio, he’s been producing a wonderful body of work specializing in portraiture, model tests, and more.
He’s a member of the community here (@viv), and he was kind enough to spare some time and answer a few questions (plus it gives me a good excuse to showcase some of his great work!).
Much of your work feels very classical in posing and light, particularly your studio portraits. What would you say are your biggest influences?
I am influenced by several classical painters and great modern photographers. Some of them are: Patrick Demarchelier, Steven Meisel and Peter Lindbergh.
The general mood defines what I see around me. Russia is a very neglected but beautiful country and women around are an inexhaustible source of inspiration.
How would you describe your own style overall?
My style is certainly a classic portrait in its modern performance.
What motivates you when deciding who/how you shoot?
I usually plan shooting in advance. The range of models is rather narrow and it’s not so easy to get there. However, I am constantly looking for new faces. I choose the style and direction of a particular shooting based on my vision of the model and the current mood.
Why portraits? What about portraiture draws you to it?
I shoot portraits because people interest me. For me, photography is an instrument of knowing people and a means of communication.
If you had to pick your own favorite 3 photographs of your work, which ones would you choose and why?
It’s difficult to choose only three photographs, but maybe these:
This photo was chosen by Olympus as a logo for their series of photo events in Russia 2017.
This is one of my most reproducible photos. ;)
This photo has a perfect mood in my opinion.
If you had to pick 3 favorite images from someone else, which ones would you choose and why?
It is very difficult to choose only three photos. The choice in any case will be incomplete, but here’s the first ones that comes to mind:
3) The portrait of Nicole Kidman by Patrick Demarchelier
How do you find your models usually?
Via social media which is the best means for model searching, but if I meet a girl I really like in the street, I can try and talk to her straight away.
In fact, the problem is not to find a model, but to choose how to reject a request without offending a prospect model that is of no interest to me.
Do you pre-visualize and plan your shoots ahead of time usually, or is there a more organic interaction with the model and the space you’re shooting in?
It’s always good to have a plan. It is also very good to have a spare plan.
Usually I discuss some common points with the model and stylist before shooting. But these plans are more connected with the mood and the general idea of the session. So when the magic of shooting begins, usually all the plans fly to hell. ;)
Do you have a shooting assistant with you, or is normally just you and the model?
The preparatory stage of shooting often requires participation of many people: a makeup artist, a hair stylist, etc., but shooting itself goes better when only two persons are involved. This is a fairly intimate process. Just like sex. :)
On the other hand, if we do a fashion shoot on order, then the presence of the customer representatives is a must.
Many shots have a strong editorial fashion feel to them: are those works for magazine/editorial use - or were they personal works you were planning to be that way?
I take pictures for local magazines and advertising agencies sometimes. Maybe it somehow influenced my other work.
What do you do with the photos you shoot?
Most of my works are for personal use.
However, I often print them in a large format and I’ve also had two solo exhibitions. Prints with my works are sold and they can always be ordered. I also publish in photo magazines sometimes, but these magazines are Russian ones so they are hardly known to you.
By the way: I periodically take part in the events held by Olympus Russia, where I demonstrate my workflow.
This video shows that I use the RawTherapee as a raw converter :)
You’re shooting on Olympus gear quite a bit, are you officially affiliated with Olympus in some way?
On occasions I hold workshops as a part of the Olympus company marketing activities. Sometimes the Olympus company provides me with their products for testing and I am expected to follow up with a review.
Is your choice to use Free Software for pragmatic reasons, or more idealistic?
The choice was dictated by purely practical considerations. I found a tool, the results of which I am almost completely satisfied with. Detail for example is outstanding, comfortable work with color grading, excellent black and white conversion, and much more.
The fact that the product is free and (which is more important to me) I have an opportunity to communicate with its developers is a huge plus!
For example, with the output of Fuji X-T20, when it was required to add a new DCP profile to the converter I simply contacted the developers, shot the test target and got what I wanted.
Would you describe your workflow a bit? Which projects do you use regularly?
My workflow is quite simple:
Shooting.
I try to shoot in a way which will not require heavy postprocessing at all. It is much easier to set up light properly than to fix it in Photoshop later.
Raw development with RawTherapee.
My goal is to develop the image in a way which makes it as close to final as possible.
Sometimes this is the end of my workflow. ;)
Color correction (if necessary) with 3DLutCreator.
In rare cases, it is more convenient to make complex color correction with the help of LUTs.
Retouching with Adobe Photoshop.
Nothing special. Removal of skin and hair defects, etc. Dodge and burn technique with a Wacom Intuos Pro.
Speaking of gear, what are you shooting with currently?
I have two systems now: Micro Four Thirds system from Olympus and X Series from Fujifilm.
Typical setups are:
Studio: Olympus PEN-F + Panasonic G 42.5/1.7
Planair: Olympus PEN-F + M.Zuiko 75/1.8 or FujiFilm X-T20 + Fujinon 35/1.4
Many of your images appear make great use of natural light. For your studio lighting setup, what type of lighting gear are you using?
My studio equipment is a mix of Aurora Codis and Bowens studio lights + a lot of modifiers from large 2 meters parabolic octobox to narrow 40x150 strip boxes and so on.
Is there something outside your comfort zone you wish you could try/shoot more of?
It is definitely landscape photography. And macro photography also attracts me - ants and snails are all great models in fact. :)
What is one piece of advice you would offer to another photographer?
Find in yourself what you want to share with others. Beauty is in the eye of the beholder. No beautiful models will help if you are empty inside.
I want to thank Ilya for taking the time to chat with me!
Take some time to have a look through his blog and work (it’s chock full of wonderful work)!
All images copyright Ilya Varivchenko and used with permission.
Welcoming the gPhoto Project to the PIXLS.US community!
Helping the community one project at a time
A major goal of the PIXLS.US effort is to do whatever we can do to help developers of projects unburden themselves from administrating their project. We do this, in part, by providing forum hosting, participating in support, providing web design, and doing community outreach. With that in mind, we are excited to welcome the gPhoto Projects to our discuss forum!
The Entangle interface, which makes use of libgphoto.
You may not have heard of gPhoto, but there is a high chance that you’ve used the project’s software. At the heart of the project is libgphoto2, a portable library that gives application access to hundreds of digital cameras. On top of the foundational library is gphoto2, a command line interface to your camera that supports almost everything that the library can do. The library is used in a bunch of awesome photography applications, such as digiKam, darktable, entangle, and GIMP. There is even a FUSE module, so you can mount your camera storage as a normal filesystem.
gPhoto was recruited to the PIXLS.US community when @darix was sitting next to gPhoto developer Marcus. Marcus was using darix’s Fuji camera to test integration into libgphoto, then the magic happened! Not only will some Fuji models be supported, but our community is growing larger. This is also a reminder that one person can make a huge difference. Thanks darix!
Welcome, gPhoto, and thank you for the years and years of development!
Stefan Schmitz is a photographer living in Northern France and specializing in sensual and nude portraits.
I stumbled upon his work during one of my searches for photographers using Free Software on Flickr, and as someone who loves shooting portraits his work was an instant draw for me.
He’s a member of the forums here (@beachbum) and was gracious enough recently to spare some time chatting with me. Here is our conversation (edited for clarity)…
Are you shooting professionally?
Nope, I’m not a professional photographer, and I think I’m quite happy about that. I do happen to photograph my surroundings for ±40 years now, and I have a basic idea about camera-handling and light. Being a pro is about paying invoices by shooting photos, and I fear that the pressure at the end of some months or quarters can easily take the fun out of photography. I’m an engineer and photography is my second love behind wife and kids.
Every now and then some of my pictures are requested and published by some sort of magazine, press or web-service, and I appreciate the attention and exposure, but there is no (or very little) money in the kind of photography I specialize in, so … everything’s OK the way it is.
Starting with photographers: Andreas Feininger, Peter Lindbergh and Alfred Stieglitz. Check out the portrait of Georgia O’Keeffe by Alfred Stieglitz: it’s 100 years old and it’s all there. Pose, light, intensity, personality - nobody has invented anything [like it] afterwards. We all just try to get close. I feel the same when I look at images taken by Peter Lindbergh, but my eternal #1 is Andreas Feininger.
Georgia O’Keeffe by Alfred Stieglitz
I got the photo-virus from my father and I learned nearly everything from daddy’s well-worn copy of The Complete Photographer[amzn] (Feininger) from 1965. Every single photo in that book is a masterpiece, even the strictly “instructional” ones. You measure every photo-book in the world against this one and they all finish second. Get your copy!
How would you describe your own style overall?
I shoot portraits of women and most of the time they don’t wear clothes. The portrait-part is very important for me: the model must connect with the viewer and ideally the communication goes beyond skin-deep. I want to see (and show) more than just the surface, and when that happens, I just press the shutter-button and try to get out of the way of the model’s performance.
What motivates you when deciding what/how/who to shoot?
I like women, so I take photos of women. If I were interested in beetles, I’d buy a macro lens and shoot beetles. All kidding aside, I think it’s a natural thing to do. I am married to a beautiful woman, an ex-model, and when she got fed-up with my eternal “can we do one more shoot” requests, we discussed things and she allowed me to go ahead and shoot models. Her support is very important to me, but her taste is very different from mine.
I really never asked myself “why” I shoot sensual portraits and nudes. It just feels like “I want to do that” and I feel comfy with it. Does there have to be a reason?
The location is very important for me. Nothing is more boring than blinding a person with a flashlight in front of a gray wallpaper. A room, a window-sill, a landmark - there’s a lot of inspiration out there, and I often think “this is where I want to shoot”. Sometimes my wife tells me of some place she has been to or seen, and I check that out.
If you had to pick your own favorite 3 images of your work, which ones would you choose and why?
Jennifer is a very professional and inspiring model. We’ve worked together quite a number of times and while you may think that this shot was inspired by The Who’s “Pinball Wizard”, I’d answer “right band, wrong song”. It’s The Who, alright, but the song’s “A quick one while he’s away”.
I chose this photo because it’s all about Jennifer’s pose and facial expression. It’s sensual, even sexy, but looking at Jennifer’s face you forget about the naked skin and all. There’s beauty, there’s depth … that’s what I’m after.
This shot of Alice is an example for the importance of natural light. There are photographers out there who can arrange light in a similar way, but I doubt that Alice would express this natural serenity in a studio setup with cables and stands and electric-transformers humming.
She’s at ease, the light is perfect - I just try to be invisible because I don’t want to ruin the moment.
Try to escape Khiara’s eyes. Go, do it. It’s all there, the pose, the room, the ribbon-chair and the little icon, but those eyes make the picture. I did NOT whiten the eyeballs nor did I dodge the iris, and of course it’s all natural/available light.
If you had to pick 3 favorite images from someone else, which ones would you choose and why?
I already named Stieglitz’ Georgia O’Keeffe as an inspiration further up - next to that there’s Helmut Newton’s Big Nude III, Henrietta and Kim Basinger’s striptease in 9 1⁄2 weeks (white silk nighty and all). Each one a masterpiece, each one very influential for me. Imagine the truth and depth of Georgia with the force and pride of Henrietta and the erotic playfulness of Kim Basinger. That photo would rule the world.
Is there something outside of your comfort zone you wish you could try/shoot more of?
I would like to work more with women above the age of 35, but it’s hard to find them. In general they stop modeling nude when the kids arrive.
Shooting more often outdoors would be cool, too, but that’s not easy here in northern France - there is no guarantee for good weather, and it’s frustrating when you organize a shoot two weeks in advance just to call it off in the very last minute due to bad weather.
Last but not least there’s a special competition among photographers; it’s totally unofficial and called “the white shirt contest”. Shoot a woman in a white shirt and make everybody “feel” the texture of that shirt. I give it a try on every shoot and very few pictures come out the way I wish. Go for it - it’s way harder than I thought!
There are websites where models and photographers can present their work and get in contact. The biggest-one worldwide is modelmayhem.com, and I highly recommend to become a member. Another good place is tumblr.com, but you have to go through a lot of dirt before you find some true gems. I have made contact via both sites and I recommend them.
You will need some pictures in your portfolio in order to show that you are - in fact - a photographer with a basic idea of portrait-work. If you shoot portraits (I mean really portraits, not some snapshots of granny and the kids under the Christmas-tree), you probably have enough photos on your disk to state the point. But if you don’t and you want to start (nude) portraits, spend some money on a workshop. I did that twice and it really helped me in several ways: communication with the model, how to start a session, do’s and don’ts - and at the end of the day you will drive home with a handful of pictures for your portfolio.
Speaking of gear, what are you shooting with currently (or what is your favorite setup)?
Gear is overrated. I am with Nikon since 1979 and today I own and use two bodies: a 1975 Nikon F2 photomic (bought used in 82), loaded with Kodak Tri-X and a Nikon D610 DSLR. 90% of my pictures are shot with a 50mm standard lens. Next on the list is the 35mm - you will need that in small rooms when the 50mm is already a bit too long and you want to keep some distance. I happen to own a 85mm, but the locations I book and shoot rarely offer enough space to make use of that lens.
There are these cheap, circular 1m silver reflectors on amazon. They cost about 15 €/$ and you get a crappy stand for the same price. That stuff is pure gold - I use the reflector a lot and I highly recommend to learn how to work with it. It’s my little secret weapon when I shoot against the light (see Alice here above).
A camera with a reasonably fast standard lens, a second battery and a silver reflector is all I need. The rest is luxury for me, but I am pretty much a one-trick-pony. Other photographers will benefit more from a bigger kit.
Most of your images appear to be making great use of natural light. Do you use other lighting gear (speedlights, monoblocks, modifiers, etc)?
Right - available light is where it’s at. I very rarely shoot with a flash kit today because it distracts me from the work with the model. I’m a loner on the set, no assistants or friends who come and help, so everything must be totally simple and foolproof.
Saying that, I own an alarming number of speedlights, umbrellas, triggers and softboxes, but I don’t need that gear very often. I try to visit the locations before I shoot. I check the directions and plan for a realistic timeframe, so today I will neither find myself in a totally dark dungeon nor in a sun-filled room with contrasts à gogo. Windows to the west - shoot in the morning, windows facing south-east: shooting in the (late) afternoon.
Here’s a shot of Karolina Lewschenko. We took this photo in a hotel room by the end of October and the available (window) light got too weak, so I used an Aurora Firefly 65 cm softbox with a Metz speedlight and set-up some classic Rembrandt-Light. I packed that gear because I knew that our timeframe wasn’t guaranteed to work out perfectly. “Better be safe than sorry”.
Do you pre-visualize and plan your shoots ahead of time usually, or is there a more organic interaction with the model and the space you’re shooting in?
Yes, I do. When I visit a place, a possible location, I have some Ideas of where to shoot, what furniture to push around and what pose to try. I can pretty much see the final picture (or my idea of it) before I book the model. Having said that, you know that no battle-plan has ever survived the first shot fired…
When the model arrives, we take some time to walk around the locations and discuss possible sets. We will then start to shoot fully clothed in order to get used to another and see how the light will be on the final shots. It’s very important for me to get feedback from the model. She might say that a pose is difficult for her or hurts after a few seconds, that she’s not comfy with something or that she would like to try a totally different thing here. I always pay a lot of attention to those ideas and - out of experience - those shots based on the model’s ideas are in general among the best of the day.
I mean we’re not here because I shoot bugs or furniture, you don’t give me the opportunity to express myself here because you are a fan of crickets; all the attention is linked to the beautiful women on my photos and how they connect with the beholder. I am just the one who captures the moments, it’s the models who fill those moments with intensity and beauty. It would be very stupid of me not to cooperate with a model who knows how to present herself and who comes up with her own ideas.
Always listen to the model, always communicate, never go quiet.
The discussion with the model also includes what degree of nudity we consider. So the second round of photos starts with the “open shirt” or topless shots before the model undresses completely. If we take photos in lingerie, we do that last (after the nudes) because lingerie often leaves traces on the skin and we don’t want that to show.
It is important to know what to do and in what order. You don’t want to have a nude model standing in front of you, asking “what’s next?” and you answer “I dunno - maybe (!) try this or that again”. If you lose your directions for a moment, just say so or say “please get your bathrobe and let’s have a look at the last pictures together”. If you are “not sure”, the model might be “not comfy”, and that’s something we want to avoid.
Would you describe your workflow a bit? Which projects do you use regularly?
A typical session is 90 to 120 minutes and I will end-up with about 500 exposures on the SD-card and maybe a roll of exposed Kodak Tri-X. The film goes to a lab and I will get the negatives and scans back within 15 to 30 days.
There’s two SD-cards, one with RAW files that I import with gThumb to /photos/year/month/day. The other card holds fine-quality JPG and those go to /pictures/year/name_of_model. My camera is already set to monochrome, I get every picture I shoot in b/w on the camera-screen and the JPG-files are also monochrome.
Next step is a pre-selection in Geeqie. That’s one great picture viewer and I delete all the missed shots (bad framing, out of focus etc.) and note/mark all the promising/good shots here. This is normally the end of day one.
Switching from RAWstudio to darktable has been a giant step for me. dt is just a great program and I still learn about new functions and modules every day. The file comes in, is converted to monochrome and afterwards color saturation and lights (red and yellow) are manipulated . This way I can treat the skin (brighter or darker) without influencing the general brightness of the picture. Highlights and lowlights may be pushed a bit to the left and I add the signature and a frame 0,5% wide, lens correction is set automatically. That’s the whole deal. On very rare occasions I add some vignette or drop the brightness gradually from top to bottom, but again: it doesn’t happen all that often. I never cut, crop or re-frame a shot. WYSIWYG. Cropping something out, turning the picture in order to get perfectly vertical lines or the likes - it all feels like cheating. I have no client to please, no deadline to meet, I can take a second longer and frame my photo when I look through the viewfinder.
The photos will then be treated in the GIMP. Some dodge and burn (especially when there are problematic, very high or low contrasts), maybe stamp an electric plug away and in the end I re-size them down to 2560 on the long side (big enough for A3 prints) and (sometimes) apply the sharpening tool with value 20 or 25. Done. I can’t save a crappy shot in post-prod and I won’t try. Out of the 500 or so frames, 10 to 15 will be processed like that and it feels like nothing has changed over the last 40 years. The golden rule was “one good shot per roll of film” and I happen to be there, too. Spot-on!
I load those 15 pictures up on my Flickr account and about once or twice a week I place a shot in the many Flickr groups. Also once a week (or every ten days) I post a photo on my Tumblr account. Today I have about 5k followers and my photos are seen between 500’000 and one million times a month, depending on the time of year and weather. There’s less traffic on warm summer days and more during cold and rainy winter-nights.
It takes me some time before I add a shot to my own website. In comparison I show few photos there, every one for a reason and I point point people to that address, so I hope I only show the best.
Is your choice to use Free Software for pragmatic reasons, or more idealistic?
I owned an Apple II in 1983 and a digital MicroVax in 1990 or so. My way to FOSS started out pragmatic and it became a conviction later on. In the late 90’s and early 2000’s I had my own small business and worked with MS Office on a Win NT machine. Photos were processed with a Nikon film-scanner through the proprietary software into an illegal copy of Adobe PS4. It was OK, stable and I didn’t fear anything, but I wasn’t really happy neither. One day I swung over to Star-Office/OpenOffice.org for financial reasons and I also got rid of that unlicensed PS and installed the GIMP (I don’t know what version, but I upgraded some time later to 1.2, that’s for sure). I had internet access and an email address since 1994, but in the late 90’s big programs still came on CDs attached to computer-magazines. Downloading the GIMP was out of question.
Gaming was never my thing and when I installed Win XP, all hell broke lose - keeping a computer safe, virus-free and running wasn’t easy before the first service pack, but MS reacted way too slow in my opinion - I tried debian (10 CD kit) on my notebook, got it running, found the GIMP and OOo - and that was it. It took a bit of trial and error and I had to buy a number of W-Lan sticks because very few were supported and so on, but in the end I got the machines running.
Later on I got hold of an Ubuntu 7.10 CD, tried that and never looked back. The few changes on my system were from Gnome to XFCE desktop and from Thunderbird to a browser-based mail-client. Xubuntu is a no-brainer, it runs stable and fast. I contribute every December 100.- € to FOSS. That’s in general 50 and 40 to two projects and a tenner to Wikipedia. I’d spend an extra tenner to any project that helps to convert old star-office files (.sdw and so on) to today’s standards (odt…), but nobody seems interested.
What is one piece of advice you would offer to another photographer?
Don’t take any advise from me, i’m still learning myself. Or wait: be kind and a gentleman with the models. They all - each and everyone of them - have had bad experiences with photographers who forgot that the models are nude for the camera, not for the man behind it. They all have been in a room with a photographer who breathes a bit too hard and doesn’t get his gear working … don’t be that arsewipe!
Arrange for a place where the model can undress in privacy - she didn’t come for a strip-show and you shouldn’t try to make it one. Have some bottles of water at hand and talk about your plans, poses and sets with the model. Few people can read minds, so communication works best when you say what you have in mind and the model says how she thinks this can be realized. The more you talk, the better you communicate, the better the pictures. No good photo has ever been shot during a quiet session, believe me.
In general the model will check your portfolio/website and expect to do more or less the same kind of work with you. If you want to do something different, say so when booking the model. If your website shows a lot of nude portraits, models will expect to do that kind of photos. They may be a bit upset if you ask them out of nowhere to wear a latex suit because it’s fetish-Friday in your world. The more open and honest you are from the beginning, the better the shooting will go down.
Don’t overdo the gear-thingy. 90% of my photos are taken with the 50mm standard lens. Period. Sometimes I have to switch to 35mm because the room is a bit to small and the distance too close for the one four-fifty, so everything I bring to an indoor-shooting is the camera, a 50, a 35, an el-cheap-o 100cm reflector from amazon (+/- 15 €/$) and an even cheaper stand for the reflector. Gear is not important, communication is.
Want to spend 300 €/$ on new gear? Spend it on a workshop. Learn how to communicate, get inspiration and fill your portfolio with a first set of pictures, so the next model you email can see that you already have some experience in the field of (nude) portraits. That’s more important than a new flashlight in your bag.
I want to thank Stefan again for taking the time and being patient enough to chat with me!
Stefan is currently living in Northern France. Before that he lived and worked in Miami, FL, and Northern Germany where he is from, went to school, and met his wife. His main website is at https://whatstefansees.com/, and he can be found on Flickr, Facebook, Twitter, Instagram, and Tumblr.
Unless otherwise noted, all of the images are copyright Stefan Schmitz (all rights reserved) and are used with permission.
A camera profile is often a combination of a color lookup table (LUT) and a tone
curve which is applied to a RAW file to get a developed image. It translates
the colors that a camera captures into the colors they should look like. If you
shoot in RAW and JPEG at the same time, the JPEG file is already a developed
picture. Your camera can do color corrections to the data it gets from the
sensor when developing a picture. In other words, if a certain camera tends to
turn blue into turquoise, the manufacturers internal profile will correct for
the color shift and convert those turquoise values back to their proper hue.
The camera manufacturer creates a tone curve for the camera and understands
what color drifts the camera tends to capture and can correct it. Also RAW
files normally look very dull and the profile will allow it to look more
pleasing with just one click. We can mimic what the camera does using a tone
curve and a color LUT. We want to do this as the base curves provided by
darktable are generalized for a manufacturers sensor behavior, but individually
profiling your camera can provide better color results.
Why do we want a color profile?
The camera captures light as linear RGB values. RAW development software needs
to transform those into CIE XYZ tristimulus
values for mathematical
calculations. The color transformation is often done under the assumption that
the conversion from camera RGB to CIE XYZ is a linear 3x3 mapping. Unfortunately
it is not because the process is spectral and the camera sensor sensitivity
also absorbs spectral light. In darktable the conversion is done the
following way: The camera RGB values are transformed using the color matrix
(either coming from the Adobe DNG Converter or dcraw) to arrive at
approximately profiled XYZ values. darktable provides color lookup table in
Lab color space to fix
inaccuracies or implement styles which are semi-camera independent. A very cool
feature is that a user can edit the color LUT. This color LUT can be created by
darktable-chart as this article will show so that you don’t have to create it
yourself.
What we want to have is the same knowledge about colors in our raw development
software as the manufacturer put into the camera. Therefore we have two ways to
achieve this. Either we fit to a JPEG generated by the camera, which can also
apply creative styles (such as film emulations, filters), or we profile against
real color reproduction. For real color a color
target ships with a file providing the color values for each patch it has.
In summary, we can create a profile that emulates the manufactures color
processing inside the body, or we can create a profile that renders real color
as accurately as possible.
The process for both is nearly identical, and we will note when it diverges in
the instructions.
Creating pictures for color profiling
To create the required pictures for camera profiling we need a color chart
(aka Color Checker) or an IT8
chart as our target. The
difference between a color chart and IT8 chart is the number of patches and
often the price. As the IT8 chart has more patches the result will be much
better. Optimal would be if the color target comes with a grey card for
creating a custom White Balance. I can recommend the X-Rite ColorChecker
Passport Photo.
It is small, lightweight, all plastic, a good quality tool and also has a gray
card. An alternative is the Spyder
Checkr.
If you want a better profiling result, you can buy a good IT8 chart from Coloraid
(you want C1) or invest for example in the ColorChecker Digital
SG.
(Please share you experience if you buy a Coloraid C1!). I recommend getting
a gray card as this makes profiling easier.
Note: ArgllCMS offers CIE and CHT files for different color charts, if you
already have one or are going to buy one, check if ArgyllCMS offers support for
it first! You can always add support to your color chart to ArgylCMS, but the
process is much more complex. This will be very important later!
You can find these files (generally) in:
/usr/share/color/argyll/ref/
The path might differ depending on the distribution you’re using. Your package
management tool should provide a way to list all files of a package so it should
be easy to find.
find /usr/share -name "*.cht"
is a possible alternative to track down where the files are located.
We are creating a color profile for direct sunlight conditions (D50) which can
be used as a general purpose profile. For this we need some special conditions.
The Color Checker needs to be photographed in direct sunlight at 5000K (K =
Kelvin), which helps to reduce any metamerism of colors on the target and
ensures a good match to the data file that tells the profiling software what
the colors on the target should look like. However a major concern is glare,
but we can reduce it with some tricks.
One of the things we can do to reduce glare, is to build a simple shooting box.
For this we need a cardboard box and at least three black T-Shirts. The box
should be open on the top and on the front like in the following picture
(Figure 1).
Figure 1: Cardboard box suitable for color profiling
Normally you just need to cut one side open. However it is better if you use
one big cardboard and build the box yourself. This way you can make the box so
it widens up in the front, see Figure 1. Then coat the inside of the box with
black T-Shirts like this:
Figure 2: A simple box for color profiling
To further reduce glare we just need the right location to shoot the picture.
We want to shoot the target when the sun provides a temperature of 5000K (D50).
We get that in the morning hours when the sun is at about 45° in the sky. It
varies on where on earth you are located and on the season of the year.
I took my shots in central Europe in mid October at 09:45.
To measure 5000K I used a gray card for white balancing. When I shoot the gray
card, my camera displayed which temperature the profile has.
Try to shoot on a day with minimal clouds so the sun isn’t changing intensity
while you shoot. The higher the temperature the more water is in the
atmosphere, which means the quality of the images for profiling might be
reduced. Temperatures below 20°C are better than above.
In some countries it may not be possible to accurately produce these images
with sunlight. This could be due to air pollution (or lack of), temperature,
humidity, latitude, and atmospheric conditions. For example, in Australia, one
might be unable to use direct sunlight to create this profile, and would have
to use a set of color balanced bulbs with the same box setup to create this.
Shooting outdoor
If you want to shoot outdoor, look for an empty tared parking lot or a lonely
road. The parking lot should be pretty big, like from a mall, without any cars
or trees! You should be far away from walls, trees or anything which could
possibly reflect. Put the box on the ground or a small chair and shoot with the
sun above your right or left shoulder behind you. You can use a black fabric
(bed sheets) if the ground reflects.
Shooting indoor with artificial light
Avoid all windows and stained glass. Create the box as mentioned, and arrange
it in a V shape with your tripod. At the top left of the V is the camera, at
the bottom is the color target, and at the top right is the light source. The
right source should be bright and even across the room and your setup. Position
yourself underneath it to avoid all shadows.
How to shoot the target?
Outdoor preparations
Start white balancing your camera outside your house, office etc. with a
gray card every hour or 30 mintues in the morning and write down the time
and temperature. This way you will find out when the sun provides the right
temperatue (5000K) to take pictures for your target.
Taking the pictures
Preparations at home
If you’re shooting outdoor, do the following preparations at home. You will not
have much time for taking the pictures of your target. You only have a Window
of about 10 minutes. An assitent in the field can be useful.
You should use a prime lens for taking the pictures. If possible a 50 mm or
85 mm lens (or anything in between, numbers are for full frame). The less
glass the light has to travel through the better it is for profiling. Thus
those two lenses are a good choice in the number of glass elements they have
and their field of view and also vignetting! With a tele lens we would be
too far away and with a wide angle lens we would need to be too near to have
just the black box in the picture.
Set your metering mode to matrix metering (evaluative metering or multi
metering - this is often a symbol with 4 boxes and a circle in the center)
and use an aperture of f/8.0 (+/- 1/3 EV).
[If you have a spot metering mode which isn’t fixed on the center, then you
can point it to the neutral gray patch of the color checker, that’s the one
we want to have exposed correctly.]
Make sure that Dynamic Range Optimization (DRO) and Auto HDR (High Dynamic
Range) or anything like that are turned off!
Set the camera to capture “RAW & JPEG” and disable lens corrections
(vignetting corrections) for JPEG files if possible. This is important
for JPEG and real color fitting. You can leave corrections for color
failures turned on.
Set your camera to color profile to AdobeRGB.
Set the ISO to the lowest possible value. Some cameras have an extended
ISO range, don’t use any of those values. For example my camera offers ISO
50, ISO 64 and ISO 80. Those are extended ISO values. The lowest ISO not in
the extended range for my camera is ISO 100. Check your camera manual!
Wear dark cloths, the best is a black hoody with long sleeves :-)
In the field
Be there in advance so you have time to prepare everything.
Set up your shooting box and mount your camera on a tripod. The best is to
have the camera looking down on the color chart like in the following
picture:
Figure 3a: Camera setup for creating pictures of the Color Checker
Make sure the color chart is parallel to plane of the camera sensors
so all patches of the chart are in focus. The color chart should be in the
middle of the image using about 1/3 of the screen so that vignetting is
not an issue.
Shoot the target, zoom to 100% and check for glare and reposition if
necessary! In Figure 3b you can see a patch with extreme glare. In Figure 3c
you can see a patch with a bit of glare. You should try to get no glare at
all. Make sure the sun is shining at an angle on the Color Checker. Change
the angle of the target in to box till you get no glare!
Figure 3b: The target with extreme glare cause by a wrong angle of the sun shining on the target
Figure 3c: The target with some glare cause by a wrong angle of the sun shining on the target
If your camera has a custom white balance feature and you have a gray card,
create a custom white balance profiles till you get 5000K (D50) and use it
(see figure 3). Put the gray card in your black box in the sunlight or
artificial light at the same position as the Color Checker. If you don’t
have a gray card, you have to use Auto White Balance (AWB) and find other
ways how to measure when you get 5000K from the sun.
Once you get 5000K from the the sun, you have about 10 minutes to take the
pictures of your target!
Now you want to begin taking images. Normally we want to have a camera profile
just for the lowest ISO value.
Note: I created profiles for ISO 100 to ISO 640, because my camera has a gain
switch at ISO 640. I learned about that by inspecting the charts which have
been measured by DPReview.
You need to take 5 pictures of your target. This is so that if an image is over
or under exposed, you have an image with a stop above or below that is then
exposed correctly. One photo for -0.3 EV, 0 EV, 0.3 EV, 0.7 EV and 1.0 EV.
Some cameras (Fuji) ISO 100 is an Extended value, so use ISO 200. Normally
Extended ISO values are captured with the lowest physical ISO and overexposed and then
exposure is reduced with image processing. Use the lowest ISO profile for them.
Hint: Some cameras have a “Continues Bracketing” feature. You can set this to
0.3EV and 5 Images. Then the camera will automatically capture 5 images in 0.3
EV stops (-0.3 EV, 0.0 EV, 0.3 EV, 0.7 EV, 1.0 EV) for you.
Once you have done all the required shots, it is time to download the RAW and
JPEG files to your computer.
Verifying correct images in darktable
For verifying the images we need to know the L-value from the Lab color
space of the neutral gray field
in the gray ramp of our color target. For the ColorChecker Passport we can look
it up in the color information (CIE) file
(ColorCheckerPassport.cie) shipping with
ArgyllCMS, which should be located at:
The ColorChecker Passport has actually two gray ramps. The neutral gray field
is the field on the bottom right of the color target ramp and is called D1 (see
Figure 4). For the ColorChecker SG it is the patch E5 and for Wolf Faust’s IT8
target the one on the left of the gray ramp (GS0). It should be described in the
specification of your target.
If we check the CIE file, we will find out that
the neutral gray field D1 has an L-value of: L=96.260066. Lets round it to
L=96. For other color targets you can find the L-value in the description or
specification of your target, often it is L=92 (e.g. Wolf Faust’s IT8 GS0).
Better check the CIE or CGATS file!
You then open the RAW file in darktable and disable the base
curve and all
other modules which might be applied automatically! You can leave the
Orientation module turned on. Select the standard input matrix in the
input color profile
module and disable gamut clipping. Make sure “camera white balance” in the
white balance
module is selected. If lens corrections are automatically applied to your JPEG
files, you need to enable
lens corrections
for your RAW files too! Only apply what has been applied to the JPEG file too.
For my configuration I was left with the following modules enabled:
Output Color Profile
Input Color Profile
Lens Correction (Optional)
Crop & Rotate (Optional)
Demosaic
White Balance
Raw Black/White Point
Apply the changes to all RAW files you have created!
You could consider making a “profiling” style and applying it en-masse.
You can also crop the image but you need to apply exactly the same crop to the
RAW and JPEG file! (This is why you use a tripod!)
Now we need to use the global color picker
module in
darkroom to find out the value of the natural white field on the color target.
Open the first RAW file in darkroom and expand the global color picker module
on the left.
Select area, mean and Lab in the color picker and use the eye-dropper
to select the natural gray field of your target. On the Color Checker it’s
on the bottom right. Here is an example:
Figure 4: Determining the color of the neutral white patch
If the value displayed in the color picker module matches the L-value of the
field or is close (+0/-2. This means L=94 to L=96 is acceptable), give the RAW
file and the corresponding JPEG file 5
stars. In the picture above it is the first value of: (96.491, -0.431,
3.020). This means L=96.491, which is what you’re looking for on
this color target. You might be looking for e.g. L=92 if you are using a
different Color Checker. See above how to find out the L-value for your
target.
For real color profiling this is very important to get right. Additionally
you want to check the JPEG is registering a L value between 96 and 98 (0/+2
tolerance). You do not want overexposure here (L=100 is white)! If your
images are over exposed, your profile will actually darken the images (this
is not what you want).
For profile extraction, this is less important as darktable-chart will extract
the differences between the raw and the JPEG, and will assume the camera’s
exposure level was correct. This means if your camera “thinks” a good exposure
is L=98 for the JPEG, and the RAW reads as L=85, then your profile needs to
create the difference here so you get the same effect.
Exporting images for darktable-chart
For exporting we need to select Lab as output color profile. This color space
is not visible in the combo box by default. You can enable it by starting
darktable with the following command line argument:
darktable --conf allow_lab_output=true
Or you always enable it by setting allow_lab_output to TRUE in darktablerc. Make
sure that you have closed darktable before making this change, then reopen it (
darktable writes to this file and may erase your change if you edit while
darktable is running).
Remember to select the Lab output color profile here as well.
You need to export all the RAW and JPEG files, not just the RAWs.
Select all 5 star RAW and JPEG files and export them.
Figure 5: Exporting the images for profiling
Profiling with darktable-chart
Before we can start you need the chart file for your color target. The chart
file contains the layout of the color checker. For example it tells the
profiling software where the gray ramp is located or which field contains
which color. For the “X-Rite Colorchecker Passport Photo” there is a
(ColorCheckerPassport.cht) file provided by
ArgyllCMS. You can find it here:
Now it is time to start darktable-chart. The initial screen will look like
this:
Figure 6: The darktable-chart screen after startup
Source Image
In the source image tab, select your PFM exported RAW file as image and for
chart your Color Checker chart file. Then fit the displayed grid on your
image.
Figure 7: Selecting the source image in darktable-chart
Make sure that the inner rectangular of the grid is completely inside of the
color field, see Figure 8. If it is too big, you can use the size slider in the
top right corner to adjust it. Better too small than too large.
Figure 8: Placing the chart grid on the source image
Reference values
This is the only step where the process diverges for real color vs camera
profile creation.
If you are creating a color profile to match the manufacturers color
processing in body, you will want to select color chart image and as the
reference image select the PFM exported JPEG file which corresponds to the
RAW file in the source image tab. Once opened you need to resize the grid again
to match the Color Checker in your image. Adjust the size with the slider if
necessary.
Figure 9: Selecting the reference value for profiling in darktable-chart
If you are creating a color profile for real color, select the mode as
cie/it8 file and load the corresponding CIE file for your color target. If
you have issues with this, run darktable-chart from the CLI and check the output.
I found that my chart would not open with:
error with the IT8 file, can't find the SAMPLE_ID column
It’s worth checking the ‘Lab (reference)’ values at the bottom of the display
to ensure they match what you expect and were correctly loaded. I saw some
cool (but incorrect) results when they did not load!
Process
In this tab you’re asked to select the patches with the gray ramp. For the
‘X-Rite Color Checker Passport’ these are the ‘NEU1 .. NEU8’ fields. Newer
version of darktable automatically detect the gray ramps! The input field
number of final patches defines how many editable color patches the resulting
style will use within the color look up table module. More patches give a
better result but slows down the process. I think 28 is a good compromise but
you might want to user the maxium of 49.
Once you have done this click on ‘process’ to start the calculation. The
quality of the result in terms of average delta E and maximum delta E are
displayed below the button. These data show how close the resulting style
applied to the source image will be able to match the reference values – the
lower the better.
You must click process each time you change source images or reference chart
to generate the new profiles. Sometimes process is “greyed out”, so simply
toggling the grey ramp setting will reactivate it.
After running ‘process’, click on ‘export’ to save the darktable style.
Figure 10: Processing the image in darktable-chart
In the export window you should already get a good name for the style. Add a
leading zero for ISO values smaller than 1000 get correct sorting in the styles
module, for example: ILCE-7M3_ISO0100_JPG.dtstyle. The JPG in the name should
indicate that we fitted against a JPG file. If you fitted against a CIE file,
remove the CIE filename from the style name. If you applied a creative style
(for example, a film emulation or filter in the camera). to the JPG, probably
add it at the end of the file name and style name.
Importing your dtstyle in darktable
To use your just created style, you need to import it in the style
module in the lighttable.
In the lighttable open the module on the right and click on ‘import’. Select
the dtstyle file you created to add it. Once imported you can select a raw file
and then double click on the style in the ‘style module’ to apply it.
To verify the style you created you can either apply it to one of the RAW files
you created for profiling. Then use the global color picker to compare the
color in the RAW with the style applied to the one in the JPEG file.
I also shoot a few normal pictures with nice colors like flowers in RAW and
JPEG and then compare the result. Sometimes some colors can be off which can
indicate that your pictures for profiling are not the best. This can be because
there were some kind of clouds, glare or the wrong daytime. Redo the shots till
you get the result you’re satisfied with.
Sadly this is a trial and error process, so you will have to create some number
of profiles before you find the results you want. It’s a good idea to
read this article again to see if you missed any important steps.
How does the result look like?
In the following screenshot (Figure 11) you can see the calculated tone curve by darktable
chart and the Sony base curve of darktable. The tone curve is based on the color LUT. It will
look flat if you apply it without the LUT.
Figure 11: Comparison of the default base curve with the new generated tone curve
Here is a comparison between the base curve for Sony on the left and the
dtstyle (color LUT + tone curve) created with darktable-chart:
Figure 12: Side by side comparison on an image (left the standard base curve, right the calculated dtstyle)
Other ideas
This process will work for extracting in-body black and white profiles, as
well as creative color profiles. I see a significant improvment in black
and white profiles from this process over the use of some of the black and white
modules in darktable.
You may find that the lowest ISO profile may provide pretty good results for
higher ISO values. This will save you a lot of time profiling, and allows
you to blanket-apply your profile to all your images quickly - you only
need one profile now! This is highly
dependant on your camera however, so experiment with this.
These profiles should work in all light conditions, provided your white
balance is correct. Given you now have a color target, you should always take
one photo of it, so you can correct the whitebalance later.
Discussion
As always the ways to get better colors are open for discussion an it can be
improved in collaboration.
Feedback is very welcome.
Thanks to the darktable developers for such a great piece of software! :-)
William Brown has contributed to the article, based on his profiling experience
following this tutorial.
Noise in digital images is similar to film grain in analogue photography. In
digital cameras, noise is either created by the amplification of digital
signals or heat produced by the sensor. It appears as random, colored speckles
on an otherwise smooth surface and can significantly degrade image quality.
Noise is always present, and if it gets too pronounced, it detracts from the
image and needs to be mitigated. Removing noise can decrease image quality or
sharpness. There are different algorithms to reduce noise, but the best option
is if having profiles for a camera to understand the noise patterns a camera
model produces.
Noise reduction is an image restoration process. You want to remove the digital
artifacts from the image in such a way that the original image is discernible.
These artifacts can be just some kind of grain (luminance noise) or colorful,
disturbing dots (chroma noise). It can either add to a picture or detract from
it. If the noise is disturbing, we want to remove it. The following pictures
show a picture with noise and a denoised version:
To get the best noise reduction, we need to generate noise profiles for each
ISO value for a camera.
Creating the pictures for noise profiling
For every ISO value your camera has, you have to take a picture. The pictures
need to be exposed a particular way to gather the information correctly. The
photos need to be out of focus with a widespread histogram like in the
following image:
We need overexposed and underexposed areas, but mostly particularly the grey
areas in between. These areas contain the information we are looking for.
Let’s go through the noise profile generation step by step. For easier creation
of the required pictures, we will create a stencil which will make it easier to
capture the photos.
Building a profiling testbed
Requiements
A dark room (wait till night time)
Monitor
Printer
Sheets of black thick paper (DIN A3, >= 200g/m²)
White paper
Scissors
Sellotape (Tesafilm)
First you need to get some thicker black paper or cardboard. No light should shine
through it! Then you need to print out a gradient on white paper. Light
should shine through the white paper!
I got black thick paper (DIN A3, >= 200g/m²) and used two sheets. You need to
be able to cover your monitor with the black paper. Put the printed gradient in
the middle and draw around it. From three sides (bottom, left, top) make the
window smaller by 1 cm, see Figure 1. On the right we need to have a gap.
Figure 1: Drawn window reduced by 1 cm on the bottom, left and top.
Next is to cut out the window and type the gradient onto the black paper like
in Figure 2. It is important that there is a gap between the white and the
black paper on the white side of the gradient. We need light for an overexposed
area.
Figure 2: The gradient taped into the window of the black paper.
Once you have done that go to your monitor and make it all white. You can an
all white image for that. Then tape the sheets to your monitor
like in Figure 3.
Figure 3: The sheets of black paper taped to the monitor.
Taking the pictures
It is time to get your camera. You need to shoot in RAW. It is best to turn off
any noise reduction especially long exposure noise reduction. Mount the camera
on a tripod and use a lens between 35 mm to 85 mm (full frame). I used a 85 mm
f/1.4 lens.
Make sure the gradient fills most of the frame. Set your camera to manual focus
and focus on infinity. Select the manual mode of your camera and choose the
fastest aperture and ISO100. Depending on the lens you’re using you might want
to close the aperture. For me f/1.4 was too blurry and I closed it till f/4.0.
You don’t want to see any edges or any structure on the paper but be too
blurry. You want to still see the gradient but we want nice transitions between
different lightning zone black -> grey -> white like in Figure 4.
Now you need to set the shutter speed. Make the picture really dark and then
make the shutter speed longer till the gap which gives us the white from the
monitor is overexposed, pure white see Figure 4. The black around the white
paper should be underexposed (pure black).
Figure 3: Example shot for noise.
Now you need to take a picture for each ISO value of your camera. When you
increase the ISO value you need to decrease the shutter speed!
If this gives you the help of the tool, continue with STEP 2 otherwise go to
STEP 1a. Packages for openSUSE, Fedora, Ubuntu and Debian packaging the noise
tools can be found
here.
STEP 1a
Your darktable installation doesn’t offer the noise tools so you need to
compile it yourself. Before you start make sure that you have the following
dependencies installed on your system:
This will automatically do everything for you. Note that this can take quite
some time to finish. I think it took 15 to 20 minutes on my machine. If a
picture is not exposed correctly, the tool will tell you the image name and you
have to recapture the picture with that ISO. Remove the non-working picture.
The tool will tell you, once completed, how to test and verify the
noise profiles you created.
Once the tool finished, you end up with a tarball you can send to darktable for
inclusion. You can open a bug here
The interesting files are the presets.json file (darktable input) and, for the
developers, the noise_result.pdf file. You can find an example PDF
here. It is a
collection of diagrams showing the histogram for each picture and the results
of the calculations.
The IMAGE team of the GREYC laboratory (UMR CNRS 6072, Caen, France) is pleased to announce the release of a new 2.2 version of G’MIC, its open-source, generic, and extensible framework for image processing. As we already did in the past, we take this opportunity to look at the latest notable features added since the previous major release (2.0, last June).
Note 1: click on a picture to view a larger version.Note 2: This is a translation of an original article, in French, published on Linuxfr.
1. Context and recent evolutions
G’MIC is a free and open-source software developed since August 2008 (distributed under the CeCILL license), by folks in the IMAGE team at the GREYC, a French public research laboratory located in Caen and supervised by three institutions: the CNRS, the University of Caen, and the ENSICAEN engineering school. This team is made up of researchers and lecturers specialized in the fields of algorithms and mathematics for image processing.
As one of the main developer of G’MIC, I wanted to sum up the work we’ve made on this software during these last months.
Fig. 1.1: The G’MIC project logo, and its cute little mascot “Gmicky” (designed by David Revoy).
G’MIC is multi-platform (GNU/Linux, MacOS, Windows …) and provides many ways of manipulating generic image data, i.e. still images or image sequences acquired as hyperspectral 2D or 3D floating-point arrays (including usual color images). More than 950 different image processing functions are already available in the G’MIC framework, this number being expandable through the use of the G’MIC scripting capabilities.
Fig.1.2: The G’MIC-Qt plugin for GIMP, currently the most popular G’MIC interface.
Since the last major version release there have been two important events in the project life:
When we released version 2.0 of G’MIC a few months ago, we were happy to announce a complete rewrite (in Qt) of the plugin code for GIMP. An extra step has been taken, since this plugin has been extended to fit into the open-source digital painting software Krita.
This has been made possible thanks to the development work of Boudewijn Rempt (maintainer of Krita) and Sébastien Fourey (developer of the plugin). The G’MIC-Qt plugin is now available for Krita versions 3.3+ and, although it does not yet implement all the I/O functionality of its GIMP counterpart, the feedback we’ve had so far is rather positive.
This new port replaces the old G’MIC plugin for Krita which has not been maintained for some time. The good news for Krita users (and developers) is that they now have an up-to-date plugin whose code is common with the one running in GIMP and for which we will be able to ensure the maintenance and further developments.
Note this port required the writing of a source file host_krita.cpp (in C++) implementing the communication between the host software and the plugin, and it is reasonable to think that a similar effort would allow other programs to get their own version of the G’MIC plugin (and the 500 image filters that come with it!).
Fig. 1.3: Overview of the G’MIC-Qt plugin running on Krita.
Another major event concerns the new license of use : The CeCILL-C license (that is in the spirit of the LGPL) is now available for some components of the G’MIC framework. This license is more permissive than the previously proposed CeCILL license (which is GPL-compatible) and is more suitable for the distribution of software libraries. This license extension (now double licensing) applies precisely to the core files of G’MIC, i.e. its C++ library libgmic. Thus, the integration of the libgmic features (therefore, all G’MIC image filters) is now allowed in software that are not themselves licensed under GPL/CeCILL (including closed source products).
The source code of the G’MIC-Qt plugin, meanwhile, remains distributed under the single CeCILL license (GPL-like).
2. Fruitful collaboration with David Revoy
If you’ve followed us for a while, you may have noticed that we very often refer to the work of illustrator David Revoy for his multiple contributions to G’MIC: mascot design, ideas of filters, articles or video tutorials, tests of all kinds, etc. More generally, David is a major contributor to the world of free digital art, as much with the comic Pepper & Carrot he produces (distributed under free license CC -BY), as with his suggestions and ongoing bug reports for the open-source software he uses.
Therefore, it seems quite natural to devote a special section to him in this article, summarizing the different ideas, contributions and experiments he has brought to G’MIC just recently. A big thank you, David for your availability, the sharing of your ideas, and for all your work in general!
Let’s first mention the progress made on the Black & White / Colorize lineart (smart-coloring) filter that had appeared at the time of the 2.0G’MIC release.
This filter is basically a lineart colorization assistant which was developed in collaboration with David. It tries to automatically generate a colorization layer for a given lineart, from the analysis of the contours and the geometry of that lineart. Following David‘s suggestions, we were able to add a new colorization mode, named “Autoclean“. The idea is to try to automatically “clean” a coloring layer (made roughly by the user) provided in addition to the lineart layer, using the same geometric analysis as for the previous colorization modes.
The use of this new mode is illustrated below, where a given lineart (left) has been colorized approximately by the user. From the two layers line art + color layer, our “Autoclean“ algorithm generates an image (right), where the colors do not overflow the lineart contours (even for “virtual” contours that are not closed). The result is not always perfect, but nevertheless reduces the time spent in the tedious process of colorization.
Fig. 2.1: The new “Autoclean” mode of the lineart colorization filter can automatically “clean” a rough colorization layer.
Note that this filter is also equipped with a new hatch detection module, which makes it possible to avoid generating too many small areas when using the previously available random colorization mode, particularly when the input lineart contains a large number of hatches (see figure below).
Fig. 2.2: The new hatching detection module limits the number of small colored areas generated by the automatic random coloring mode.
More recently, David suggested the idea of a filter to separately vary the hue and saturation of colors having certain levels of luminosity. The underlying idea is to give the artist the ability to draw or paint digitally using only grayscale, then colorize his masterpiece afterwards by re-assigning specific colors to the different gray values of the image. The obtained result has of course a limited color range, but the overall color mood is already in place. The artist only has to retouch the colors locally rather than having to colorize the entire painting by hand.
The figure below illustrates the use of this new filter Colors/Equalize HSI/HSL/HSV available in the G’MIC plugin : each category of values can be finely adjusted, resulting in preliminary colorizations of black and white paintings.
Fig. 2.3: Equalization in HSI/HSL/HSV colorspaces allows to easily set the global color mood for B&W paintings.
Note that the effect is equivalent to applying a color gradient to the different gray values of the image. This is something that could already be done quite easily in GIMP. But the main interest here is we can ensure that the pixel brightness remains unchanged during the color transformation, which is not an obvious property to preserve when using a gradient map.
What is nice about this filter is that it can apply to color photographs as well. You can change the hue and saturation of colors with a certain brightness, with an effect that can sometimes be surprising, like with the landscape photography shown below.
Fig. 2.4: The filter “Equalize HSI/HSL/HSV” applied on a color photograph makes it possible to change the colorimetric environment, here in a rather extreme way.
Another one of the David‘s ideas concerned the development of a random local deformation filter, having the ability to generate angular deformations. From an algorithmic point of view, it seemed relatively simple to achieve.
Note that once the implementation has been done (in concise style: 12 lines!) and pushed into the official filter updates, David just had to press the “Update Filters“ button of his G’MIC-Qt plug-in, and the new effect Deformations/Crease was there immediately for testing. This is one of the practical side of developing new filters using the G’MIC script language!
Fig. 2.5: New effect “Crease” for local angular deformations.
However, I must admit I didn’t really have an idea on what this could be useful for in practice. But the good thing about cooperating with David is that HE knows exactly what he’s going to do with it! For instance, to give a crispy look to the edges of his comics, or for improving the render of his alien death ray.
Fig. 2.6: Using the G’MIC “Crease” filter for two real cases of artistic creation.
3. Filters, filters, filters…
David Revoy is not the only user of G’MIC: we sometimes count up to 900 daily downloads from the main project website. So it happens, of course, that other enthusiastic users inspire us new effects, especially during those lovely discussions that take place on our forum, kindly made available by the PIXLS.US community.
Many photographers will tell you that it is not always easy to enhance the details in digital photographs without creating naughty artifacts that often have to be masked manually afterwards. Conventional contrast enhancement algorithms are most often based on increasing the local variance of pixel lightness, or on the equalization of their local histograms. Unfortunately, these operations are generally done by considering neighborhoods with a fixed size and geometry, where each pixel of a neighborhood is always considered with the same weight in the statistical calculations related to these algorithms.
It is simpler and faster, but from a qualitative point of view it is not an excellent idea: we often get “halos” around contours that were already very contrasted in the image. This classic phenomenon is illustrated below with the application of the Unsharp mask filter (the one present by default in GIMP) on a part of a landscape image. This generates an undesirable “halo” effect at the frontier between the mountain and the sky (this is particularly visible in full resolution images).
Fig. 3.1: Unwanted “halo” effects often occur with conventional contrast enhancement filters.
The challenge of the detail enhancement algorithms is to be able to analyze the geometry of the local image structures in a more fine way, to take into account geometry-adaptive local weights for each pixel of a given neighborhood. To make it simple, we want to create anisotropic versions of the usual enhancement methods, orienting them by the edges detected in the images.
Following this logic, we have added two new G’MIC filters recently, namely Details/Magic details and Details/Equalize local histograms, which try to better take the geometric content of the image into account for local detail enhancement (e.g. using the bilateral filter).
Fig. 3.2: The new G’MIC detail enhancement filters.
Thus, the application of the new G’MIC local histogram equalization on the landscape image shown before gives something slightly different : a more contrasted result both in geometric details and colors, and reduced halos.
Fig. 3.3: Differences of results between the standard GIMP Unsharp Mask filter and the local histogram equalization of G’MIC, for details enhancement.
New filters to apply geometric deformations on images are added to G’MIC on a regular basis, and this new major version 2.2 offers therefore a bunch of new deformation filters.
So let’s start with Deformations/Spherize, a filter which allows to locally distort an image to give the impression that it is projected on a 3D sphere or ellipsoid. This is the perfect filter to turn your obnoxious office colleague into a Mr. Potato Head!
Fig .3.4: Two examples of 3D spherical deformations obtained with the G’MIC “Spherize” filter.
On the other hand, the filter Deformations/Square to circle implements the direct and inverse transformations from a square domain (or rectangle) to a disk (as mathematically described on this page), which makes it possible to generate this type of deformations.
Fig. 3.5: Direct and inverse transformations from a square domain to a disk.
The effect Degradations/Streak replaces an image area masked by the user (filled with a constant color) with one or more copies of a neighboring area. It works mainly as the GIMP clone tool but prevents the user to fill the entire mask manually.
Fig. 3.6: The “Streak” filter clones parts of the image into a user-defined color mask.
You might say that image deformations are nice, but sometimes you want to transform an image in a more radical way. Let’s introduce now the new effects that turn an image into a more abstract version (simplification and re-rendering). These filters have in common the analysis of the local image geometry, followed by a step of image synthesis.
For example, G’MIC filter Contours/Super-pixels locally gathers the image pixels with the same color to form a partitioned image, like a puzzle, with geometric shapes that stick to the contours. This partition is obtained using the SLIC method (Simple Linear Iterative Clustering), a classic image partitioning algorithm, which has the advantage of being relatively fast to compute.
Fig. 3.7: Decomposition of an image in super-pixels by the Simple Linear Iterative Clustering algorithm (SLIC).
The filter Artistic/Linify tries to redraw an input image by superimposing semi-transparent colored lines on an initially white canvas, as shown in the figure below. This effect is the re-implementation of the smart algorithm initially proposed on the site http://linify.me (initially implemented in JavaScript).
Fig. 3.8: The “Linify” effect tries to redraw an image by superimposing only semi-transparent colored lines on a white canvas.
The effect Artistic/Quadtree variations first decomposes an image as a quadtree, then re-synthesize it by drawing oriented and plain ellipses on a canvas, one ellipse for each quadtree leaf. This renders a rather interesting “painting” effect. It is likely that with more complex shapes, even more attractive renderings could be synthesized. Surely an idea to keep in mind for the next filters update :)
Fig. 3.9: Decomposing an image as a quadtree allows to re-synthesize it by superimposing only plain colored ellipses.
And now that you have processed so many beautiful pictures, why not arrange them in the form of a superb photo montage? This is precisely the role of the filter Arrays & tiles/Drawn montage, which allows to create a juxtaposition of photographs very quickly, for any kind of shapes.
The idea is to provide the filter with a colored template in addition to the serie of photographs (Fig.3.10a), and then to associate each photograph with a different color of the template (Fig.3.10b). Next, the arrangement is done automatically by G’MIC, by resizing the images so that they appear best framed within the shapes defined in the given montage template (Fig.3.10c).
We made a video tutorial illustrating the use of this specific filter.
Fig. 3.10a: Step 1: The user draws the desired organization of the montage with shapes of different colors.
Fig. 3.10b: Step 2: G’MIC’s “Drawn Montage” filter allows you to associate a photograph for each template color.
Fig. 3.10c: Step 3: The photo montage is then automatically synthetized by the filter.
But let’s go back to more essential questions: have you ever needed to draw gears? No?! It’s quite normal, that’s not something we do everyday! But just in case, the new G’MIC filter Rendering/Gear will be glad to help, with different settings to adjust gear size, colors and number of teeth. Perfectly useless, so totally indispensable!
Fig. 3.11: The Gear filter, running at full speed.
Need a satin texture right now? No?! Too bad, the filter Patterns / Satin could have been of a great help!
Fig. 3.12: G’MIC’s satin filter will make your life more silky.
And finally, to end up with the series of these “effects that are useless until we need them”, note the apparition of the new filter Degradations/JPEG artifacts which simulates the appearance of JPEG compression artifacts due to the quantization of the DCT coefficients encoding 8×8 image blocks (yes, you will get almost the same result saving your image as a JPEG file with the desired quality).
Fig. 3.13: The “JPEG artifacts” filter simulates the image degradation due to 8×8 block DCT compression.
4. Other notable improvements
This review of these new available G’MIC filters should not overshadow the various improvements that have been made “under the hood” and that are equally important, even if they are less visible in practice for the user.
A big effort of cleaning and restructuring the G’MIC-Qt plugin code has been realized, with a lot of little inconsistencies fixed in the GUI. Let’s also mention in bulk order some new interesting features that have appeared in the plugin:
The ability to set a timeout) when trying to preview some computationnaly intensive filters.
A better management of the input-output parameters for each filter (with persistence, better menu location, and a reset button).
Maximizing the size of the preview area is now easier. Editing its zoom level manually is now possible, as well as chosing the language of the interface (regardless of the language used for the system), etc.
All these little things gathered together globally improves the user experience.
Fig. 4.1: Overview of the G’MIC-Qt plugin interface in its latest version 2.2.
Even less visible, but just as important, many improvements have appeared in the G’MIC computational core and its associated G’MIC script language interpreter. You have to know that all of the available filters are actually written in the form of scripts in the G’MIC language, and each small improvement brought to the interpreter may have a beneficial consequence for all filters at once. Without going too much into the technical details of these internal improvements, we can highlight those points:
The notable improvement in the syntax of the language itself, which goes along with better performances for the analysis of the language syntax (therefore for the script executions), all this with a smaller memory footprint.
The G’MIC built-in mathematical expression evaluator is also experiencing various optimizations and new features, to consider even more possibilities for performing non-trivial operations at the pixel level.
A better support of raw video input/outputs (.yuv format) with support for4:2:2 and 4:4:4 formats, in addition to4:2:0 which was the only mode supported before.
Finally, two new animations have been added to the G’MIC demos menu (which is displayed e.g. when invoking gmic without arguments from the command-line):
First, a 3D starfield animation:
Fig.4.2: New 3D starfield animation added to the G’MIC demo menu.
Fig. 4.3: The playable 3D version of the “Tower of Hanoi”, available in G’MIC.
Finally, let us mention the introduction of the command tensors3d dedicated to the 3D representation of second order tensor fields. In practice, it does not only serve to make you want to eat Smarties®! It can be used for example to visualize certain regions of MRI volumes of diffusion tensors:
Fig. 4.4: G’MIC rendering of a 3D tensor field, with command tensors3d.
To finish this tour, let us also mention the complete redesign of G’MIC Online during the year 2017, done by Christophe Couronne and Véronique Robert from the development departement of the GREYC laboratory.
G’MIC Online is a web service allowing you to apply a subset of G’MIC filters on your images, directly inside a web browser. These web pages now have a responsive design, which makes them more enjoyable than before on mobile devices (smartphones and tablets). Shown below is a screenshot of this service running in Chrome/Android, on a 10’’ tablet.
Fig. 4.5: New responsive design of the G’MIC Online web service, running here on a 10” tablet.
5. Conclusion and perspectives
The overview of this new version 2.2 of G’MIC is now over.
One possible conclusion could be: “There are plenty of perspectives!“.
G’MIC is a free project that can be considered as mature: the first lines of code were composed almost ten years ago, and today we have a good idea of the possibilities (and limits) of the beast. We hope to see more and more interest from FOSS users and developers, for example for integrating the G’MIC-Qt generic plugin in various software focused on image or video processing.
The possibility of using the G’MIC core under a more permissive CeCILL-C license can also be a source of interesting collaborations in the future (some companies have already approached us about this). While waiting for potential collaborations, we will do our best to continue developping G’MIC and feed it with new filters and effects, according to the suggestions of our enthusiastic users. A big thanks to them for their help and constant encouragement (the motivation to write code or articles, past 11pm, would not be the same without them!).
“Long live open-source image processing and artistic creation!”
There are two libre graphics related meetings coming up early next year.
The annual Libre Graphics Meeting (in Spain this year), and something entirely new: a
libre graphics track at SCaLE.
How exciting!
The Libre Graphics Meeting is going to be in Seville, Spain this year.
They recently published their Call for Participation and are accepting presentation and talk proposals now.
Unfortunately, I won’t be able to attend this year, but there’s a pretty good chance some friendlier folks from the community will be!
We’ll update more about who will be making it out as soon as we know, and maybe we can convince someone to run another photowalk with everyone.
(On a side note, if anyone from the community is going to make it and wants a hand putting anything together for a presentation just let us know - we’re here to help.)
This year we have a neat announcement - due to some prodding from Nate Willis, we have been given a day at the Southern California Linux Expo (SCaLE) to hold a Libre Graphics focused track!
The expo is at the Pasadena Convention Center, March 8-11, 2018.
We first had a chance to hang out with LWN editor Nate Willis during the Libre Graphics Meeting 2016 in London, and later out at the Texas Linux Fest.
GIMP was able to have both Akkana Peck and myself out to present on GIMPy stuff and host a photowalk as well.
The organizer for SCaLE, Ilan, was kind enough to give us a day (Friday, March 9th) and a room for all the libre graphics artists, designers, programmers, and hackers.
You could come meet the face behind these avatars.
I will be in attendance promoting GIMP stuff in the main track, Dr. Ullah (Isaac Ullah) will hopefully be presenting, and Mica will be there (@paperdigits) as well.
I’m pretty certain we’ll be holding a photowalk for attendees while we’re there - and we may even setup a nice headshot booth in the expo to take free headshots for folks.
We would love to see some folks out there.
If you think you might be able to make it, or even better submit a talk proposal, please come and join us!
(I was thinking about getting an AirBnB to stay in, so if folks let me know they are going to make it out we can coordinate a place to all stay together.)
The libre graphics community is thrilled to announce that a special,
one-day track at SCaLE 16x will be dedicated to libre graphics
software and artists. All those who work with free and open-source
tools for creative graphics projects are invited to submit a proposal
and join us for the day!
SCaLE 16x will take place from March 8 to 11 of 2018 in Pasadena
California. Libre Graphics Day: SCaLE will take place at the main
SCaLE venue on Friday, March 9.
The libre graphics track is an opportunity for teams, contributors and
practitioners involved in Libre Graphics projects to share their
experiences, showcase new developments, and hear new and inspiring ideas.
By libre graphics we mean “free, Libre and Open Source tools for
creative uses”. Libre graphics is not just about software, but extends to
standards and file formats used in creative work.
People from around the world who are passionate about
Free/Libre tools and their creative applications are encouraged to
submit a talk proposal. Sessions will be 30 minutes in length.
Developers, artists, and activists alike are invited. First-time
presenters and established projects of all sizes are welcome to submit.
We are looking for:
Reflections and practical sessions on promoting the philosophy
and use of Libre Graphics tools.
Technical presentations and workshops for developers.
Showcases of excellent work made using Libre Graphics tools.
New tools and workflows for graphics and code.
Reflections on the activities of existing Free/Libre and Open Source communities.
There are many different approaches to blending exposures in the various projects, and they can range from extremely detailed and complex to quick and simple.
Today we’re going to look at the latter.
I was recently lucky enough to attend an old friends wedding in upstate NY.
Mairi got married!
(For those not familiar with her, she’s the model from An Open Source Portrait as well as A Chiaroscuro Portrait tutorials.)
Mairi’s chiaroscuro portrait.
I had originally planned on celebrating with everyone and wrangling my two kids, so I left my camera gear at home.
Turns out Mairi was hoping that I’d be shooting photos.
Not wanting to disappoint, I quickly secured a kit from a local rental shop.
(Thank goodness for friends new and old to help wrangle a very busy 2 year old.)
During the rehearsal I was experimenting with views to get a feel for the room I’d have and how framing would work out.
One of the shots looked from the audience and right into a late afternoon sun.
My inner nerd kicked in and I thought, “This might be a neat image to use for a tutorial!”.
Exposure Fusion (Mapping)
The idea behind exposure fusion (or mapping) is to extend the dynamic range represented in an image by utilizing more than one exposure of the same subject and choosing relevant bits to fit in the final output.
I say “fit” because usually you are trying to put a larger amount of data than a single image might have been able to capture.
So you choose which parts you want to use to get something that you’ll like.
For example, here we have two images that will be used in this article where the image showing the foreground correctly causes the sky to blow out, while exposing for the sky causes the foreground to go almost black.
By selectively combining these two images, we can get something that might show a larger dynamic range than would have been possible in a single exposure:
This porridge is too hot, this porridge is too cold, but this porridge is just right.
This is one common use case scenario for creating HDR/EXR imaging (and tonemapping is the term for doing exactly what we’re describing here - squishing data into the viewable range in a way that we like).
In fact, at the end of this article I’ll show how Enfuse handled merging these image exposures (spoiler: pretty darn well).
Exposing
In exposing for the subjects in this image, I used the structure to block the sun from direct view (though there’s still a loss of contrast and flaring).
The straight out of the camera jpg looks like this:
Foreground exposure
This gave me a well exposed foreground and subjects.
I then gave the shutter speed a quick spin to 1⁄1000 (about 4-stops) to get the sky better exposed.
The camera jpg for the sky looked like this:
Sky exposure
In retrospect I probably would have been better to shoot for 2-stops difference to keep the sky exposed higher in the histogram, but c’est la vie.
It also helps to avoid going too far in the extremes when exposing, so as to avoid making it look too unrealistic (yes - the example above probably skirts that pretty close, but it’s exaggerated to make a good article).
This gives us a nice enough starting point to play with some simple exposure mapping.
Alignment
For this to work properly the images do need to line up as perfectly as possible.
Imperfect alignment can be worked around to some extent, usually determined by how complex your masking will have to be, but the better aligned the images are the easier your job will be.
As usual I have had good luck using the align_image_stack script that’s included as part of Hugin.
This makes short work of getting the images aligned properly for just this sort of work:
/path/to/hugin/align_image_stack -m -a OUT FILE1 FILE2
On Windows, this looks like:
c:\Program Files\Hugin\bin\align_image_stack.exe -m -a OUT FILE1 FILE2
Once it finishes up, you’ll end up with some new files like OUT0001.tif.
These are your aligned images that we’ll now bring into GIMP!
Masking
The heart of fusing these exposures is going to rely entirely on masking.
This is where it usually pays off nicely to take your time and consider carefully an approach that will keep things looking clean and with a natural transition between the exposures.
If this had simple geometry it would be an easy problem to solve, but the inclusion of the trees in the background makes it slightly more complex (but not nearly as bad as hair masking can get).
The foreground and sky are very simple things to mask overall, where we know we may want 100% of the foreground to come from one image, and 100% of the sky from another. This helps simplifies things greatly.
Rough mask (temporary - for reference only) where we can see we want all of the sky from one image, and all of the foreground from another.
I tend to keep the darker sky layer on the bottom and the lighter foreground layer above that.
The hard edges of the structure make it an easy masking job there, so the main area of concern here is getting a good blend with the treeline in the background.
There are a couple of approaches we can take to try and get a good blend, so let’s have a look…
Luminosity (Grayscale) Mask
A common approach would be to apply an inverted grayscale mask to the foreground layer.
If there’s a decent amount of contrast between the foreground/sky layers then this is a quick and easy way to get something to use as a base for further work:
Applying this mask yields pretty good looking results right away:
You can also investigate some of the other color channel options to see if there might be something that works better to create a clean mask with.
In GIMP 2.9.x I also found that using Colors > Components > Extract Component using CMYK Key produced another finely separated option.
This makes a nice starting point.
As we said we wanted all of the sky from one exposure and the rest of the image from the other exposure, we can start roughing in the overall mask.
For this simple walkthrough we can make our job a bit easier by using two copies of the foreground layer and selectively blending them over the sky layer.
Why Two Layers?
If you take your foreground layer and start cleaning up the mask for the sky by painting in black, it should be relatively easy.
Until you get down to the treeline.
You can use a soft-edged brush and try to blend in smoothly, but in order to let the sky come through nicely you may find yourself getting more of the dark exposure trees showing through.
This will show as a dark halo on the tops of the trees:
A nice way to adjust the falloff along the tops of the trees is by using a second copy of the foreground layer, and using a gradient on the mask that will blend smoothly from full sky to full foreground along the tops of the trees.
This will ease the dark halo a bit until the transition looks good to you.
You can then modify/update the gradient on the copy until the transition is smooth or to your liking.
At this point my layers would look like this in GIMP:
The results of using a second fore layer with a gradient to help ease the transition:
Top: Original grayscale mask only
Middle: Manual mask painting down to treeline
Bottom: Second layer with gradient mask
When pixel-peeping it may not seem perfect, but in the context of the entire image it’s a nice way to get an easy blend for not too much extra work.
Left: Grayscale mask, Right: final mask with gradient
At this point most of the exposure is blended nicely.
The only place in this particular image I would work some more would be to darken the structure a little bit to lessen the flaring and maybe bring back a little darkness.
This can be accomplished by painting over the top mask.
I used black with a smaller opacity of around 25% to paint over the structure and allow the darker version underneath to show through a bit more:
Left: gradient masked, Right: structure darkened slightly to taste
Enfuse Comparison
I have previously used Enfuse and gotten great results even more quickly.
For comparison here is the result of running Enfuse against the same images:
I prefer our manually blended result personally, but I could see another future article or post about using the Enfuse blend for areas of complexity and blending the Enfuse output into the final image to help.
Might be interesting.
(I prefer our blended result because Enfuse considered extremely bright areas as candidates for fusion with the other exposure - so the bricks and tent highlights got pushed down automatically.)
Fin
From here any further fiddling with the image is purely for fun.
The two versions of the image have been merged nicely.
If you wanted to adjust the result to not appear quite as extreme you could modify each of the layers to taste.
For instance, you could lighten the sky layer to decrease the extreme range difference between it and the foreground layer.
Where’s the fun in keeping it too realistic though? :)
For reference, here’s my final version after masking with a bit of a Portra tone thrown in for good measure:
Not bad for a relatively quick approach.
Resources
This wouldn’t be complete with some resources and further reading for folks!
I have saved the GIMP 2.9.x .XCF file I used to write this.
It has all of the masks and layers I used to create the final version of the image:
This is becoming a sort of tradition for me to post something giving thanks around this holiday.
I think it’s because this community has become such a large part of my life (even if I don’t have nearly as much time to spend on it as I’d like).
Also, I think it helps to remind ourselves once in a while of the good things that happen to us. So in that spirit…
I want to start things off by acknowledging those that go the extra mile and help offset the costs of the infrastructure to keep this crazy ship afloat (sorry, I’m an ocean engineer by training and a sailor - so nautical metaphors abound!).
Once again the amazing Dimitrios Psychogios has graciously covered our server expenses (and then some) for another full year.
On behalf of the community, and particularly myself, thank you so much!
Your generosity will cover infrastructure costs for the year and give us room to grow as the community does.
We also have some awesome folks who support us through monthly donations (which are nice because we can plan better if we need to). Together they cover the costs of data storage + transfer in/out of Amazon AWS S3 storage (basically the storage and transfer of all of the attachments and files in the forums).
So thank you, you cool froods, you really know where your towels are:
Thank you all!
If you happen to see any of these great folks around the forum consider taking a moment to thank them for their generosity!
If you’d like to join them in supporting the site financially, check out the support page.
The community has just been amazing, and we’ve seen nice growth this past year.
Since the end of August we’ve seen about a 50% increase in weekly sessions on discuss.
We’re currently hovering around 2,500 daily pageviews on the forums:
We’ve added almost 950 new users, or almost 3 new users every day!
I figure @LebedevRI will yell at me if I forget to mention raw.pixls.us (RPU) again.
Back in January @andabata built a new site to help pick up the work of the old rawsamples.ch website to collect raw sample files for testing.
So thank you @andabata and @LebedevRI for your work on this!
A big thank you to everyone who has taken the time to check the site and upload missing (or non-freely licensed) raw files to include!
While we’re talking about RPU, please consider having a look at this post about it on discuss and take a few minutes to see if you might be able to contribute by providing raw samples that we are missing or need (see the post for more details).
If you don’t have something we need, please consider sharing the post on social media to help us raise awareness of RPU!
Thank you!
If you’re not aware of it, one of the things we try to do here beside run the site and forum is to assist projects with websites and design work if they want it.
Earlier this year the digiKam team needed to migrate their old Drupal website to something more modern (and secure) and @paperdigits figured, “why not”?
So we rolled up our sleeves and got them setup with a newly designed static website built using Hugo (which was completely new to me).
We were also able to manage their comments on the website for them by embedding topics from right here on discuss.
This way their users can still own their comments and we can manage spam and moderate things for them.
The best part, though, is the addition of their users and knowledge to the community!
I want to personally take a moment to thank @darix for all the work he does keeping things running smoothly here.
If you don’t see him, it means all the work he’s doing is paying off.
I speak with him daily and see firsthand the great work he’s doing to make sure all of us have a nice place to call home.
Thank you so much, @darix!
As usual @paperdigits (https://silentumbrella.com) also has a great attitude and pro-active approach to the community which I am super thankful for.
He also does things that aren’t always visible, but are essential to keeping things running smoothly, like moderating the forum, checking the health of sites we are helping to manage, and writing/editing posts.
I can’t stress enough how much it helps to keep your interest and spirits engaged in the community when you have someone else around who’s so positive and helpful. Thank you so much, @paperdigits!
At the end of the day this is a community, and it’s vibrancy and health is a direct result of all of you, its members.
So above all else this is by far the thing I am most thankful for - getting to meet, learn, and interact with all of you.
Peter really (ahem) throws a light on many amazing luminaries from not only the Free/Open Source Software community, but in some cases the history and roots of all modern computing.
He has managed to coordinate portrait sessions with many people that may be unassuming to a layperson, but take a moment to read any of the short bios on the site and the gravity of the contributions from the subjects to modern computing becomes apparent.
This project is my attempt to highlight a revolution whose importance is not broadly understood by a world that relies heavily upon the fruits of its labor.
That’s really what Peter has done here.
He has collected individuals whose contributions all add up to something far greater than their collective sums to shape the digital world many take for granted these days, and is presenting them in a powerful and thoughtful way more befitting their gifts.
A Chat with Peter Adams
I was lucky enough to be able to get a little bit of time with Peter recently, and with some help from the community had a few questions to present to him.
He was kind enough to take some time out of his day and be patient while I prattled on…
Linus Torvalds, Santa Fe, New Mexico, 2016 by Peter Adams
What was the motivation for this particular project for you? Why these people?
I had a long career working in the tech industry, and kind of grew up on a lot of this software when I was in college. Then got to apply it throughout a career as senior technologist or CTO at a bunch of different companies in the valley.
So I went from learning about it in college, to being someone that used it, to then being somebody that contributed to it and starting my own open source project back in 2006.
That open source ethos, the software, and the people that created, maintained and promoted it - it’s something that’s been right there in my face for, really, the last 25 years.
I wanted to marry my knowledge of it with my passion for photography, and shine a light on it.
I went through a few different chapters of the story myself in the 80’s and then the mid-90’s with linux.
I kind of felt like the story was starting to slip into obscurity, not because it’s less important - in fact I think it’s more important now than it’s ever been.
The software is actually used by more people now than it has ever been.
The smartphone revolution, mobile, has brought that to a forefront and all of these mobile platforms are based on this open source technology.
Everything Apple does is based on BSD, and everything Google/Android does is based on Linux.
I feel like it’s a more impactful story now than ever, but very few people are telling the story.
As a photographer I’ve always cringed at the photographic response to the story.
Podium shot after podium shot of these incredible people.
So I wanted to put some faces to names, bring these people to life in a more impactful way than I think anyone has done before. Hopefully that’s what the project is doing!
I started this project in 2013/2014, in earnest probably late 2014.
Of all of the people that you’ve shot, I’m curious, who would you say is one that maybe stuck out with you the most, or even better, did you get any cool stories out of some of the subjects?
Everyone that I’ve photographed has been absolutely wonderful. I mean, that’s the first thing about this community: it’s a very gracious community.
Everybody was very gracious with their time, and eager to participate.
I think people recognize that this is a community they belong to and they really want me to be a part of it, which is really great.
So, I enjoyed my time with everybody.
Everybody brought a different, interesting story about things.
The UNIX crew from Bell Labs had particularly colorful stories, very interesting sort of historical tidbits about UNIX and Free Software.
I talked to Ken Thompson about going to Russia and flying MIGs right after the collapse of the Soviet Union.
Wonderful stories from Doug McIlroy about the team and the engineering - how they worked together at Bell labs.
Just a countless list of cool stories and cool people for sure.
Ken Thompson, Menlo Park, California, 2016 by Peter Adams
Doug McIlroy, Boston, Massachusetts, 2015 by Peter Adams
P: It must have been fascinating!
It’s been really fun. A lot of these folks, I’ve really looked up to them over the years as sort of heroes, and so when you get people in front of your lens like that, it’s a really wonderful experience.
It’s also a challenging experience because you want to do justice to them.
Many of these folks that I’ve thought about for 20+ years, finally getting to shoot them is a real treat.
Where are you shooting these? Are you mostly bringing them into your studio in the valley?
I shot a lot of people when I had a studio in Silicon Valley.
I brought a lot of people there and that was great.
Now typically I’m doing shoots on the coasts.
So I’ll do shoots in NY and I’ll rent a studio and bring 6 or 7 people in there or we’ll do a studio up in SF for some people.
But I’ve done shoots in back alleyways, I’ve done shoots in tiny little conference rooms,
I’ll bring the studio to people if that’s what I have to do.
So I’d say so far it’s been about 50-50.
The lighting setups are wonderful and do justice to the subjects, and I think somebody in the community was curious if you had decided on B&W from the beginning for this series of photos? Was this a conscious decision early on?
B&W on a white background was a conscious choice right from the beginning.
Knowing the group, I felt like that was going to be the best way to explore the people and the faces.
Every one of these faces just tells, I think, a really interesting story.
I try to bring the personality of the person into the photo, and B&W has always been my favorite way to do that.
The white background just puts the emphasis right on the person.
How much of it would you say is you that goes into the final pose and setup of the person, or do you let the subject feel out the room and get comfortable and shoot from there?
It’s a little bit of both.
I wish I got to spend a lot of time up front with the person before we started shooting, but the way everybody’s schedule worked is - none of these shoots are more than an hour and many of them are much shorter than an hour.
There’s definitely the pleasantries up front and talking for a little bit, but then I try to get people right in front of the camera as quick as possible.
I don’t really pose them.
My process is to sit back and observe, and I always tell people “if I’m not taking photos, it’s not because you’re doing anything wrong - I’m just waiting for you to settle or looking, examining”.
Which is, for most people, a really uncomfortable process, I try to make it as comfortable as possible.
Then we’ll start taking pictures.
I may move them a little bit, or we may setup a table so they can rest their hand on their chin or something like that.
Generally the photos that come out are not pre-meditated.
It’s very rare that I go into any of these shoots with an actual “I want the person like this, setup like that, etc…”.
I’d say 99% of these shots, the expressions, the feeling that comes out, that I’m capturing is organic.
It’s something that comes up in the shoot.
I just try to capture it whenever I see it by clicking the shutter, that’s basically what I’m doing there.
You list what equipment you shot each portrait with, but I’m curious about the lighting setup. Is there a “go-to” lighting setup that you like to use?
The lighting is literally the same on every shot, though there’s slightly different positions.
It’s a six light setup: there are four lights on the background, there’s a beauty dish overhead, and generally a fill light.
The fill is either a big Photek or PLM, basically a big umbrella, or a ringflash depending on how small the room is.
That’s the same lighting setup on all of them.
Four lights on the background, two lights on the subject.
I’ll vary the two lights on the subject positionally, but for the most part they’re pretty close.
Do you use Free Software in your normal photographic workflow at all?
I don’t use as much Free Software as I’d like in my own workflow.
My workflow, because I shoot with Phase One, the files go into Capture One and then from there they go into Photoshop for final edits.
I have used GIMP in the past.
I really would like to use more Free Software, so I’m a learner in that regard for what tools would make sense.
Spencer Kimball (co-creator of GIMP), Menlo Park, 2015 by Peter Adams
Peter Mattis (co-creator of GIMP), New York City, 2015 by Peter Adams
Did that habit grow out of the professional need of having those tools available to you?
Phase One, which makes the Medium Format digital back and camera that I use for all of my portrait work, also makes Capture One.
They have basically customized the software to get the most of their own files.
That’s pretty much why I’ve wound up there instead of Lightroom or another tool.
It’s just that that software tends to bring out the tonality, especially in the B&W side, better I’ve found than any other tool.
This project was self financed to start with?
Yes, this is a self-financed project.
I do hope that we’ll get some sponsors, especially for the book, just because it tends to be a pretty heavy upfront outlay to produce a book.
I’m going to think about things like Kickstarter but the corporate sponsors I think will be really helpful for the exhibits and the book.
Speaking of the book, is it ready - have you already gone to print?
No, the book isn’t ready yet.
I still have probably another 10-12 people that I need to photograph and then we’ll start producing it.
I’ve done some prototypes and things on it but it’s still a little bit of a ways away.
The biggest hurdle on this project is actually scheduling and logistics.
Getting access to people in a way that is economical.
Instead of me flying all over the place for one shot, I try to stack up a number of people into a day.
It’s tough - this is a busy crowd, very in demand.
Did your working in open source teach you anything beyond computer code in some way? Was there an influence from the people you may have worked around, or the ethos of Free Software in general that stuck with you? Working with this crowd, was there a takeaway for you beyond just the photographic aspects of it?
Absolutely!
First of all it’s an incredibly inspiring group of people.
This is a group of people that have dedicated, in some cases most of, their lives to the development of software that they give away to the world, and don’t monetize themselves.
The work they’re doing is effectively a donation to humanity.
That’s incredibly inspiring when you look at how much time goes into these projects and how much time this group of people spends on that.
It’s a very humbling thing.
I’d say the other big lesson is that Open Source is such a unique thing.
There’s really nothing like it.
It’s starting to take over other industries and moving beyond just software - it’s gone into hardware.
I’ve started to photograph some of the open source hardware pioneers.
It’s going into bio-tech, pharmaceuticals, agriculture (there’s an open source seed project).
I think that the lessons that are learned here and that this group of people is teaching is really affecting humanity on a much much larger level than the fact that this stuff is powering your cell phone or is powering your computer.
Open source is really sort of a way of doing business now.
Even more than doing business it’s a way of operating in the world.
More and more people, industries, and companies are choosing that.
In today’s world where all you read is bad news, that’s a lot of really good news.
It’s an awesome thing to see that accelerating and catching on.
It’s been incredibly inspiring to me.
P: I think even all the way back to the Polio vaccine, is one of those things. The effect that it had on humanity was immeasurable, and the fact that it wasn’t monetized by Salk was amazing.
Look at how many lives were saved because of that.
If you think about the acceleration of the innovation we’ve had just in the technology sector - could things like the iPhone or the Android operating system - would these things have happened now, or over the last decade, without this [open source], or would we be looking at those types of innovations happening twenty years from now?
I think that’s a question you have to ask.
I don’t think it’s an obvious answer that Apple or Google or somebody else would have just come up with this without the open source [contributions].
This stuff is so fundamental, it’s such a basic building block for everything that’s happening now.
It may be responsible for the golden age that we’re seeing now.
I think it is.
The average teenager they pick up and post a photo to Instagram - they don’t realize that there’s a hundred open source projects at work to make that possible.
P: And the fact that the people that underlay that entire stack gave it away.
Right.
And that giving it away was necessary to create the Instagrams to create all these networks.
It wasn’t just this happenstance thing where people didn’t know any better.
In some cases obviously that did exist, but it’s the fact that consciously people are contributing into a commons that makes it so powerful and enables all of this innovation to happen.
It’s really cool.
To close, is there another photographer, book, organization - that you’d like any of the readers to know about and maybe spend some time to go and check out. Something that maybe you’ve long admired or recently discovered?
Sure!
You’ve mentioned Martin Schoeller, who is one of my personal favorites and inspirations out there.
I’d say the other photographer who has had probably the most impact on my photography over the years has been Richard Avedon.
For people that aren’t familiar with his work I’d say definitely go check out the Avedon foundation.
Pick up any of his books which are just wonderful.
You’ll definitely see that influence on my photography, especially this project, since he shot black and white on white background.
Such stunning work.
I’d say that those are two great ones to start with.
Alright! Avedon and Schoeller - I can certainly think of worse people to go start a journey with. Thank you so much for taking time with me today!
Hey no problem! It’s been fun to talk to you.
There are many more fascinating portraits awaiting you over on the project site, and every one of them is worth your time!
See them all at:
Our friendly neighborhood @LebedevRI pointed out to me a little while ago that we had reached some nice milestones for https://raw.pixls.us.
Not surprisingly I had spaced out and not written anything about it (or really any sort of social posts). Bad Pat!
For anyone not familiar with RPU, a quick recap (we had previously written about raw.pixls.us earlier this year).
There used to be a website for housing a repository of raw files for as many digital cameras as possible called rawsamples.ch.
It was created by Jakob Rohrbach and had been running since March of 2007.
Back in 2016 the site was hit with a SQL injection attack that left the Joomla database corrupted (in a teachable moment, the site also didn’t have a database backup).
With the rawsamples.ch site down, @LebedevRI and @andabata worked to get a replacement option in-place and working: https://raw.pixls.us!
We grabbed all the files we could salvage from rawsamples.ch and @andabata setup the new page.
We’ve had a slowly growing response as folks have filled in gaps for camera models we still don’t have.
For reference, we currently have
unique cameras, and
unique samples.
We have many raw samples that were not licensed as freely as we would like.
Ideally we are looking for images that have been released Creative Commons Zero (CC0).
This list is all samples we already have that are not licensed CC0, so if you happen to
have one of the cameras listed below please consider uploading some new samples for us!
Canon IXUS900Ti
Canon PowerShot A550
Canon PowerShot A570 IS
Canon PowerShot A610
Canon PowerShot A620
Canon PowerShot A630
Canon Powershot A650
Canon PowerShot A710 IS
Canon PowerShot G7
Canon PowerShot S2 IS
Canon PowerShot S5 IS
Canon PowerShot SD750
Canon Powershot SX110IS
Canon EOS 10D
Canon EOS 1200D
Canon EOS-1D
Canon EOS-1D Mark II
Canon EOS-1D Mark III
Canon EOS-1D Mark II N
Canon EOS-1D Mark IV
Canon EOS-1Ds
Canon EOS-1Ds Mark II
Canon EOS-1Ds Mark III
Canon EOS-1D X
Canon EOS 300D
Canon EOS 30D
Canon EOS 400D
Canon EOS 40D
Canon EOS 760D
Canon EOS D2000C
Canon EOS D60
Canon EOS Digital Rebel XS
Canon EOS M
Canon EOS Rebel T3
Canon EOS Rebel T6i
Canon PowerShot A3200 IS
Canon Powershot A720 IS
Canon PowerShot G10
Canon PowerShot G11
Canon PowerShot G12
Canon PowerShot G15
Canon PowerShot G1
Canon PowerShot G1 X Mark II
Canon PowerShot G2
Canon PowerShot G3
Canon PowerShot G5
Canon PowerShot G5 X
Canon PowerShot G6
Canon PowerShot Pro1
Canon PowerShot Pro70
Canon PowerShot S30
Canon PowerShot S40
Canon PowerShot S45
Canon PowerShot S50
Canon PowerShot S60
Canon PowerShot S70
Canon PowerShot S90
Canon PowerShot SD450
Canon Powershot SX110IS
Canon PowerShot SX130 IS
Canon PowerShot SX1 IS
Canon PowerShot SX50 HS
Canon PowerShot SX510 HS
Canon PowerShot SX60 HS
Canon Poweshot S3IS
Epson R-D1
Fujifilm FinePix E550
Fujifilm FinePix E900
Fujifilm FinePix F600EXR
Fujifilm FinePix F700
Fujifilm FinePix F900EXR
Fujifilm FinePix HS10 HS11
Fujifilm FinePix HS20EXR
Fujifilm FinePix S200EXR
Fujifilm FinePix S2Pro
Fujifilm FinePix S3Pro
Fujifilm FinePix S5000
Fujifilm FinePix S5600
Fujifilm FinePix S6500fd
Fujifilm FinePix X100
Fujifilm X100S
Fujifilm X-A2
Fujifilm XQ1
Hasselblad CF132
Hasselblad CFV
Hasselblad H3D
Kodak DC120
Kodak DC50
Kodak DCS460D
Kodak DCS560C
Kodak DCS Pro SLR/n
Kodak EOS DCS 1
Kodak Kodak C330
Kodak Kodak C603 / Kodak C643
Kodak Z1015 IS
Leaf Aptus 75
Leaf Leaf Aptus 22
Leica Leica Digilux 2
Leica Leica D-LUX 3
Leica M8
Leica M (Typ 240)
Leica V-LUX 1
Mamiya ZD
Minolta DiMAGE 7
Minolta DiMAGE 7Hi
Minolta DiMAGE 7i
Minolta DiMAGE A1
Minolta DiMAGE A200
Minolta DiMAGE A2
Minolta Dimage Z2
Minolta Dynax 5D
Minolta Dynax 7D
Minolta RD-175
Minolta RD-175
Nikon 1 S2
Nikon 1 V1
Nikon Coolpix P340
Nikon Coolpix P6000
Nikon Coolpix P7000
Nikon Coolpix P7100
Nikon D100
Nikon D1
Nikon D1X
Nikon D2X
Nikon D300S
Nikon D3
Nikon D3X
Nikon D40
Nikon D60
Nikon D70
Nikon D800
Nikon D80
Nikon D810
Nikon E5400
Nikon E5700
Nikon LS-5000
Nokia Lumia 1020
Olympus C5050Z
Olympus C5060WZ
Olympus C8080WZ
Olympus E-1
Olympus E-20
Olympus E-300
Olympus E-30
Olympus E-330
Olympus E-3
Olympus E-420
Olympus E-450
Olympus E-500
Olympus E-510
Olympus E-520
Olympus E-5
Olympus E-600
Olympus E-P1
Olympus E-P2
Olympus E-P3
Olympus E-PL5
Olympus SP350
Olympus SP500UZ
Olympus XZ-1
Panasonic DMC-FZ150
Panasonic DMC-FZ18
Panasonic DMC-FZ200
Panasonic DMC-FZ28
Panasonic DMC-FZ30
Panasonic DMC-FZ38
Panasonic DMC-FZ70
Panasonic DMC-FZ72
Panasonic DMC-FZ8
Panasonic DMC-G1
Panasonic DMC-G3
Panasonic DMC-GF3
Panasonic DMC-GF5
Panasonic DMC-GF7
Panasonic DMC-GH2
Panasonic DMC-GH3
Panasonic DMC-GH4
Panasonic DMC-GM1
Panasonic DMC-GX7
Panasonic DMC-L10
Panasonic DMC-L1
Panasonic DMC-LF1
Panasonic DMC-LX1
Panasonic DMC-LX2
Panasonic DMC-LX3
Panasonic DMC-LX5
Panasonic DMC-LX7
Panasonic DMC-TZ60
Panasonic DMC-TZ71
Pentax *ist D
Pentax *ist DL2
Pentax *ist DS
Pentax K100D Super
Pentax K10D
Pentax K20D
Pentax K-50
Pentax K-m
Pentax K-r
Pentax K-S1
Pentax Optio S4
Polaroid x530
Ricoh GR DIGITAL 2
Samsung EX2F
Samsung NX100
Samsung NX300
Samsung NX300M
Samsung NX500
Samsung WB2000
Sigma DP2 Quattro
Sigma DP1s
Sigma DP2 Merrill
Sigma SD10
Sigma SD14
Sigma SD9
Sony DSC-R1
Sony DSC-RX100
Sony DSC-RX100M2
Sony DSC-RX100M3
Sony DSC-RX100M4
Sony DSC-RX10
Sony DSC-RX10M2
Sony DSLR-A100
Sony DSLR-A200
Sony DSLR-A300
Sony DSLR-A330
Sony DSLR-A350
Sony DSLR-A550
Sony DSLR-A580
Sony DSLR-A700
Sony DSLR-A850
Sony DSLR-A900
Sony NEX-3
Sony NEX-5R
Sony NEX-7
Sony SLT-A35
Sony SLT-A58
Sony SLT-A77
Sony SLT-A99
We are really working hard to make sure we are a good resource of freely available raw samples for all Free Software imaging projects to use.
Thank you so much for helping out if you can!
The IMAGE team of the research laboratory GREYC in Caen/France is pleased to announce the release of a new major version (numbered 2.0) of its project G’MIC: a generic, extensible, and open source framework for image processing.
Here, we present the main advances made in the software since our last article.
The new features presented here include the work carried out over the last twelve months (versions 2.0.0 and 1.7.x, for _x_ varying from _2_ to _9_).
G’MIC is an open-source project started in August 2008, by the IMAGE team.
This French research team specializes in the fields of algorithms and mathematics for image processing.
G’MIC is distributed under the CeCILL license (which is GPL compatible) and is available for multiple platforms (GNU/Linux, MacOS and Windows).
It provides a variety of user interfaces for manipulating generic image data, that is to say, _2D_ or _3D_ multispectral images (or sequences) with floating-point pixel values. This includes, of course, “classic” color images.
Fig.1.1: Logo of the G’MIC project, an open-source framework for image processing, and its mascot Gmicky.
The popularity of G’MIC mostly comes from the plug-in it provides for GIMP (since 2009).
To date, there are more than 480 different filters and effects to apply to your images, which considerably enlarges the list of image processing filters
available by default in GIMP.
G’MIC also provides a powerful and autonomous command-line interface, which is complementary
to the CLI tools you can find in the famous ImageMagick or GraphicsMagick projects.
There is also a web service G’MIC Online, allowing to apply image processing effects directly from a browser.
Other (but less well known) G’MIC-based interfaces exist: a webcam streaming tool ZArt,
a plug-in for Krita,
a subset of filters available in Photoflow,
Blender or Natron…
All these interfaces are based on the CImg and libgmic libraries, that are portable,
thread-safe and multi-threaded, via the use of OpenMP.
G’MIC has more than 950 different and configurable processing functions, for a library of only 6.5Mio,
representing a bit more than 180 kloc.
The processing functions cover a wide spectrum of the image processing field, offering algorithms for geometric manipulations, colorimetric changes,
image filtering (denoising and detail enhancement by spectral, variational, non-local methods, etc.), motion estimation and registration,
display of primitives (_2D_ or _3D_ mesh objects), edge detection, object segmentation, artistic rendering, etc.
It is therefore a very generic tool for various uses, useful on the one hand for converting, visualizing and exploring image data,
and on the other hand for designing complex image processing pipelines and algorithms
(see these project slides for details).
2. A new versatile interface, based on Qt
One of the major new features of this version 2.0 is the re-implementation of the plug-in code, from scratch.
The repository G’MIC-Qt developed by Sébastien (an experienced member of
the team) is a _Qt_-based version of the plug-in interface, being as independent as possible of the widget API provided by GIMP.
Fig.2.1: Overview of version 2.0 of the G’MIC-Qt plug-in running for GIMP.
This has several interesting consequences:
The plug-in uses its own widgets (in _Qt_) which makes it possible to have a more flexible and customizable interface than with the GTK widgets
used by the GIMP plug-in API: for instance, the preview window becomes resizable at will, manages zooming by mouse wheel, and can be freely moved
to the left or to the right. A filter search engine by keywords has been added, as well as the possibility of choosing between a light
or dark theme. The management of favorite filters has been also improved and the interface even offers a new mode for setting the visibility of the filters.
Interface personalization is now a reality.
The plug-in also defines its own API, which is used to facilitate its integration in third party software (other than GIMP).
In practice, a software developer has to write a single file host_software.cpp implementing the functions of the API to make the link between the plug-in
and the host application. Currently, the file host_gimp.cpp does this for GIMP as a host.
But there is now also a stand-alone version available (file host_none.cpp that runs
this _Qt_ interface in solo mode, from a shell (with command gmic_qt).
Boudewijn Rempt, project manager and developer of the marvelous painting software Krita,
has also started writing such a file host_krita.cpp to make this “new generation” plug-in
communicate with Krita. In the long term, this should replace the previous G’MIC plug-in implementation they made (currently distributed with Krita),
which is aging and poses maintenance problems for developers.
Minimizing the integration effort for developers, sharing the G’MIC plug-in code between different applications, and offering a user interface that is
as comfortable as possible, have been the main objectives of this complete redesign. As you can imagine, this rewriting required a long and sustained effort,
and we can only hope that this will raise interest among other software developers, where having a consistent set of image processing filters
could be useful (a file host_blender.cpp available soon ? We can dream!). The animation below illustrates some of the features
offered by this new _Qt_-based interface.
Fig.2.2: The new G’MIC-Qt interface in action.
Note that the old plug-in code written in GTK was updated also to work with the new version 2.0 of G’MIC,
but has fewer features and probably will not evolve anymore in the future, unlike the _Qt_ version.
3. Easing the work of cartoonists…
One of G’MIC’s purposes is to offer more filters and functions to process images.
And that is precisely something where we have not relaxed our efforts, despite the number of filters already available in the previous versions!
In particular, this version comes with new and improved filters to ease the colorization of line-art. Indeed, we had the chance to host the artist
David Revoy for a few days at the lab. David is well known to lovers of art and free software by his multiple contributions
in these fields (in particular, his web comic Pepper & Carrot is a must-read!).
In collaboration with David, we worked on the design of an original automatic line-art coloring filter, named
Smart Coloring.
Fig.3.1: Use of the “Colorize line-art [smart coloring]“ filter in G’MIC.
When drawing comics, the colorization of line-art is carried out in two successive steps:
The original drawing in gray levels (Fig.3.2.[1]) is first pre-colored with solid areas, i.e. by assigning a unique color to each region or distinct object
in the drawing (Fig.3.2.[3]). In a second step, the colourist reworks this pre-coloring, adding shadows, lights and modifying the colorimetric ambiance,
in order to obtain the final colorization result (Fig.3.2.[4]).
Practically, flat coloring results in the creation of a new layer that contains only piecewise constant color zones, thus forming a colored partition of the plane.
This layer is then merged with the original line-art to get the colored rendering (merging both in multiplication mode, typically).
Fig.3.2: The different steps of a line-art coloring process (source: David Revoy).
Artists admit it themselves: flat coloring is a long and tedious process, requiring patience and precision.
Classical tools available in digital painting or image editing software do not make this task easy.
For example, even most filling tools (bucket fill) do not handle discontinuities in drawn lines very well (Fig.3.3.a),
and even worse when lines are anti-aliased.
It is then common for the artist to perform flat coloring by painting the colors manually with a brush on a separate layer (Fig.3.3.b),
with all the precision problems that this supposes (especially around the contour lines, Fig.3.3.c).
See also this link for more details.
Fig.3.3: Classical problems encountered when doing flat coloring (source: David Revoy).
It may even happen that the artist decides to explicitly constrain his style of drawing, for instance by using aliased brushes in a higher resolution image,
and/or by forcing himself to draw only connected contours, in order to ease the flat colorization work that has to be done afterwards.
The Smart Coloring filter developed in version 2.0 of G’MIC allows to automatically pre-color an input line-art without much work.
First, it analyses the local geometry of the contour lines (estimating their normals and curvatures).
Second, it (virtually) does contour auto-completion using spline curves.
This virtual closure allows then the algorithm to fill objects with disconnected contour plots.
Besides, this filter has the advantage of being quite fast to compute and gives coloring results of similar quality to more expensive optimization techniques
used in some proprietary software.
This algorithm smoothly manages anti-aliased contour lines, and has two modes of colorization:
by random colors (Fig.3.2.[2] and Fig.3.4) or guided by color markers placed beforehand by the user (Fig.3.5).
Fig.3.4: Using the G’MIC “Smart Coloring“ filter in random color mode, for line-art colorization (source: David Revoy).
In “random” mode, the filter generates a piecewise constant layer that is very easy to recolor with correct hues afterwards.
This layer indeed contains only flat color regions, and the classic bucket fill tool is effective here to quickly reassign a coherent color
to each existing region synthesized by the algorithm.
In the user-guided markers mode, color spots placed by the user are extrapolated in such a way that it respects the geometry of the original drawing as much as possible,
taking into account the discontinuities in the pencil lines, as this is clearly illustrated by the figure below:
Fig.3.5: Using the G’MIC “Smart Coloring“ filter in user-guided color markers mode, for line-art colorization (source: David Revoy).
This innovative, flat coloring algorithm has been pre-published on HAL (in French):
A semi-guided high-performance flat coloring algorithm for line-arts.
Curious people could find there all the technical details of the algorithm used.
The recurring discussions we had with David Revoy on the development of this filter enabled us to improve the algorithm step by step,
until it became really usable in production. This method has been used successfully (and therefore validated) for the pre-colorization
of the whole episode 22 of the webcomic Pepper & Carrot.
The wisest of you know that G’MIC already had a line-art colorization filter!
True, but unfortunately it did not manage disconnected contour lines so well (such as the example in Fig.3.5),
and could then require the user to place a large number of color spots to guide the algorithm properly.
In practice, the performance of the new flat coloring algorithm is far superior.
And since it does not see any objection to anti-aliased lines, why not create ones?
That is the purpose of another new filter “Repair / Smooth [antialias]“ able to add anti-aliasing
to lines in cartoons that would have been originally drawn with aliased brushes.
Fig.3.6: Filter “Smooth [antialias]“ smooths contours to reduce aliasing effect in cartoons (source: David Revoy).
4. …Not to forget the photographers!
“Colorizing drawings is nice, but my photos are already in color!”, kindly remarks the impatient photographer. Don’t be cruel!
Many new filters related to the transformation and enhancement of photos have been also added in G’MIC2.0. Let’s take a quick look of what we have.
CLUTs (Color Lookup Tables) are functions for colorimetric transformations defined in the RGB cube:
for each color (Rs,Gs,Bs) of a source image _Is_, a CLUT assigns a new color (Rd,Gd,Bd) transferred to the destination image _Id_
at the same position. These processing functions may be truly arbitrary, thus very different effects can be obtained according to the different CLUTs used.
Photographers are therefore generally fond of them (especially since these CLUTs are also a good way to simulate the color rendering of certain old films).
In practice, a CLUT is stored as a _3D_ volumetric color image (possibly “unwrapped” along the z = B axis to get
a _2D_ version).
This may quickly become cumbersome when several hundreds of CLUTs have to be managed.
Fortunately, G’MIC has a quite efficient CLUT compression algorithm (already mentioned in a previous article),
which has been improved version after version. So it was finally in a quite relax atmosphere that we added more than 60 new CLUT-based transformations in G’MIC,
for a total of 359CLUTs usable, all stored in a data file that does exceed 1.2 Mio.
By the way, let us thank
Pat David,
Marc Roovers and
Stuart Sowerby for their contributions to these color transformations.
Fig.4.1.1: Some of the new CLUT-based transformations available in G’MIC (source: Pat David).
But what if you already have your own CLUT files and want to use them in GIMP? No problem !
The new filter “Film emulation / User-defined“ allows to apply such transformations from CLUT data file, with a partial support of files with
extension .cube (CLUT file format proposed
by Adobe, and encoded in ASCIIo_O!).
And for the most demanding, who are not satisfied with the existing pre-defined CLUTs,
we have designed a very versatile filter “Colors / Customize CLUT“, that allows the user to build their own custom CLUTfrom scratch:
the user places colored keypoints in the RGB color cube and these markers are interpolated in _3D_
(according to a Delaunay triangulation)
in order to rebuild a complete CLUT, i.e. a dense function in RGB.
This is extremely flexible, as in the example below, where the filter has been used to change the colorimetric ambiance of a landscape,
mainly altering the color of the sky.
Of course, the synthesized CLUT can be saved as a file and reused later for other photographs,
or even in other software supporting this type of color transformations
(for example RawTherapee or
Darktable).
Fig.4.1.2: Filter “Customize CLUT“ used to design a custom color transform in the RGB cube.
Fig.4.1.3: Result of the custom colorimetric transformation applied to a landscape.
To stay in the field of color manipulation, let us also mention the appearance of the filter “Colors / Retro fade“ which creates a “retro” rendering of
an image with grain generated by successive averages of random quantizations of an input color image.
Fig.4.1.4: Filter “Retro fade“ in the G’MIC plug-in.
Many photographers are looking for ways to process their digital photographs so as to bring out the smallest details of their images,
sometimes even to exaggeration, and we can find some of them in the pixls.us forum.
Looking at how they perform allowed us to add several new filters for detail and contrast enhancement in G’MIC.
In particular, we can mention the filters “Artistic / Illustration look“ and “Artistic / Highlight bloom“, which are direct re-implementations of the tutorials
and scripts written by Sébastien Guyader as well as the filter
“Light & Shadows / Pop shadows“ suggested by Morgan Hardwood.
Being immersed in such a community of photographers and cool guys always gives opportunities to implement interesting new effects!
Fig.4.2.1: Filters “Illustration look“ and “Highlight bloom“ applied to a portrait image.
In the same vein, G’MIC gets its own implementation of the Multi-scale Retinex algorithm,
something that was already present in GIMP, but here enriched with additional controls
to improve the luminance consistency in images.
Fig.4.2.2: Filter “Retinex“ for improving luminance consistency.
Our friend and great contributor to G’MIC, Jérome Boulanger,
also implemented and added a dehazing filter “Details / Dcp dehaze“ to attenuate the fog effect in photographs, based on the
Dark Channel Prior algorithm.
Setting the parameters of this filter is kinda hard, but the filter gives sometimes spectacular results.
Fig.4.2.3: Filter “DCP Dehaze“ to attenuate the fog effect.
And to finish with this subsection, let us mention the implementation in G’MIC of the
Rolling Guidance algorithm, a method to simplify images that has become a
key step used in many newly added filters. This was especially the case in this quite cool filter for image sharpening,
available in “Details / Sharpen [texture]“.
This filter works in two successive steps:
First, the image is separated into a texture component + a color component, then the details of the texture component only are enhanced before
the image is recomposed. This approach makes it possible to highlight all the small details of an image, while minimizing the undesired
halos near the contours, a recurring problem happening with more classical sharpening methods (such as the well known
Unsharp Mask).
Fig.4.2.4: The “Sharpen [texture]“” filter shown for two different enhancement amplitudes.
As you may know, a lot of photograph retouching techniques require the creation of one or several “masks”, that is,
the isolation of specific areas of an image to receive differentiated processing.
For example, the very common technique of
luminosity masks is a way to treat differently shadows and highlights
in an image. G’MIC2.0 introduces a new interesting filter “Colors / Color mask [interactive]“ that implements a relatively sophisticated algorithm
(albeit computationally demanding) to help creating complex masks. This filter asks the user to hover the mouse over a few pixels that are representative of
the region to keep. The algorithm learns in real time the corresponding set of colors or luminosities and deduces then the set of pixels that
composes the mask for the whole image (using Principal Component Analysis on the RGB samples).
Once the mask has been generated by the filter, the user can easily modify the corresponding pixels with any type of processing. The example below illustrates the use
of this filter to drastically change the color of a car
Fig.4.3.1: Changing the color of a car, using the filter “Color mask [interactive]“.
It takes no more than a minute and a half to complete, as shown in the video below:
Fig.4.3.2: Changing the color of a car, using filter “Color mask [interactive]“ (video tutorial).
This other video exposes an identical technique to change the color of the sky in a landscape.
Fig.4.3.3: Changing the color of the sky in a landscape, using filter “Color mask [interactive]“ (video tutorial).
5. And for the others…
Since illustrators and photographers are now satisfied, let’s move on to some more exotic filters, recently added to G’MIC,
with interesting outcomes!
Have you ever wondered how to easily estimate the average or median frame of a sequence of input images?
The libre aficionadoPat David, creator of the site pixls.us often asked the question.
First of all when he tried to denoise images by combining several shots of a same scene.
Then he wanted to simulate a longer exposure time by averaging photographs taken successively. And finally, calculating averages of various kind of images for artistic purposes (for example, frames of
music video clips,
covers of Playboy magazine or
celebrity portraits).
Hence, with his cooperation, we added new commands -median_files,-median_videos, -average_files and-average_videos to compute all these image features very easily
using the CLI tool gmic. The example below shows the results obtained from a sub-sequence of the
« Big Buck Bunny“ video. We have simply invoked the following commands from the Bash shell:
Fig.5.1.1: Sequence in the « Big Buck Bunny“ video, directed by the Blender foundation.
Fig.5.1.2: Result: Average image of the « Big Buck Bunny“ sequence above.
Fig.5.1.3: Result: Median image of the « Big Buck Bunny“ sequence above.
And to stay in the field of video processing, we can also mention the addition of the commands -morph_files and -morph_video that render temporal interpolations
of video sequences, taking the estimated intra-frame object motion into account, thanks to a quite smart variational and multi-scale estimation algorithm.
The video below illustrates the rendering difference obtained for the retiming of a sequence using temporal interpolation,
with (right) and without (left) motion estimation.
Fig.5.1.4: Video retiming using G’MIC temporal morphing technique.
Those who like to mistreat their images aggressively will be delighted to learn that a bunch of new image deformation and degradation effects
have appeared in G’MIC.
First of all, the filter “Deformations / Conformal maps“ allows one to distort an image using conformal maps.
These deformations have the property of preserving the angles locally, and are most often expressed as functions of complex numbers.
In addition to playing with predefined deformations, this filter allows budding mathematicians to experiment with their own complex formulas.
Fig.5.2.1: Filter “Conformal maps“ applying a angle-preserving transformation to the image of Mona Lisa.
Fans of Glitch Art may also be concerned by several new filters whose rendering
look like image encoding or compression artifacts. The effect “Degradations / Pixel sort“ sorts the pixels of a picture by row or by
column according to different criteria and to possibly masked regions, as initially described on
this page.
Fig.5.2.2: Filter “Pixel sort“ for rendering a kind of “Glitch Art” effect.
Degradations / /Pixel sort also has two little brothers, filters “Degradations / Flip & rotate blocks“ and “Degradations / Warp by intensity“.
The first divides an image into blocks and allows to rotate or mirror them, potentially only for certain color characteristics
(like hue or saturation, for instance).
Fig.5.2.3: Filter “Flip & rotate blocks“ applied to the hue only to obtain a “Glitch Art” effect.
The second locally deforms an image with more or less amplitude, according to its local geometry.
Here again, this can lead to the generation of very strange images.
Fig.5.2.4: Filter “Warp by intensity“ applied to the image of Mona Lisa (poor Mona!).
It should be noted that these filters were largely inspired by the
Polyglitch plug-in,
available for Paint.NET, and have been implemented after a suggestion from a friendly user
(yes, yes, we try to listen to our most friendly users!).
What else do we have in store? A new image abstraction filter, Artistic / Sharp abstract, based on the Rolling Guidance algorithm mentioned before.
This filter applies contour-preserving smoothing to an image, and its main consequence is to remove the texture.
The figure below illustrates its use to generate several levels of abstraction of the same input image, at different smoothing scales.
Fig.5.3.1: Creating abstractions of an image via the filter “Sharp abstract“.
In the same vein, G’MIC also gets a filter Artistic / Posterize which degrades an image to simulate posterization.
Unlike the filter with same name available by default in GIMP (which mainly tries to reduce the number of colors, i.e. do color quantization),
our version adds spatial simplification and filtering to approach a little more the rendering of old posters.
Fig.5.3.2: Filter “Posterize“ of G’MIC, compared to the filter with same name available by default in GIMP.
If you still want more (and in this case one could say you are damn greedy!), we will end this section by discussing
some of the new, but unclassifiable filters.
We start with the filter “Artistic / Diffusion tensors“, which displays a field of diffusion tensors, calculated from the structure tensors of an image
(structure tensors are symmetric and positive definite matrices, classically used for estimating the local image geometry).
To be quite honest, this feature had not been originally developed for an artistic purpose, but users of the plug-in came across it by chance and asked
to make a GIMP filter from it. And yes, this is finally quite pretty, isn’t it?
Fig.5.4.1: Filter “Diffusion Tensors“ filter and its multitude of colored ellipses.
From a technical point of view, this filter was actually an opportunity to introduce new drawing features into the G’MIC mathematical evaluator,
and it has now become quite easy to develop G’MIC scripts for rendering custom visualizations of various image data.
This is what has been done for instance, with the command -display_quiver reimplemented from scratch, and which allows to generate this type of rendering:
Fig. 5.4.2: Rendering vector fields with the G’MIC command -display_quiver.
For lovers of textures, we can mention the apparition of two new fun effects: First, the “Patterns / Camouflage“ filter. As its name suggests,
this filter produces a military camouflage texture.
Fig. 5.4.3: Filter “Camouflage“, to be printed on your T-shirts to go unnoticed in parties!
Second, the filter “Patterns / Crystal background“ overlays several randomly colored polygons in order to synthesize a texture that vaguely
looks like a crystal seen under a microscope. Pretty useful to quickly render colored image backgrounds.
Fig.5.4.4: Filter “Crystal background“ in action.
And to end this long overview of new G’MIC filters developed since last year, let us mention “Rendering / Barnsley fern“.
This filter renders the well-known Barnsley fern fractal.
For curious people, note that the related algorithm is available on Rosetta Code,
with even a code version written in the G’MIC script language, namely:
# Put this into a new file 'fern.gmic' and invoke it from the command line, like this:
# $ gmic fern.gmic -barnsley_fern
barnsley_fern :
  1024,2048
  -skip {"
      f1 = [ 0,0,0,0.16 ];           g1 = [ 0,0 ];
      f2 = [ 0.2,-0.26,0.23,0.22 ];  g2 = [ 0,1.6 ];
      f3 = [ -0.15,0.28,0.26,0.24 ]; g3 = [ 0,0.44 ];
      f4 = [ 0.85,0.04,-0.04,0.85 ]; g4 = [ 0,1.6 ];
      xy = [ 0,0 ];
      for (n = 0, n<2e6, ++n,
        r = u(100);
        xy = r<=1?((f1**xy)+=g1):
             r<=8?((f2**xy)+=g2):
             r<=15?((f3**xy)+=g3):
                   ((f4**xy)+=g4);
        uv = xy*200 + [ 480,0 ];
        uv[1] = h - uv[1];
        I(uv) = 0.7*I(uv) + 0.3*255;
      )"}
  -r 40%,40%,1,1,2
And here is the rendering generated by this function:
Fig.5.4.5: Fractal “Barnsley fern“, rendered by G’MIC.
6. Overall project improvements
All filters presented throughout this article constitute only the visible part of the G’MIC iceberg.
They are in fact the result of many developments and improvements made “under the hood”, i.e., directly on the code of the
G’MICscript language interpreter.
This interpreter defines the basic language used to write all G’MIC filters and commands available to users.
Over the past year, a lot of work has been done to improve the performances and the capabilities of this interpreter:
The mathematical expressions evaluator has been considerably enriched and optimized, with more functions available
(especially for matrix calculus), the support of strings, the introduction of const variables for faster evaluation,
the ability to write variadic macros, to allocate dynamic buffers, and so on.
New optimizations have been also introduced in the CImg library, including the parallelization of new functions
(via the use of OpenMP). This C++ library provides the implementations of the “critical” image processing
algorithms and its optimization has a direct impact on the performance of G’MIC (in this respect, note that CImg is also released with a major version 2.0).
Compiling G’MIC on Windows now uses a more recent version of g++ (6.2 rather than 4.5), with the help of Sylvie Alexandre.
This has actually a huge impact on the performances of the compiled executables: some filters run up to 60 times faster than with the previous binaries
(this is the case for example, with the Deformations / Conformal Maps filter, discussed in section 5.2).
The support of large .tiff images (format BigTIFF, with files that can be larger than 4Gb)
is now enabled (read and write), as it is for 64-bit floating-point TIFF images
The 3D rendering engine built into G’MIC has also been slightly improved, with the support for bump mapping.
No filter currently uses this feature, but we never know, and prepare ourselves for the future!
Fig.6.1: Comparison of 3D textured rendering with (right) and without “Bump mapping” (left).
And as it is always good to relax after a hard day’s work, we added the game of Connect Four to G’MIC :).
It can be launched via the shell command $ gmic -x_connect4 or via the plug-in filter “Various / Games & demos / Connect-4“.
Note that it is even possible to play against the computer, which has a decent but not unbeatable skill
(the very simple _AI_ uses the Minimax algorithm with a two-level decision tree).
Fig.6.2: The game of “Connect Four“, as playable in G’MIC.
Finally, let us mention the undergoing redesign work of the G’MIC Online web service, with a
beta version already available for testing.
This re-development of the site, done by Christophe Couronne and Véronique Robert
(both members of the GREYC laboratory), has been designed to better adapt to mobile devices.
The first tests are more than encouraging. Feel free to experiment and share your impressions!
7. What to remember?
First, the version 2.0 of G’MIC is clearly an important step in the project life, and the recent improvements
are promising for the future developments.
It seems that the number of users are increasing (and they are apparently satisfied!), and we hope that this will encourage open-source software developers
to integrate our new G’MIC-Qt interface as a plug-in for their own software.
In particular, we are hopeful to see the new G’MIC in action under Krita soon, this would be already a great step!
Second, G’MIC continues to be an active project, and evolve through meetings and discussions with members of artists and photographers communities
(particularly those who populate the forums and IRC of pixls.us and GimpChat).
You will likely able to find us there if you need more information, or just if you want to discuss things related to (open-source) image processing.
And while waiting for a future hypothetical article about a future release of G’MIC, you can always follow the day-after-day progress of the project via
our Twitter feed.
Until then, long live open-source image processing!
Credit: Unless explicitly stated, the various non-synthetic images that illustrate this post come from Pixabay.
I was idling in our IRC chat room earlier when @Morgan_Hardwood wished us all a “Happy Discuss Anniversary”.
Wouldn’t you know it, another year slipped right by!
(Surely there’s no way it could already be a year since the last birthday post?
Where does the time go?)
We’ve had a bunch of neat things happen in the community over the past year!
Let’s look at some of the highlights.
I want to start with this topic because it’s the perfect opportunity to recognize some folks who have been supporting the community financially…
When I started all of this I decided that I definitely didn’t want ads to be on the site anywhere.
I had gotten enough donations from my old blog and GIMP tutorials that I could cover costs for a while entirely from those funds (I also re-did my personal blog recently and removed all ads from there as well).
I don’t like ads.
You don’t like ads.
We’re a big enough community that we can keep things going without having to bring those crappy things into our lives.
So to reiterate, we’re not going to run ads on the site.
We are hosting the main website on Stablehost, the forums (discuss) are on a VPS at Digital Ocean, and our file storage for discuss is out on Amazon S3(see below).
All told our costs are about $30 per month.
Not so bad!
Even so, we have had some folks who have donated to help us offset these costs and I want to take a moment to recognize their generosity and graciousness!
Dimitrios Psychogios has been a supporter of the site since the beginning.
This past year he covered (more than) our hosting costs for the entire year, and for that I am infinitely grateful (yes, I have infinite gratitude).
It also helps that based on his postings on G+ our musical tastes are very similarly aligned.
As soon as I get the supporters page up you’re going to the top of the list!
Thank you, Dimitrios, for your support of the community!
Jonas Wagner (@Jonas_Wagner) and McCap (@McCap) both donated this past year as well.
Which is doubly-awesome because they are both active in the community and have written some great content for everyone as well (@McCap is the author of the article A Masashi Wakui look with GIMP, and has been active in the community since the beginning as well).
Mica (@paperdigits) and Luka are both recurring donators which I am particularly grateful for.
It really helps for planning to know we have some recurring support like that.
I have a bunch of donations where the donators didn’t leave me a name to use for attribution and I don’t want to just assume it’s ok. If you know you donated and see your first name in the list below (and are ok with me using your full name and a link if you want) then please let me know and I’ll update this post (and for the donators page later).
These are the folks who are really making a difference by taking the time and being gracious enough to support us.
Even if you don’t want your full name out here, I know who you are and am very, very grateful and humbled by your generosity and kindness. Thank you all so much!
Marc W. (you rock!)
Ulrich P.
Luc V.
Ben E.
Keith A.
Philipp H.
Christian M.
Matthieu M.
Christian M.
Christian K.
Maria J.
Kevin P.
Maciej D.
Christian K.
Egbert G.
Michael H.
Jörn H.
Boris H.
Norman S.
David O.
Walfrido C.
Philip S.
David S.
Keith B.
Andrea V.
Stephan R.
David M.
Bastian H.
Chance J.
Luka S.
Nathanael S.
Sven K.
Pepijn V.
Benjamin W.
Jörg W.
Patrick B.
Joop K.
Alain V.
Egor S.
Samuel S.
On that note.
If anyone wanted to join the folks above in supporting what we’re up to, we have a page specifically for that:
I wasn’t able to attend LGM this year, being held down in Rio (but the GIMP team did).
That’s not to say that we didn’t have folks from the community there: Farid (@frd) from Estúdio Gunga was there!
I was able to help coordinate a presentation by Robin Mills (@clanmills) about the state (and future) of Exiv2.
They’re looking for a maintainer to join the project, as Robin will be stepping down at the end of the year for studies.
If you think you’d be interested in helping out, please get in touch with Robin on the forums and let him know!
I also put together (quickly) a few slides on the community that were included in the “State of the Libre Graphics” presentation that kicks off the meeting (presented this year by GIMPer Simon Budig):
This was just a short overview of the community and I think it makes sense to include it here was well.
Since we stood the forum up two years ago we’ve seen about 3.2 million pageviews and have just under 1,400 users in the community.
Which is just awesome to me.
@LebedevRI was also going to be mad if I didn’t take the time to at least let folks know about raw.pixls.us, where we currently have 693 raw files across 477 cameras.
Please, take a moment to check raw.pixls.us and see if we are missing (or need better) files from a camera you may have, and get us samples for testing!
We set up raw.pixls.us so we can gather camera raw samples for regression testing of rawspeed as well to have a place for any other project that might need raw files to test with.
As we blogged about previously, the new site is also a replacement for the now defunct rawsamples.ch website.
Stop in and see if we’re missing a sample you can provide, or if you can provide a better (or better licensed) version for your camera.
We’re focusing specifically on CC0 contributions.
As I mentioned in my last blog post, we learned that the digiKam team was looking for a new webmaster through a post on discuss.
@Andrius posted a heads up on the digiKam 5.5.0 release in this thread.
Needless to say, less than a month or so later, @paperdigits had already finished up a nice new website for them!
This is something we’re really trying to help out the community with and are super glad to be able to help out the digiKam team with this.
The less time they have to worry about web infrastructure and security for it, the more time they can spend on awesome new features for their project and users.
Yes, we used a static site generator (Hugo in this case), and we were also able to move their commenting system to use discuss as its back-end!
This is the same way we’re doing comments for PIXLS.US right now (scroll to the bottom of this post).
They’ve got their own category on discuss for both general digiKam discussion as well as their linked comments from their website.
Speaking of using discourse as a commenting system…
We’ve been using discourse as our forum software from the beginning.
It’s a modern, open, and full-featured forum software that I think works incredibly well as a modern web application.
The ability to embed comments in a website that are part of the forum was one of the main reasons I went with it.
I didn’t want to expose users to unnecessary privacy concerns by embedding a third-party commenting system (cough, disqus, cough).
If I was going to go through the trouble of setting up a way to comment on things, I wanted to homogenize it with a full community-building effort.
This past year they (the discourse devs) added the ability to embed comments in multiple hosts (it was only one host when we first stood things up).
This means that we can now manage the comments for anyone else thay may need them!
Of course, building out a new website for digiKam meant that this was a perfect time to test things.
It all works beautifully, with one minor nitpick.
The ability to style the embedded comments was limited to a single style for all the places that they might be embedded.
This may be fine if all of the sites look similar, but if you visit www.digikam.org and compare it to here, you can see they are a little bit different…
(we’re on white, digikam.org is on a dark background).
We needed a way to isolate the styling on a per-host basis, which after much help from @darix (yet again :)) I was able to finally hack something together that worked and get it pushed upstream (and merged finally)!
When RawTherapee migrated their official forums over to pixls they brought something really fun with them: Play Raw.
They would share a single raw file amongst the community and then have everyone process and share their results (including their processing steps and associated .pp3 settings file).
If you haven’t seen it yet, we’ve had quite a few Play Raw posts over the past year with all sorts of wonderful images to practice on and share!
There are portraits, children, dogs, cats, landscapes, HDR, and phở!
There’s over 19 different raw files being shared right now, so come try your hand at processing (or even share a file of your own)!
We are a photography forum, so it only made sense that we made it as easy as possible for community members to upload and share images (raw files, and more).
It’s one of the things I love about discourse that it’s so easy to add these things to your posts (simply drag-and-drop into the post editor) and upload them.
While this is easy to do, it does mean that we have to store all of this data.
The VPS we use from Digital Ocean only has a 40GB SSD and it has to include all of the main forum running on it.
We did have a little space for a while, but to help alleviate the local storage as a possible problem down the line, I moved our file storage out to Amazon S3.
This means that we can upload all we want and won’t really hit a wall with actual available storage space.
It costs more each month than trying to store it all on local storage for the site, but then we don’t have to worry about expansion (or migration) later.
Plus our current upload size limit per file is 100MB!
As you can see, we’re only looking at about $5USD/month on average in storage and transfer costs for the site with Amazon.
We’re also averaging about $22usd/month in hosting costs with Digital Ocean, so we’re still only about $27/month in total hosting costs.
Maybe $30 if we include the hosting for the main website which is at Stablehost.
We’ve had an IRC room for a long time (longer than discuss I think), but I only just got around to including a link on the site for folks to be able to join through a nice web client (Kiwi IRC).
It was included as part of an oft-requested set of links to get back to various parts of the main site from the forums.
I also added these links in the menu for the site as well (the header links are hidden when on mobile, so this way you can still access the links from whatever device you’re using):
If you have your own IRC client then you can reach us on irc.freenode.net #pixls.us.
Come and join us in the chat room!
If you’re not there you are definitely missing out on a ton of stimulating conversation and enlightening discussions!
One of the goals we have here at PIXLS.US is to help Free Software projects however we can, and one of those ways is to focus on things that we can do well that might help make things easier for the projects.
It may not be much fun for project developers to deal with websites or community outreach necessarily.
This is something I think we can help with, and recently we had an opportunity to do just that with the awesome folks over at the photo management project digiKam.
As part of a post announcing the release of digiKam 5.5.0 on discuss. we learned that they were in need of a new webmaster, and they needed something soon to migrate away from Drupal 6 for security reasons.
They had a rudimentary Drupal 7 theme setup, but it was severely lacking (non-responsive and not adapted to the existing content).
The previous digiKam website, running on Drupal 6.
The new digiKam website! Great work Mica!
Mica (@paperdigits) reached out to Gilles Caulier and the digiKam community and offered our help, which they accepted!
At that point Mica gathered requirements from them and found in the end that a static website would be more than sufficient for their needs.
We coordinated with the KDE folks to get a git repo setup for the new website, and rolled up our sleeves to start building!
Mica chose to use the Hugo static-site generator to build the site with.
This was something new for us, but turned out to be quite fast and fun to work with (it generates the entire digiKam site in just about 5 seconds).
Coupled with a version of the Foundation 6 blog theme we were able to get a base site framework up and running fairly quickly.
We scraped all of the old site content to make sure that we could port everything as well as make sure we didn’t break any urls along the way.
We iterated some design stuff along the way, ported all of the old posts to markdown files, hacked at the theme a bit, and finally included comments that are now hosted on discuss.
What’s wild is that we managed to pull the entire thing together in about 6 weeks total (of part-time working on it).
The digiKam team seems happy with the results so far, and we’re looking forward to continue helping them by managing this infrastructure for them.
A big kudos to Mica for driving the new site and getting everything up and running.
This was really all due to his hard work and drive.
This is the same category that news posts from the website will post in, so feel free to drop in and say hello or share some neat things you may be working on with digiKam!
This years Libre Graphics Meeting (2017) is going to be held in the lovely city seen above, Rio de Janeiro, Brazil!
This is an important meeting for so many people in the Free/Libre art community as it’s one of the only times they have an opportunity to meet face to face.
We’ve had some folks attending the past LGM’s (Leipzig and London) and it’s a wonderful opportunity to spend some time with friends. (Also, @frd from the community will be there!)
The GIMP team will be in attendance this year. I happen to have a fondness for them so I’m asking anyone reading this to please head over and donate to the project.
That link is for the GNOME PayPal account, but there are other ways to donate as well.
This is one of the few times that the GIMP team gets a chance to meet in person.
They use the time to hack at GIMP and to manage internal business.
The time they get to spend together is invaluable to the project and by extension everyone that uses GIMP.
Just look at these faces!
Surely this (Brady) Bunch of folks is worth helping to get a better GIMP?
Left to right, top to bottom: Ville, Mitch, Øyvind, Simon, Liam, João, Aryeom, Jehan, Michael
Besides @frd I’m not sure who else from the community might be attending, so if I’ve missed you I apologize!
Please feel free to use this topic to communicate and coordinate if you’d like.
It appears that personally I’m on a biennial schedule with attending LGM - so I’m looking forward to next year to be able to catch up with everyone!

 Login
Login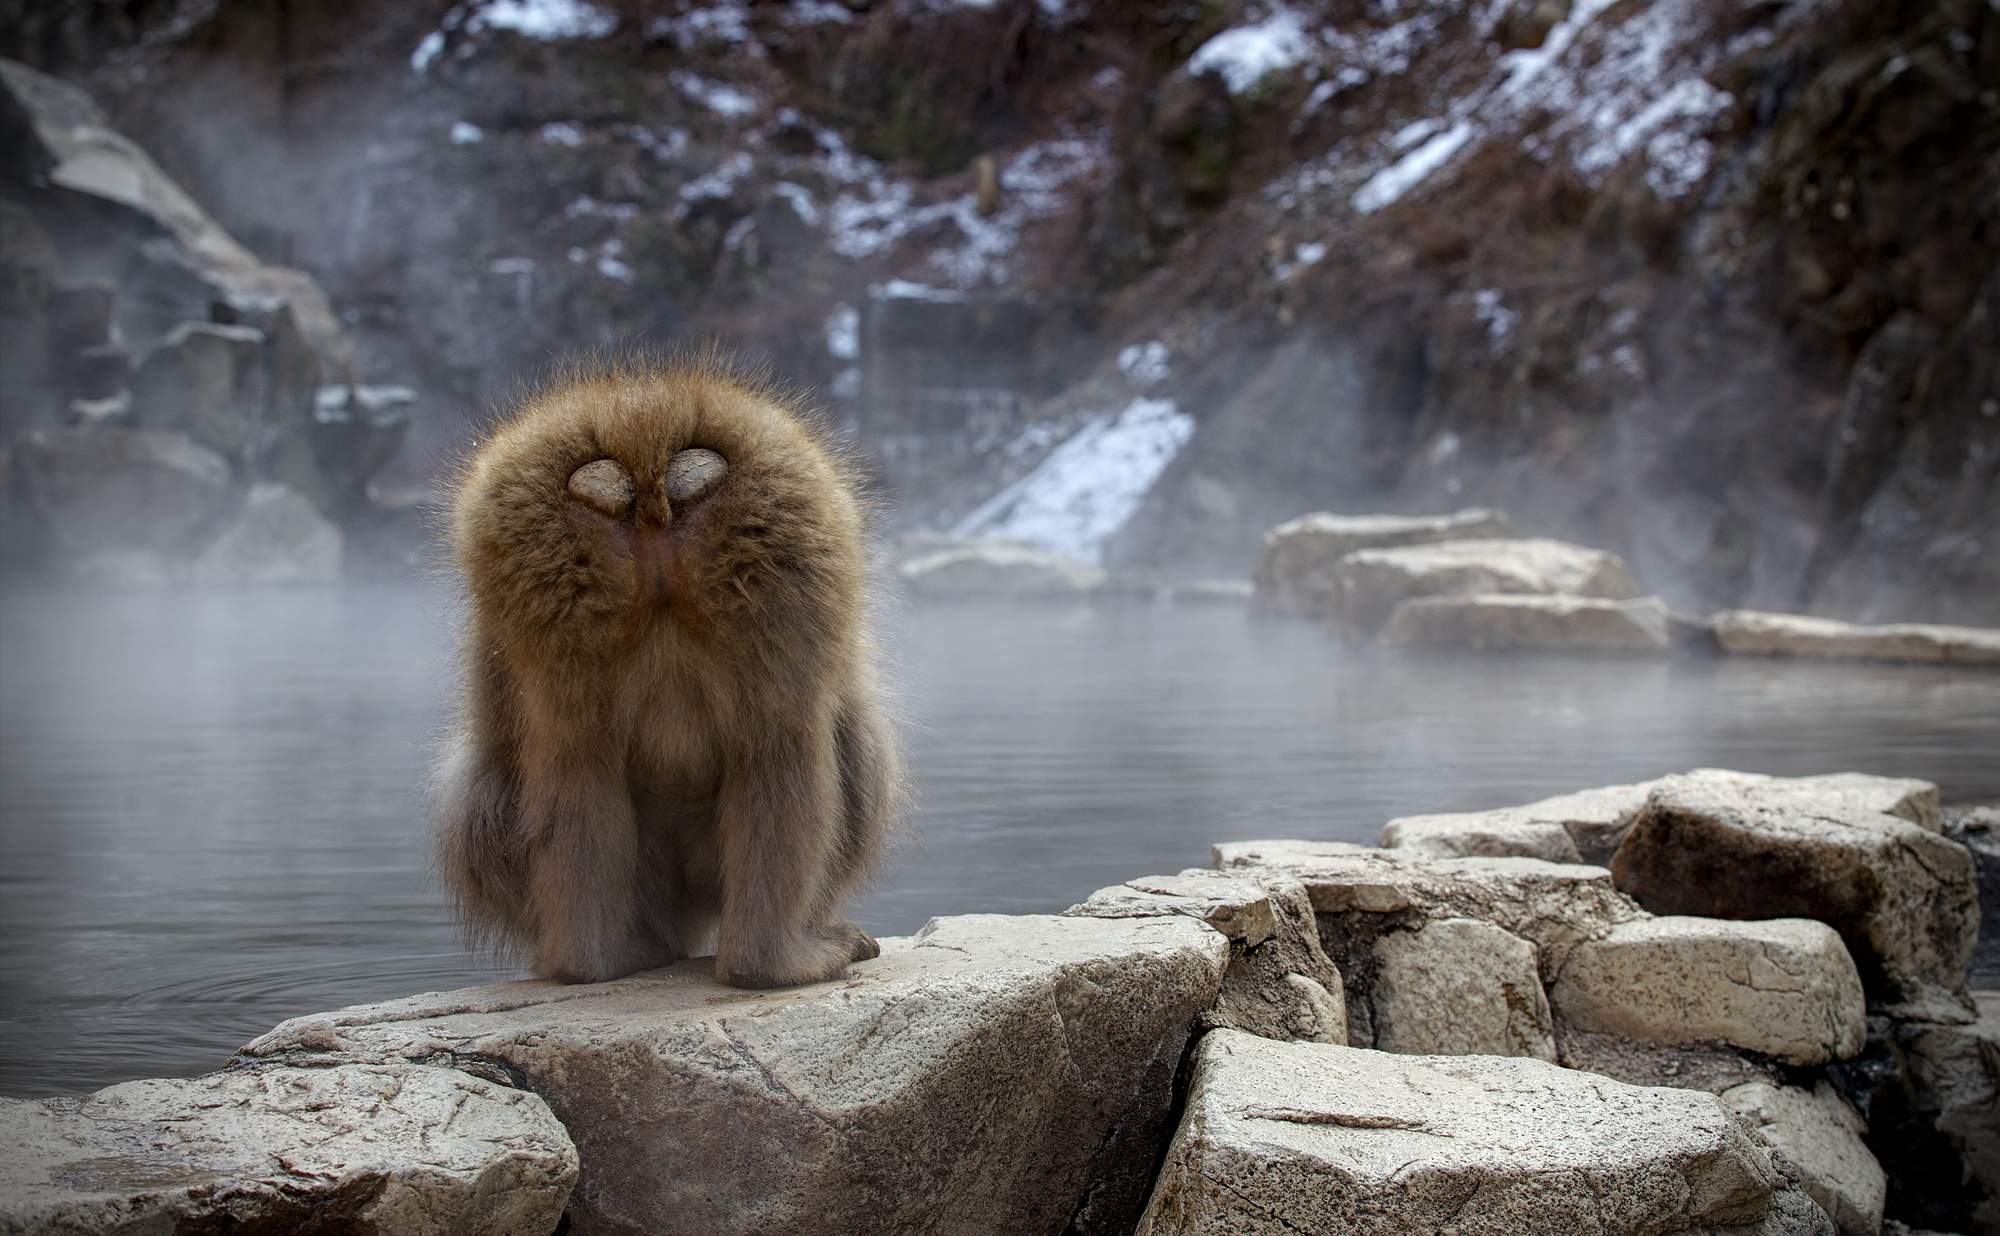
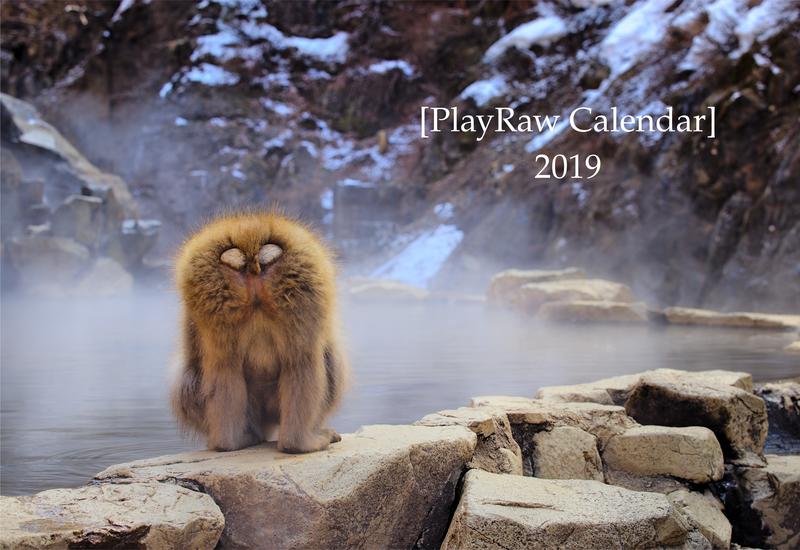
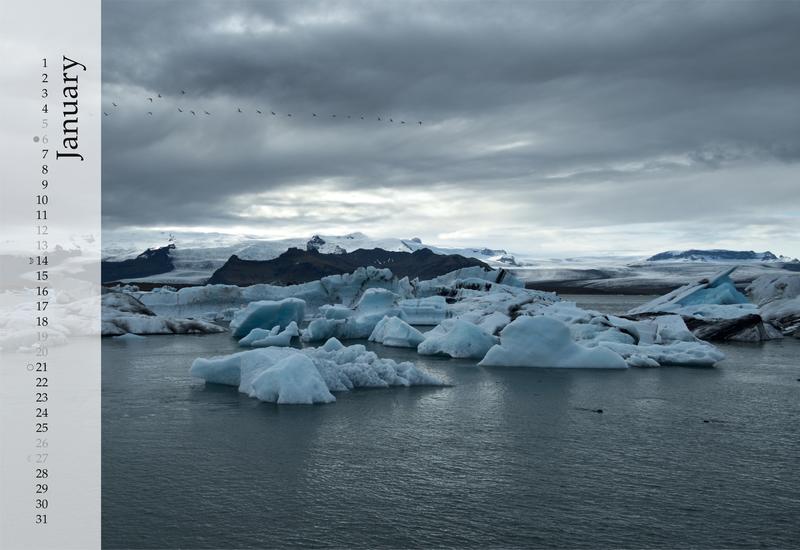
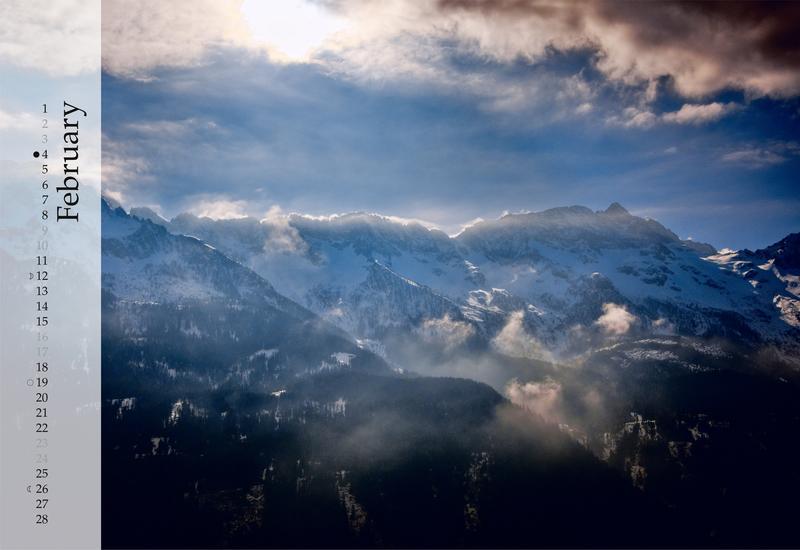
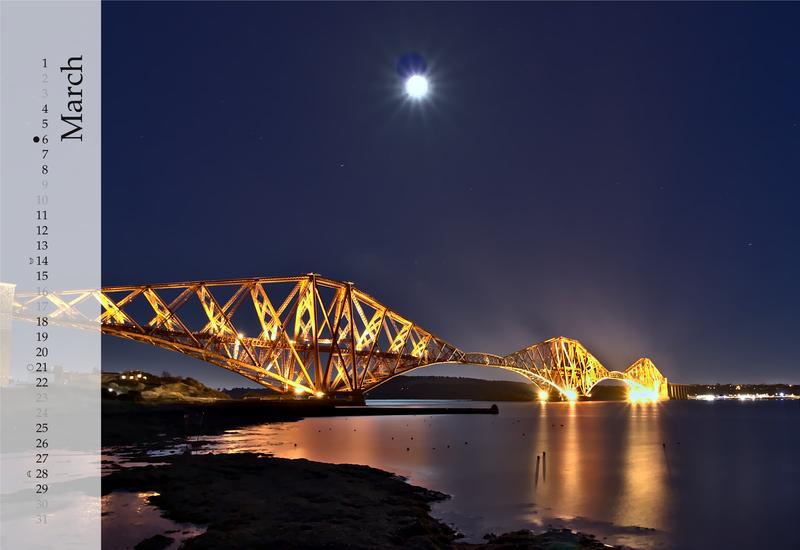
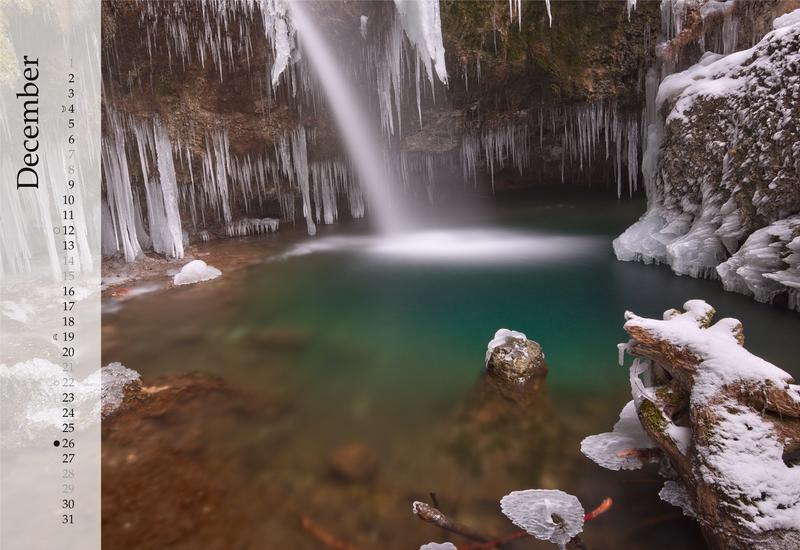
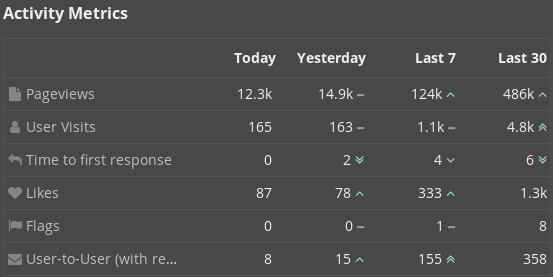
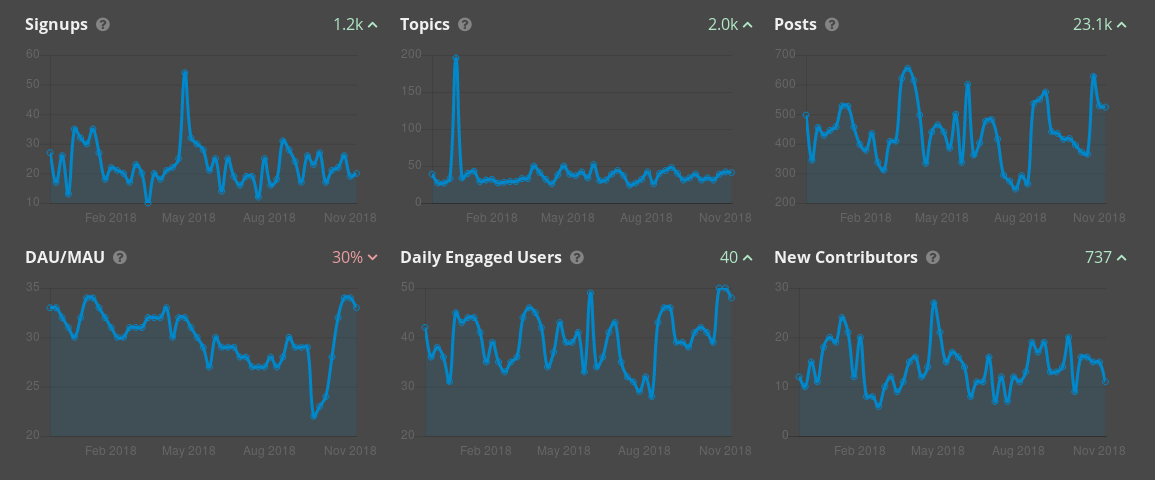
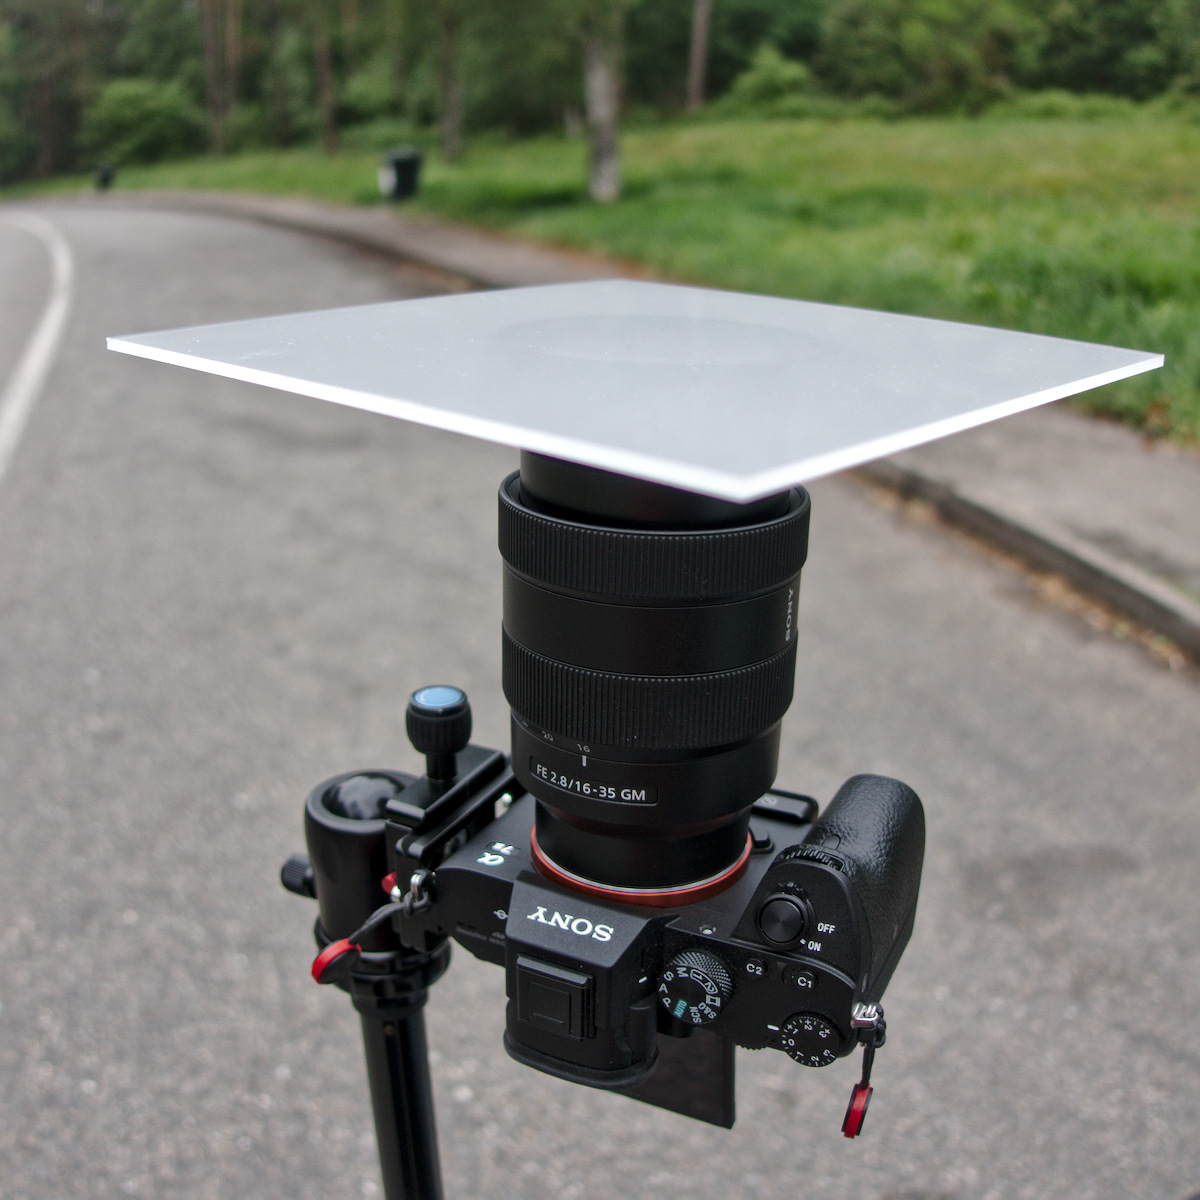
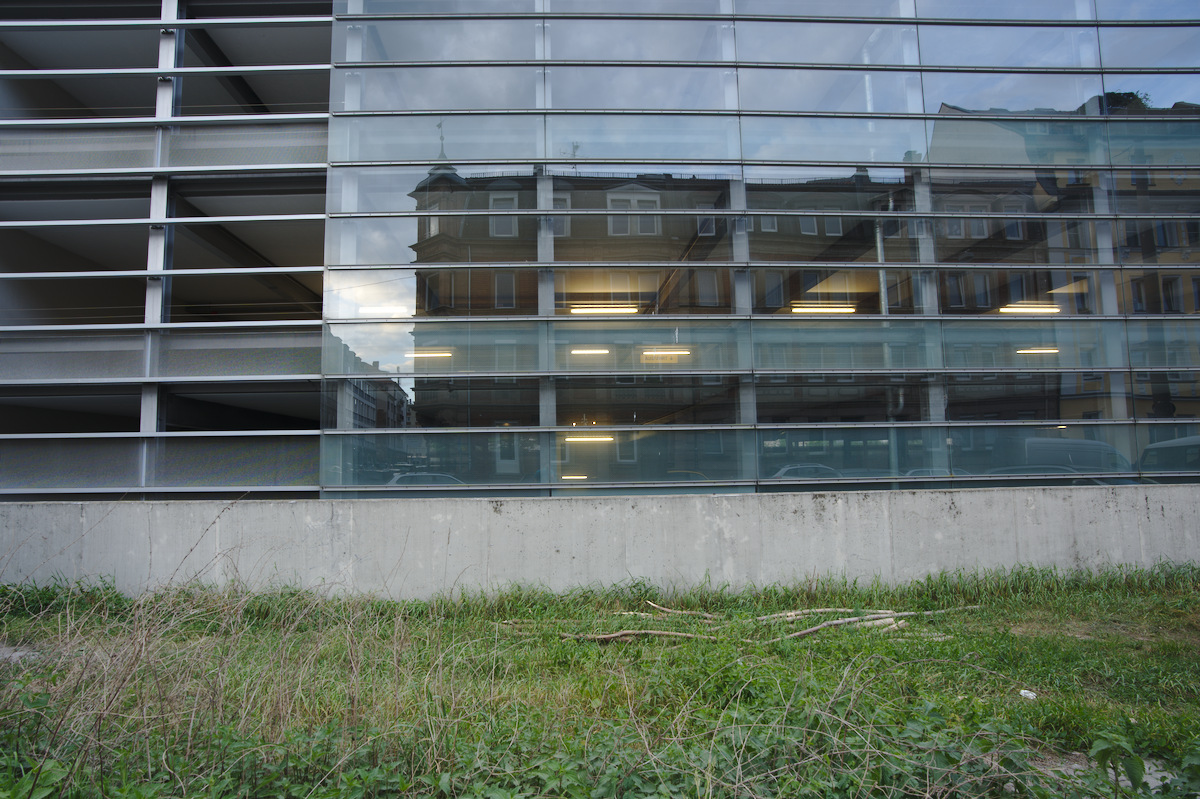
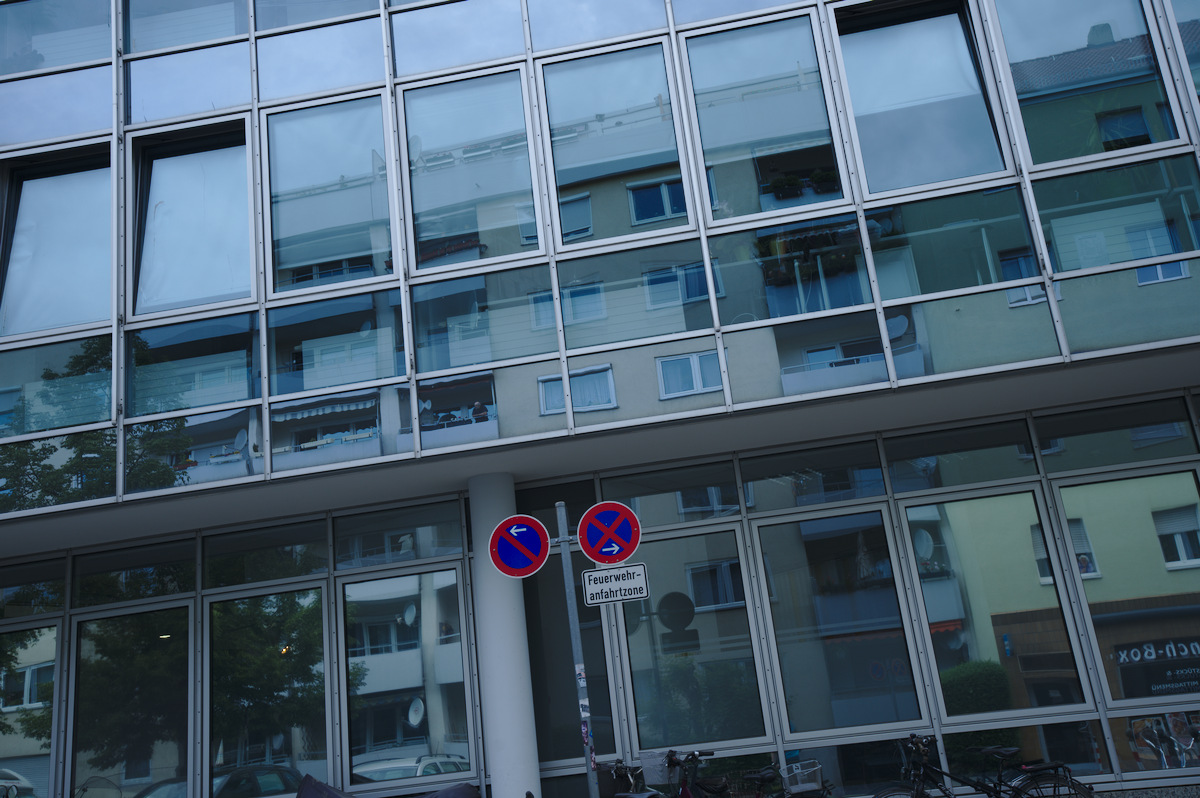
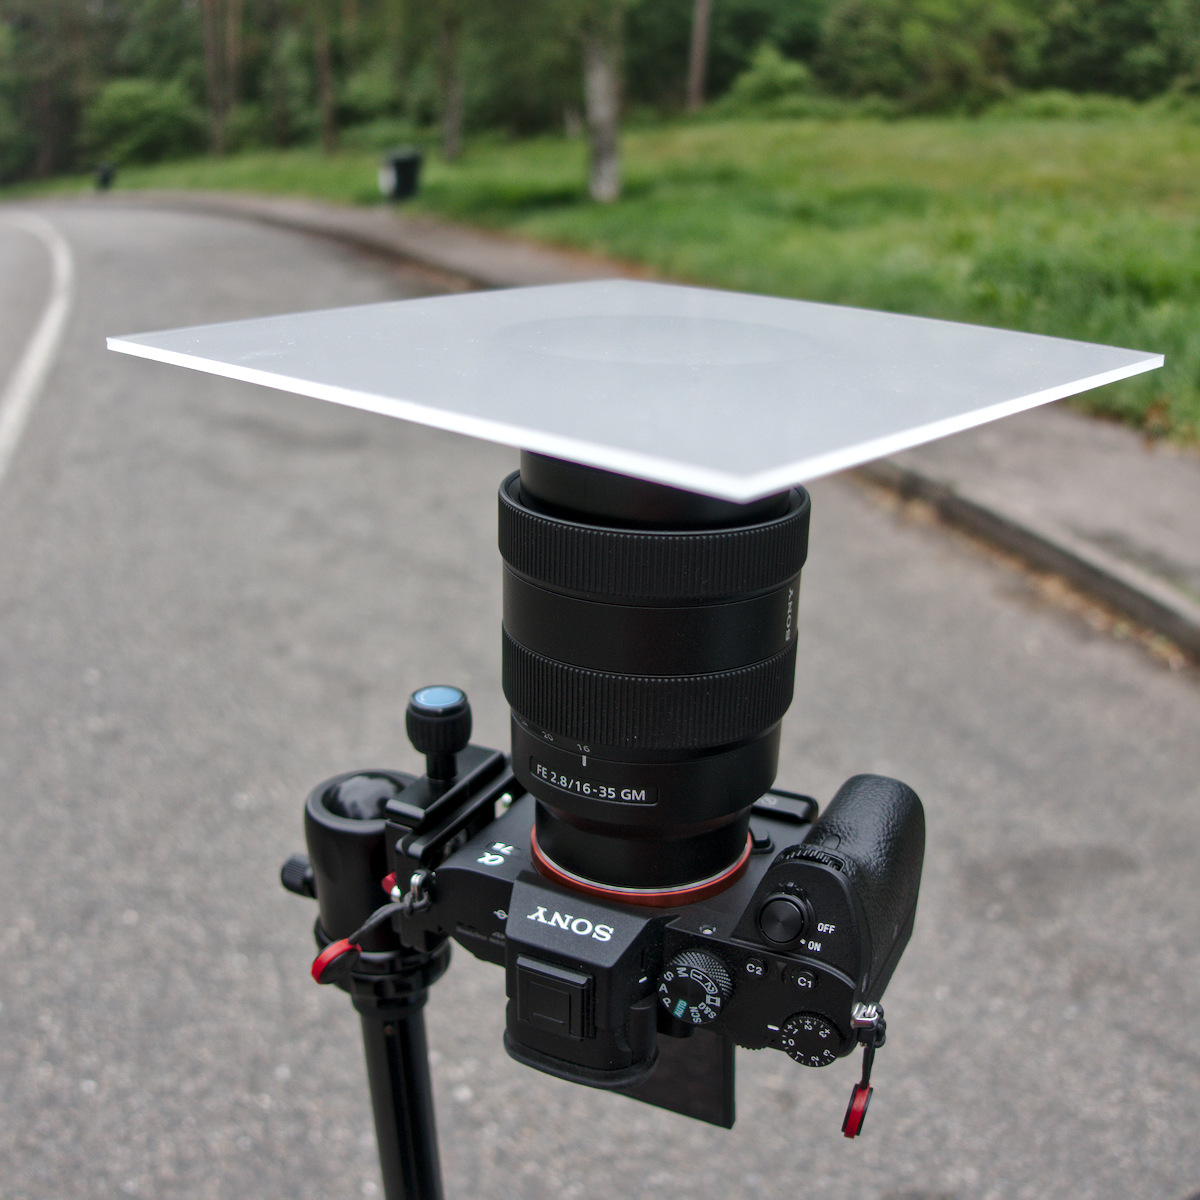

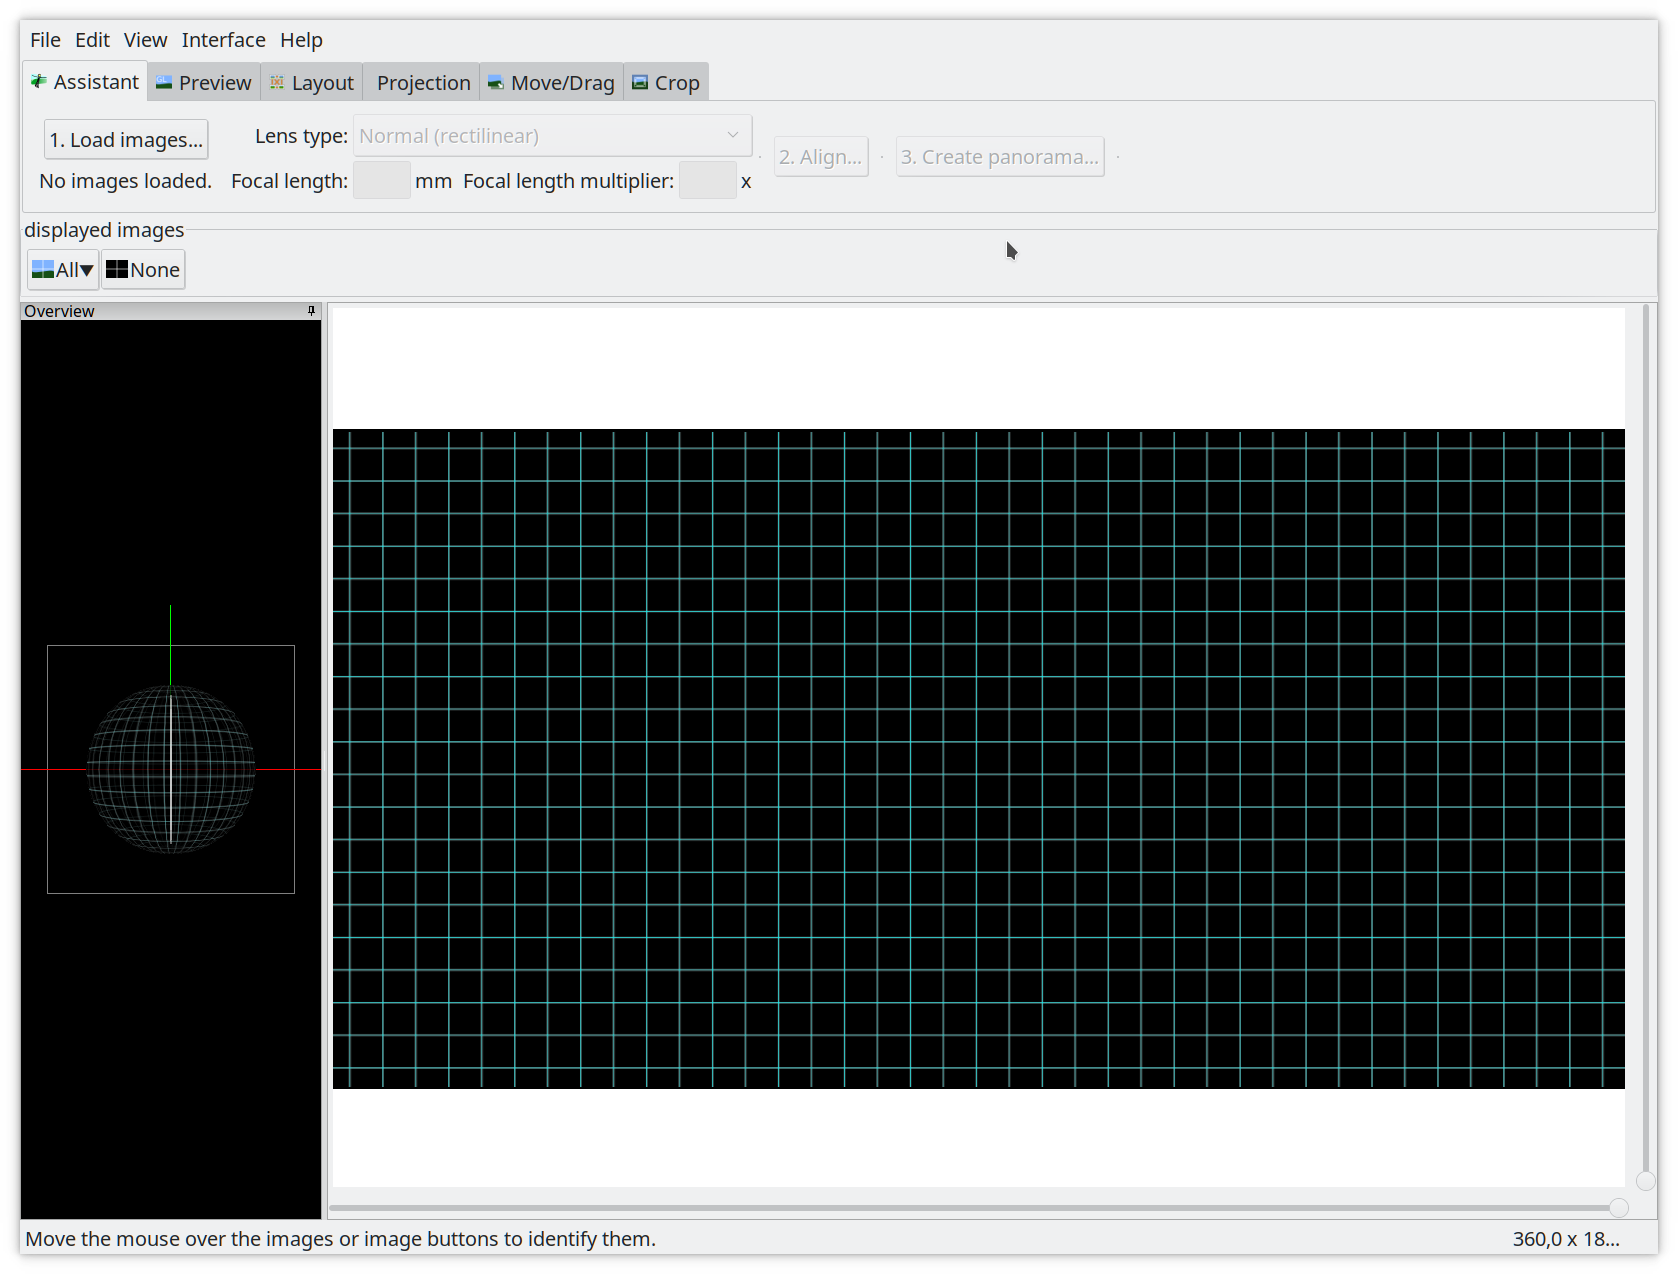
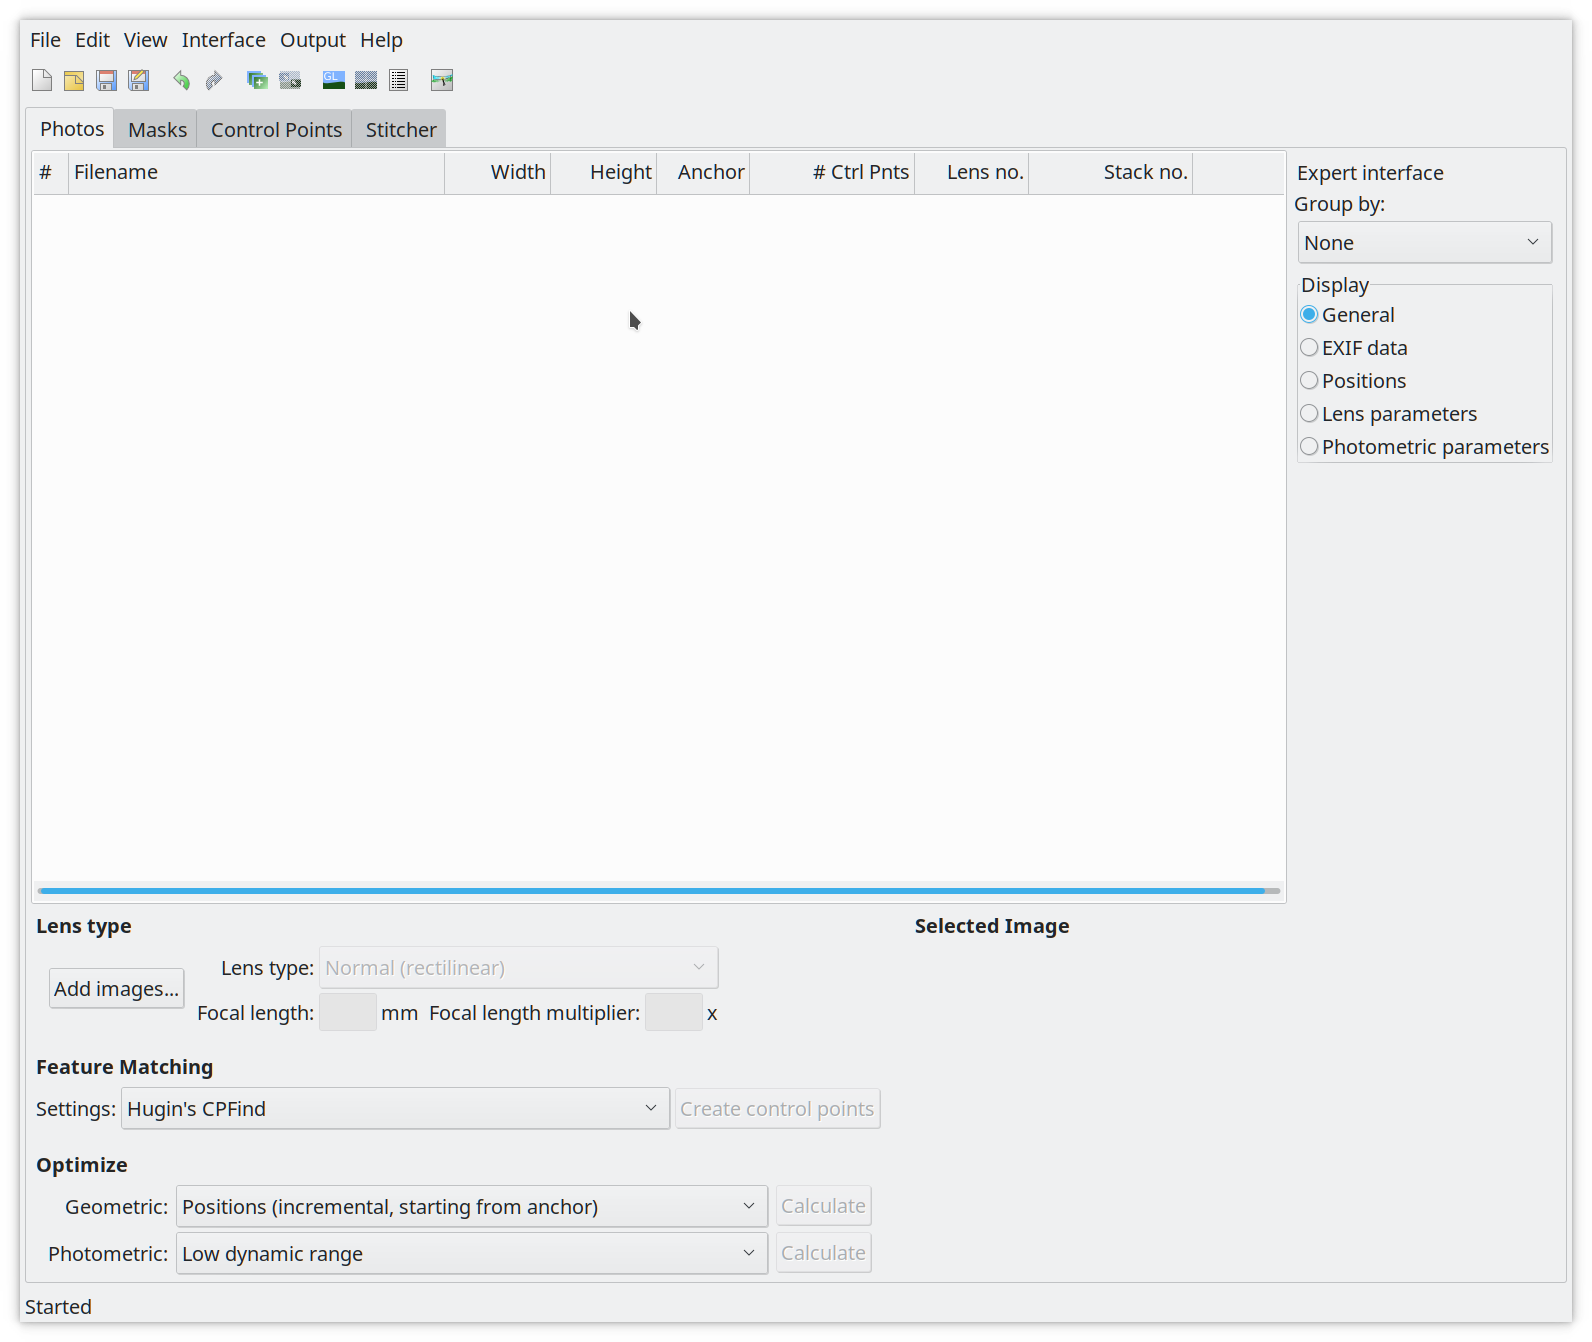
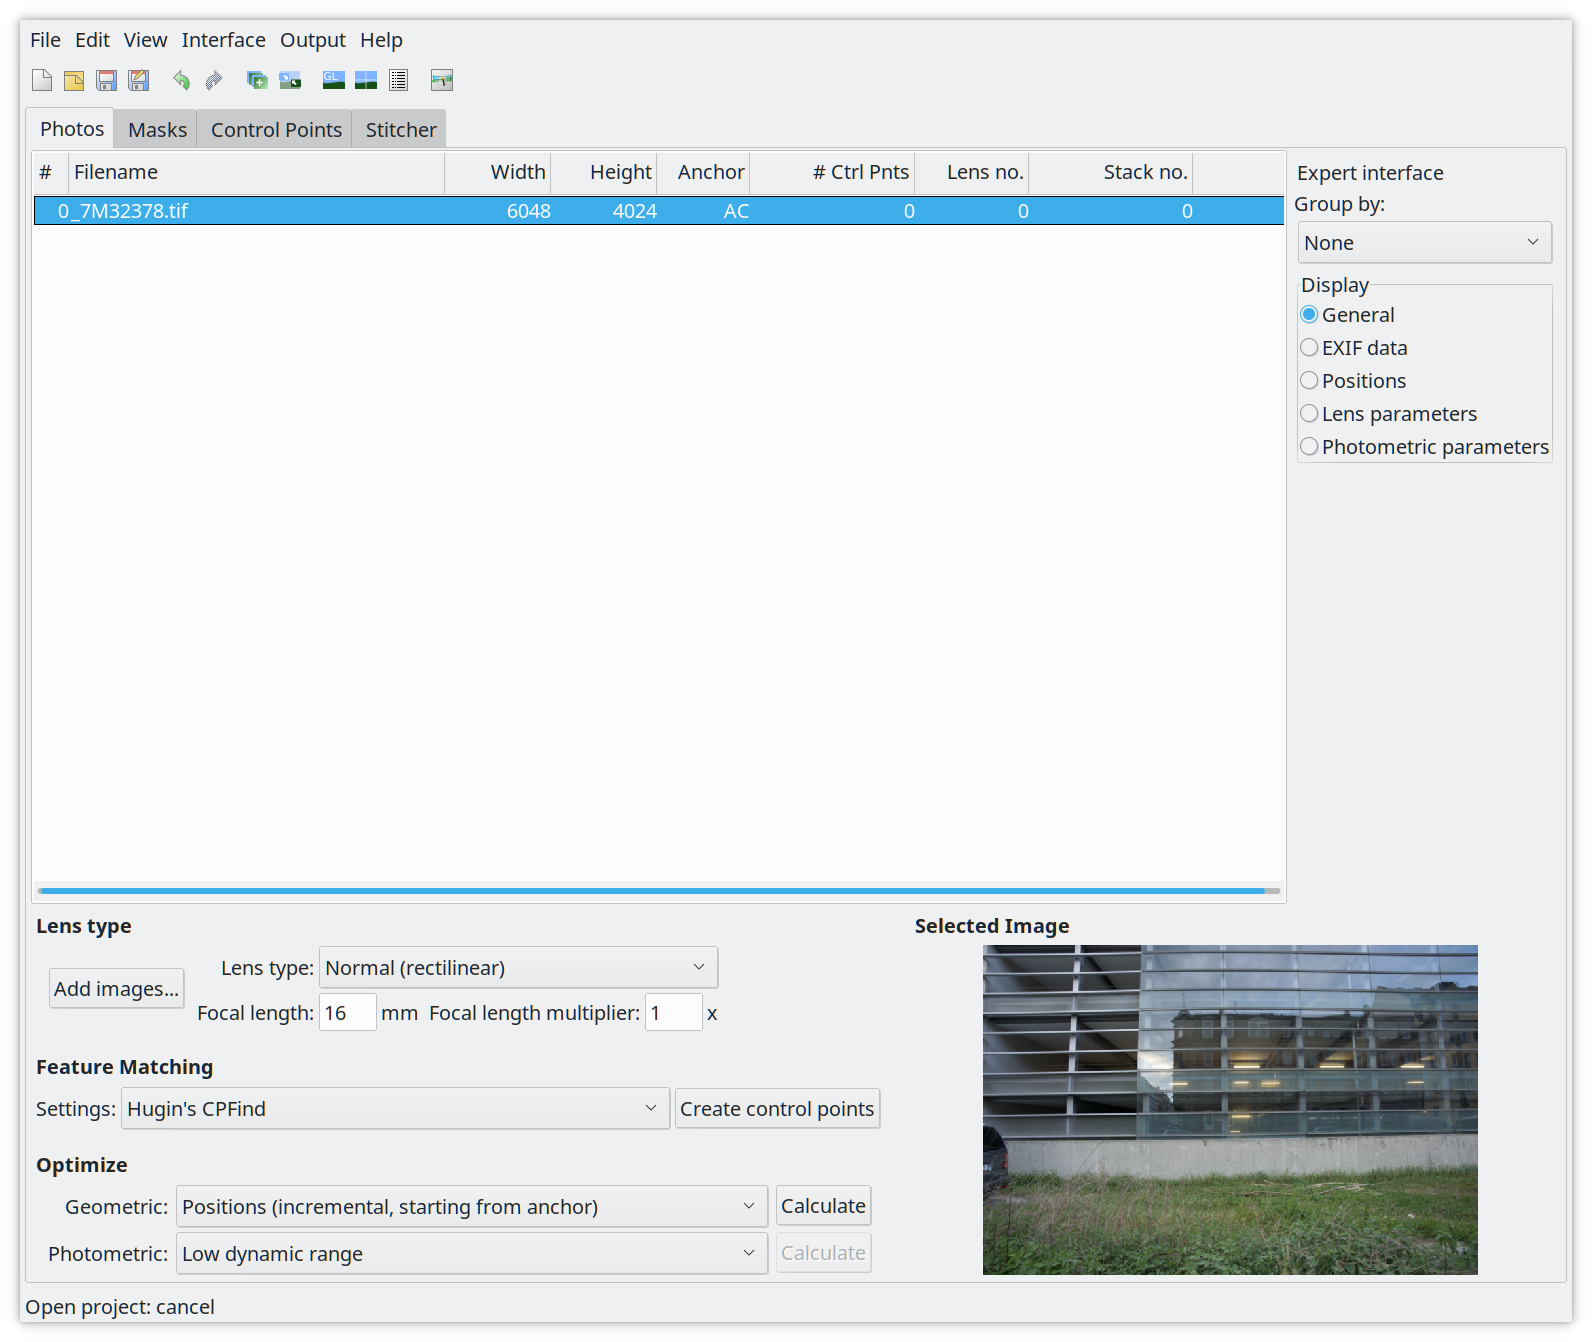
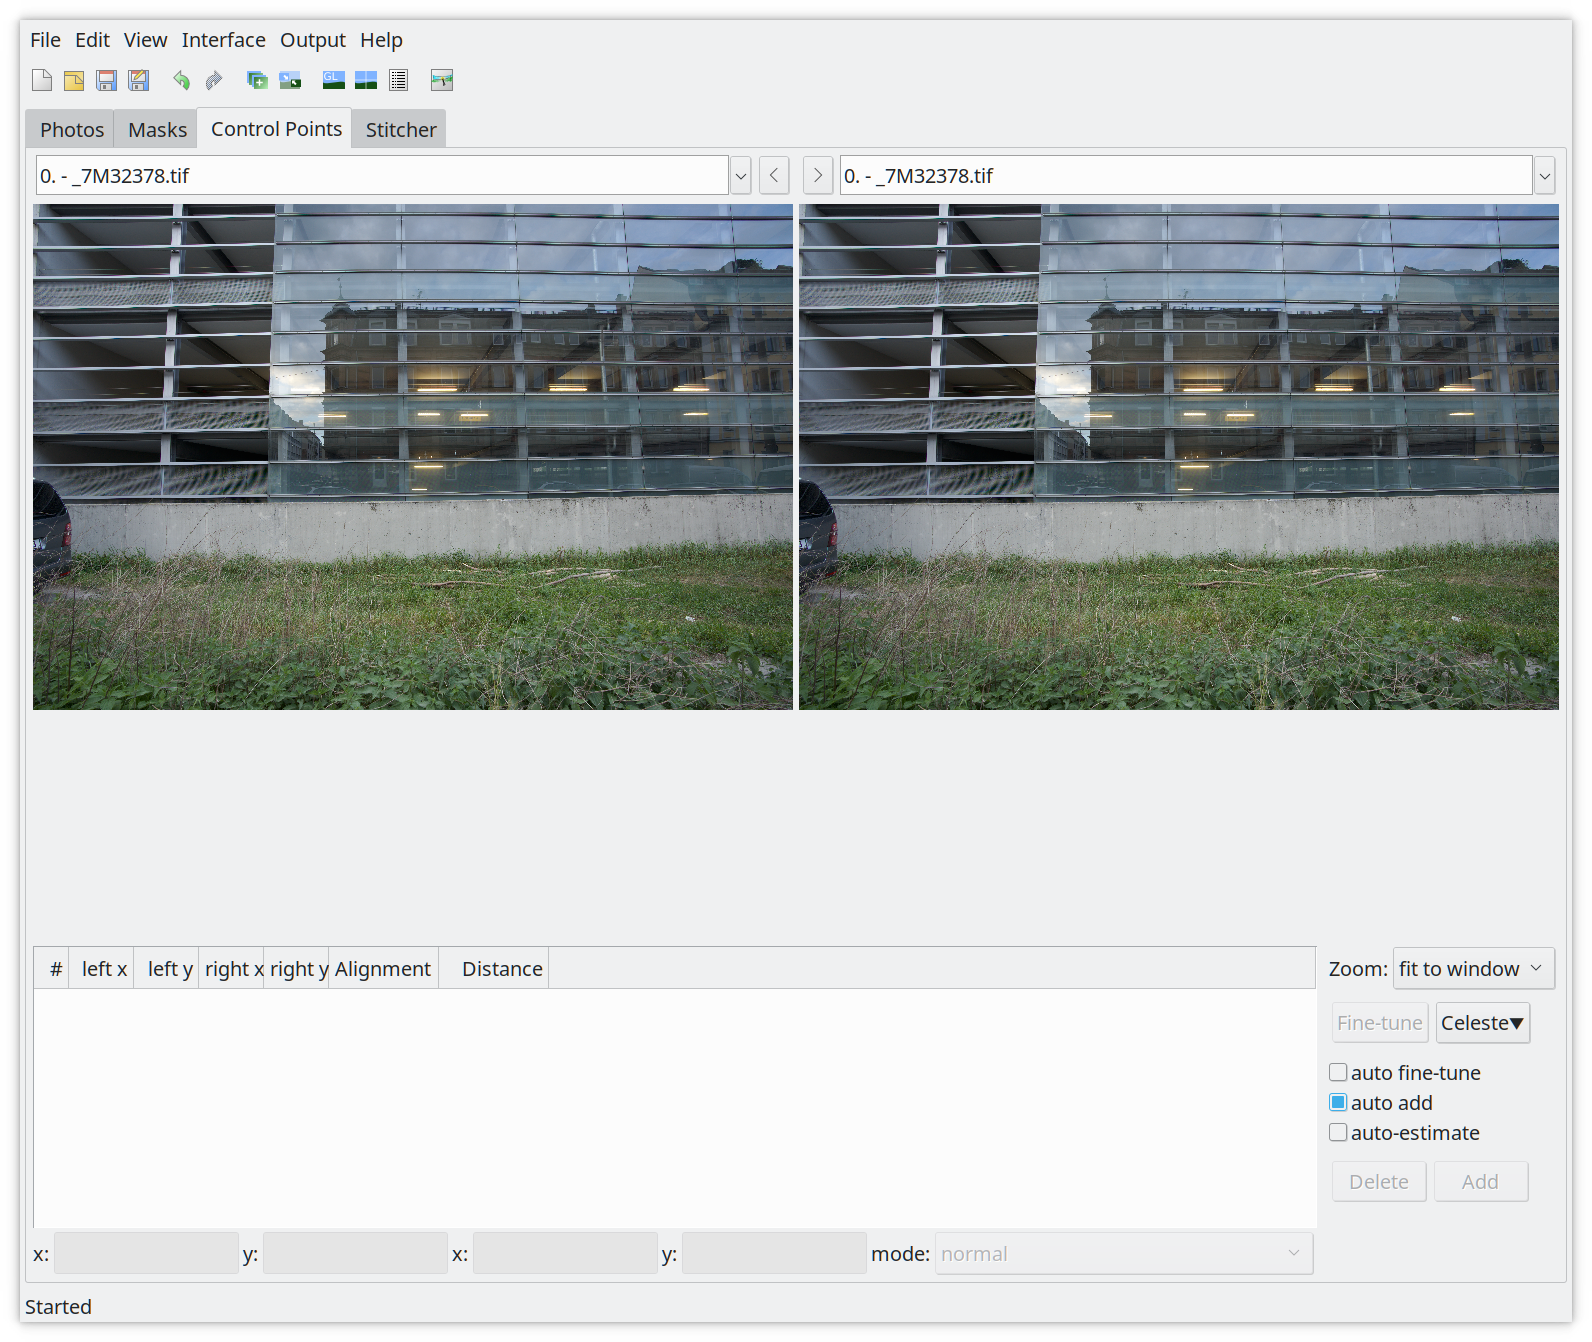
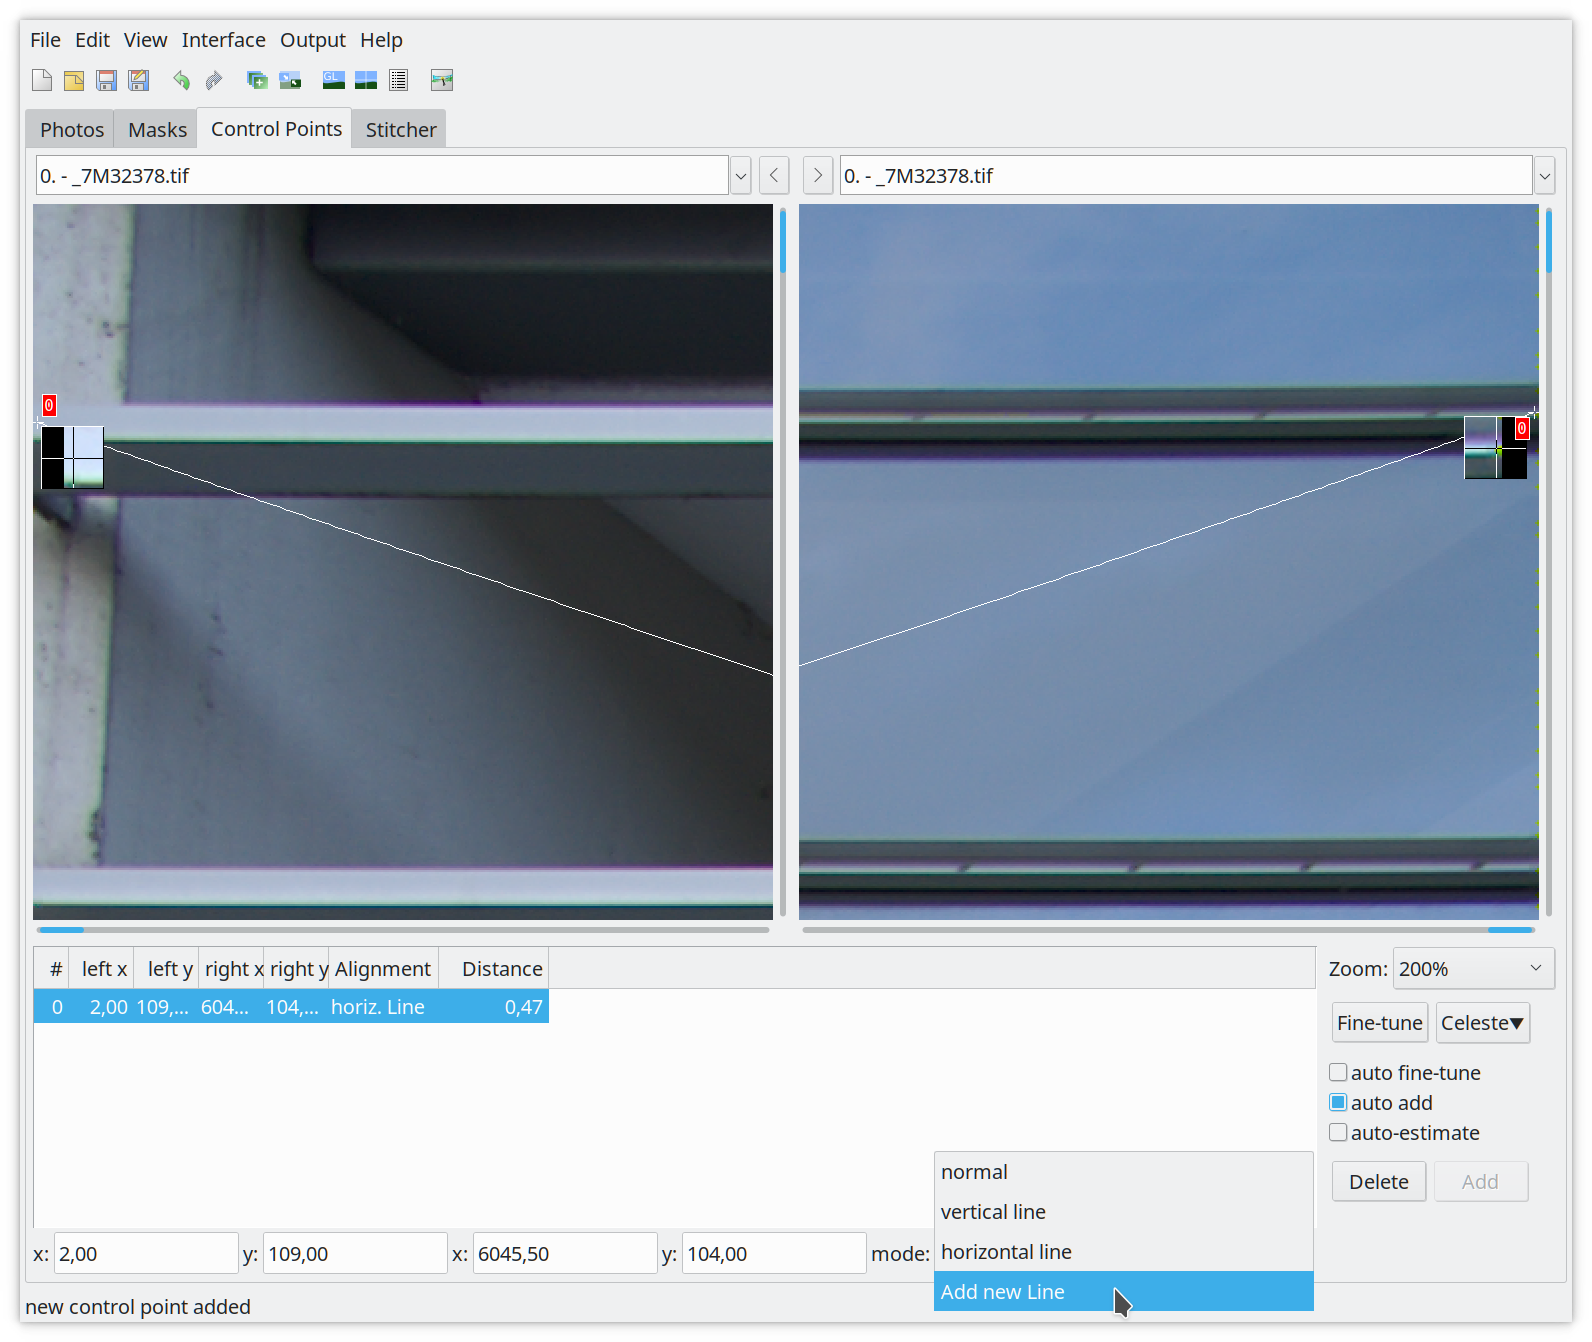
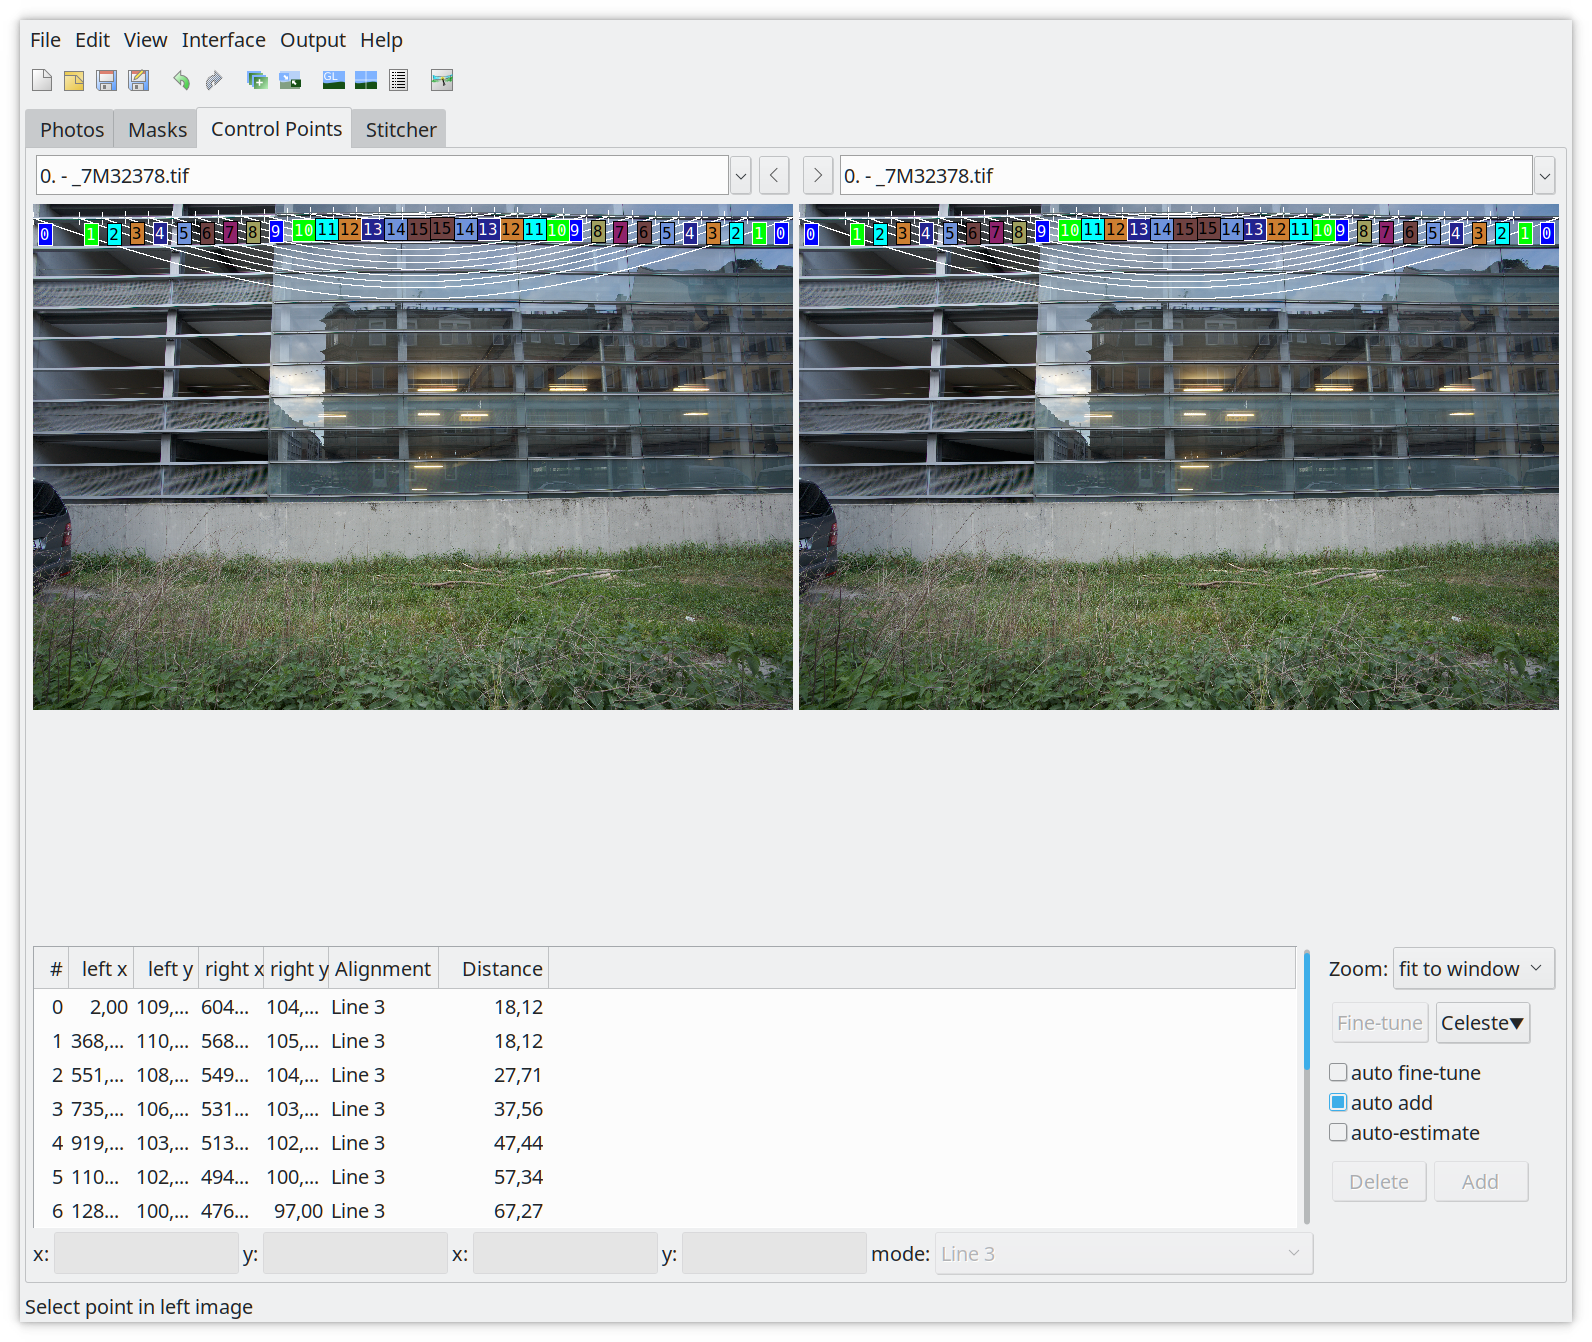
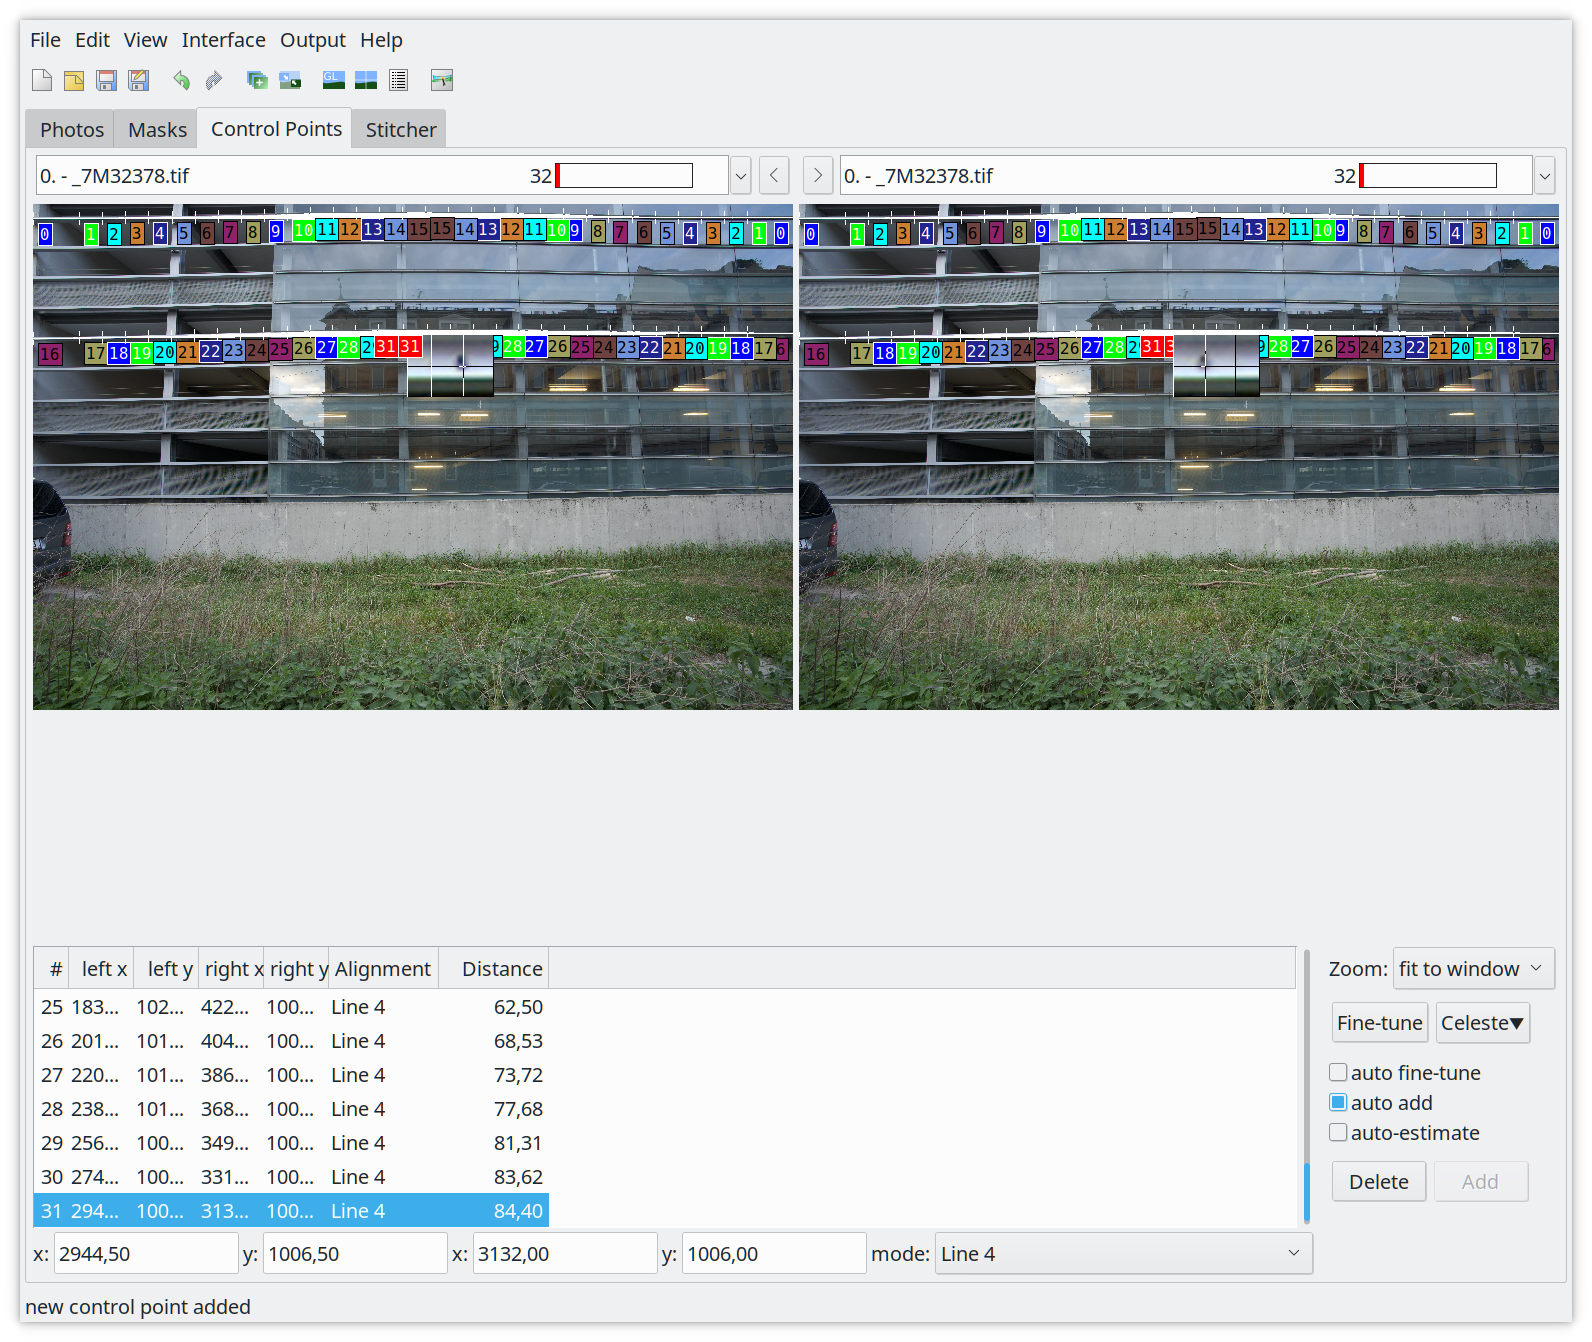
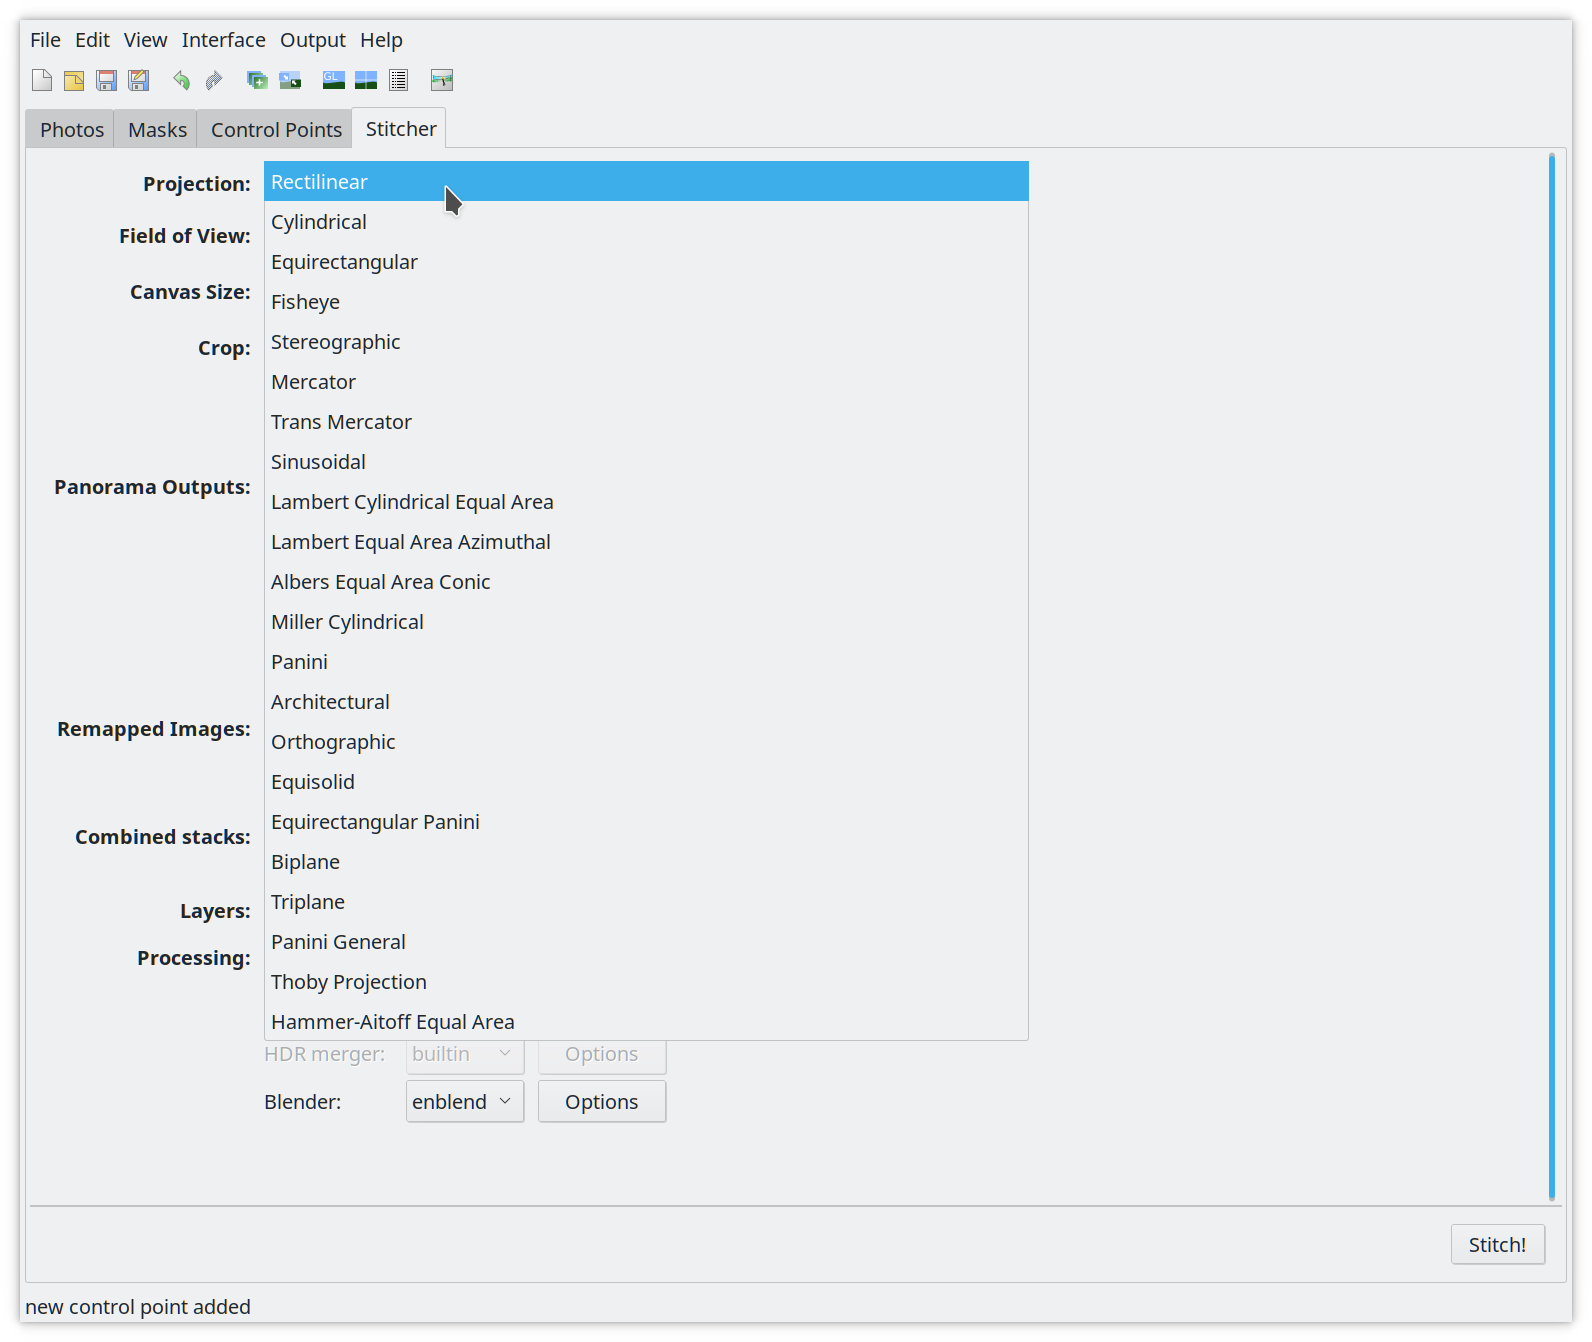
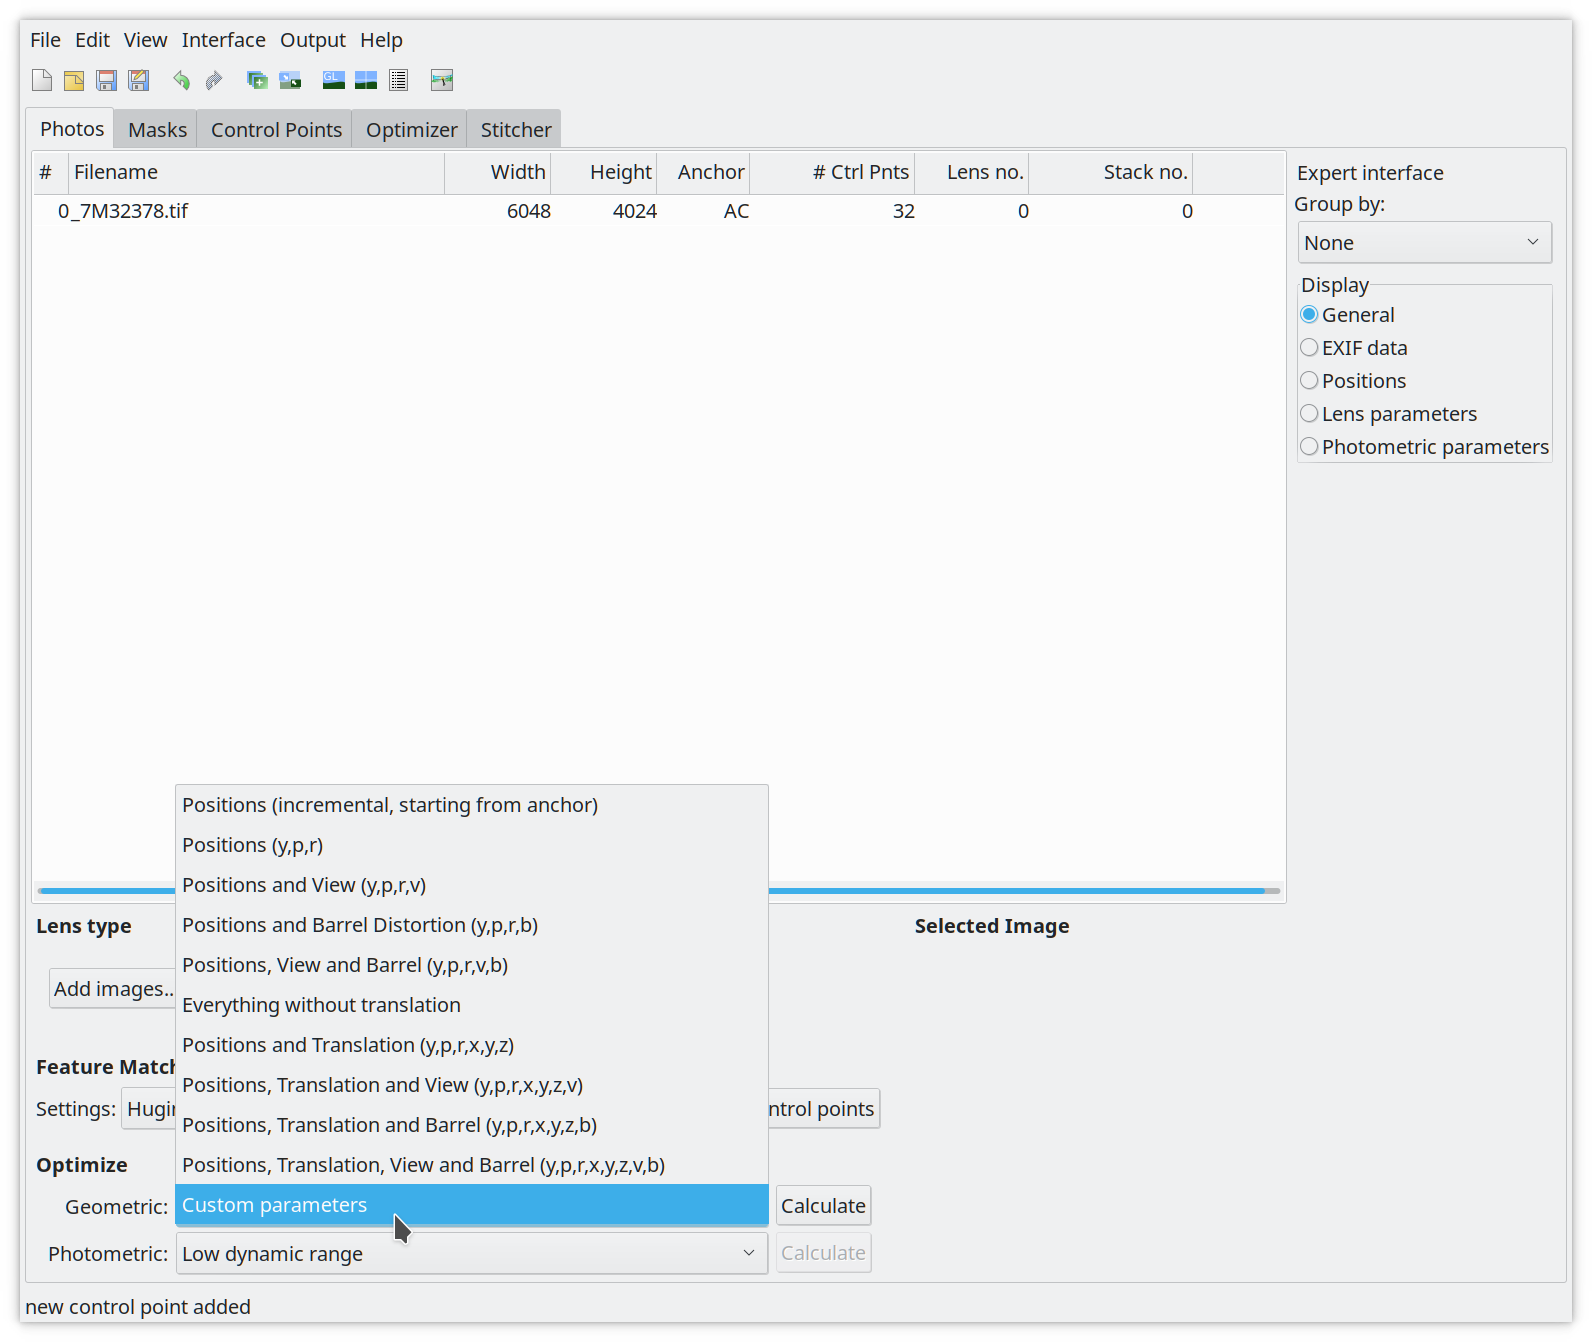
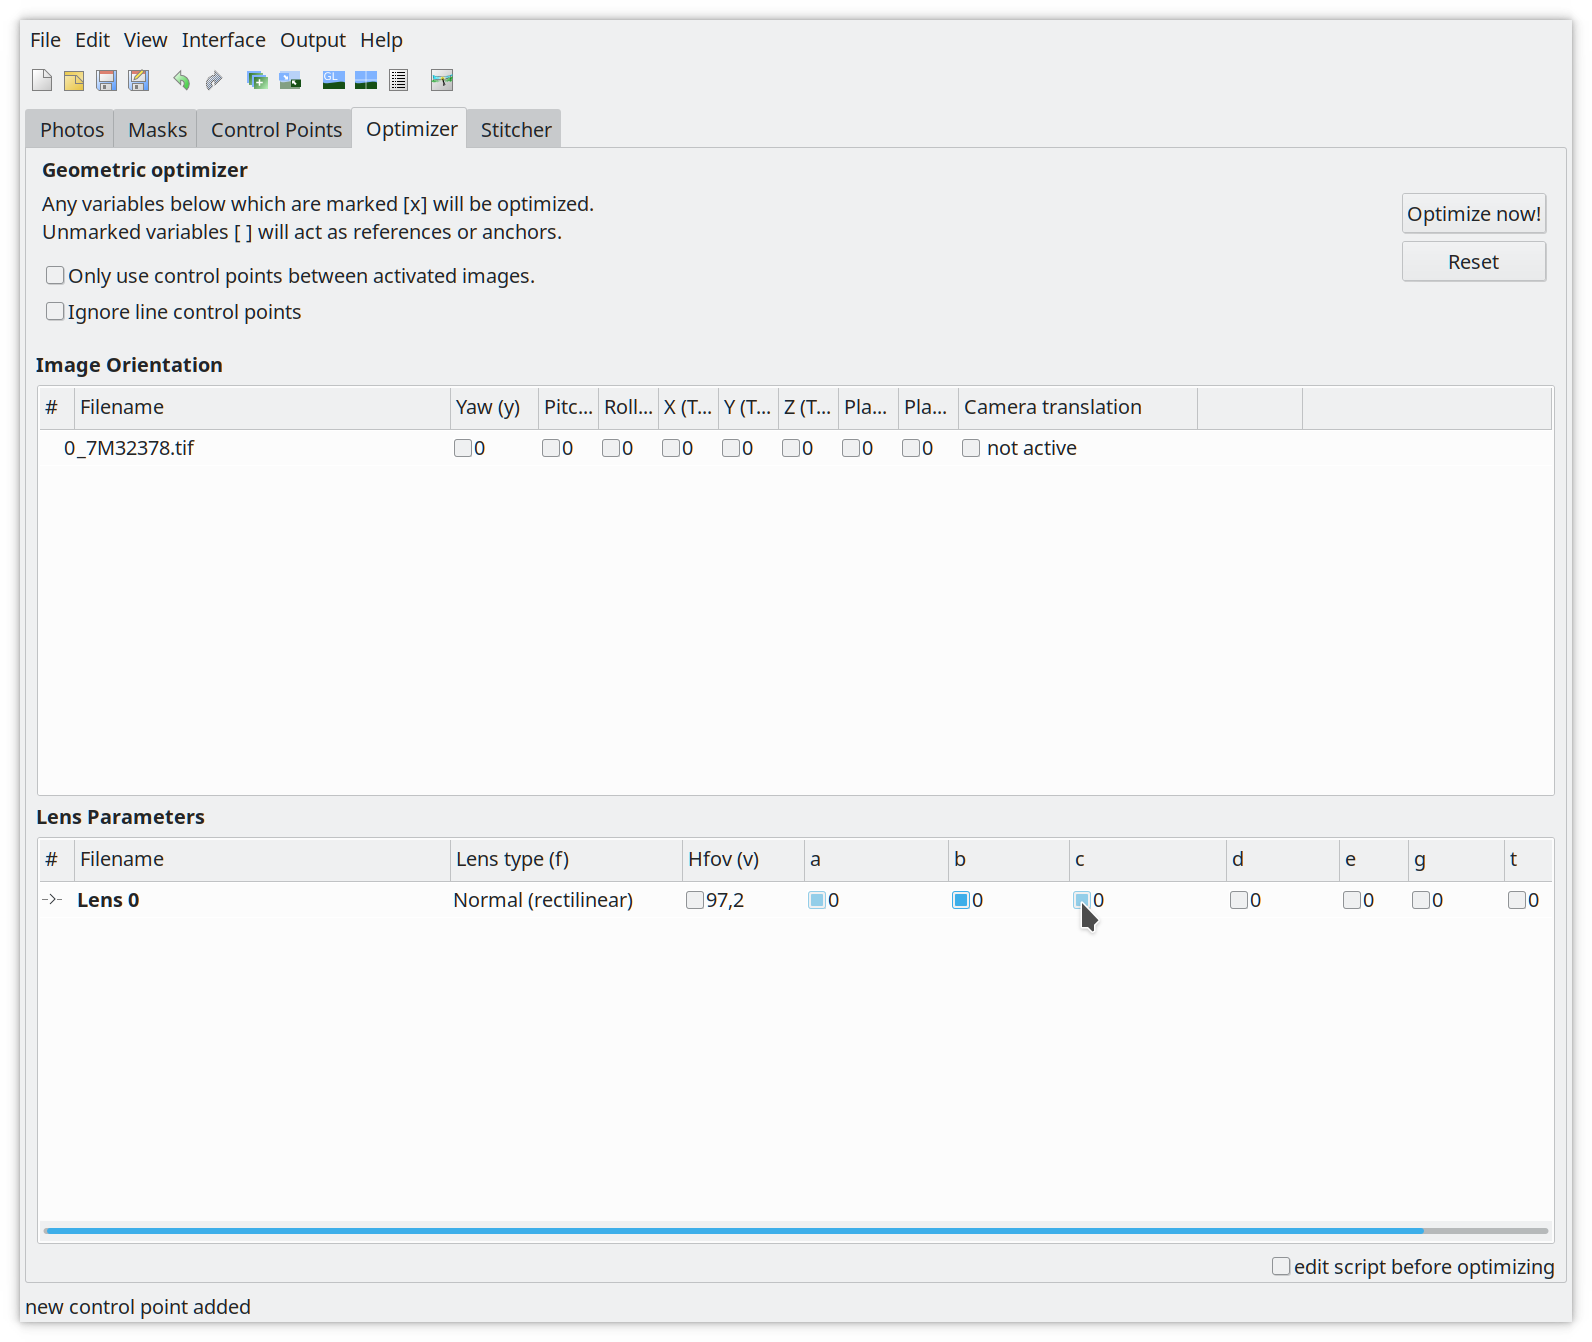
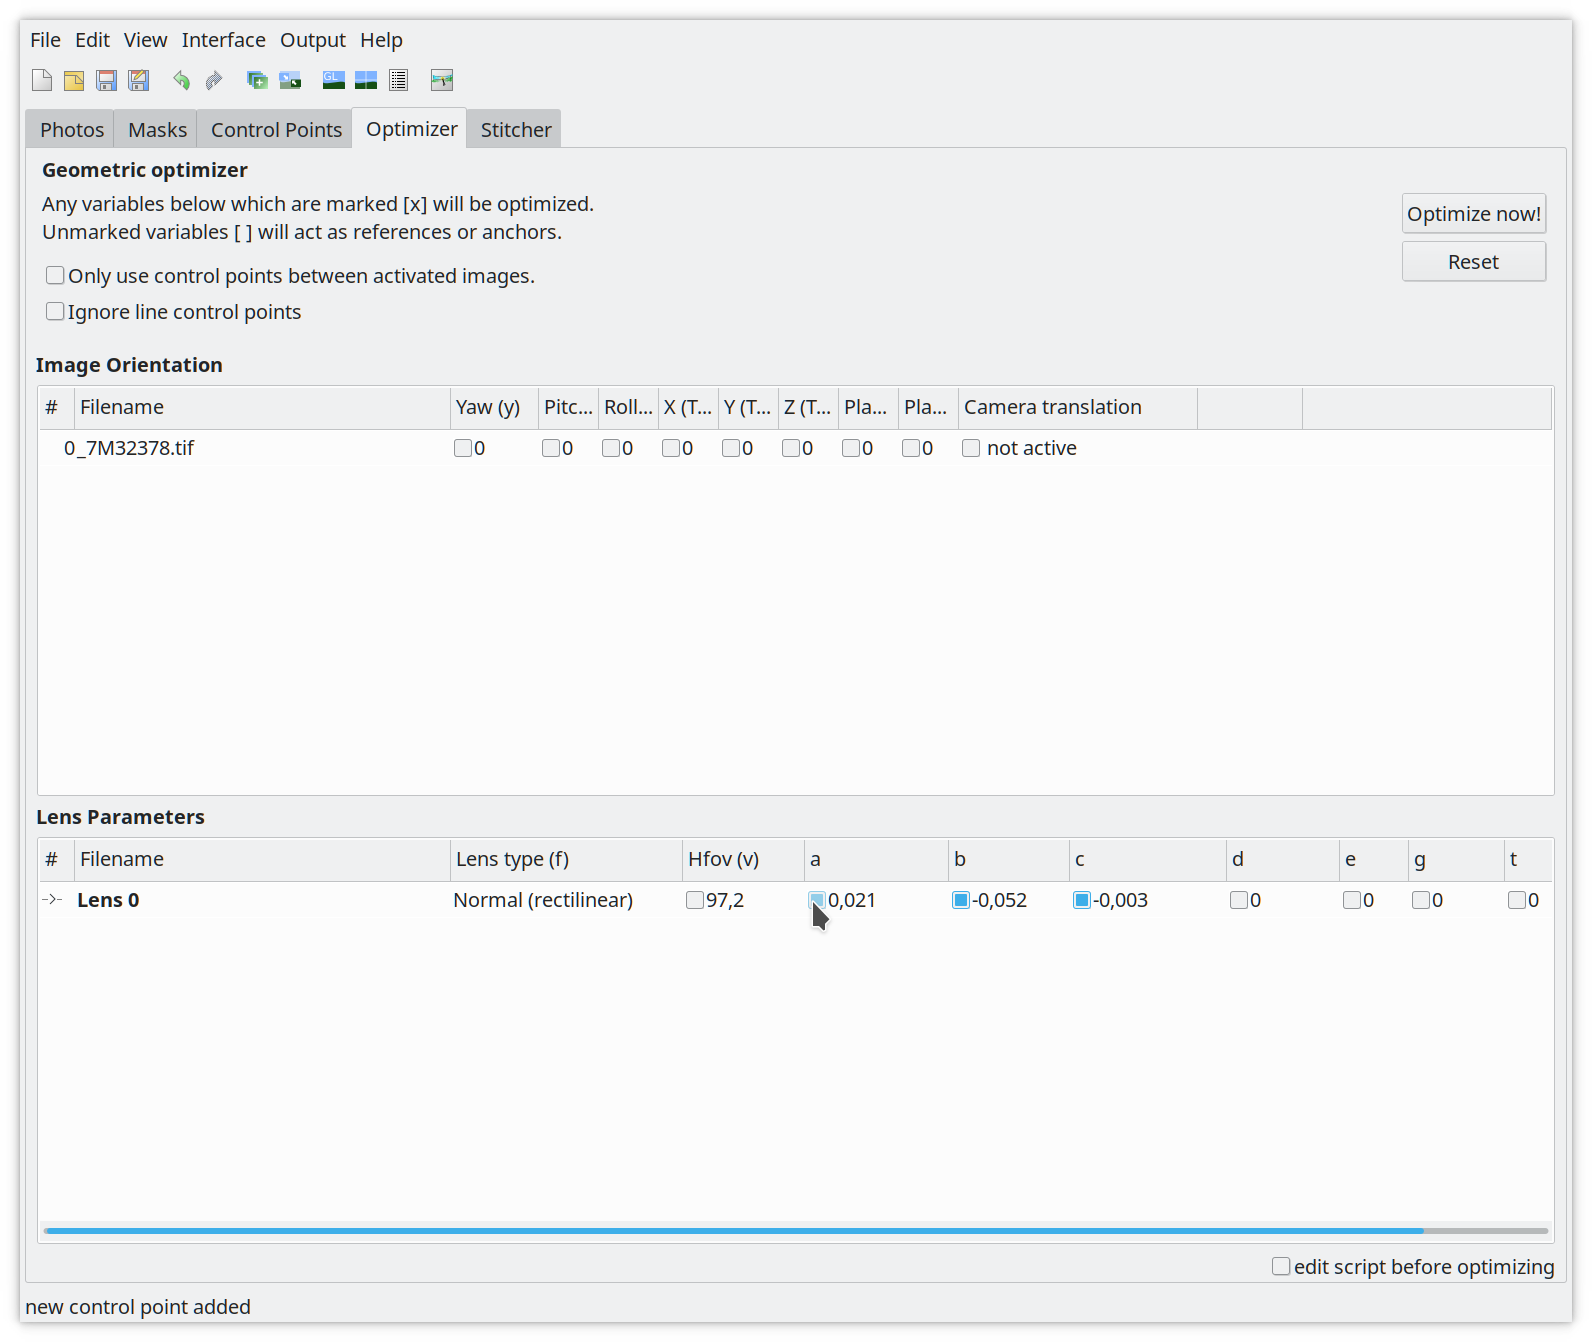
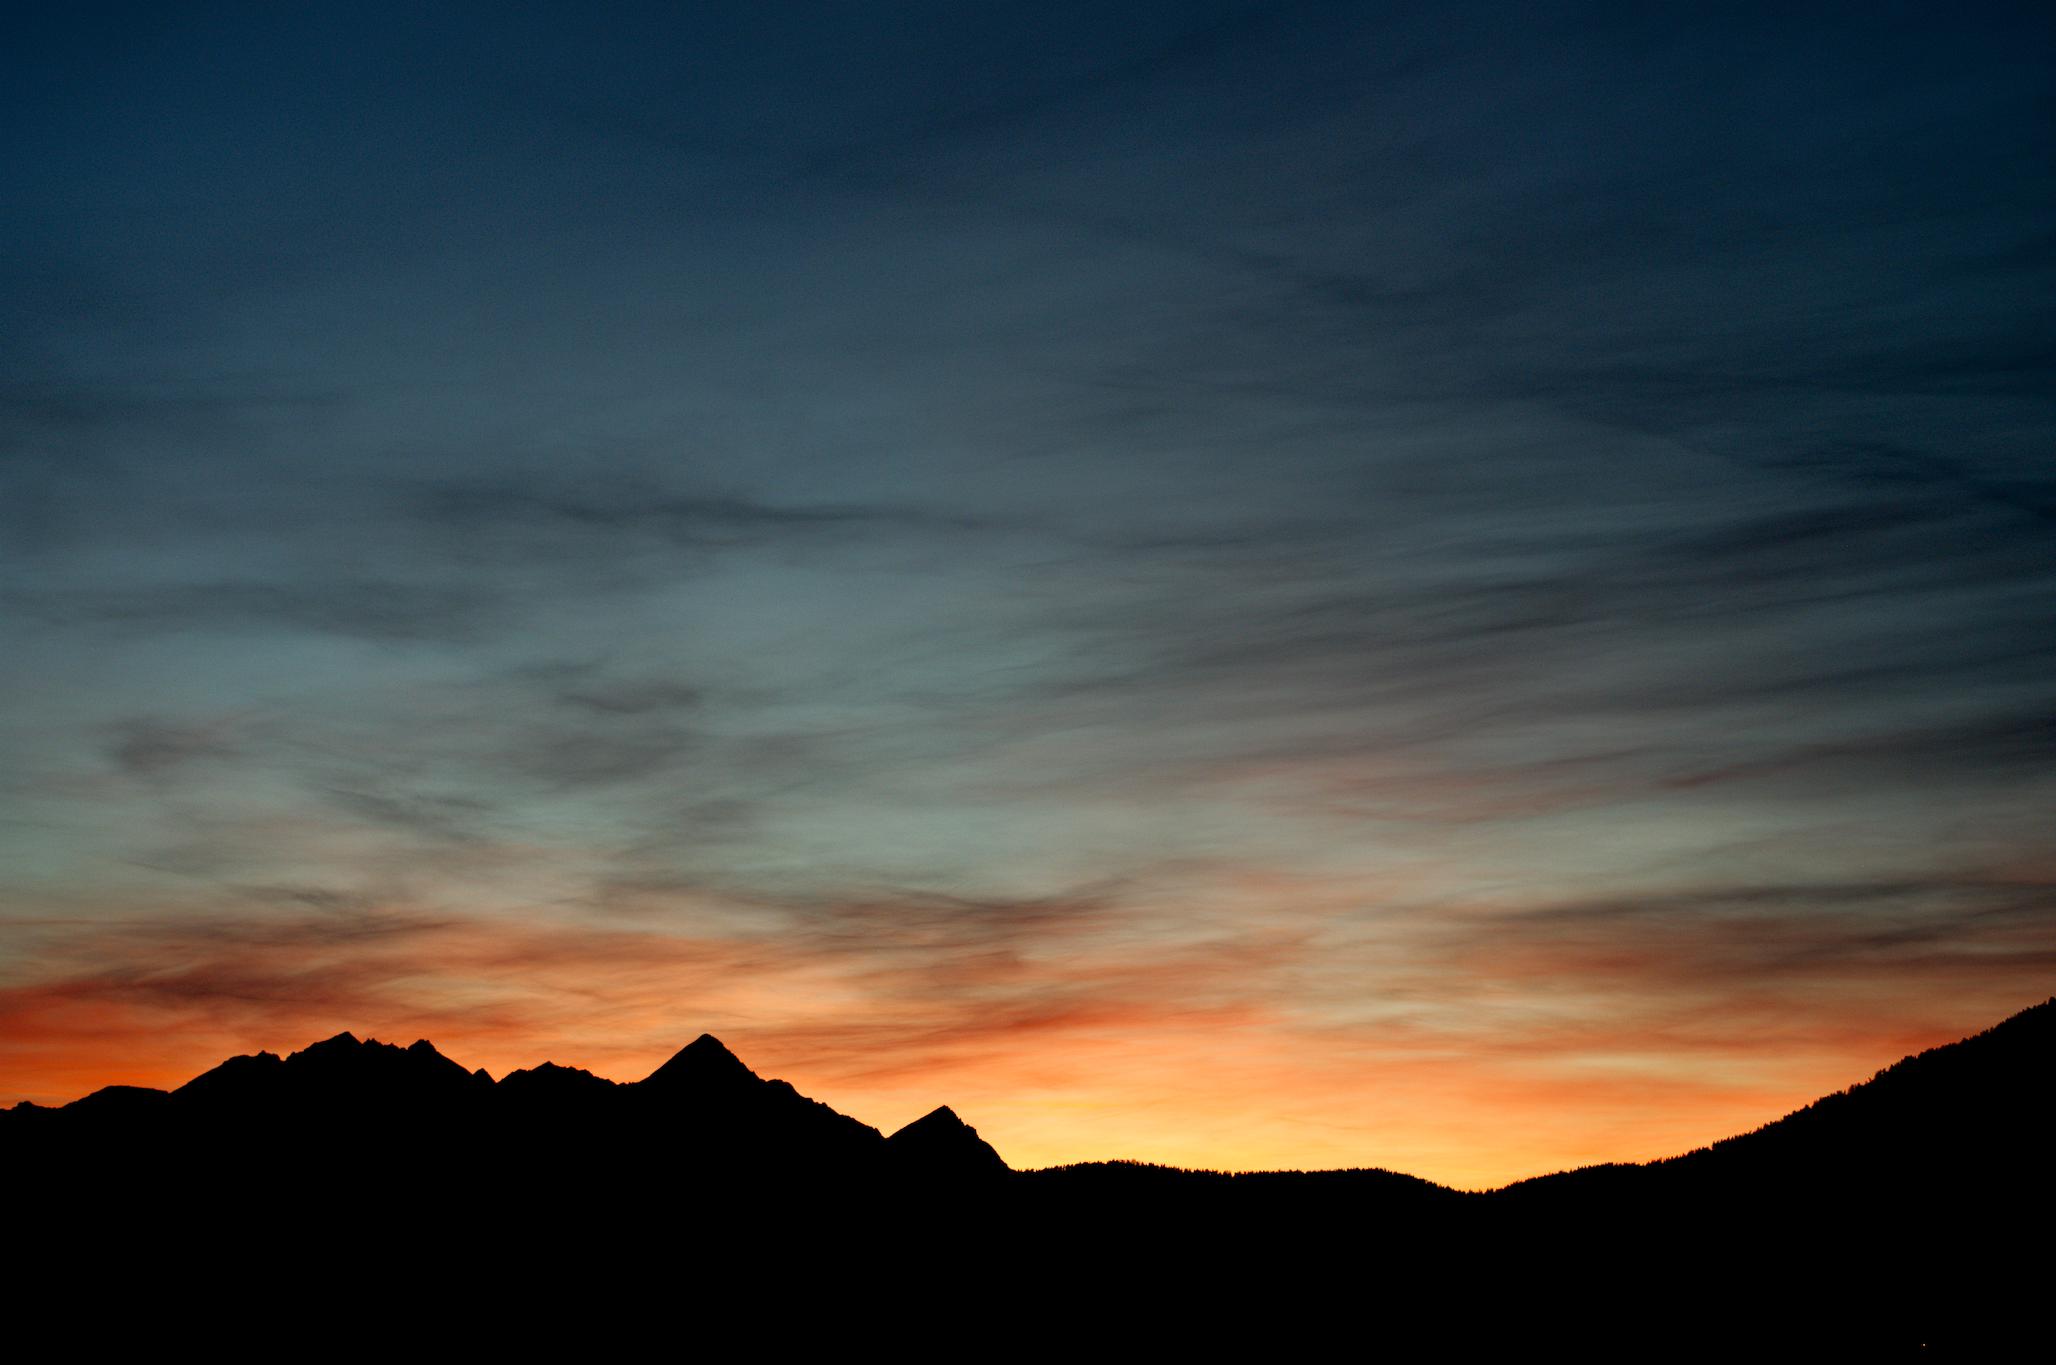
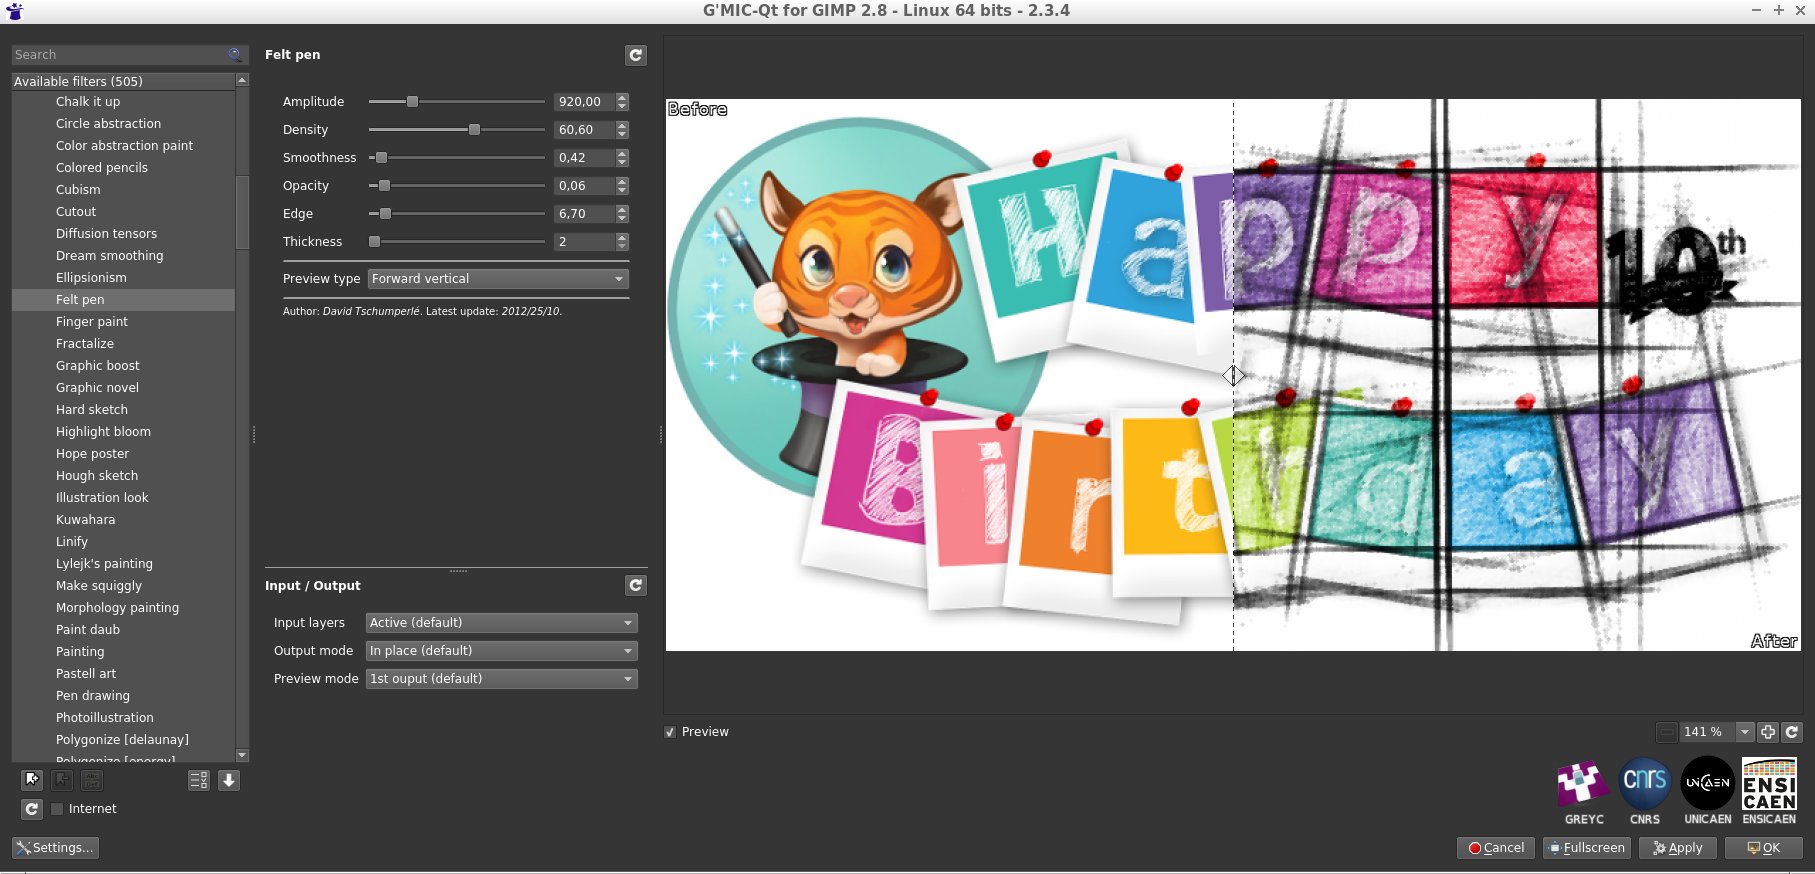

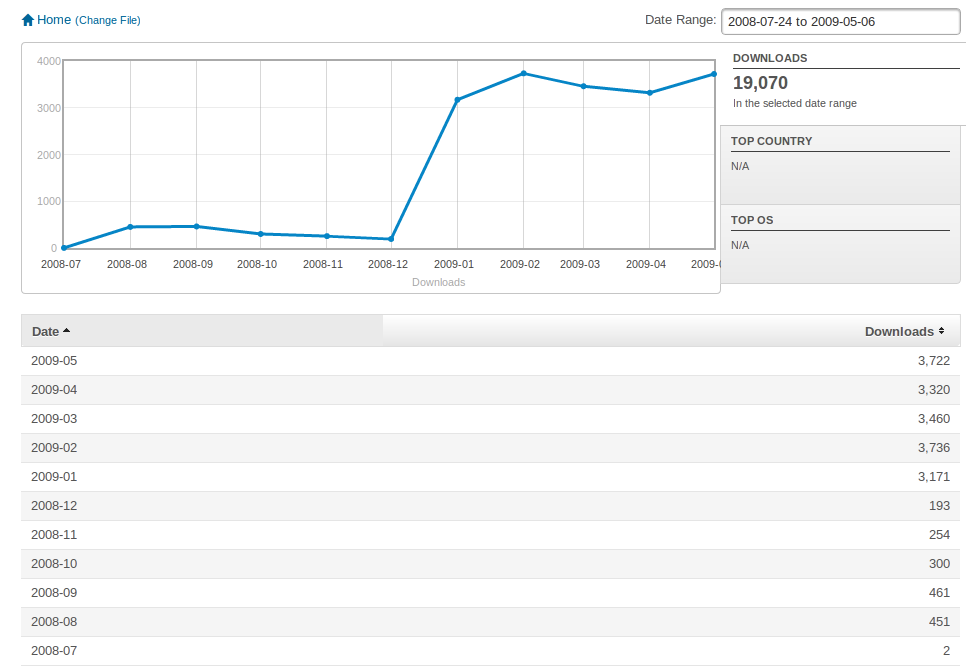

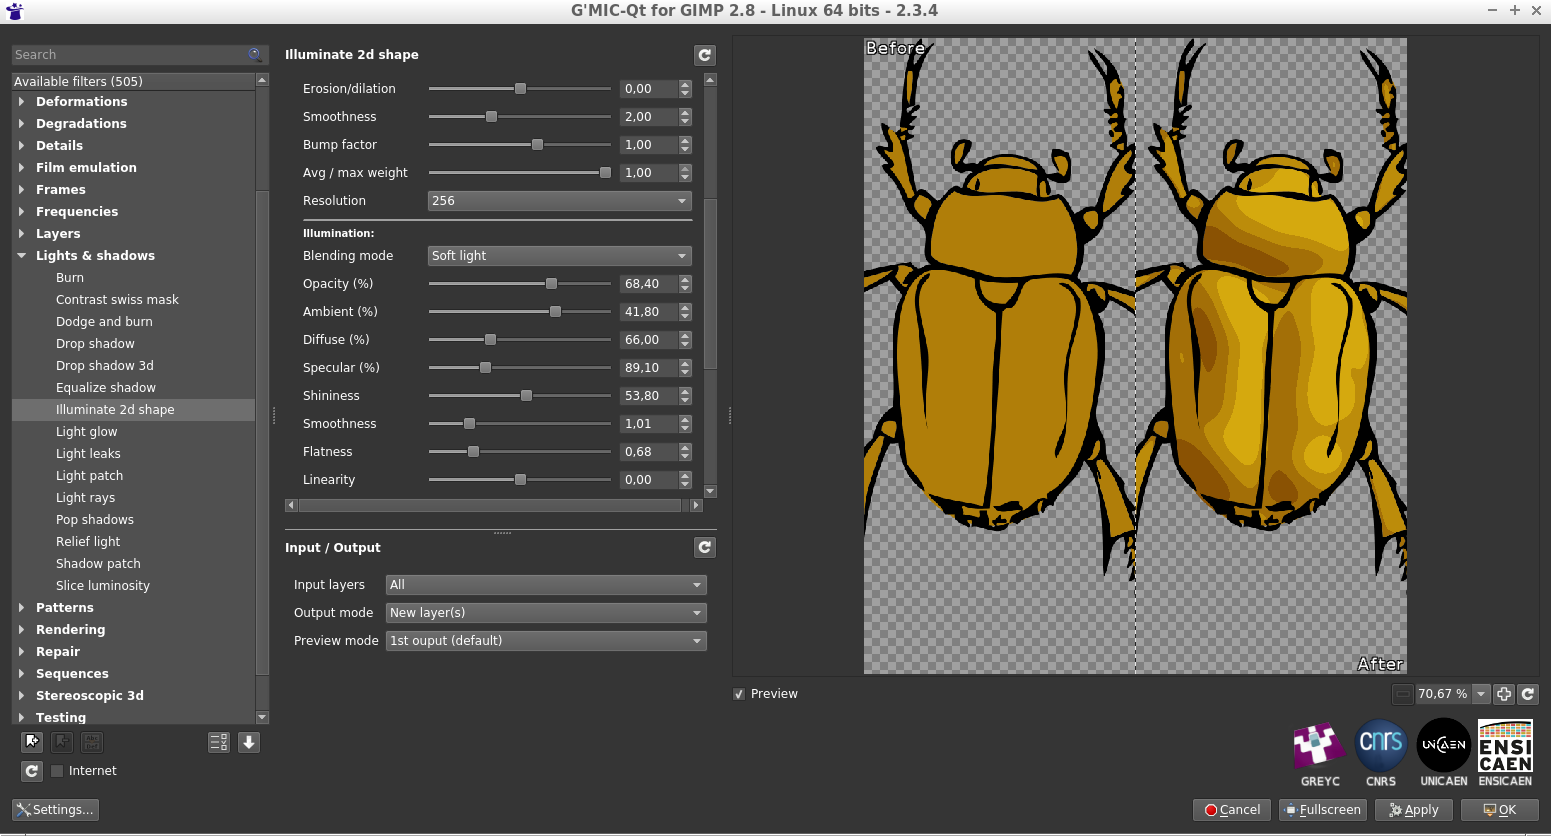
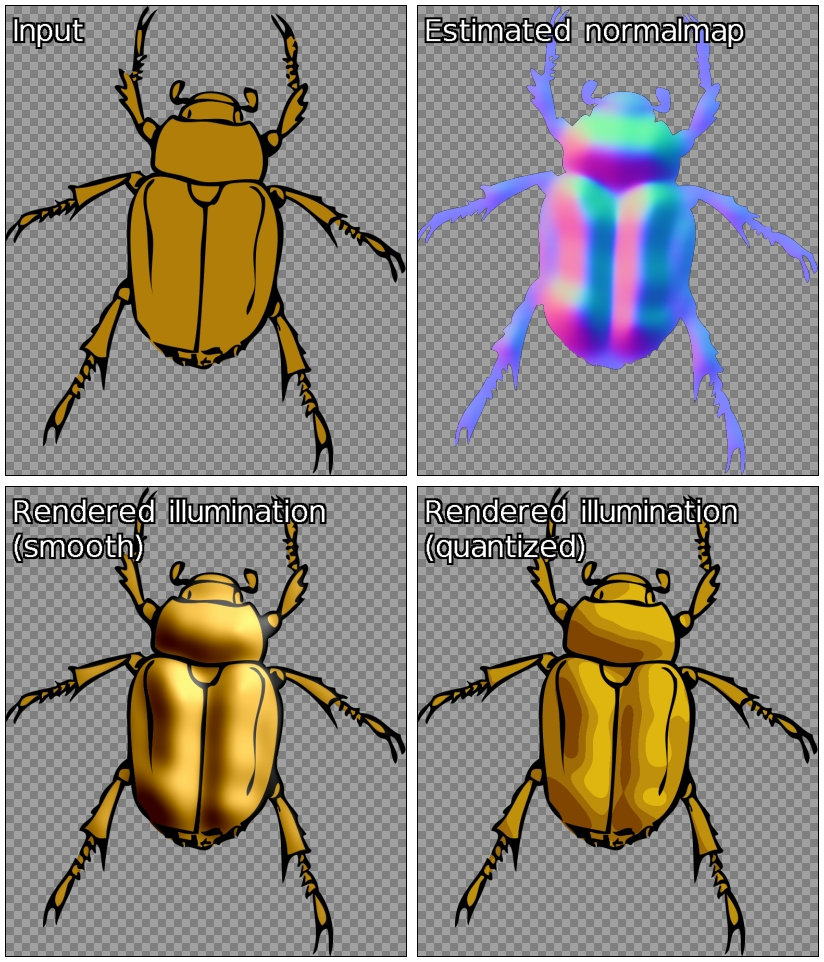
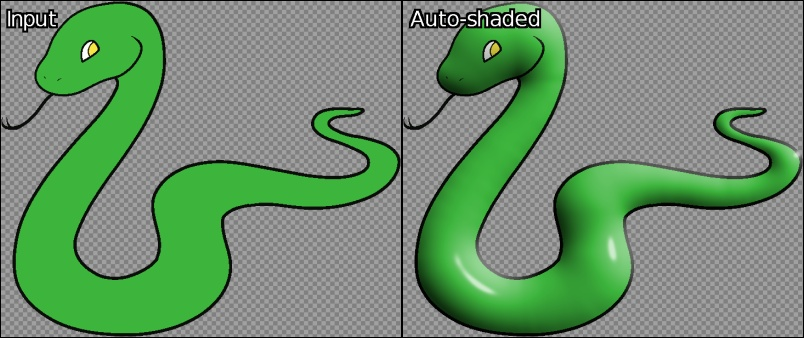
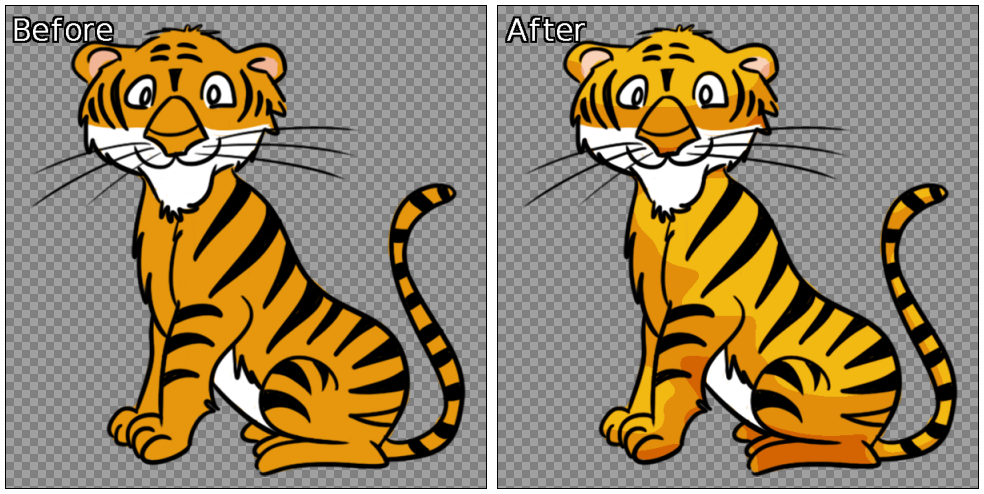
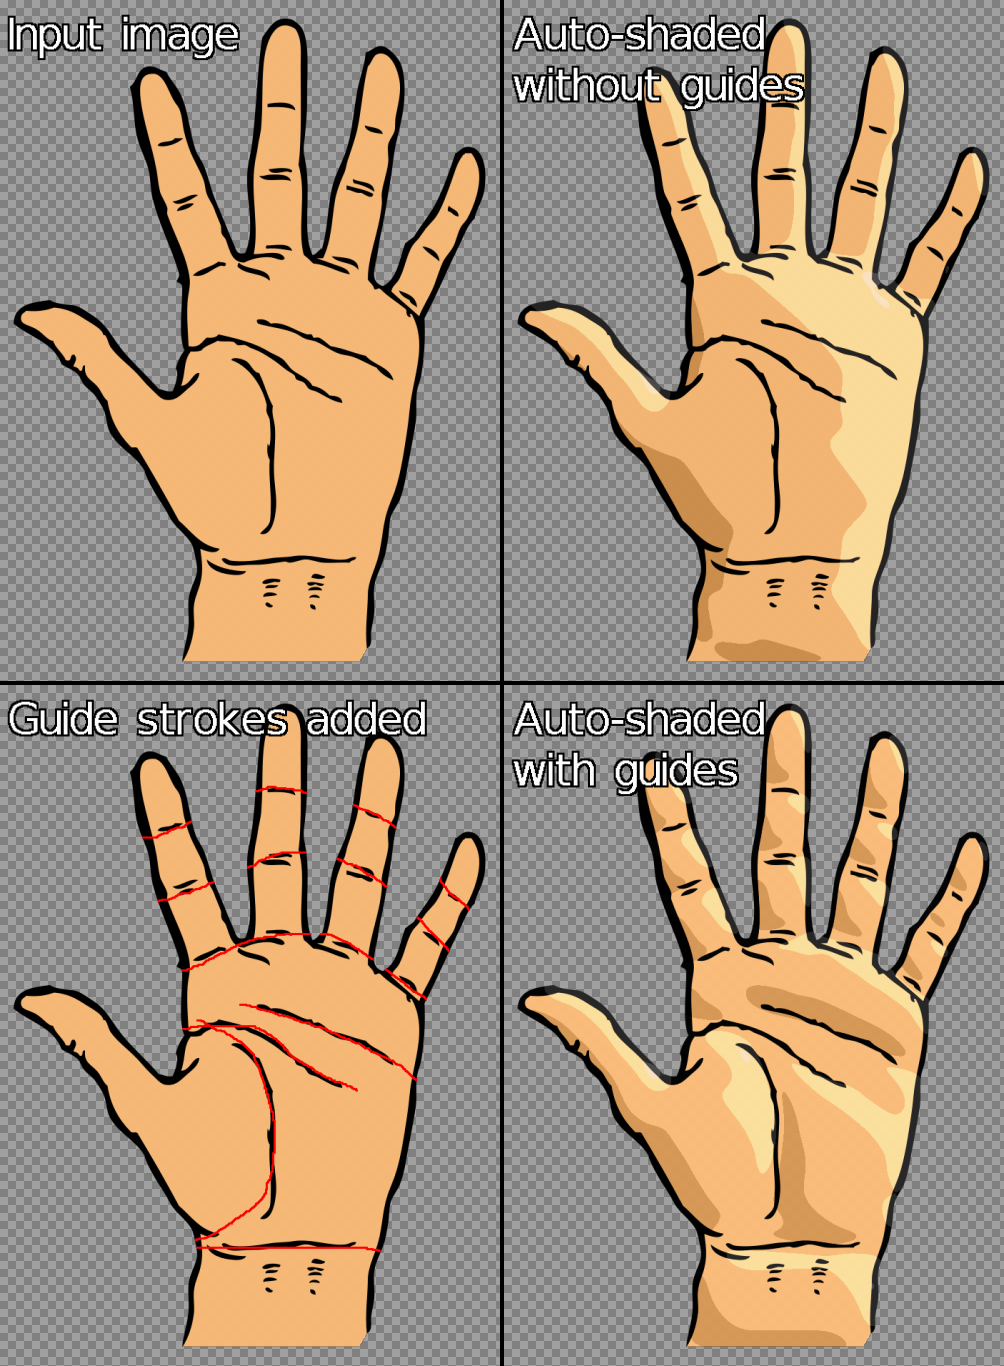
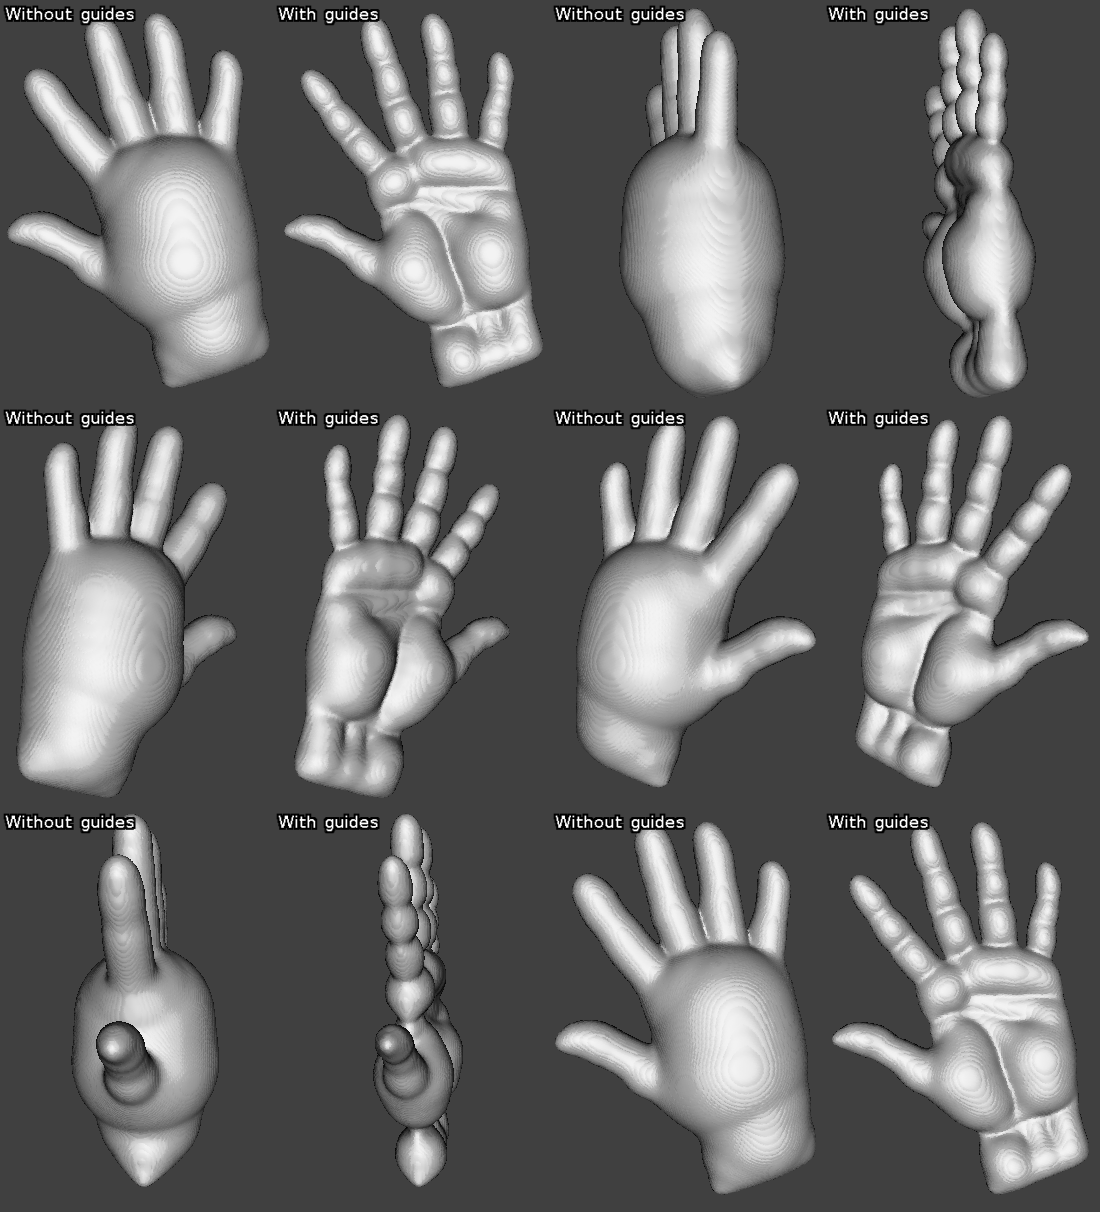

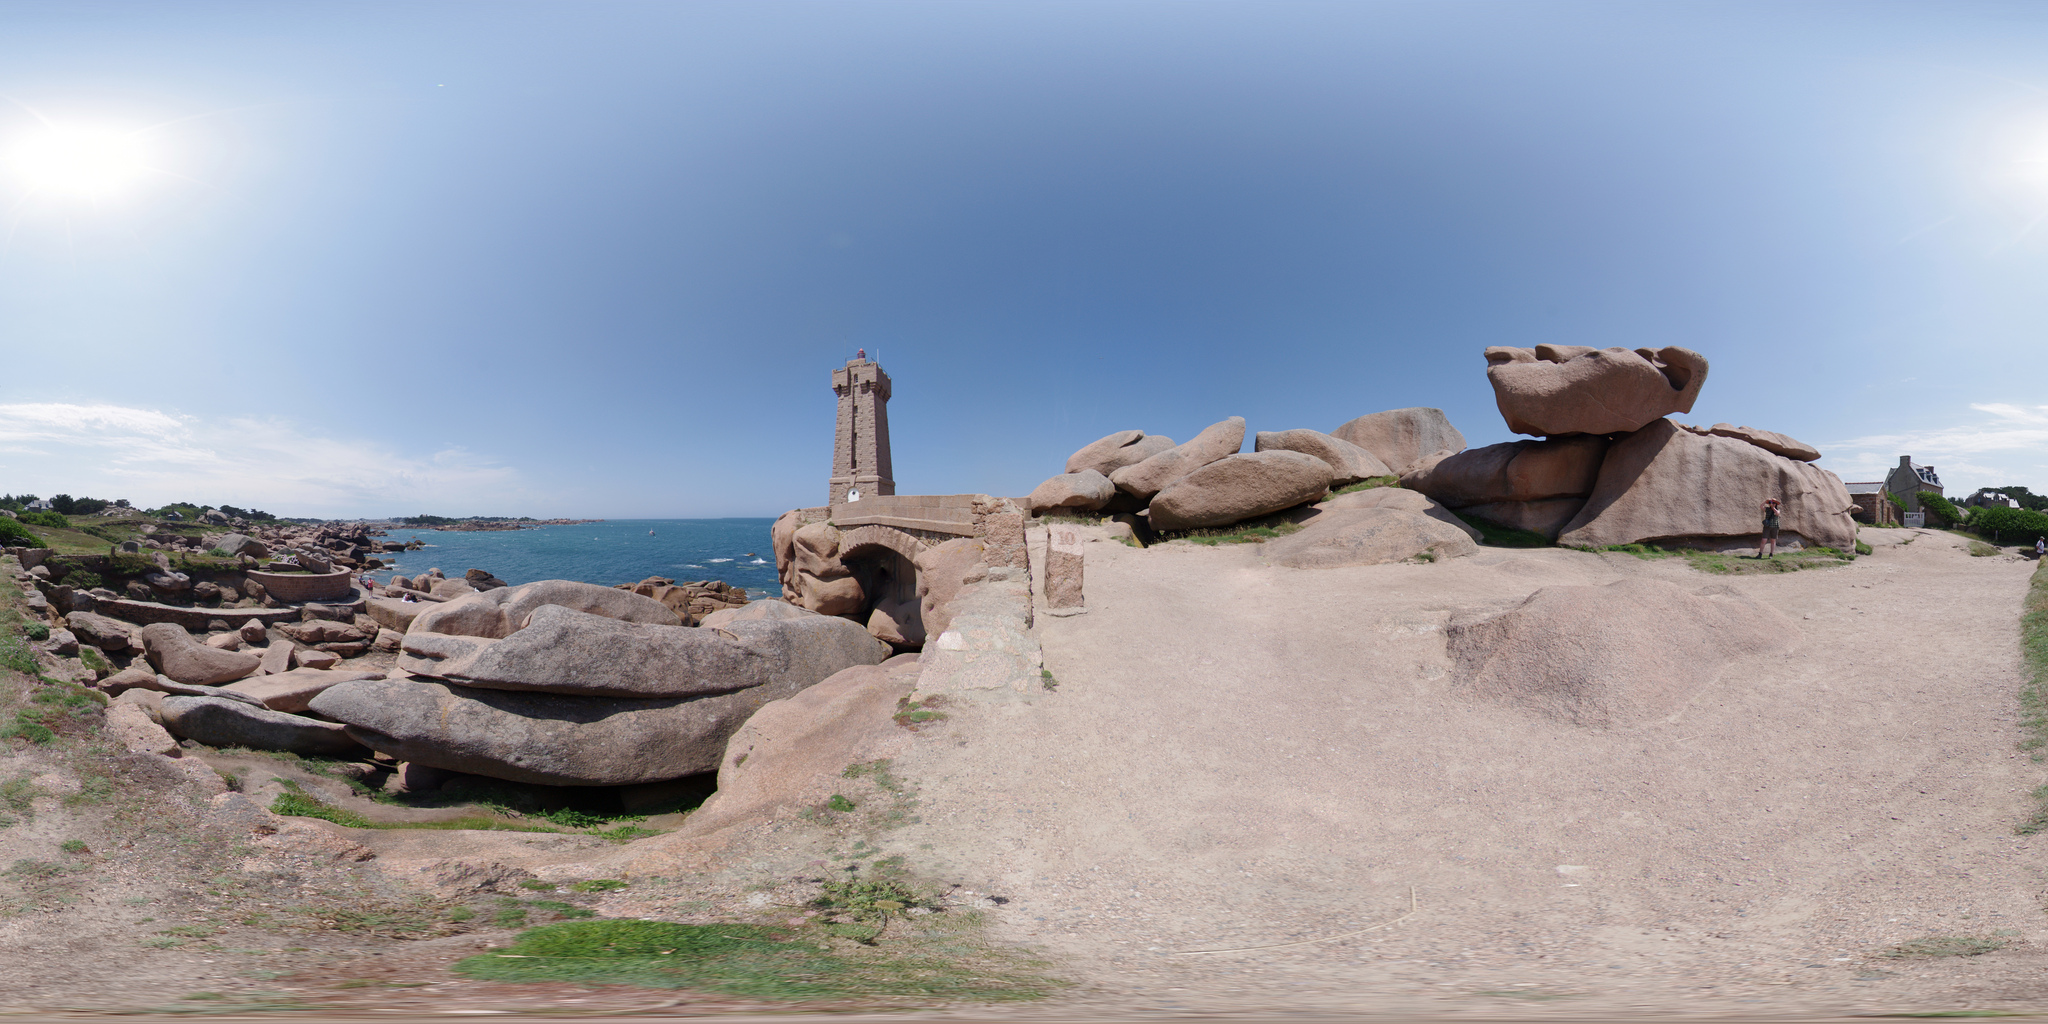
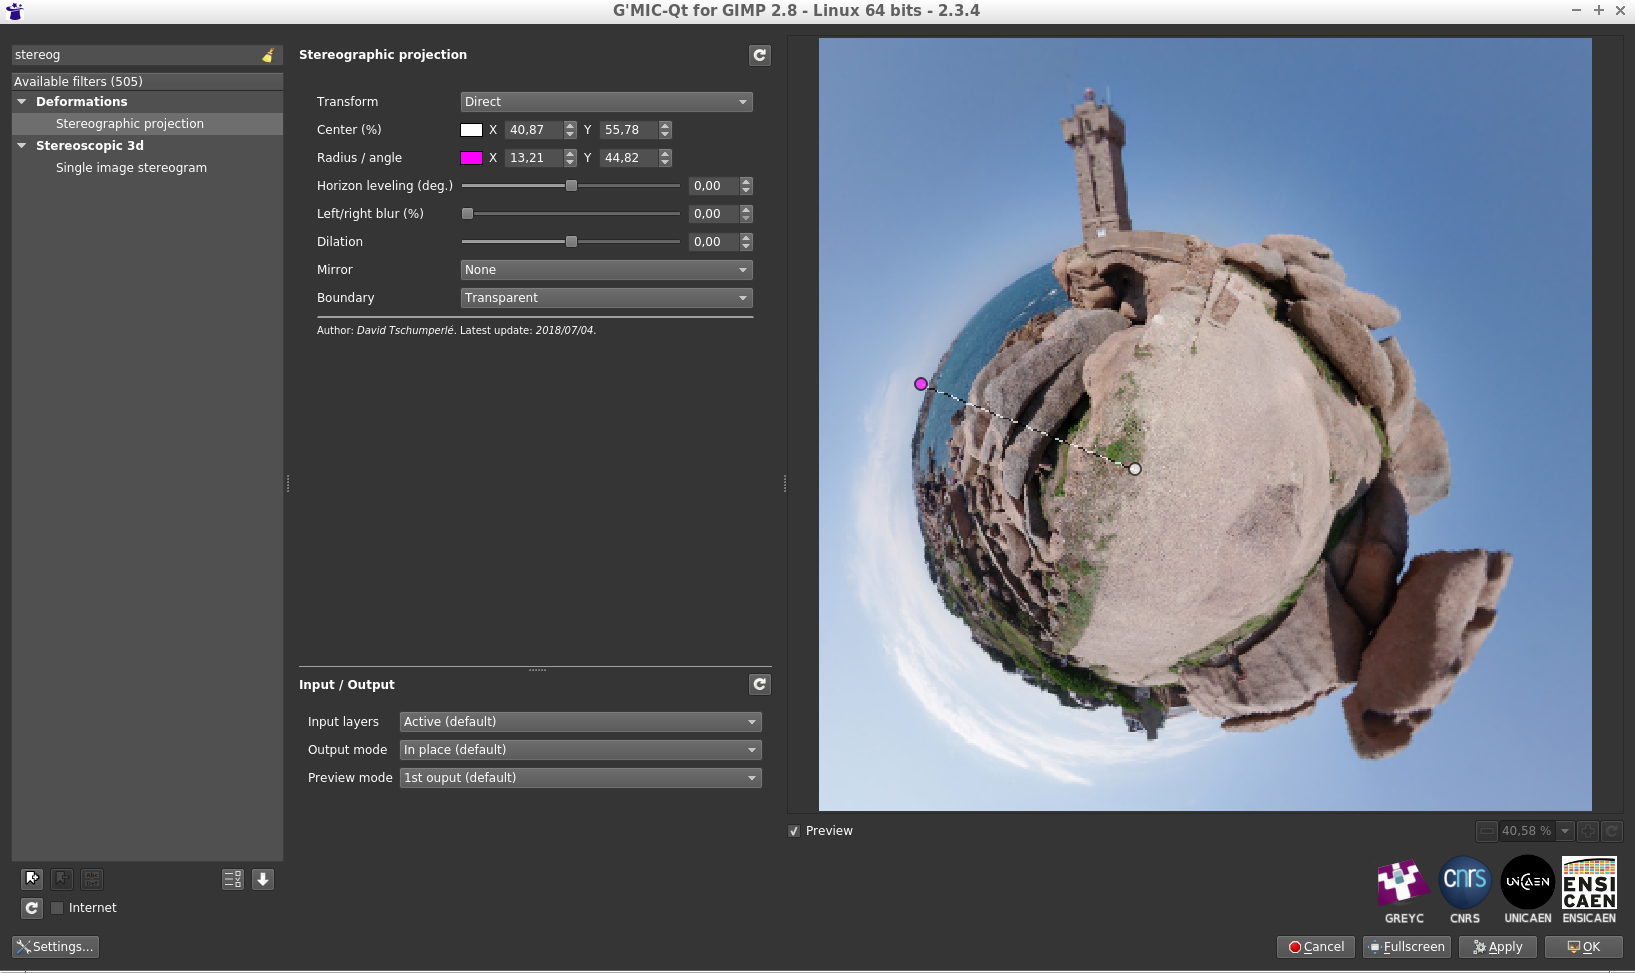
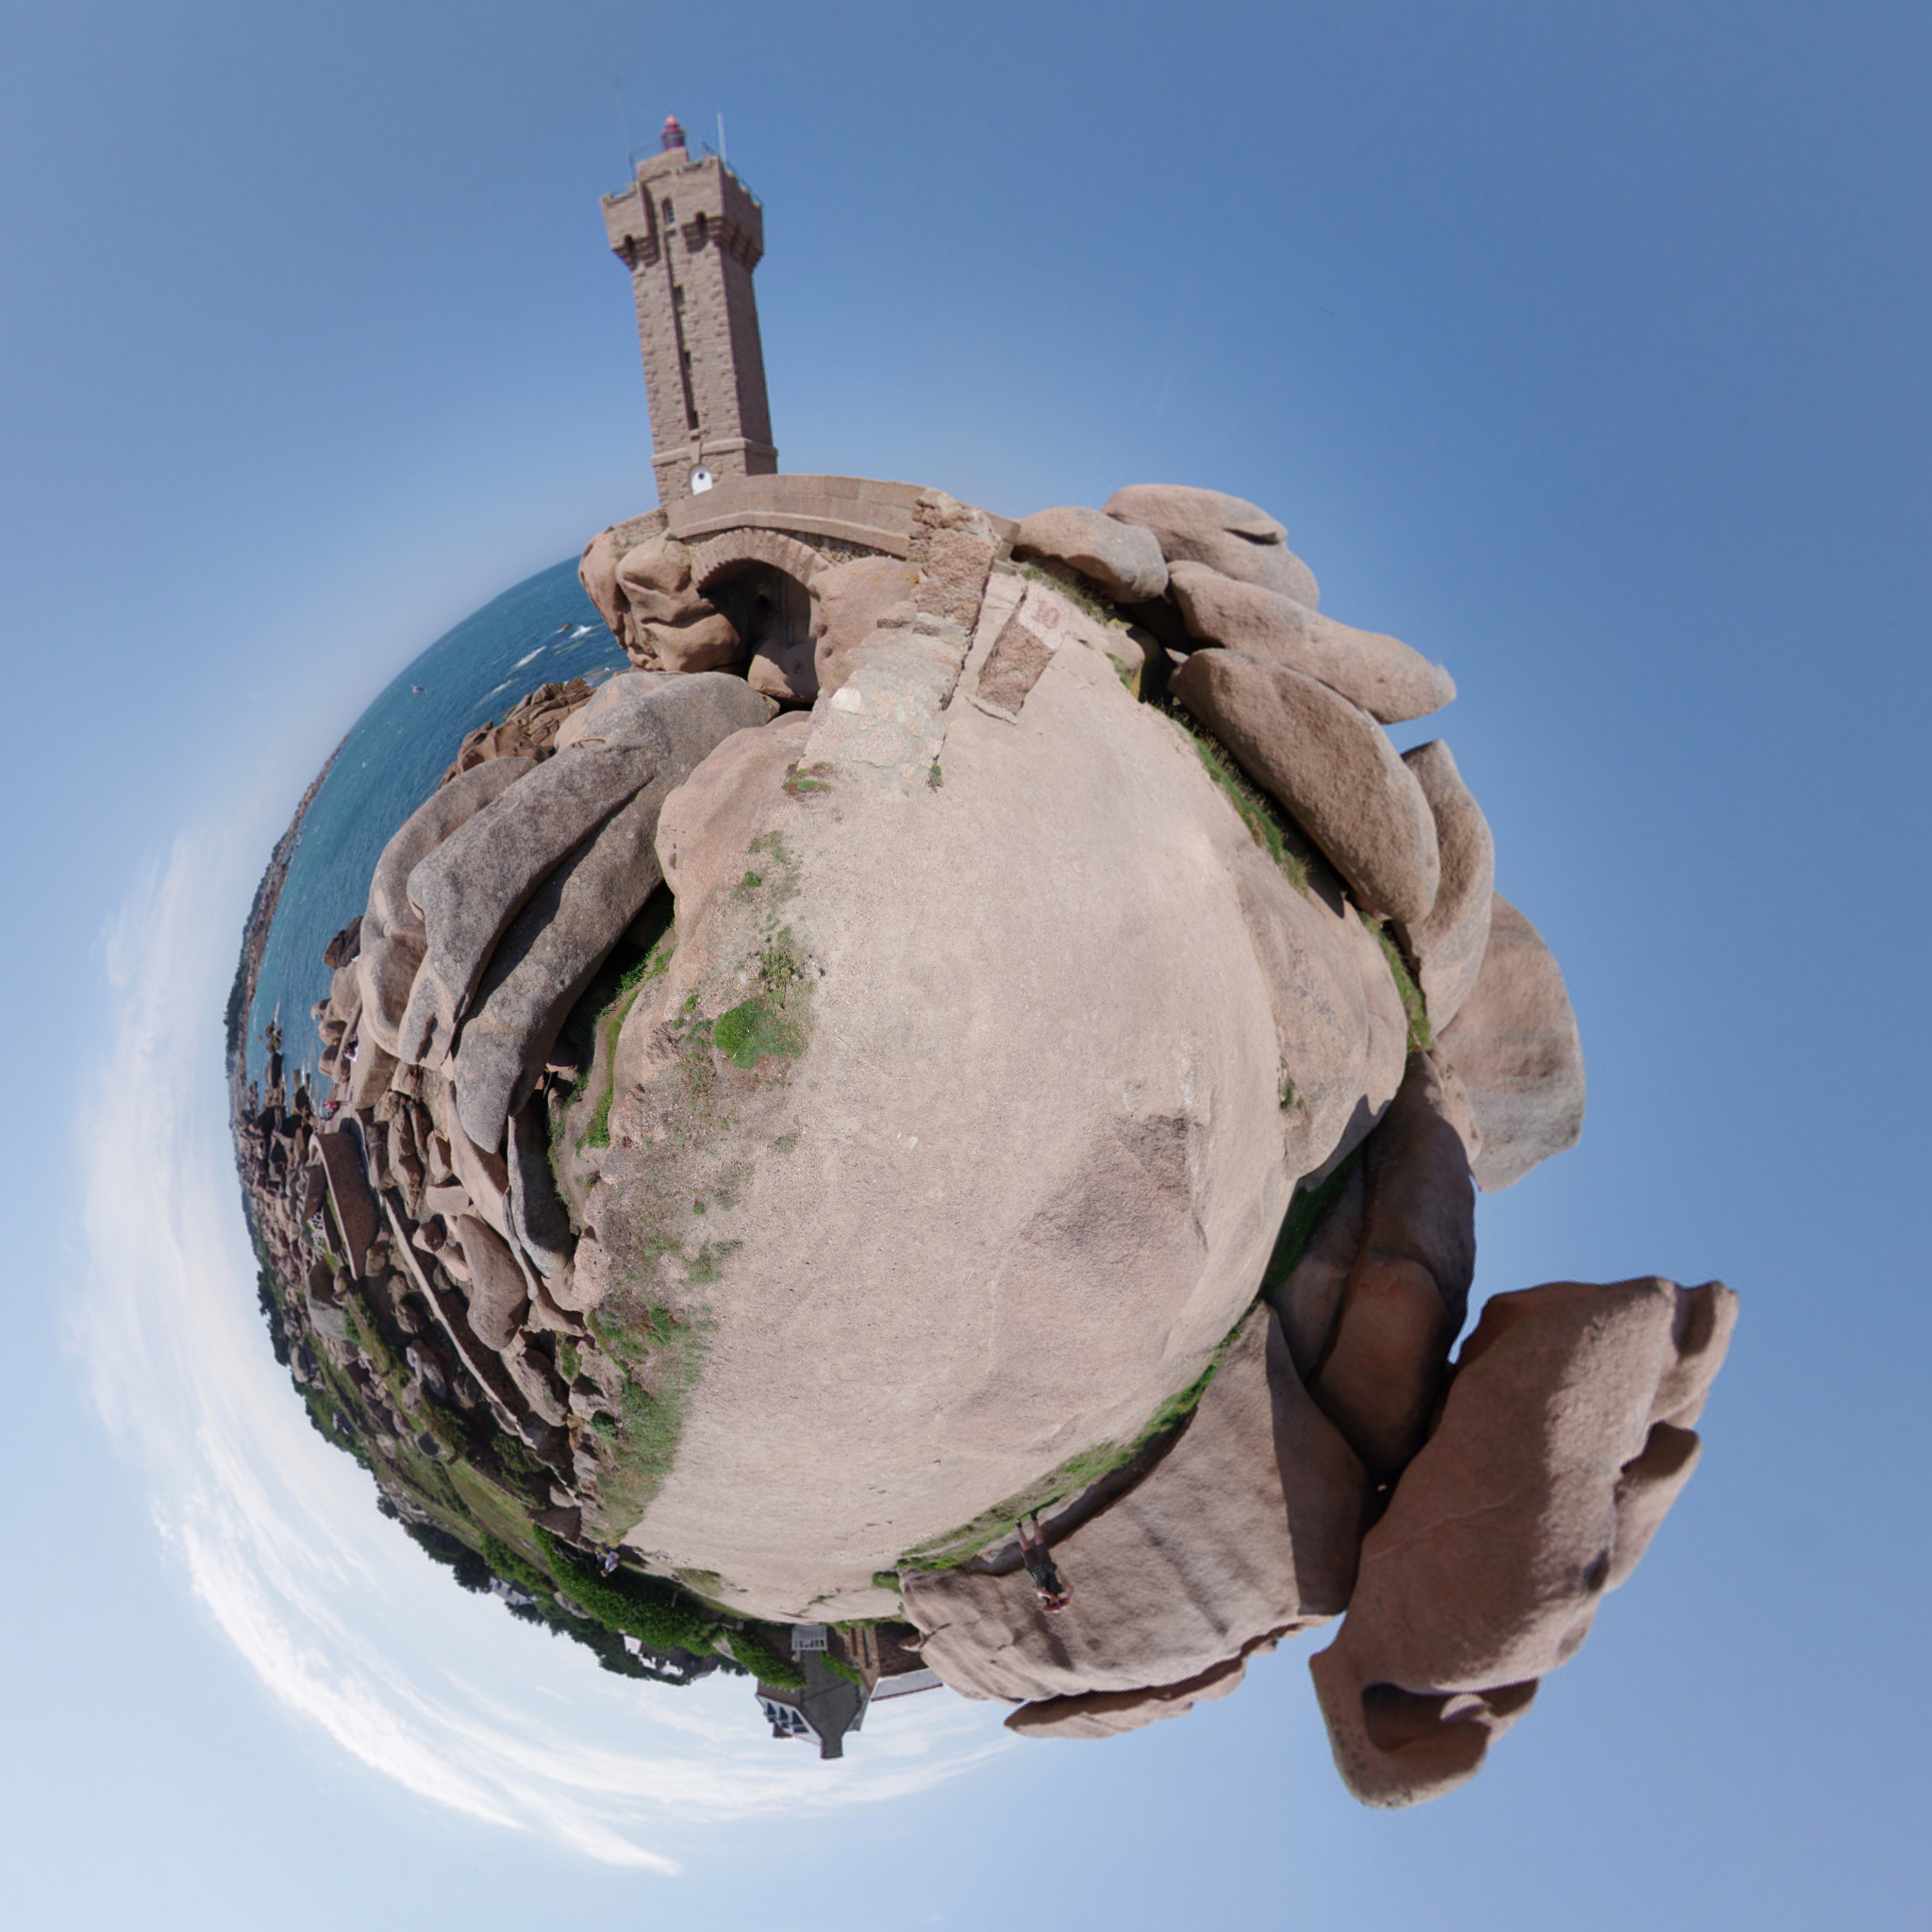
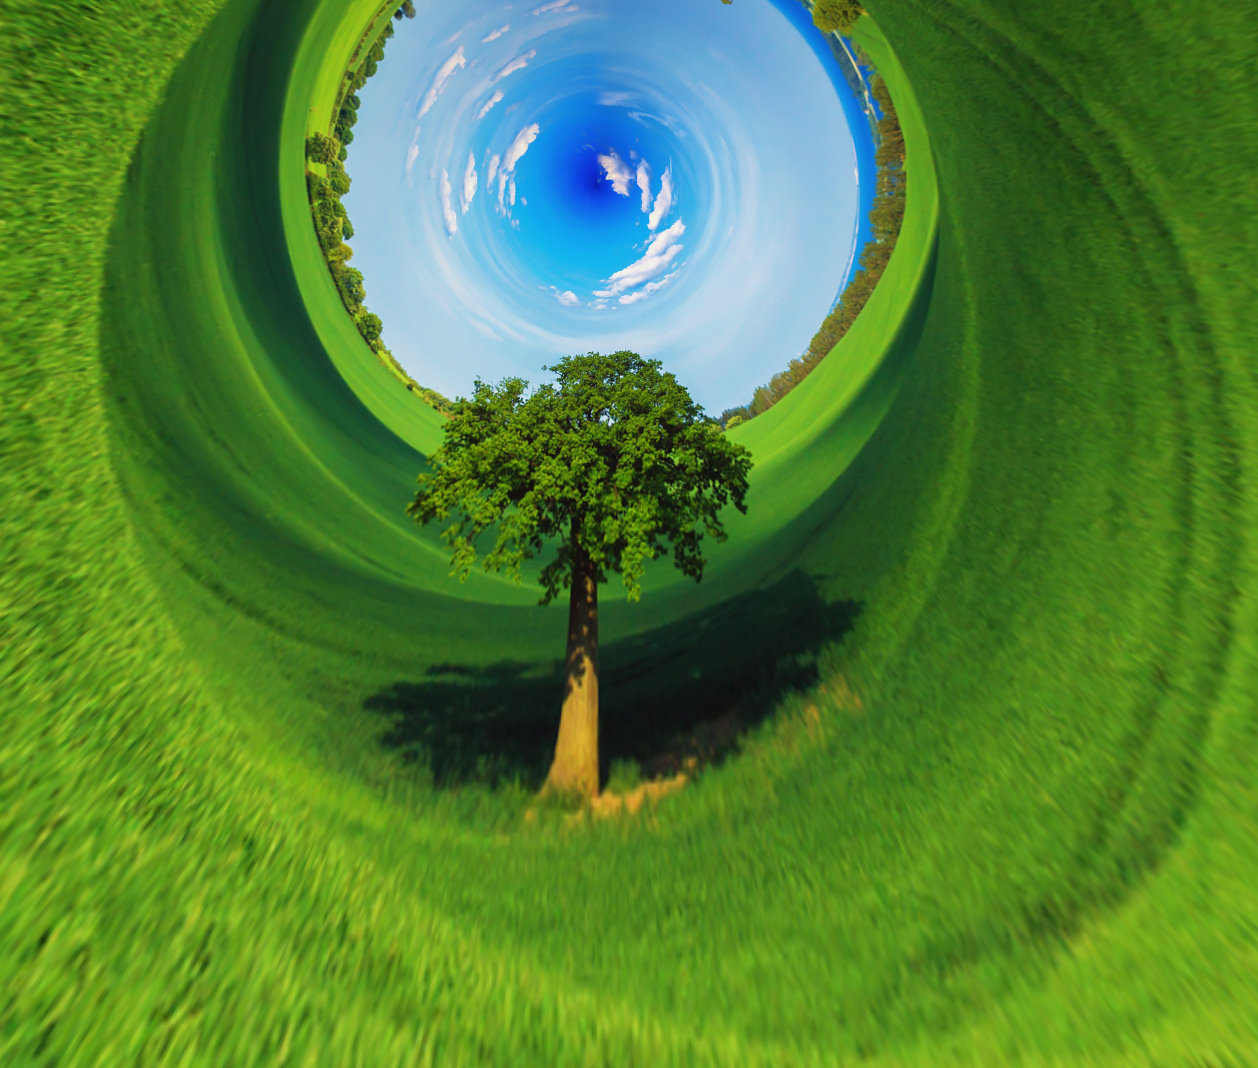
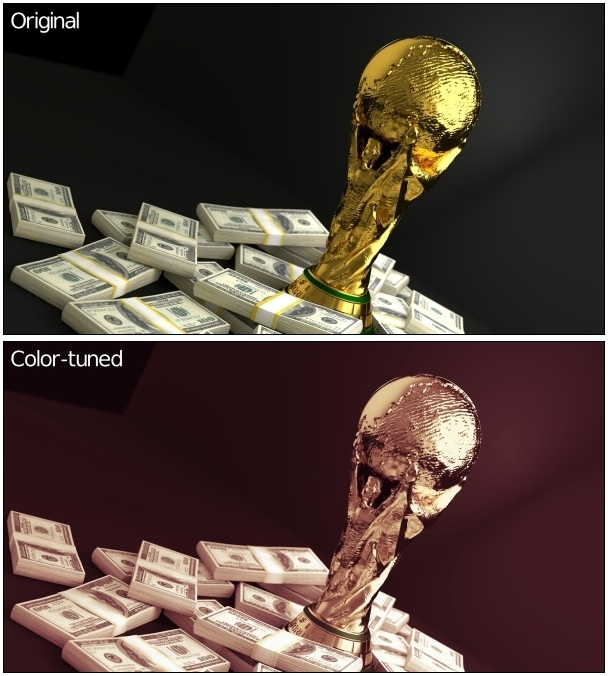
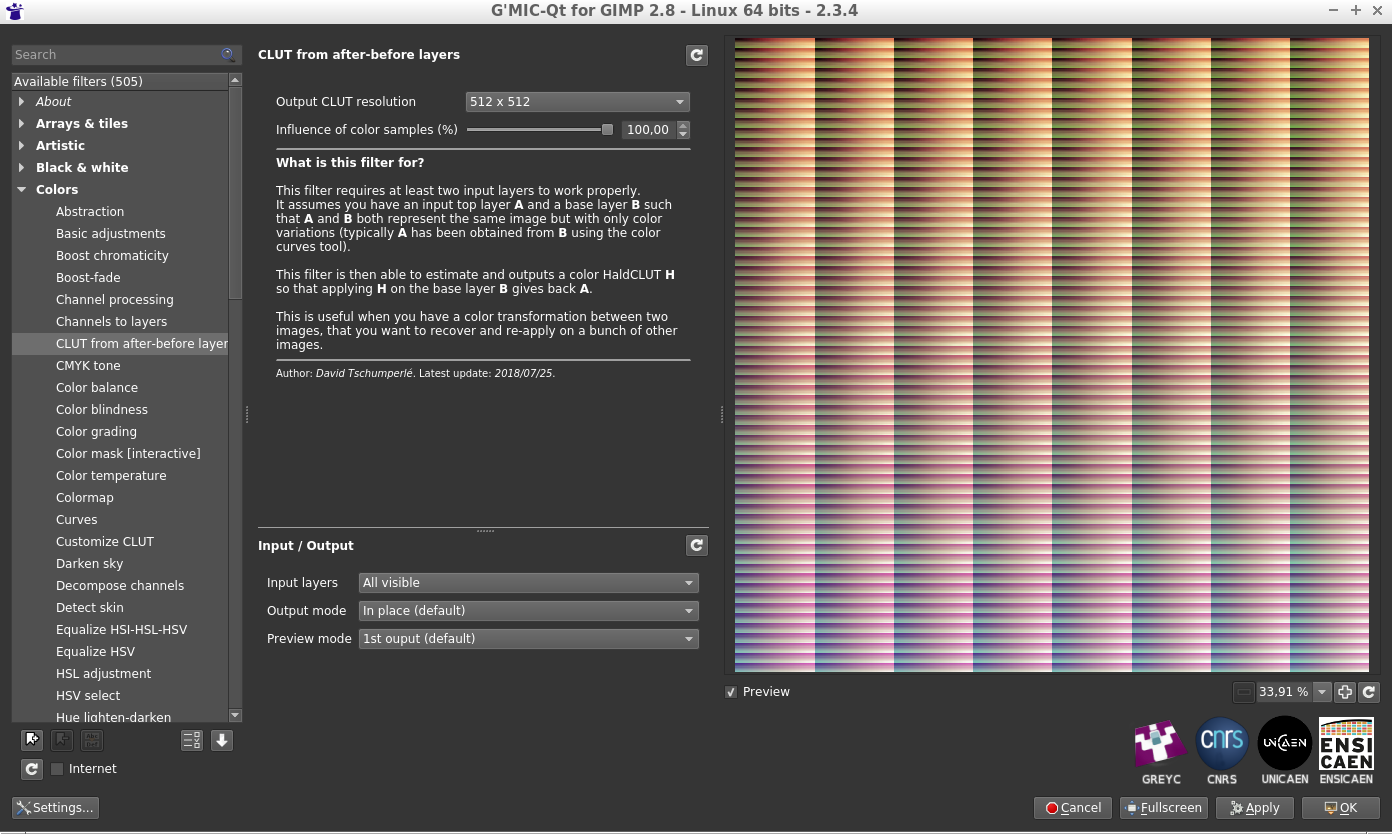
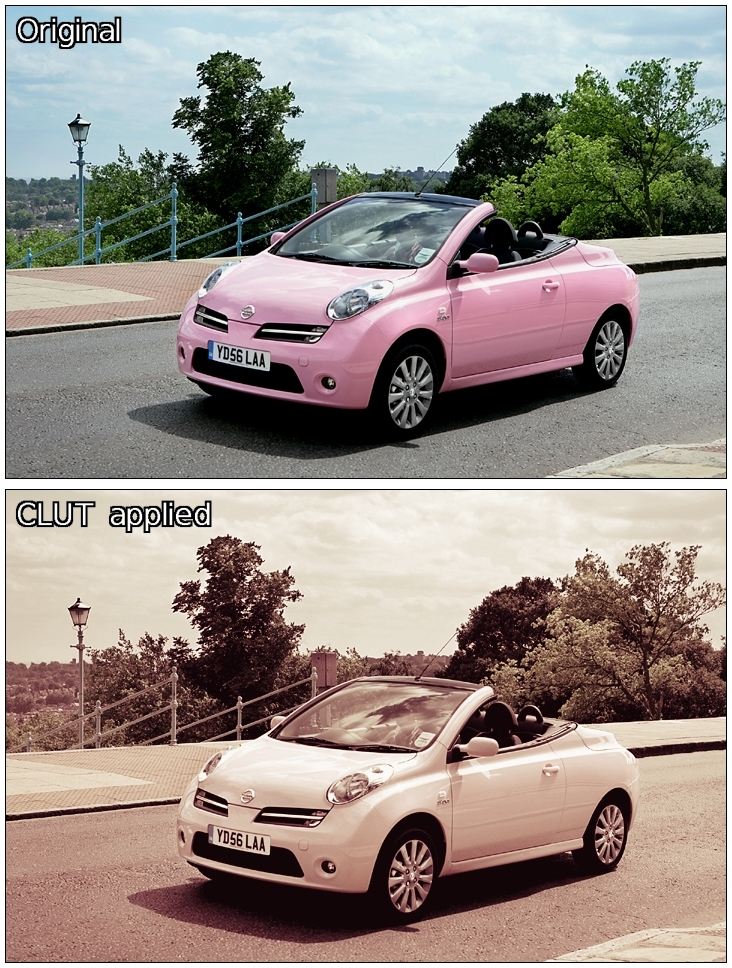
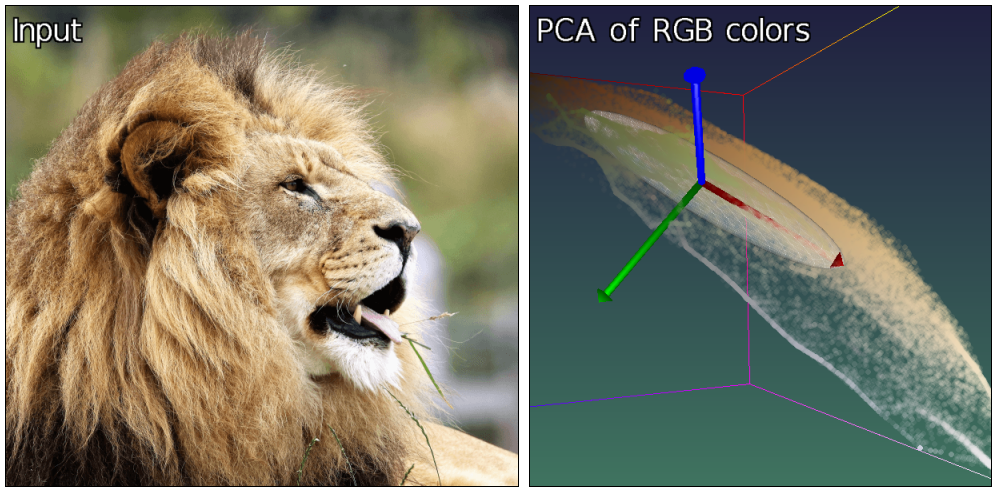
![Filter 'Mixer [PCA]'](http://gmic.eu/gmic234/fullsize/gmic_mix_pca.png)
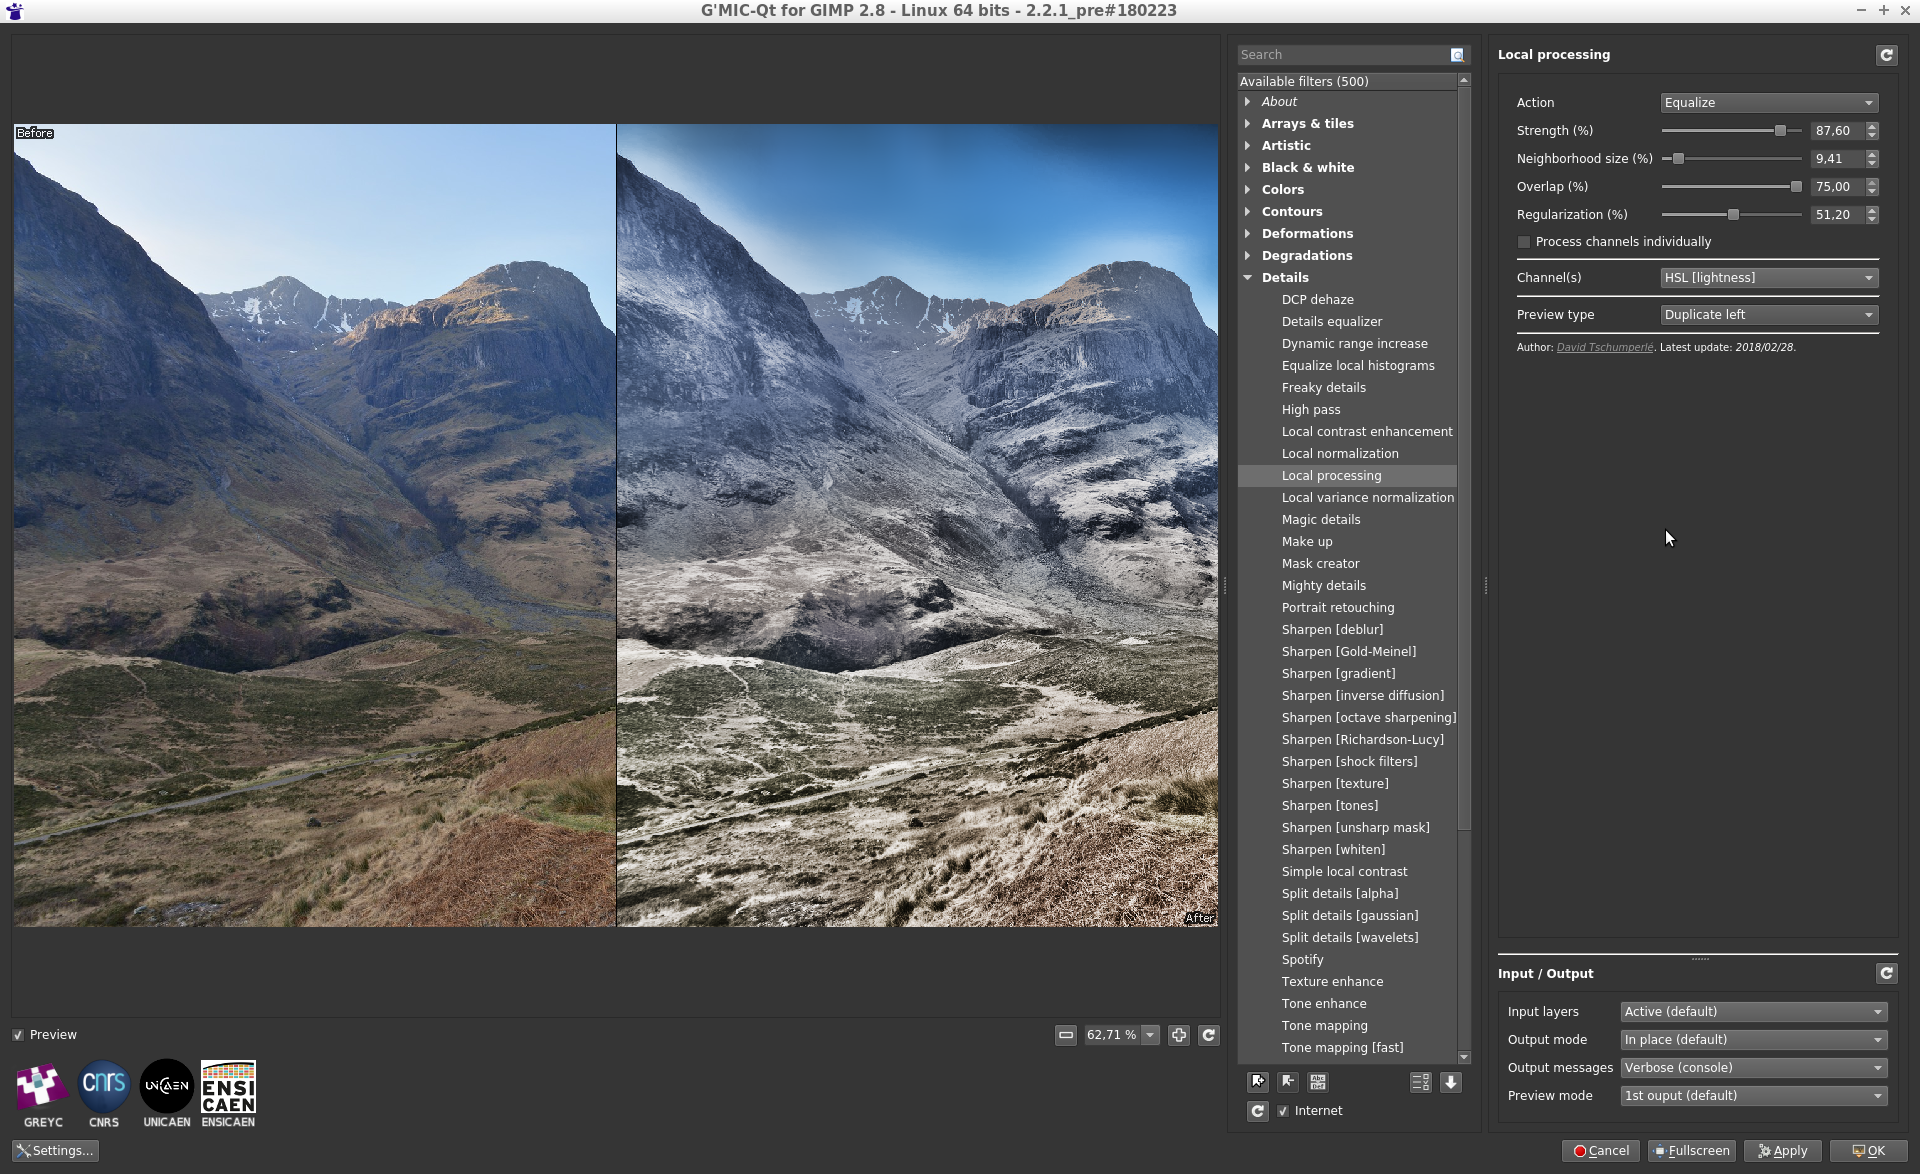
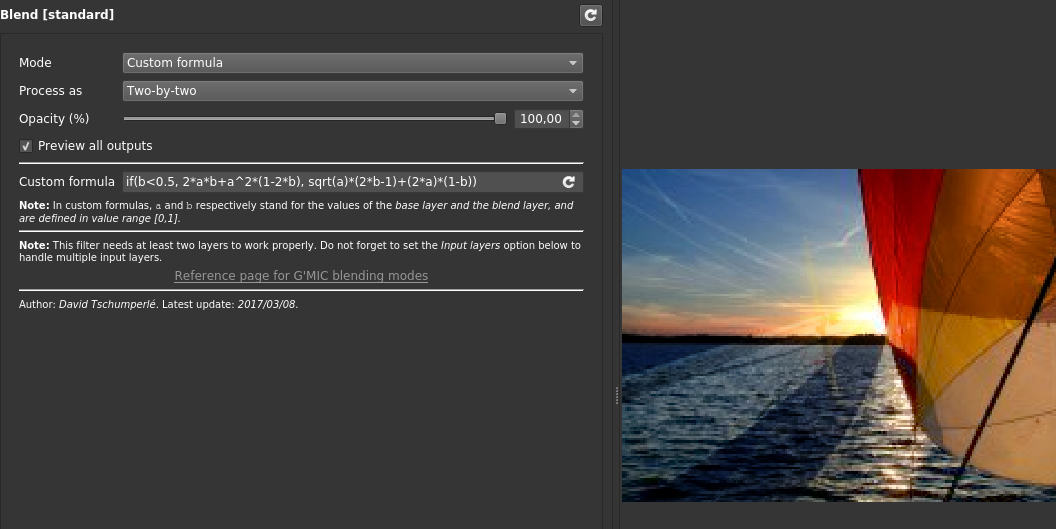

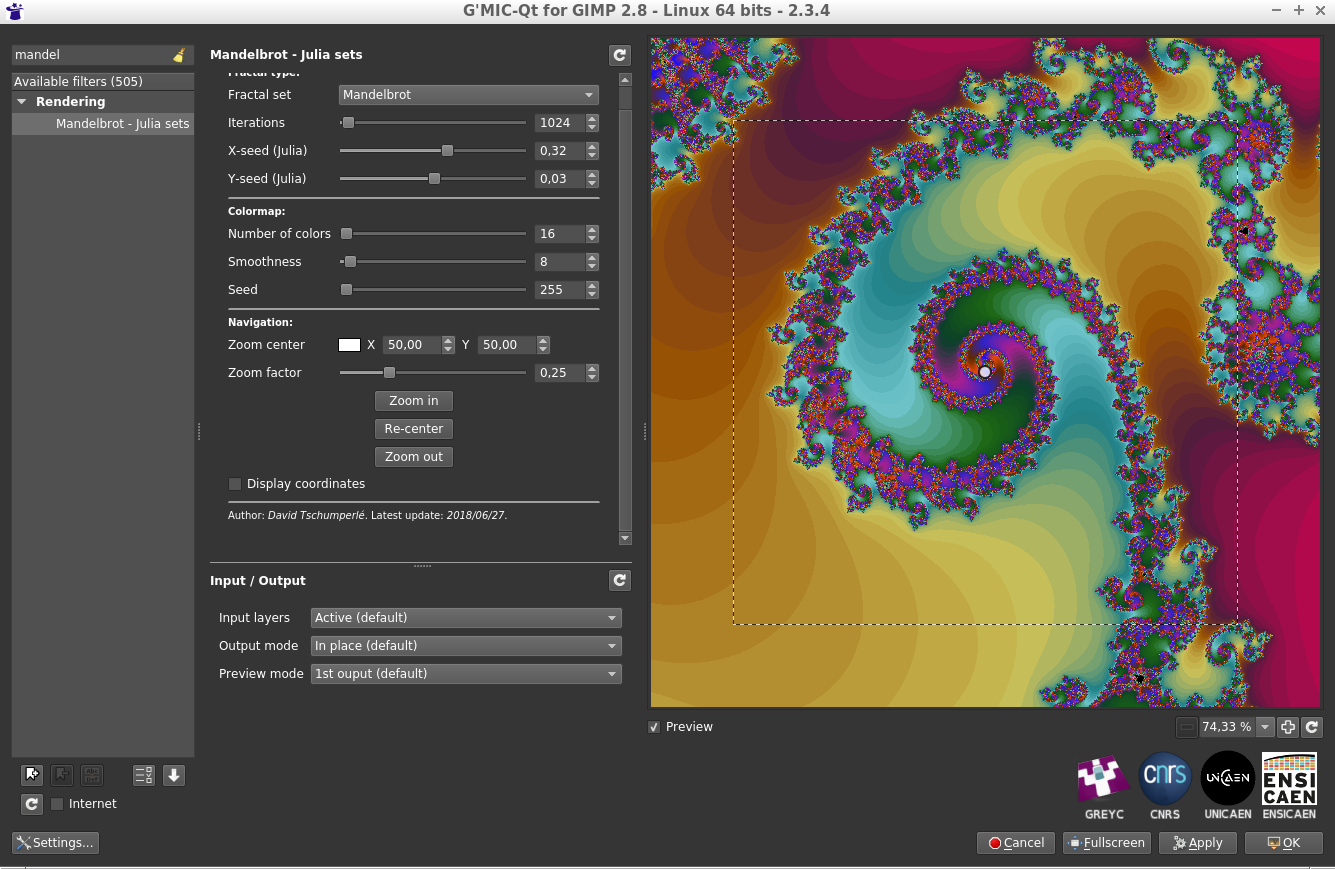
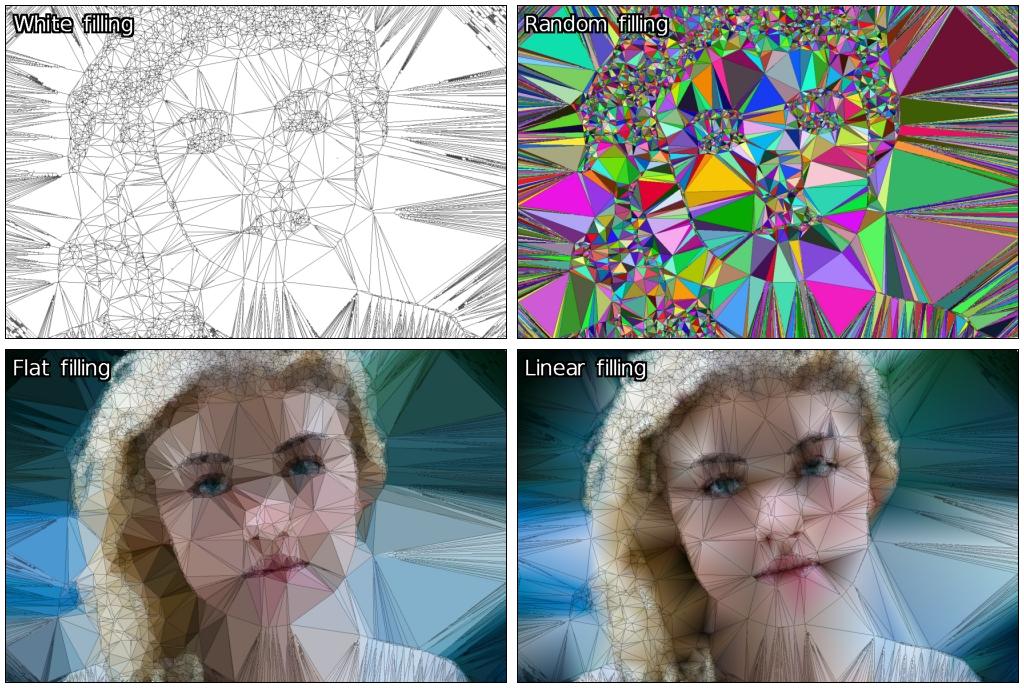


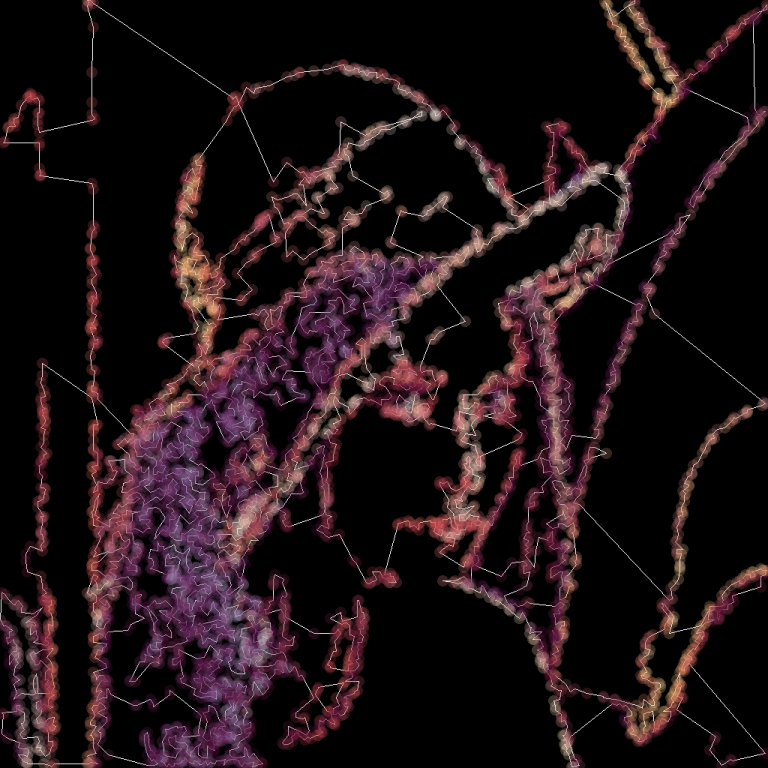
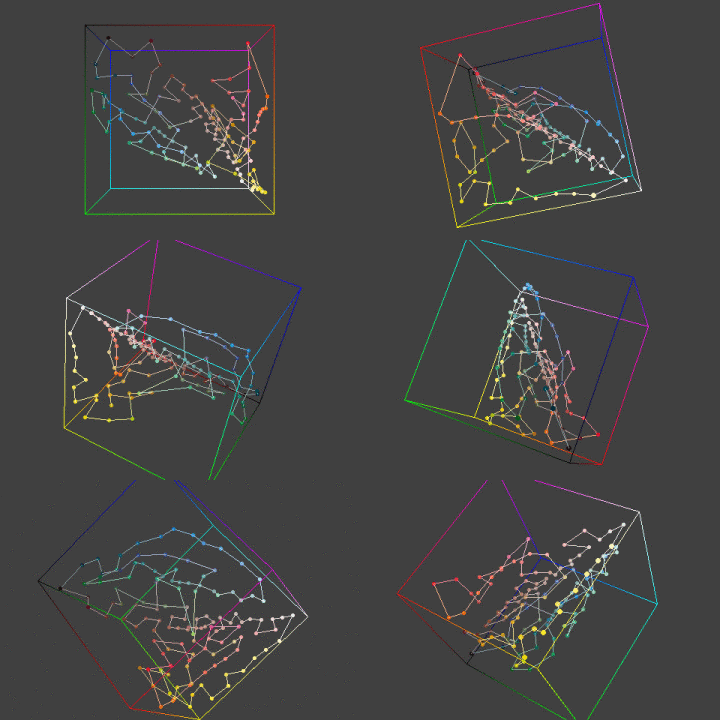
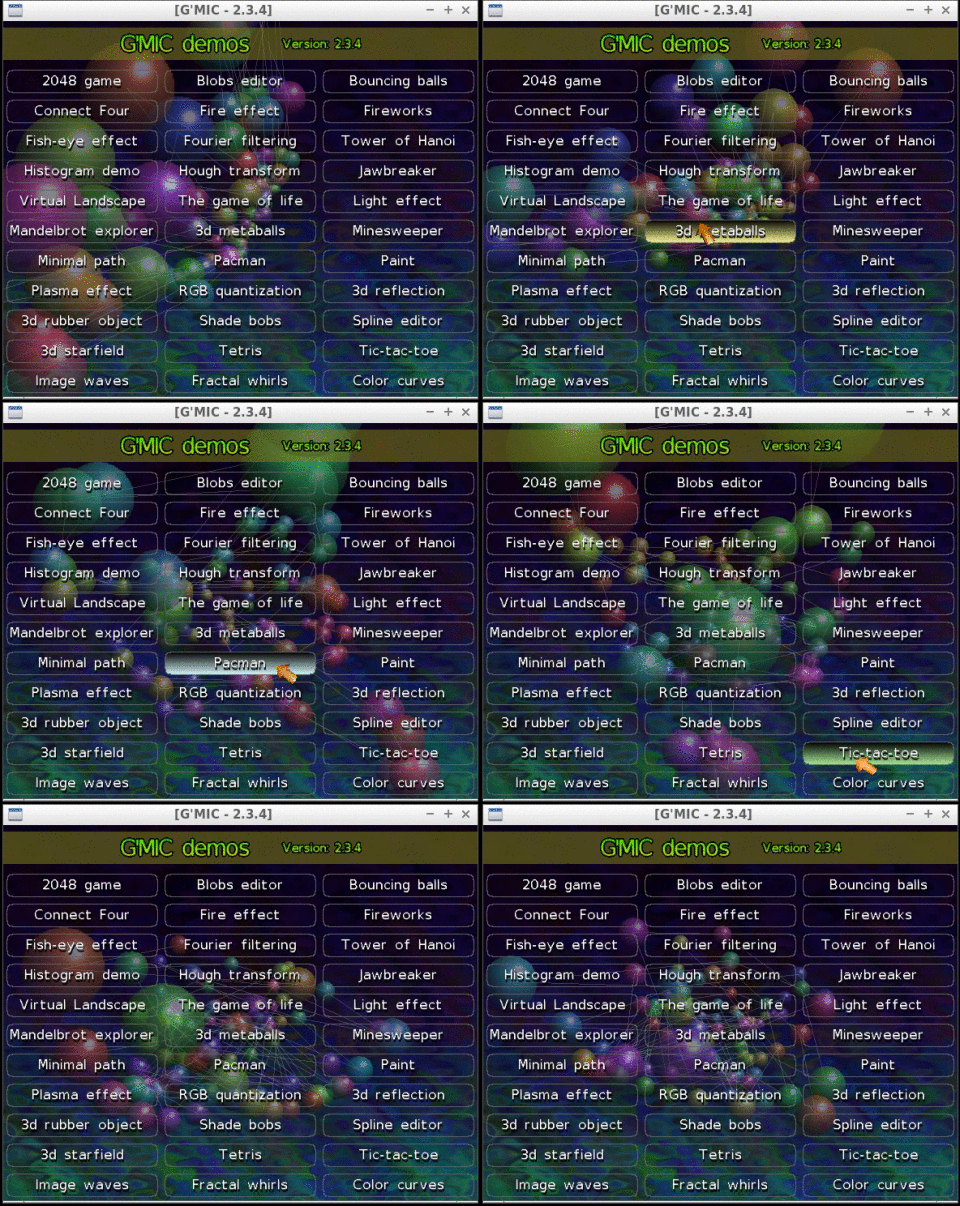
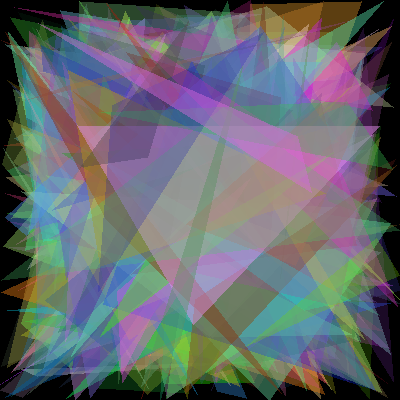
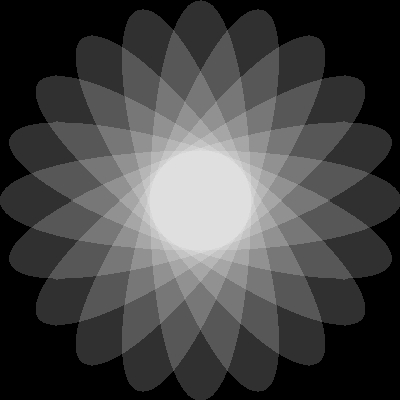
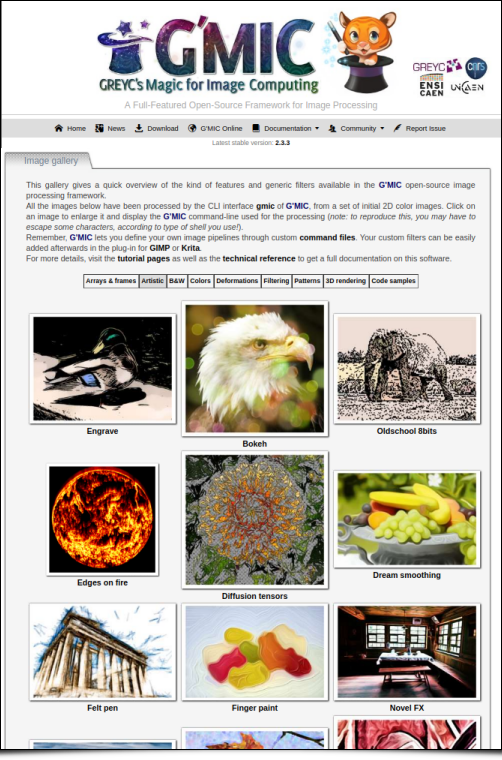


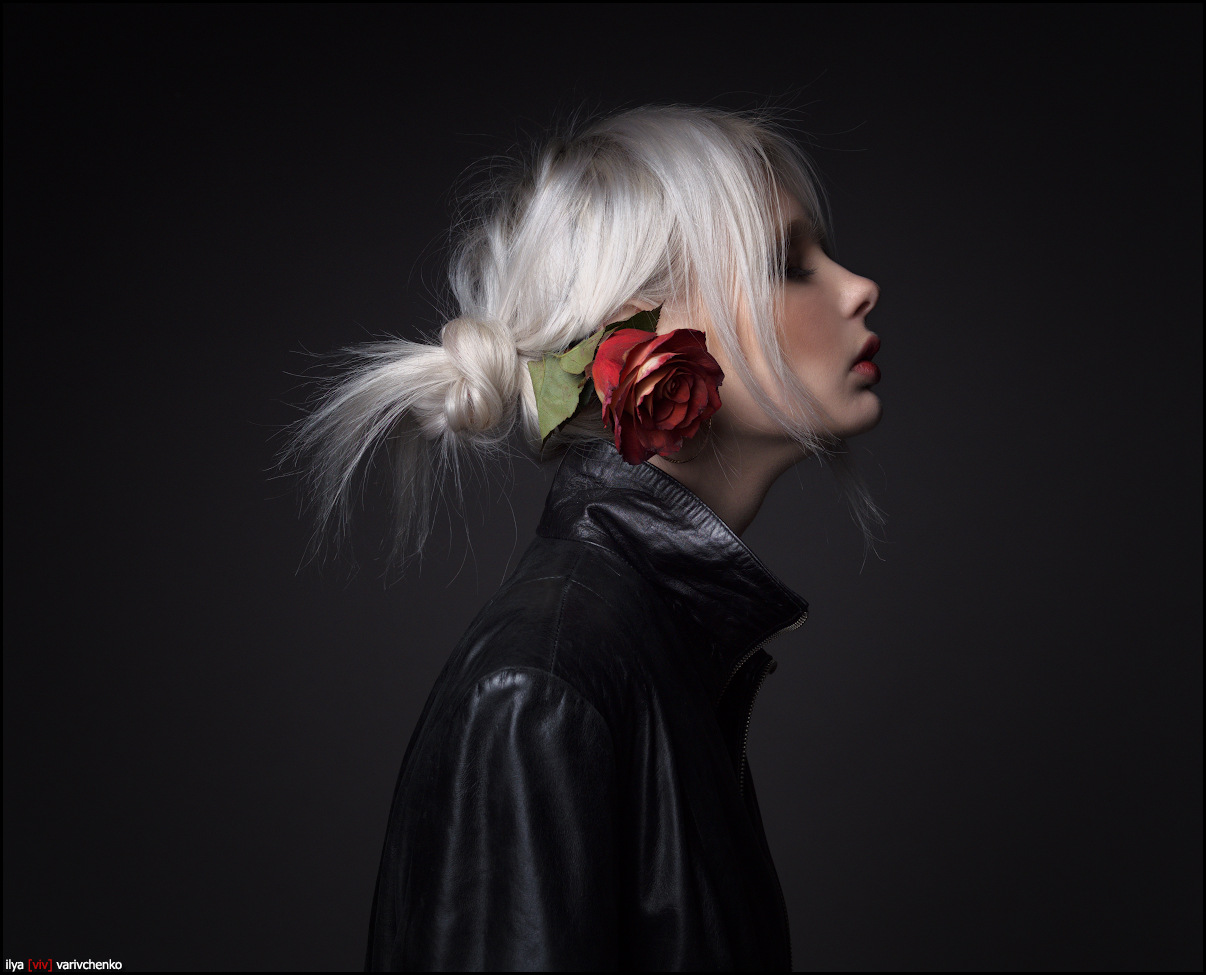
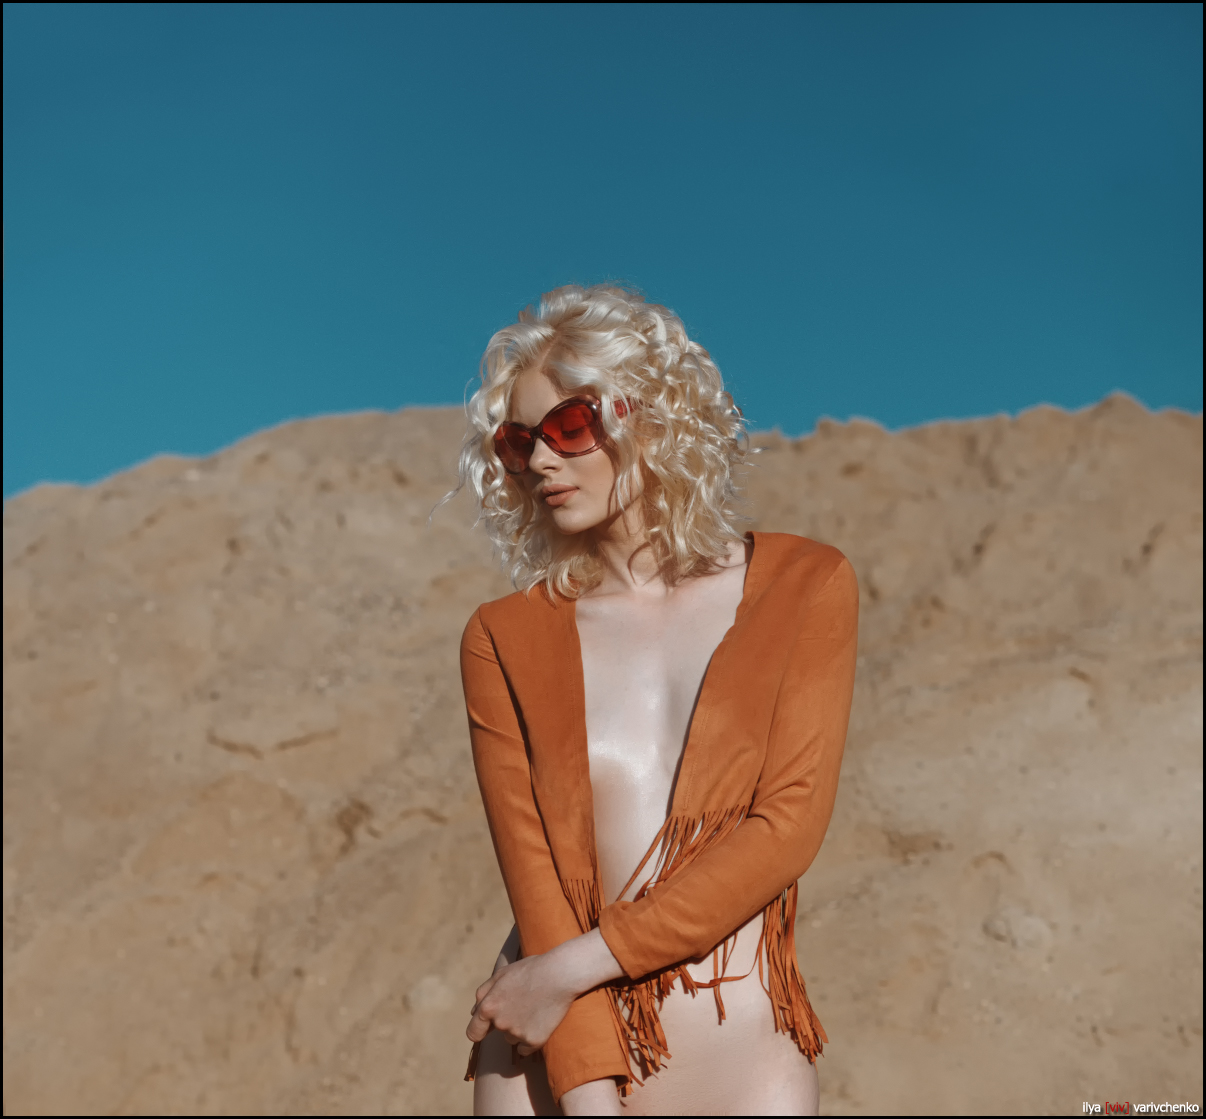
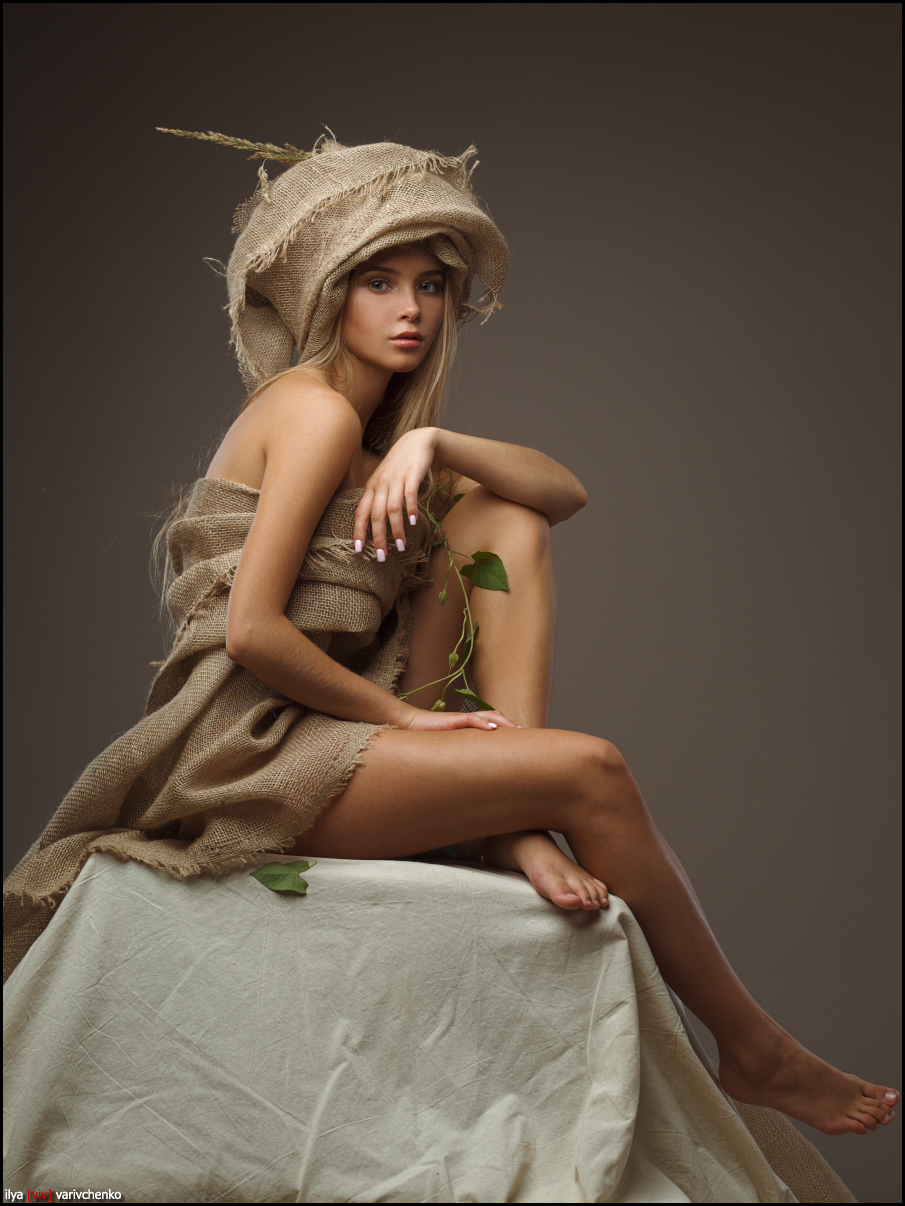
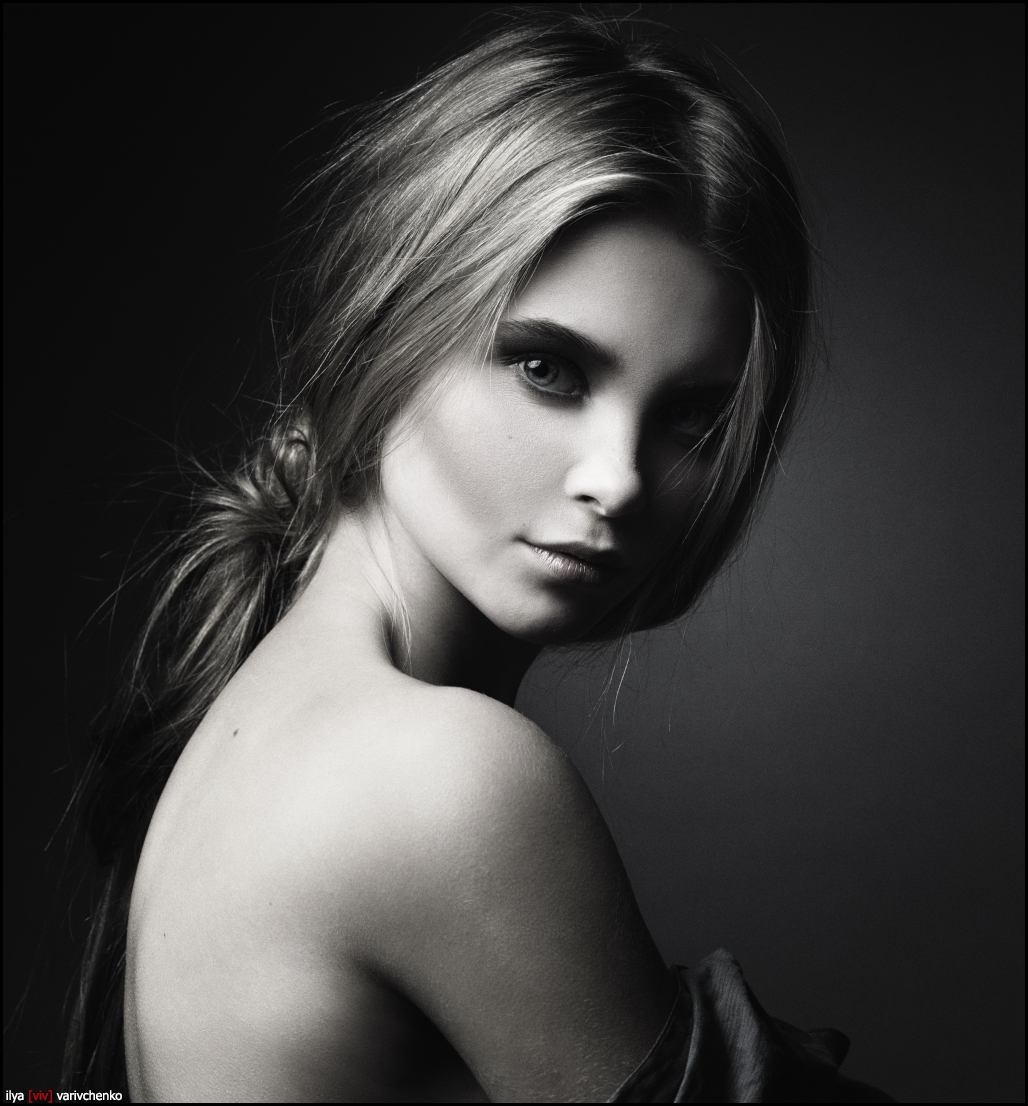
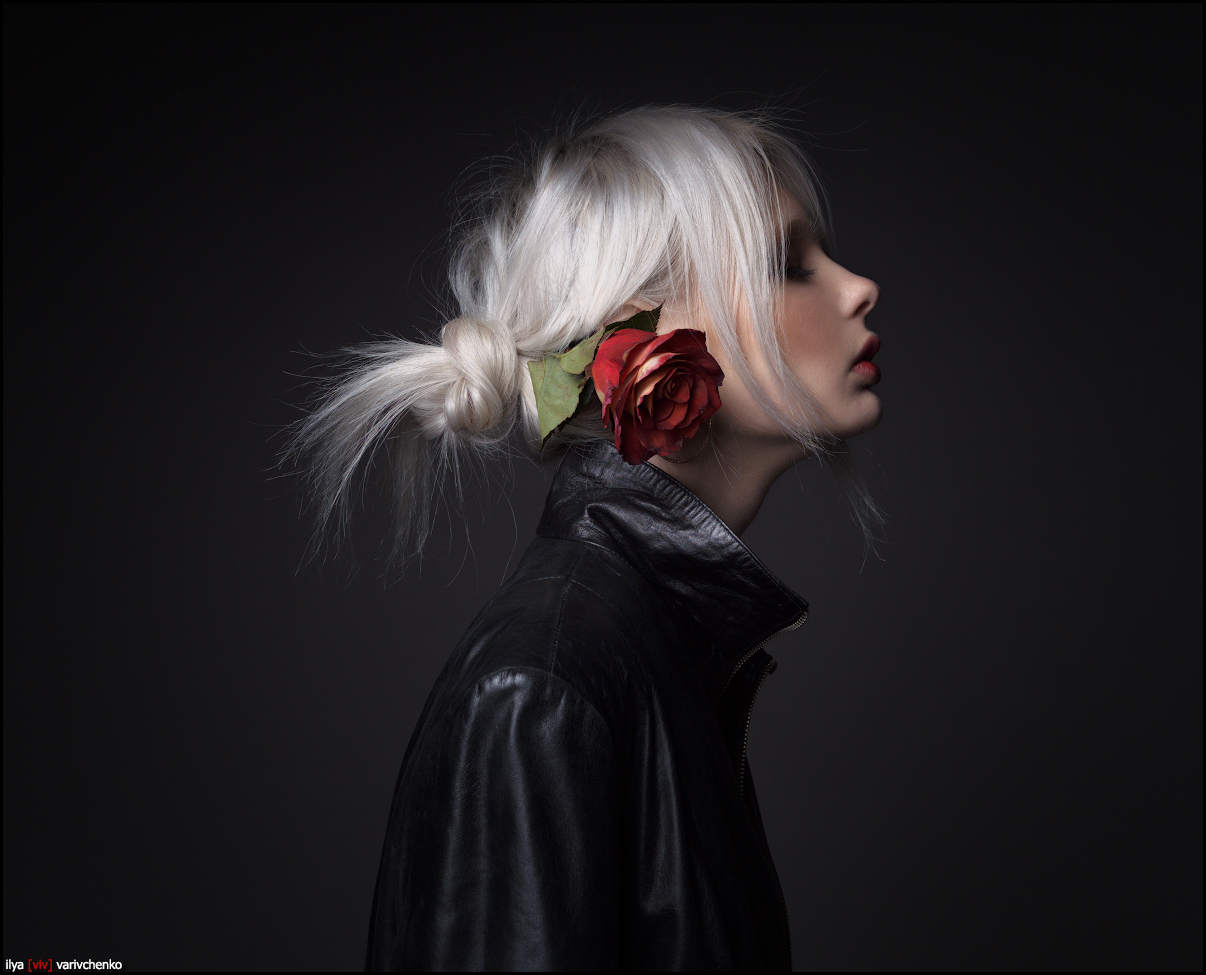
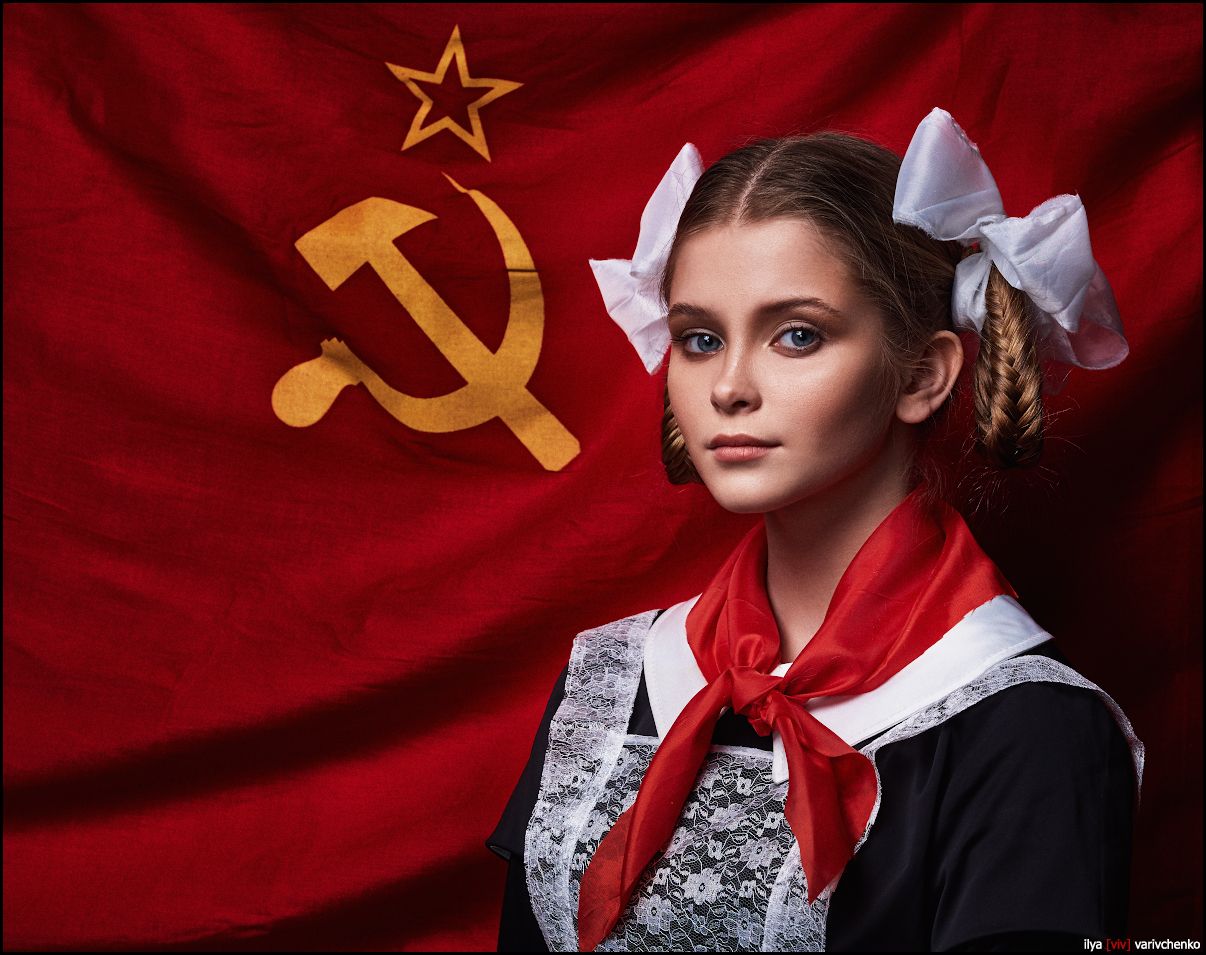

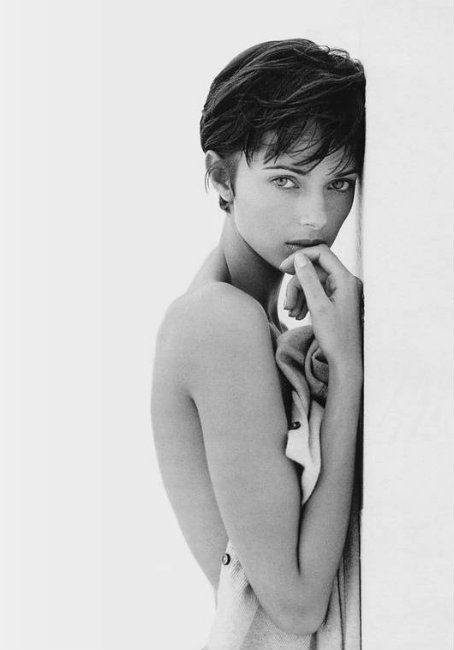
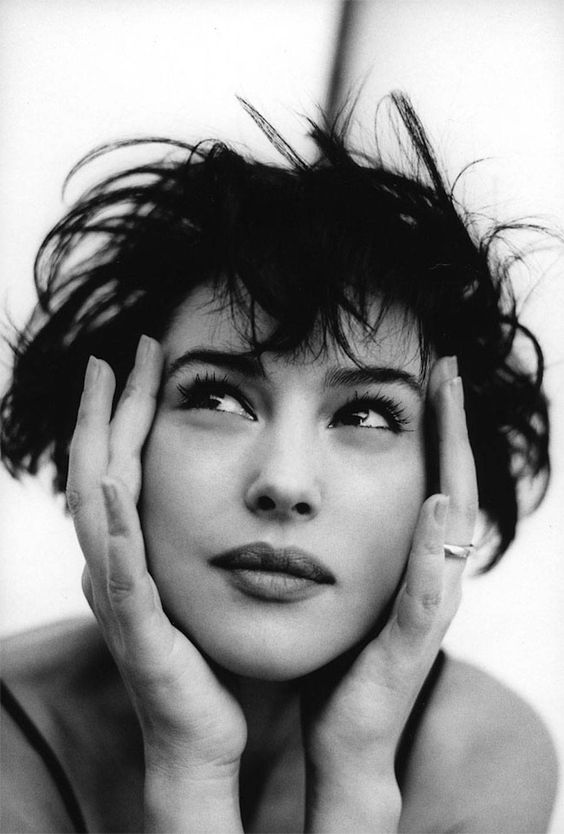
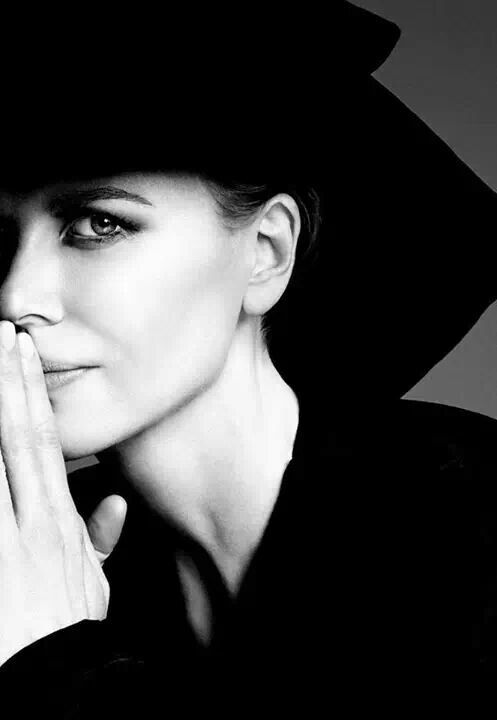
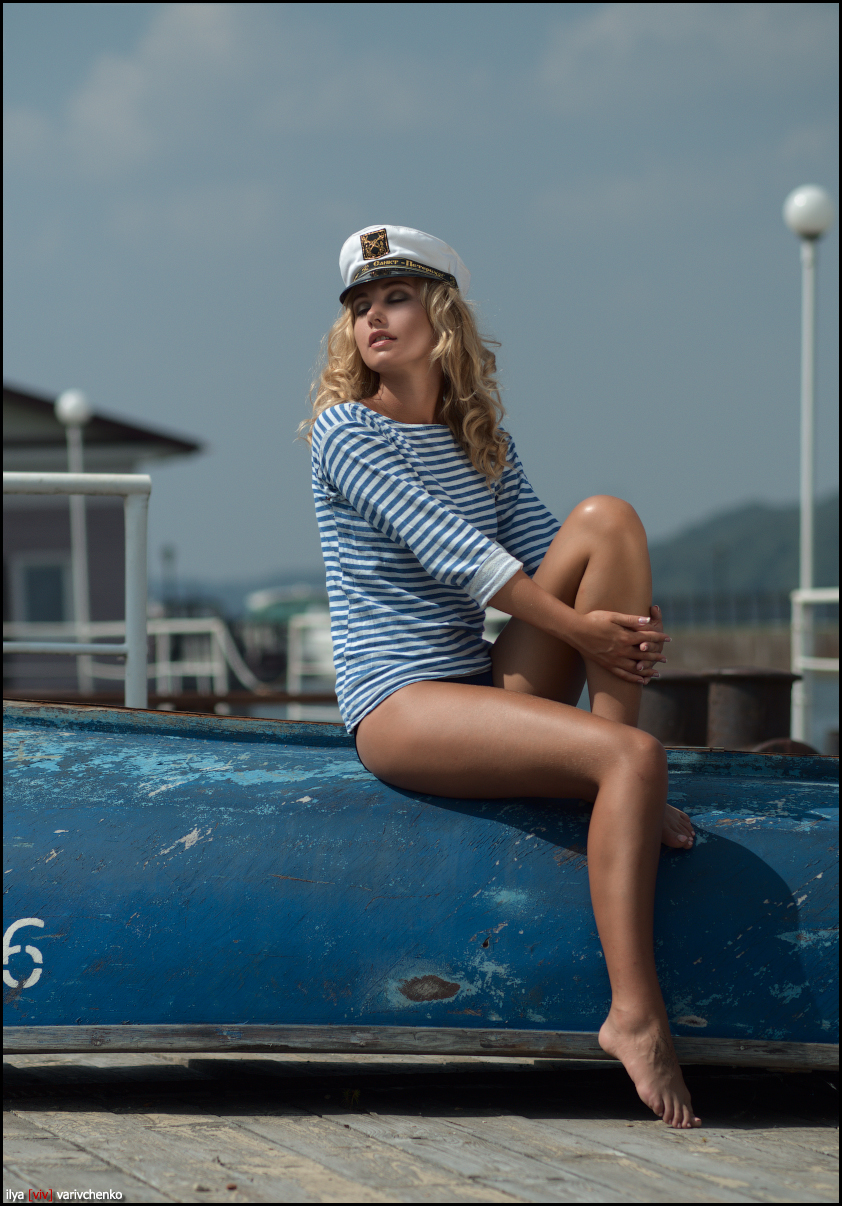
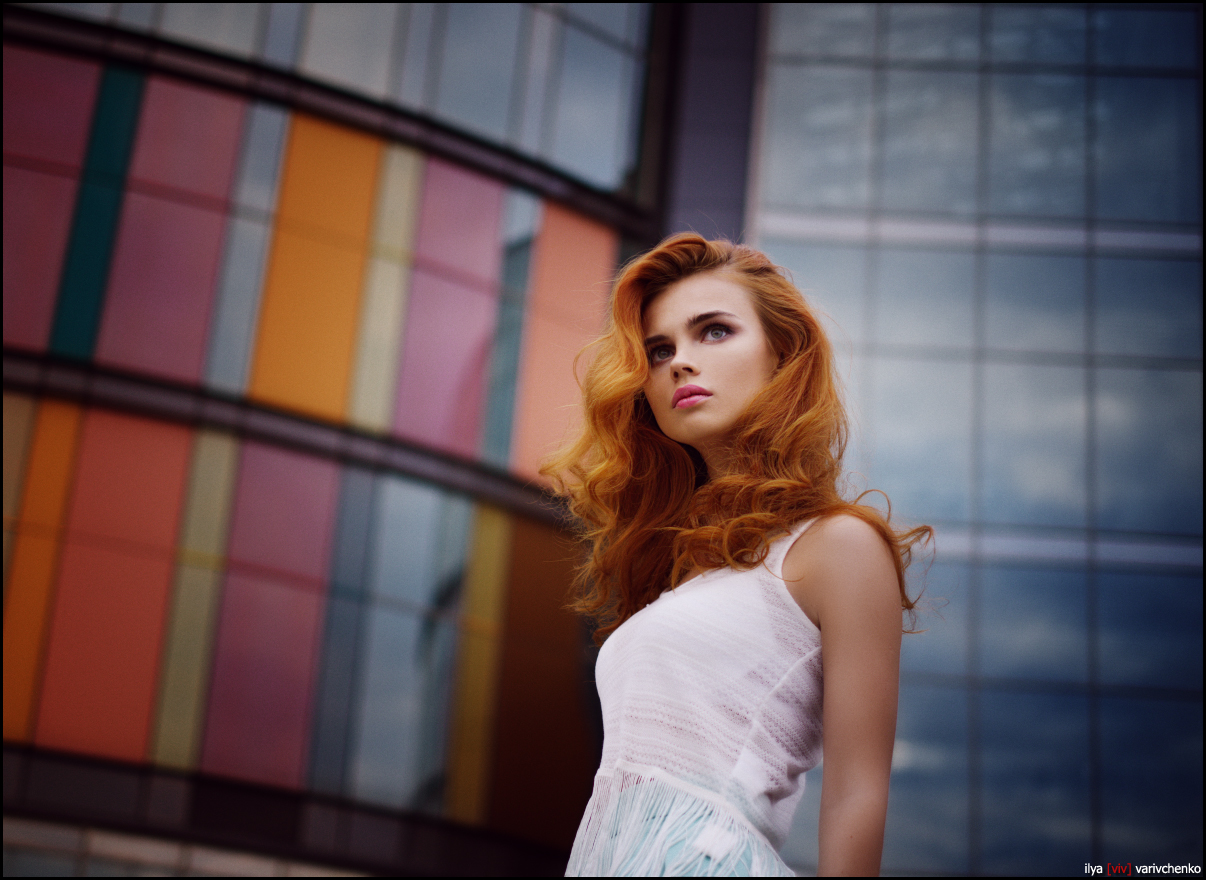
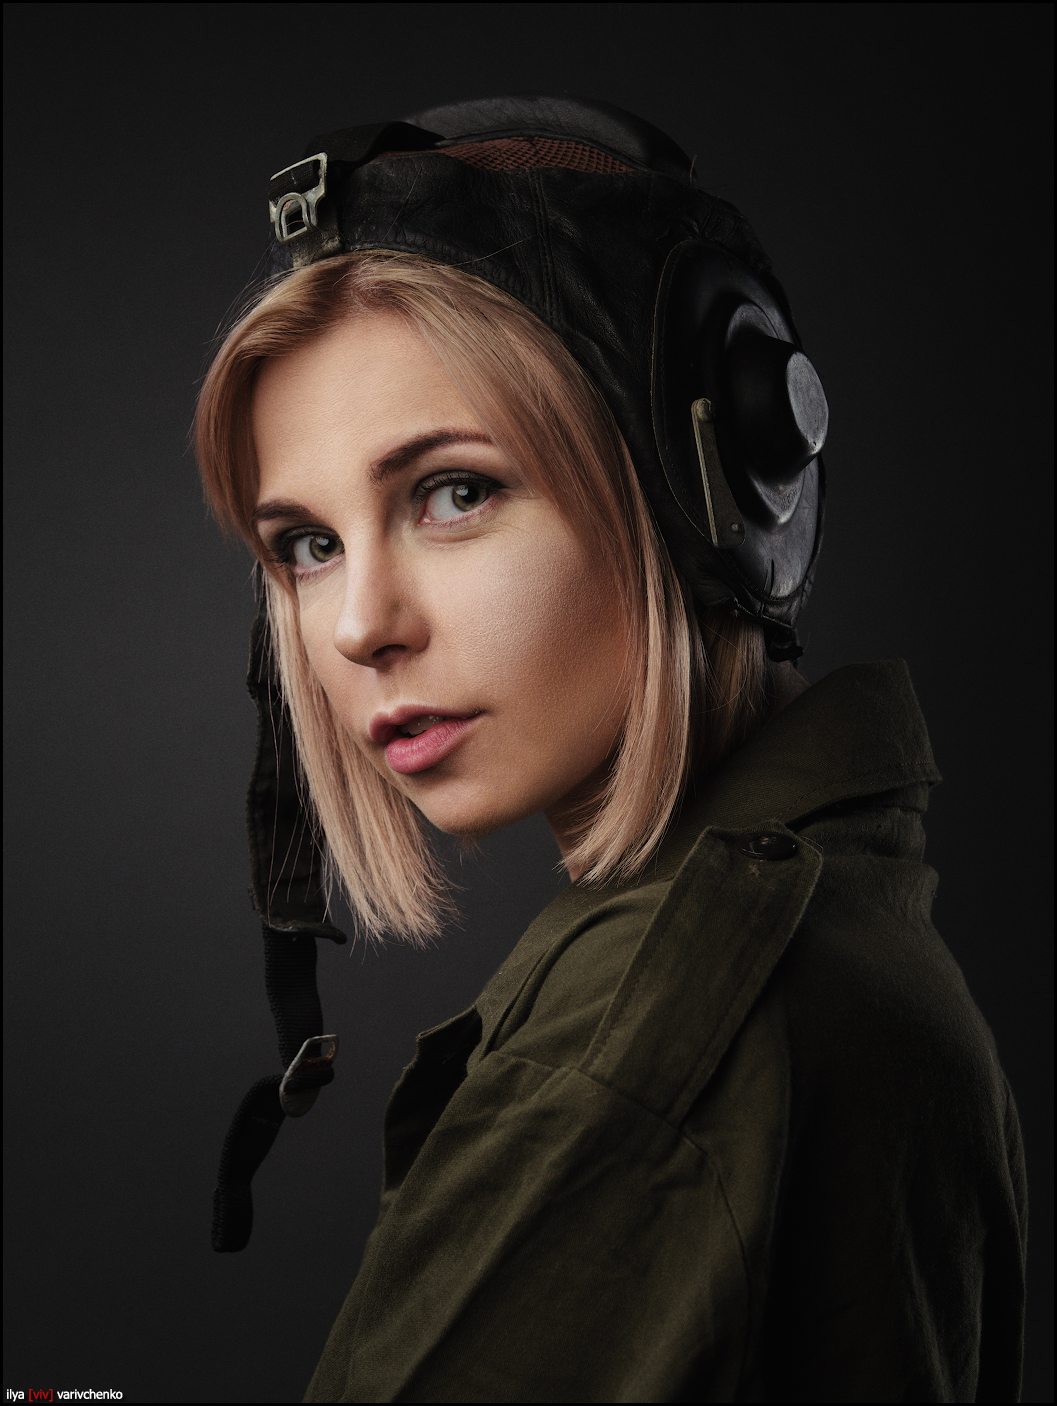
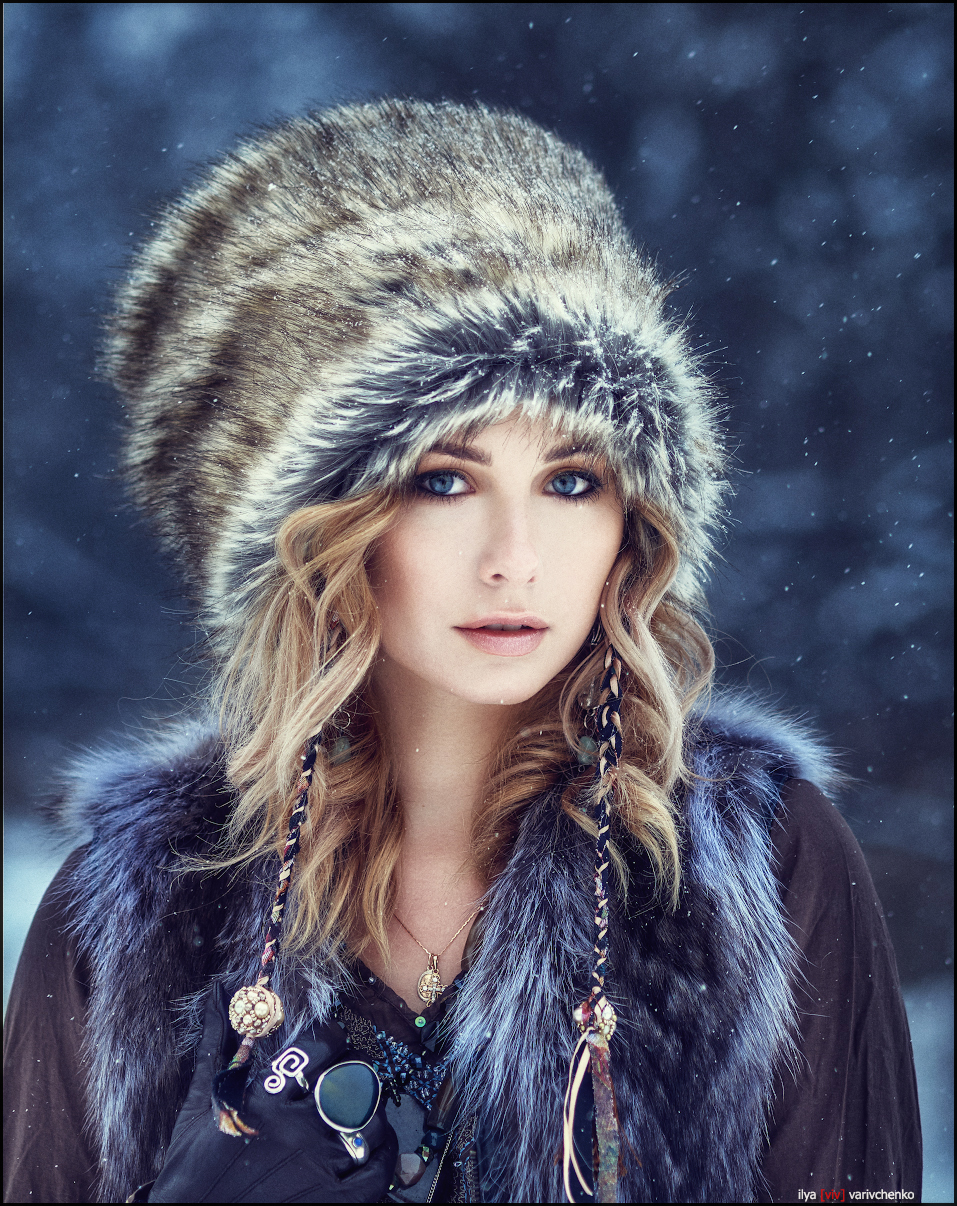
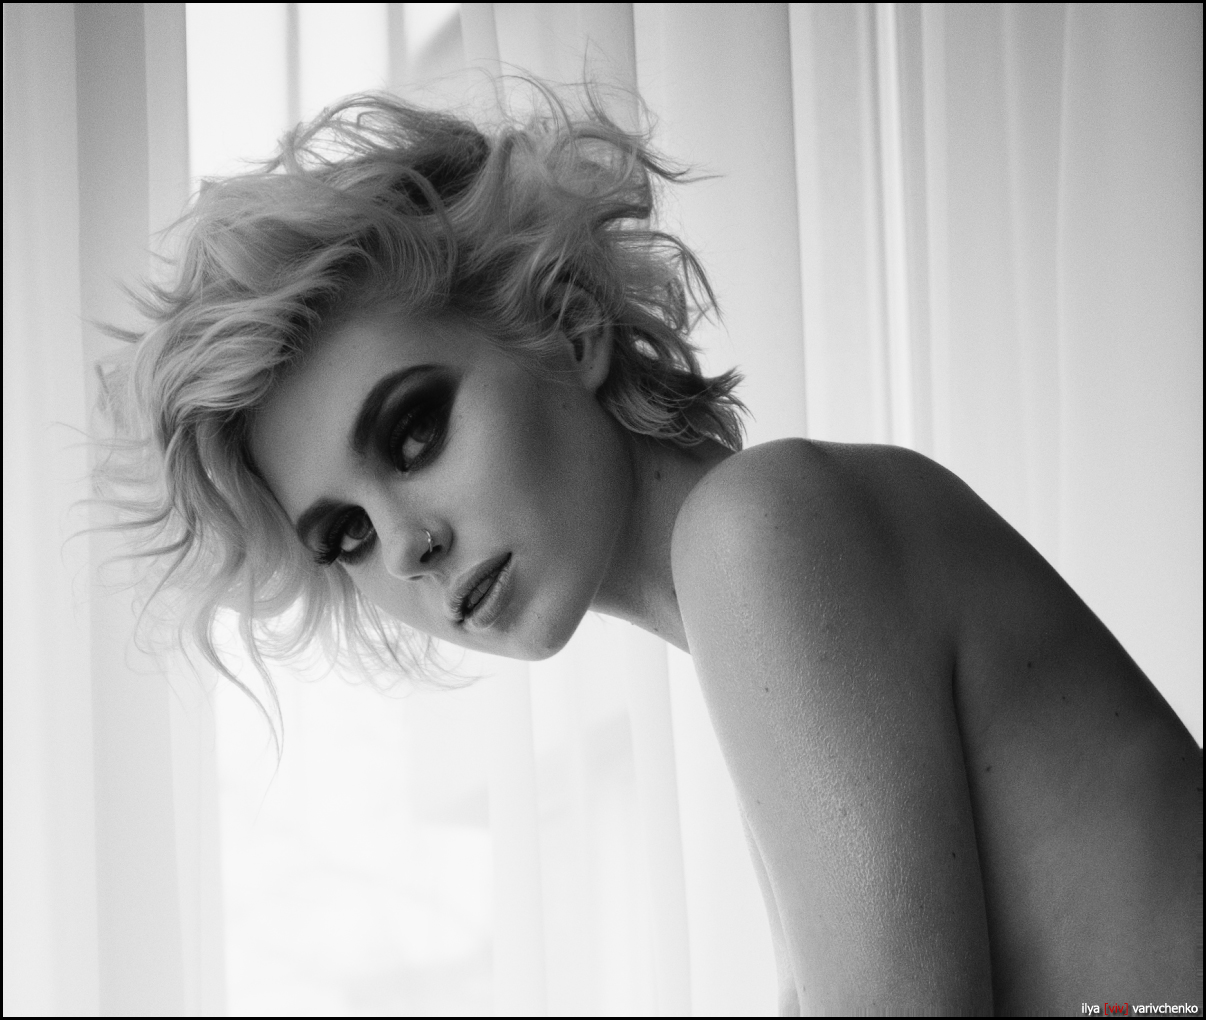
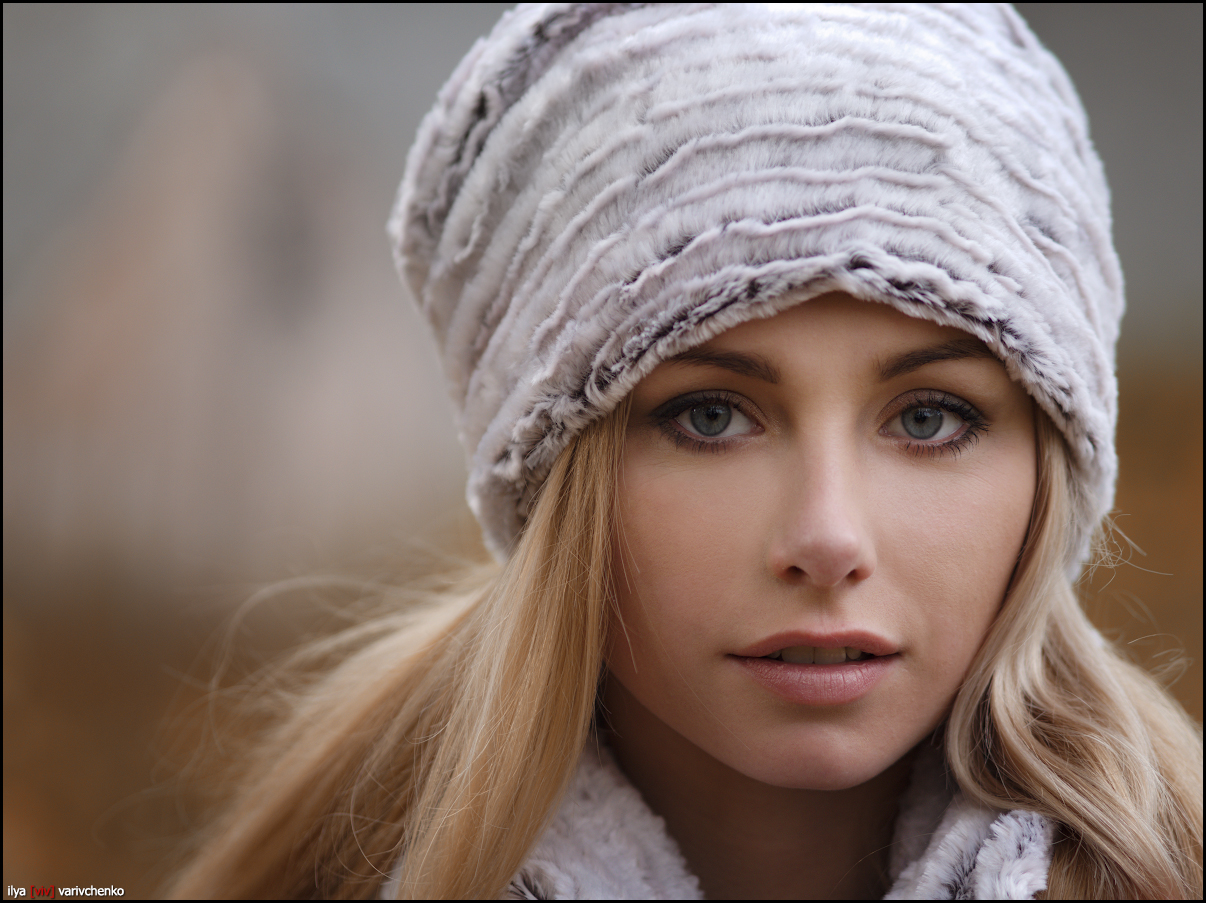
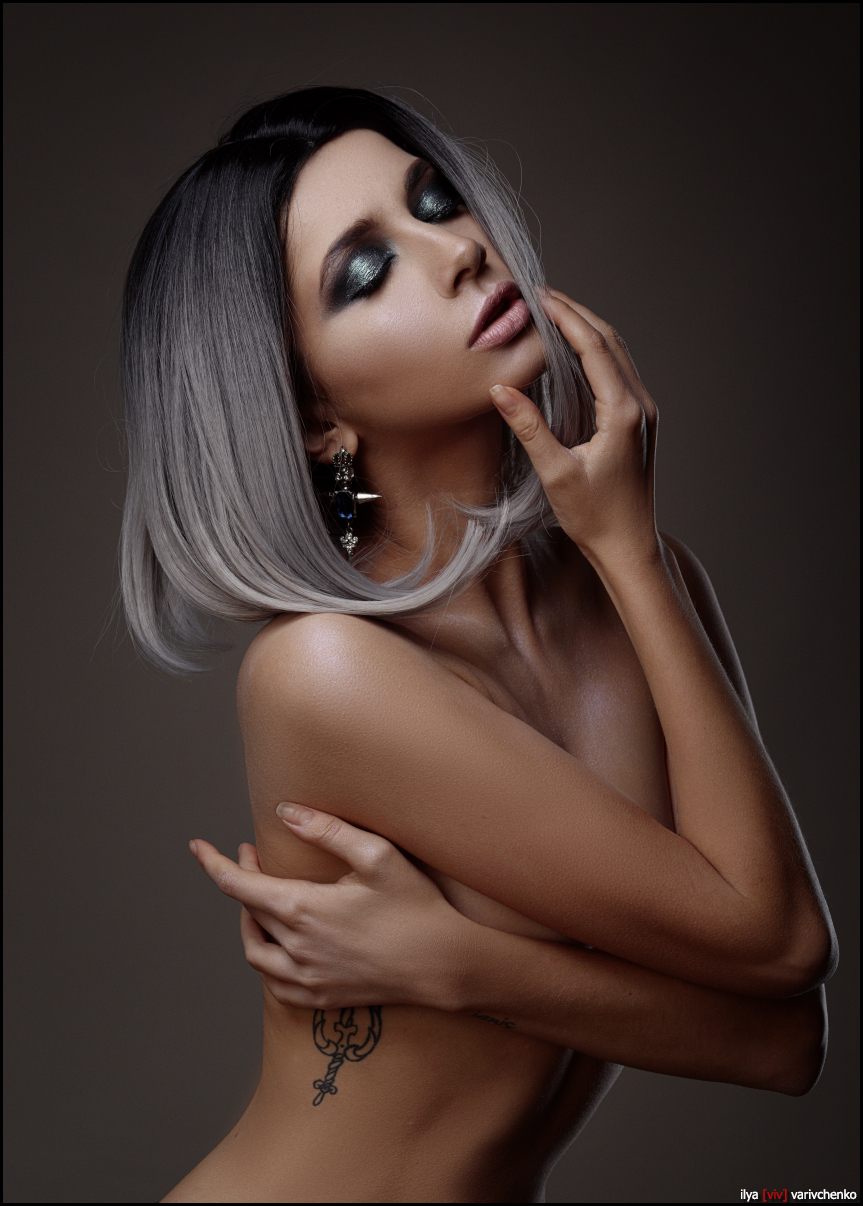
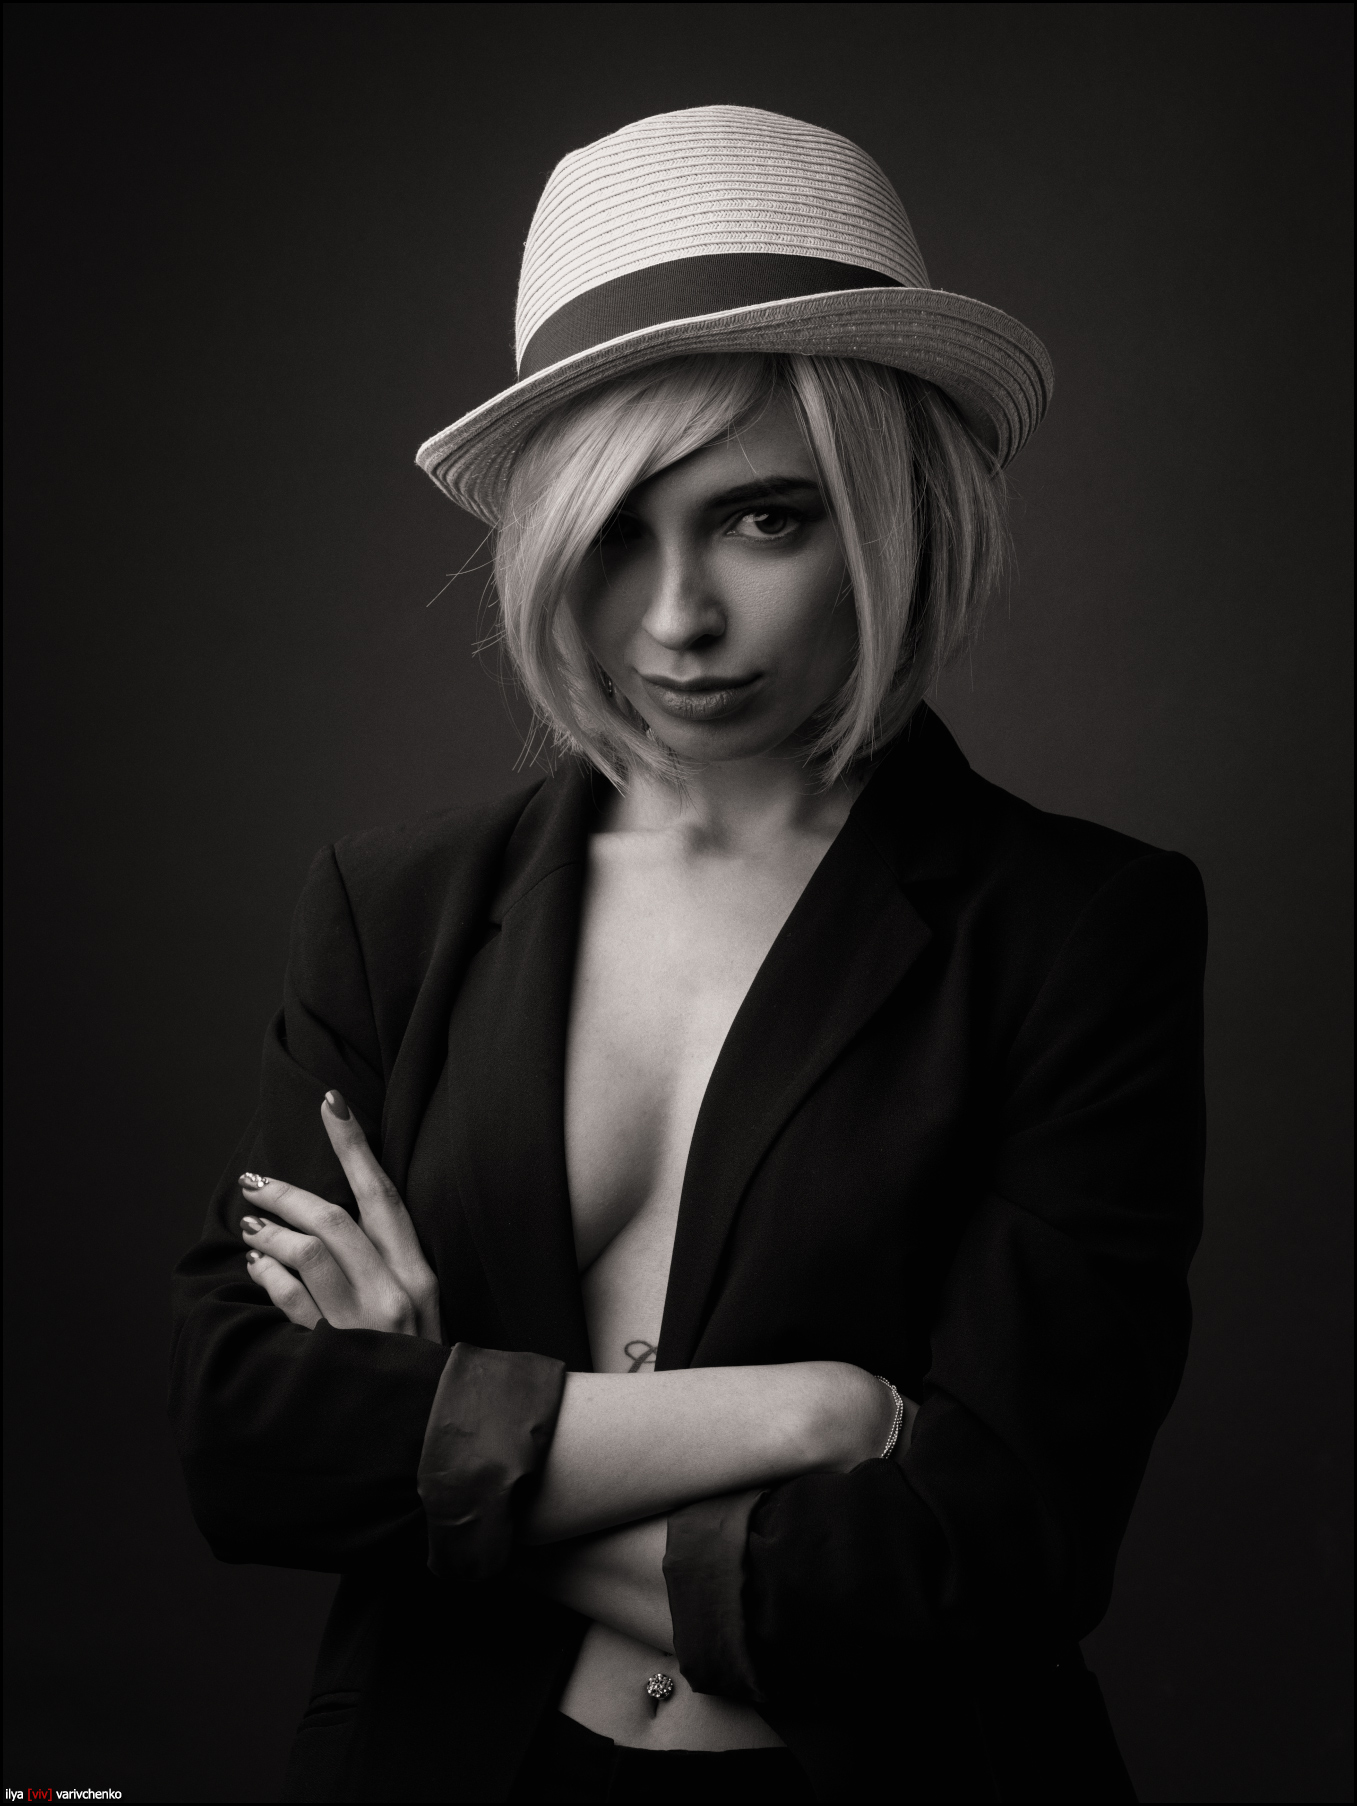
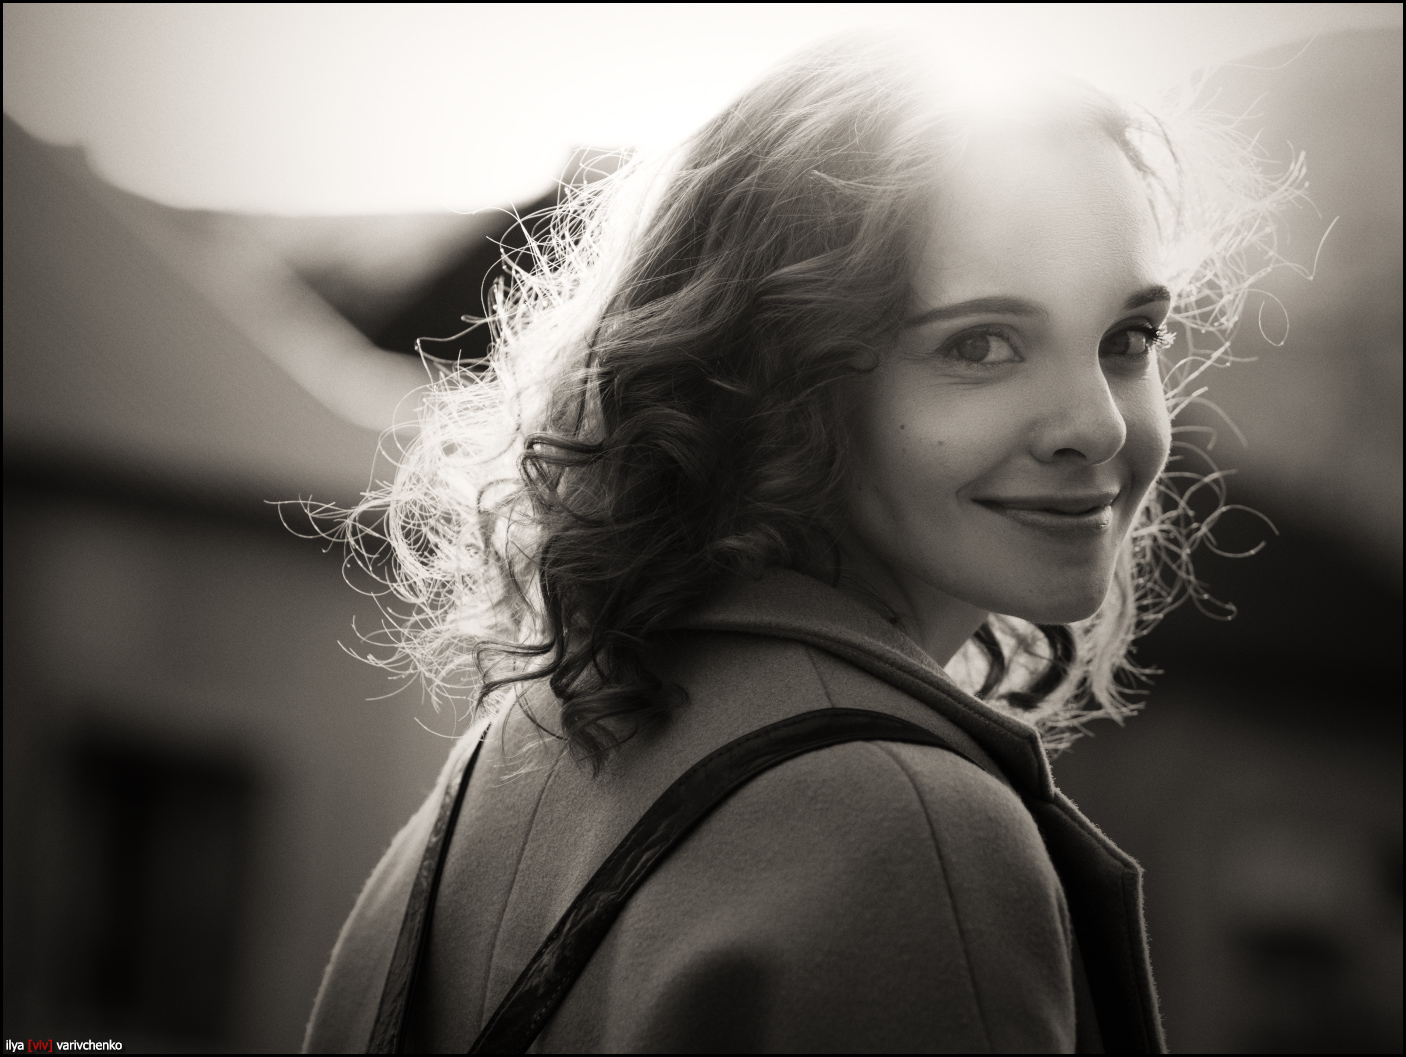
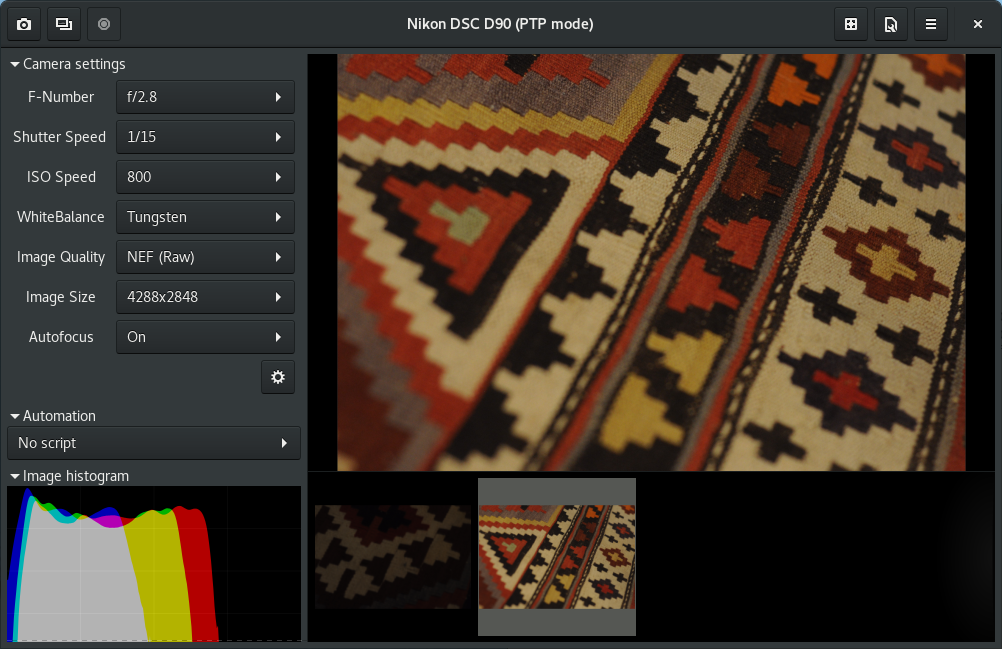 The Entangle interface, which makes use of
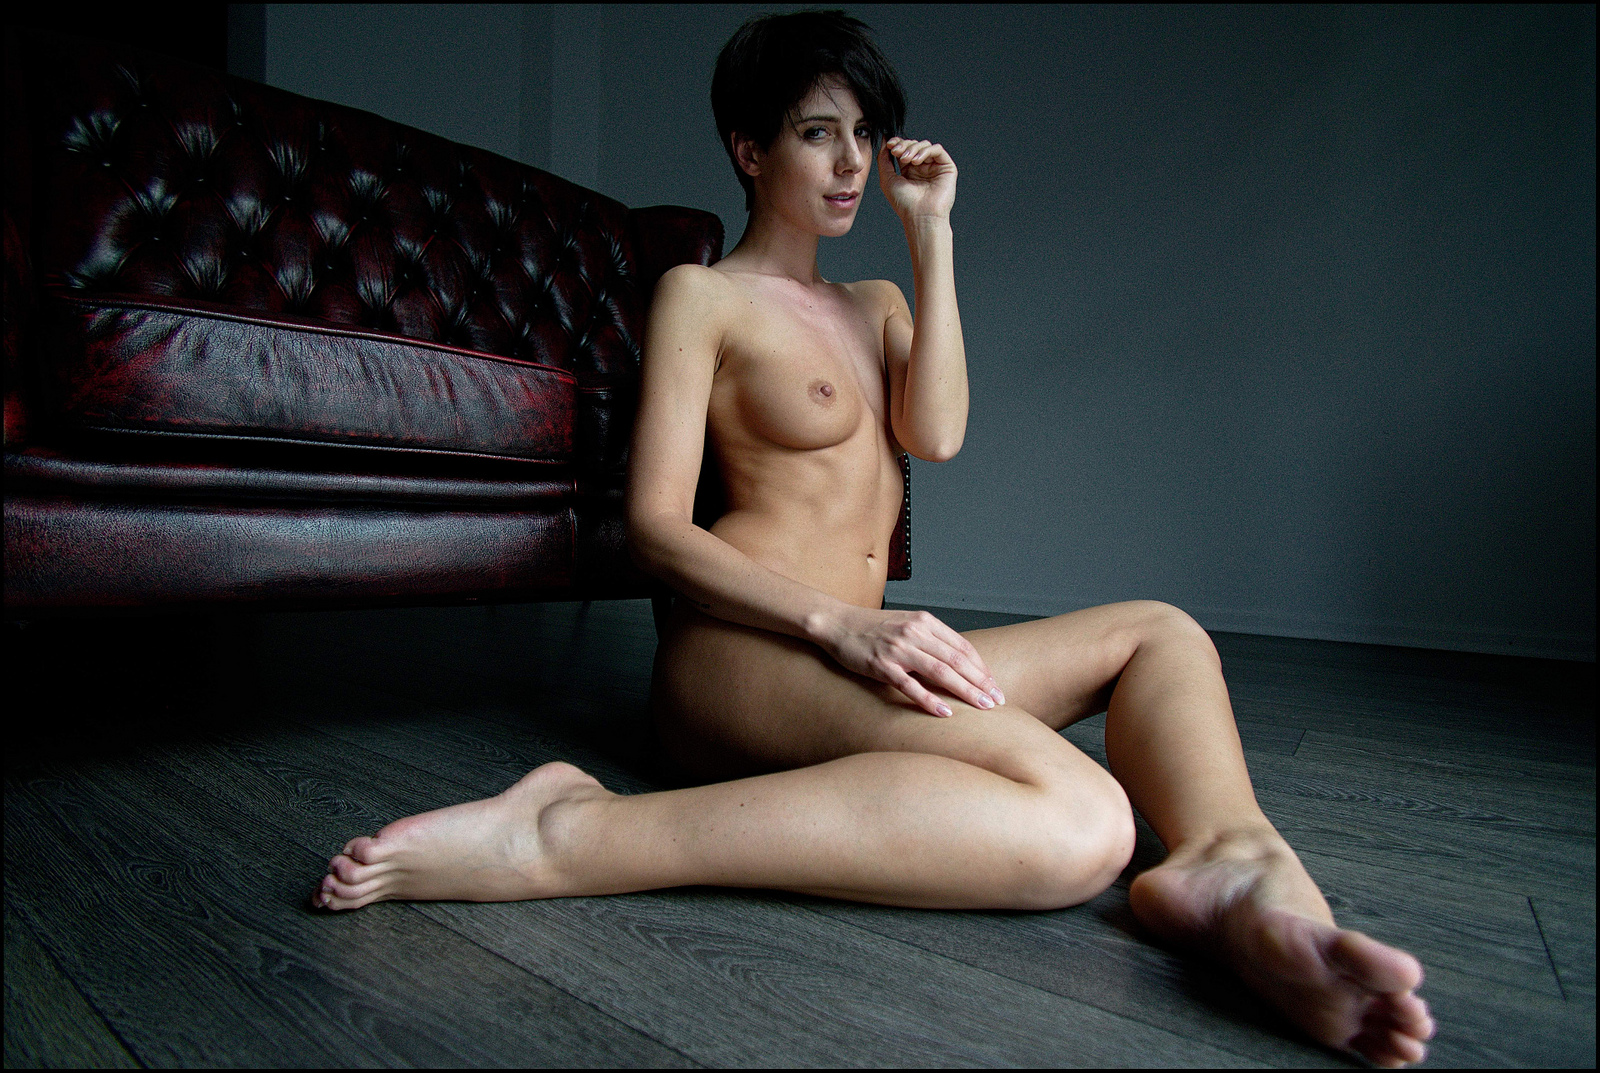
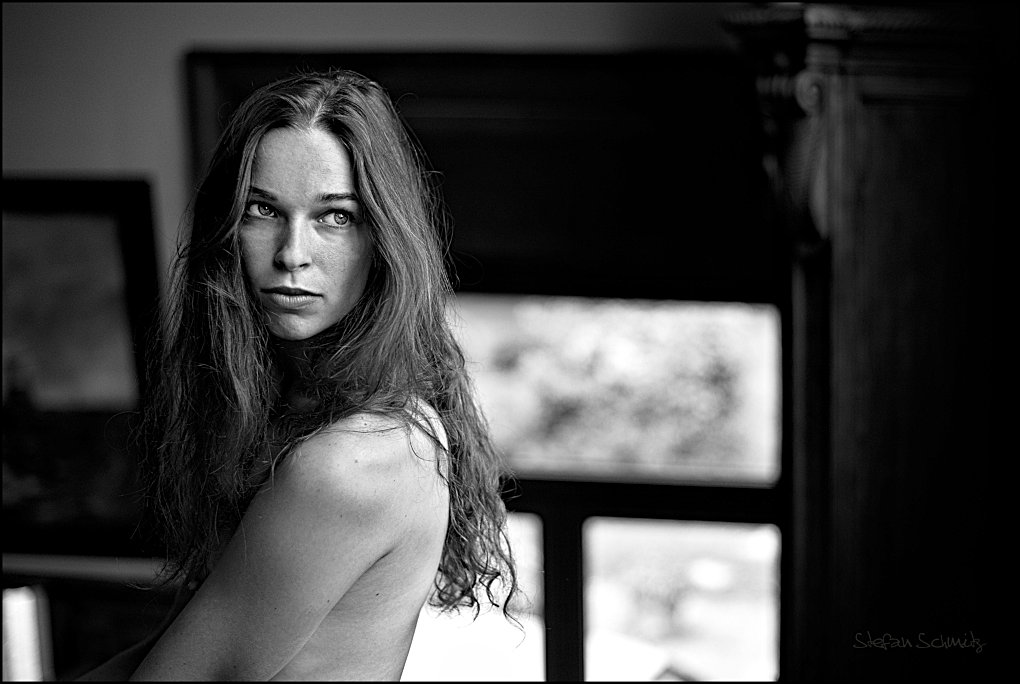
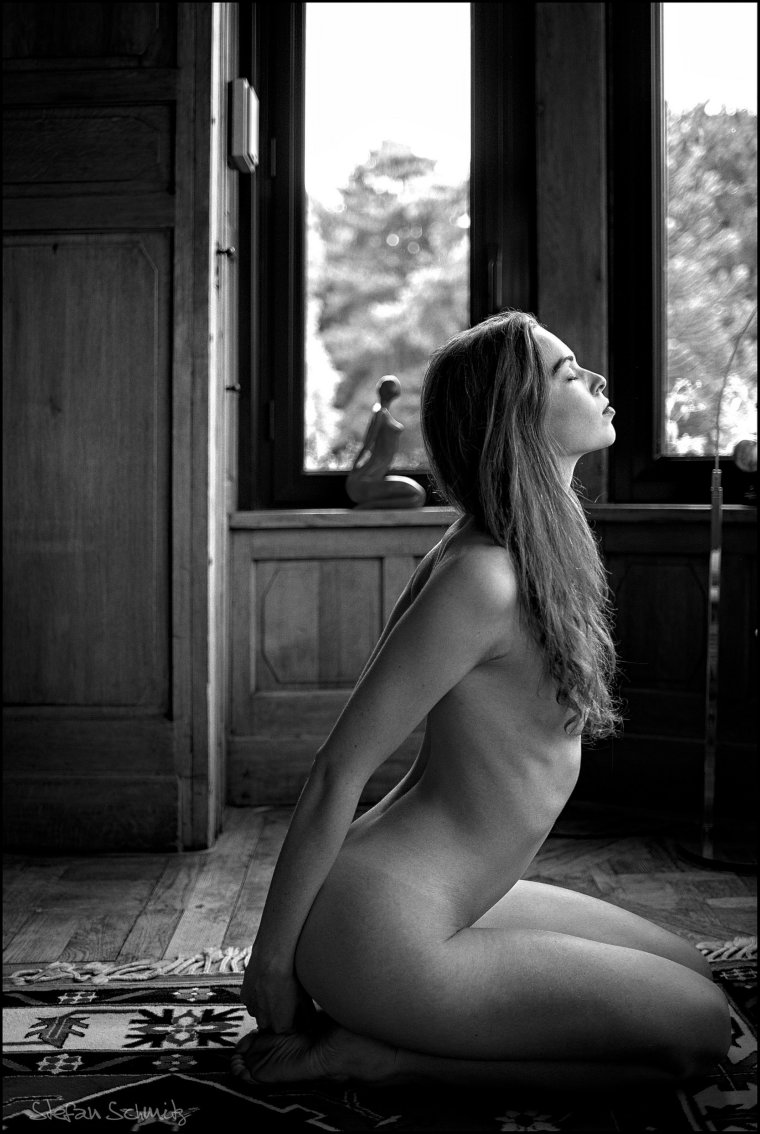

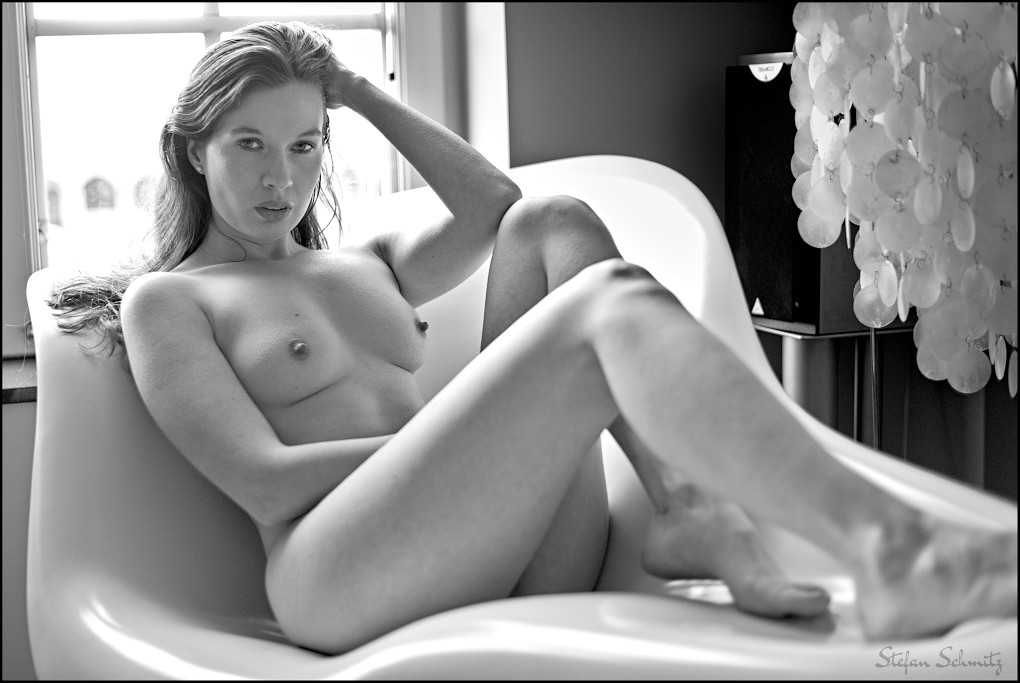
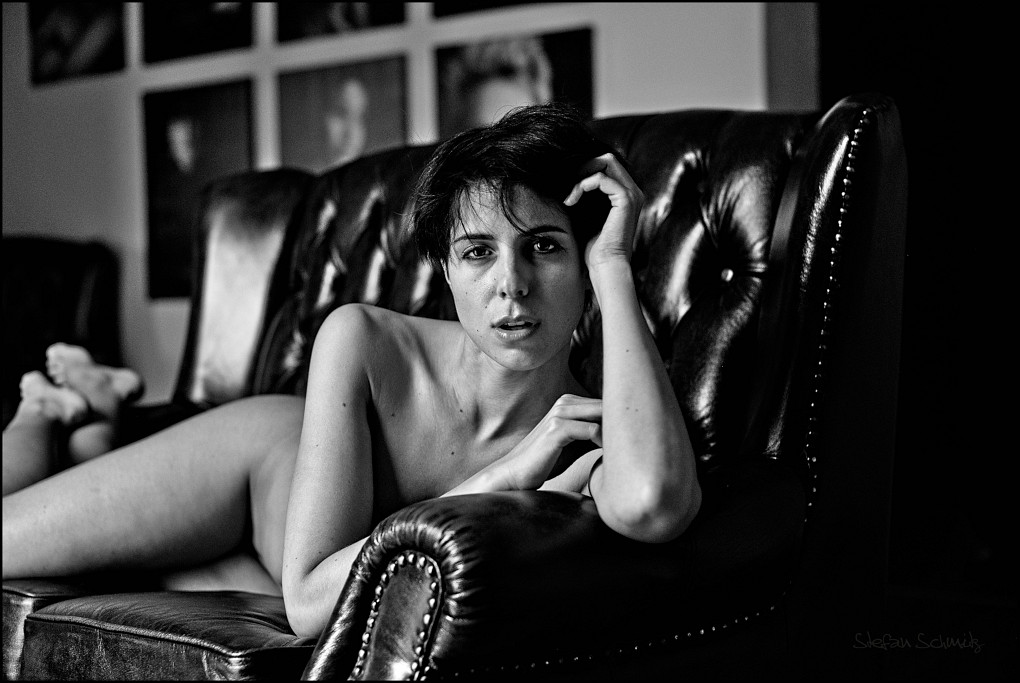
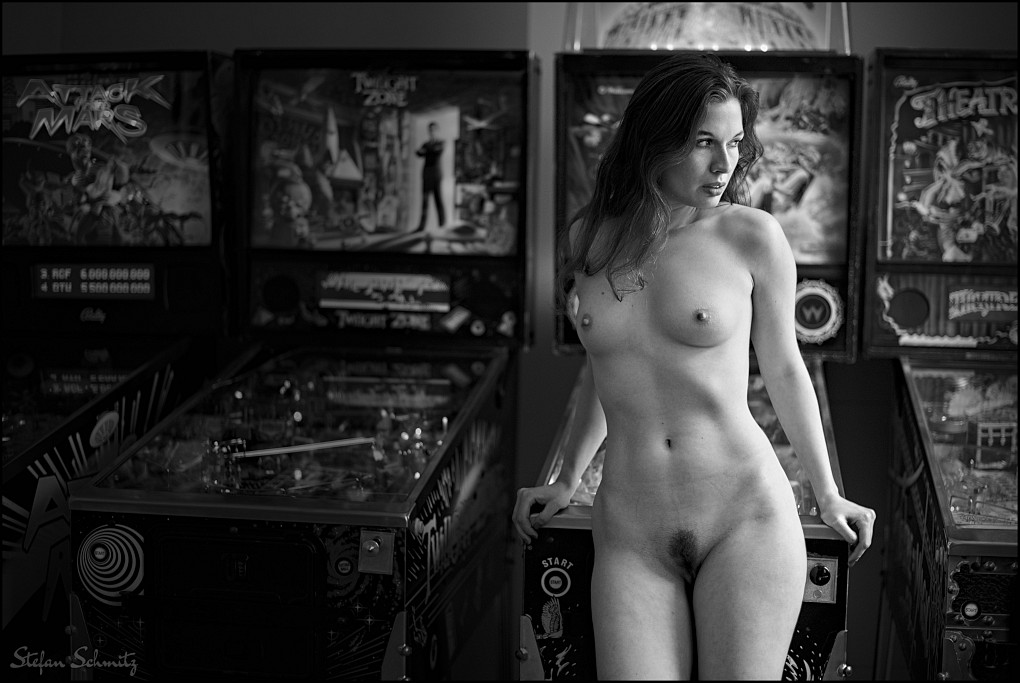
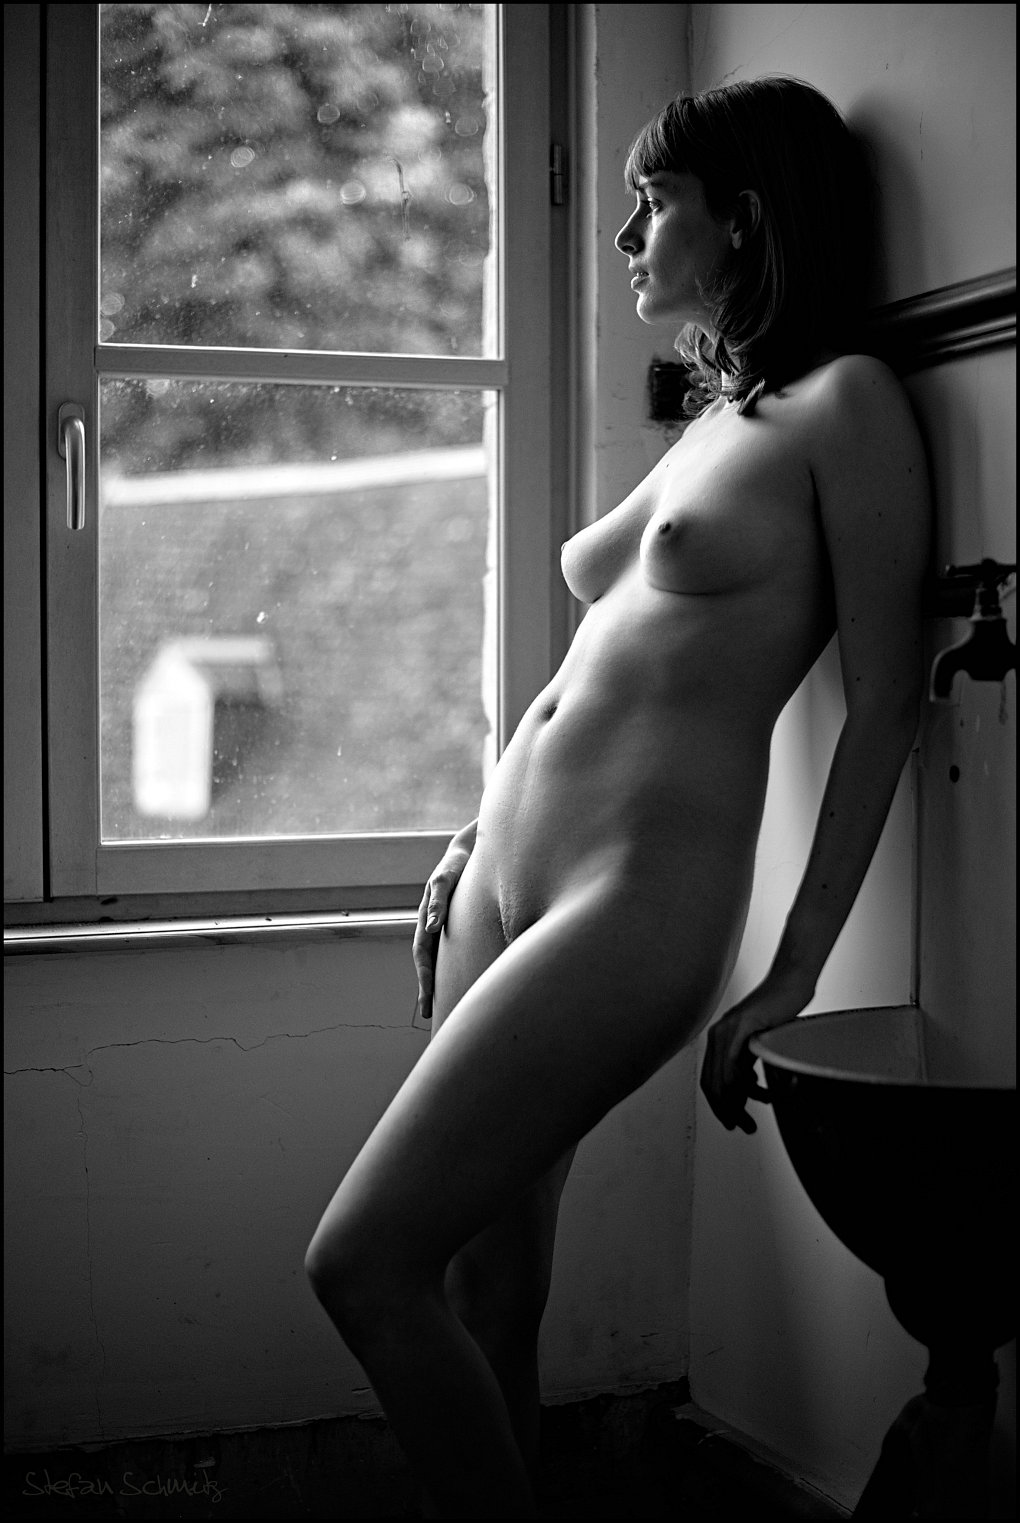
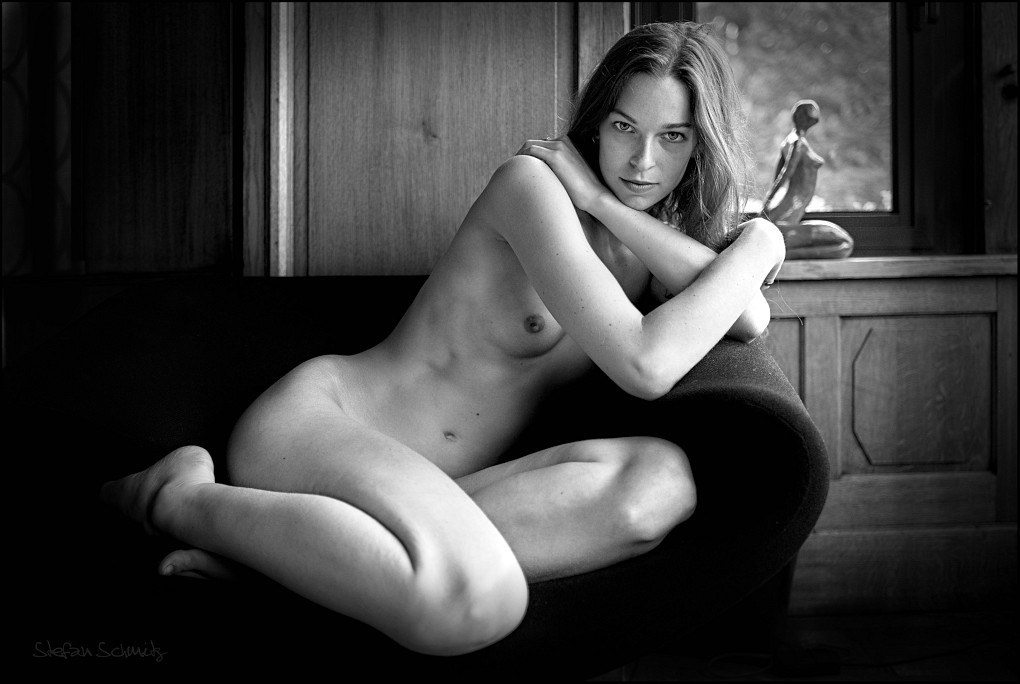

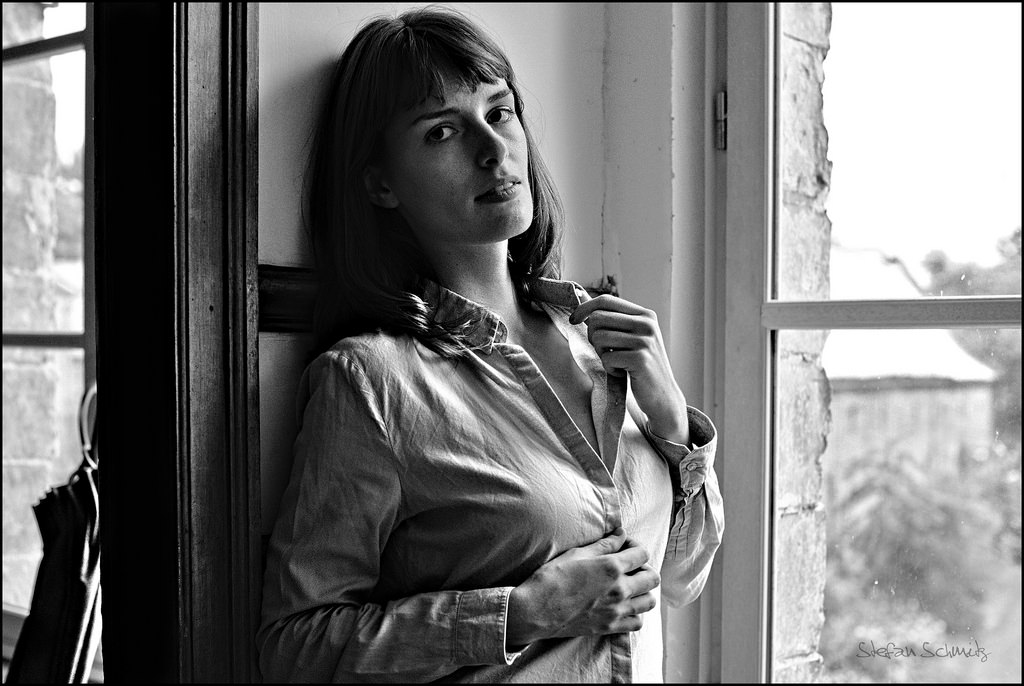
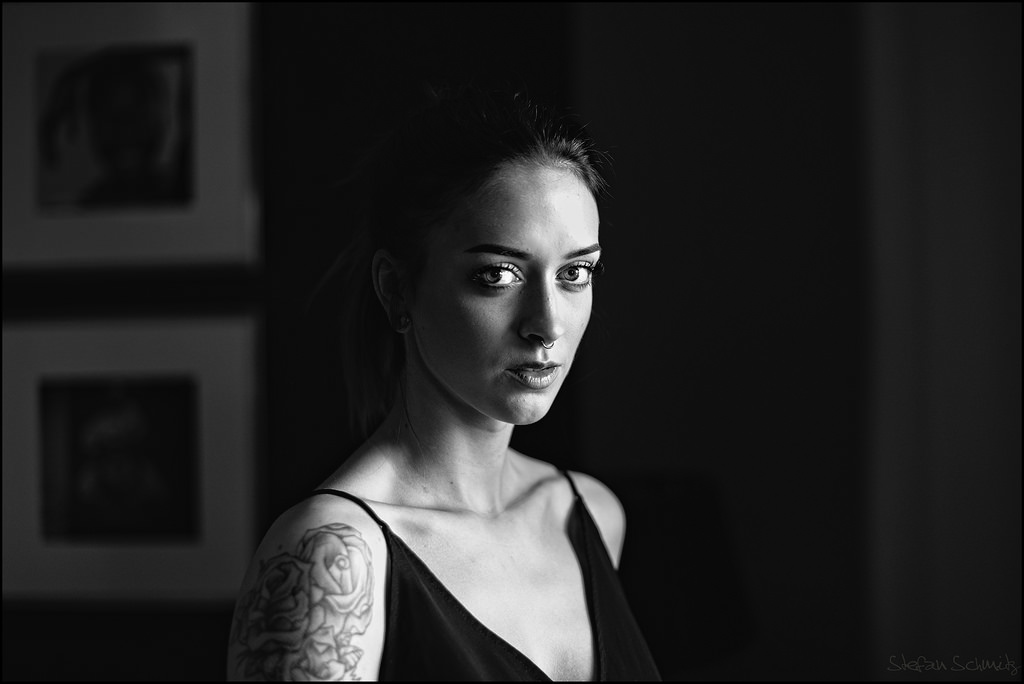
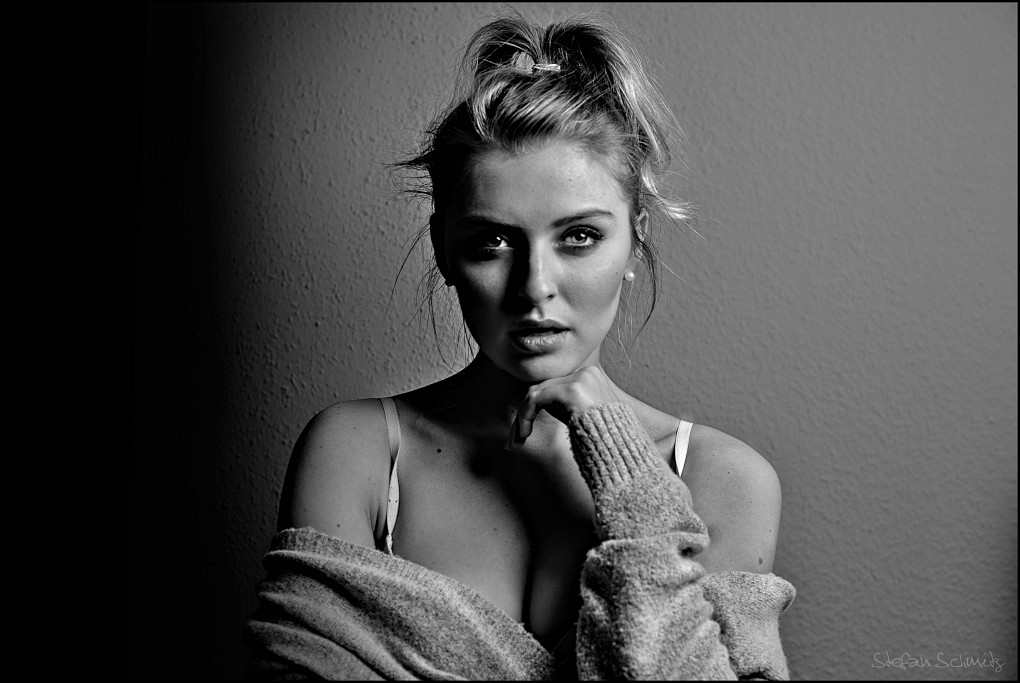

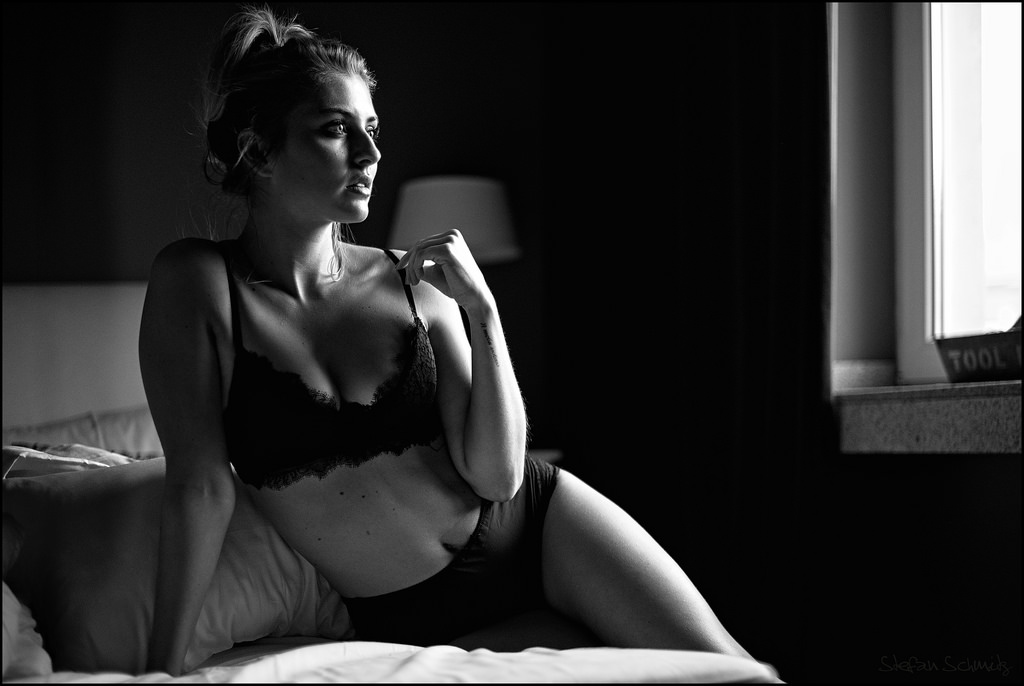
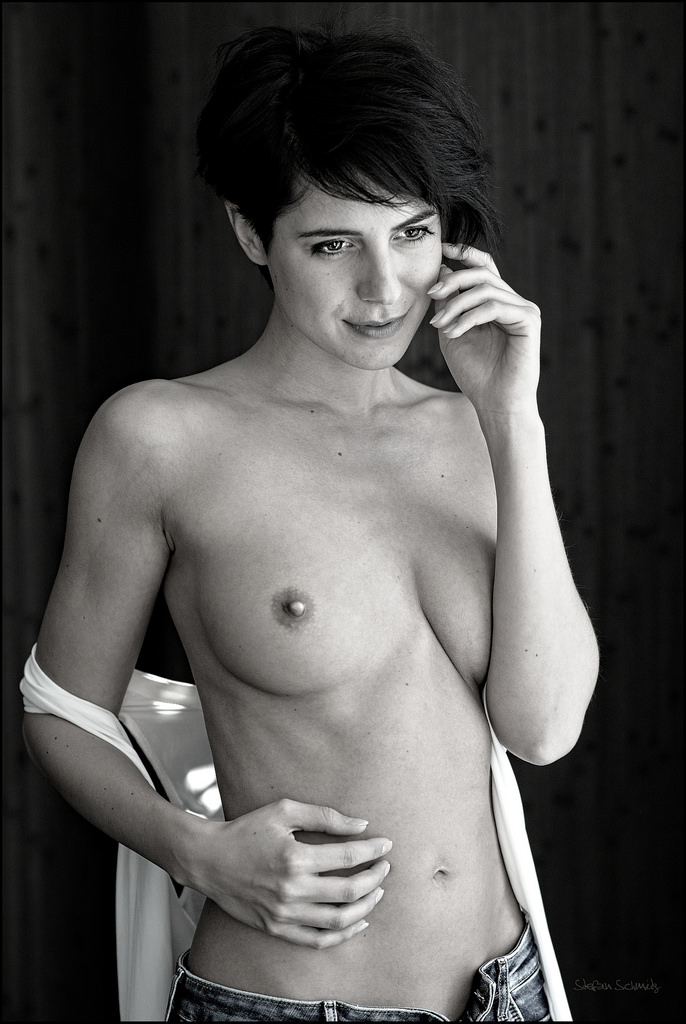
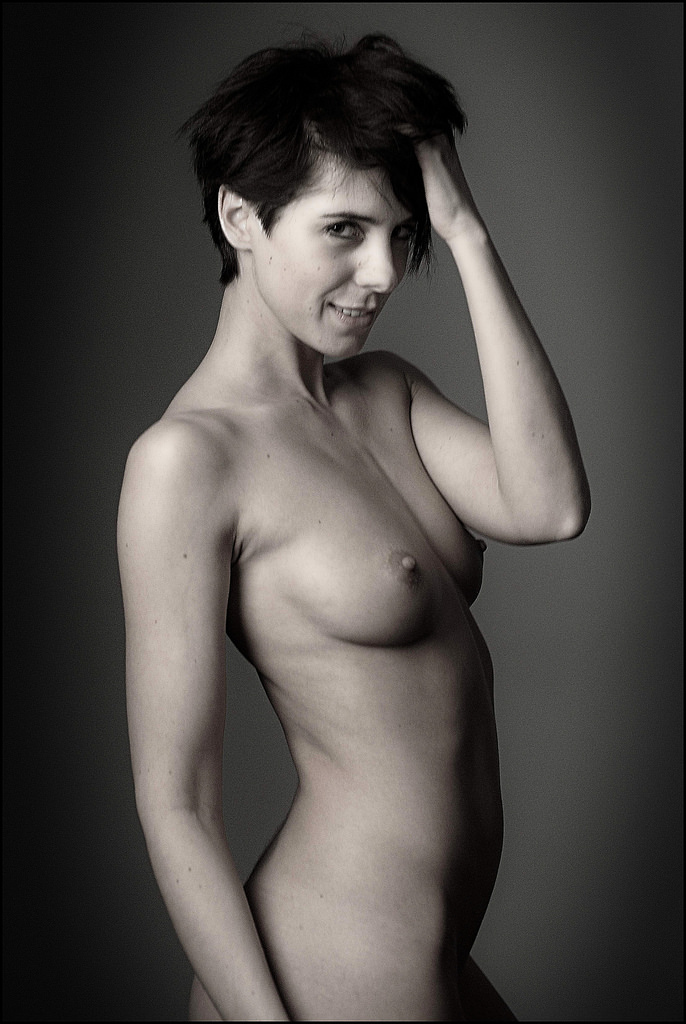
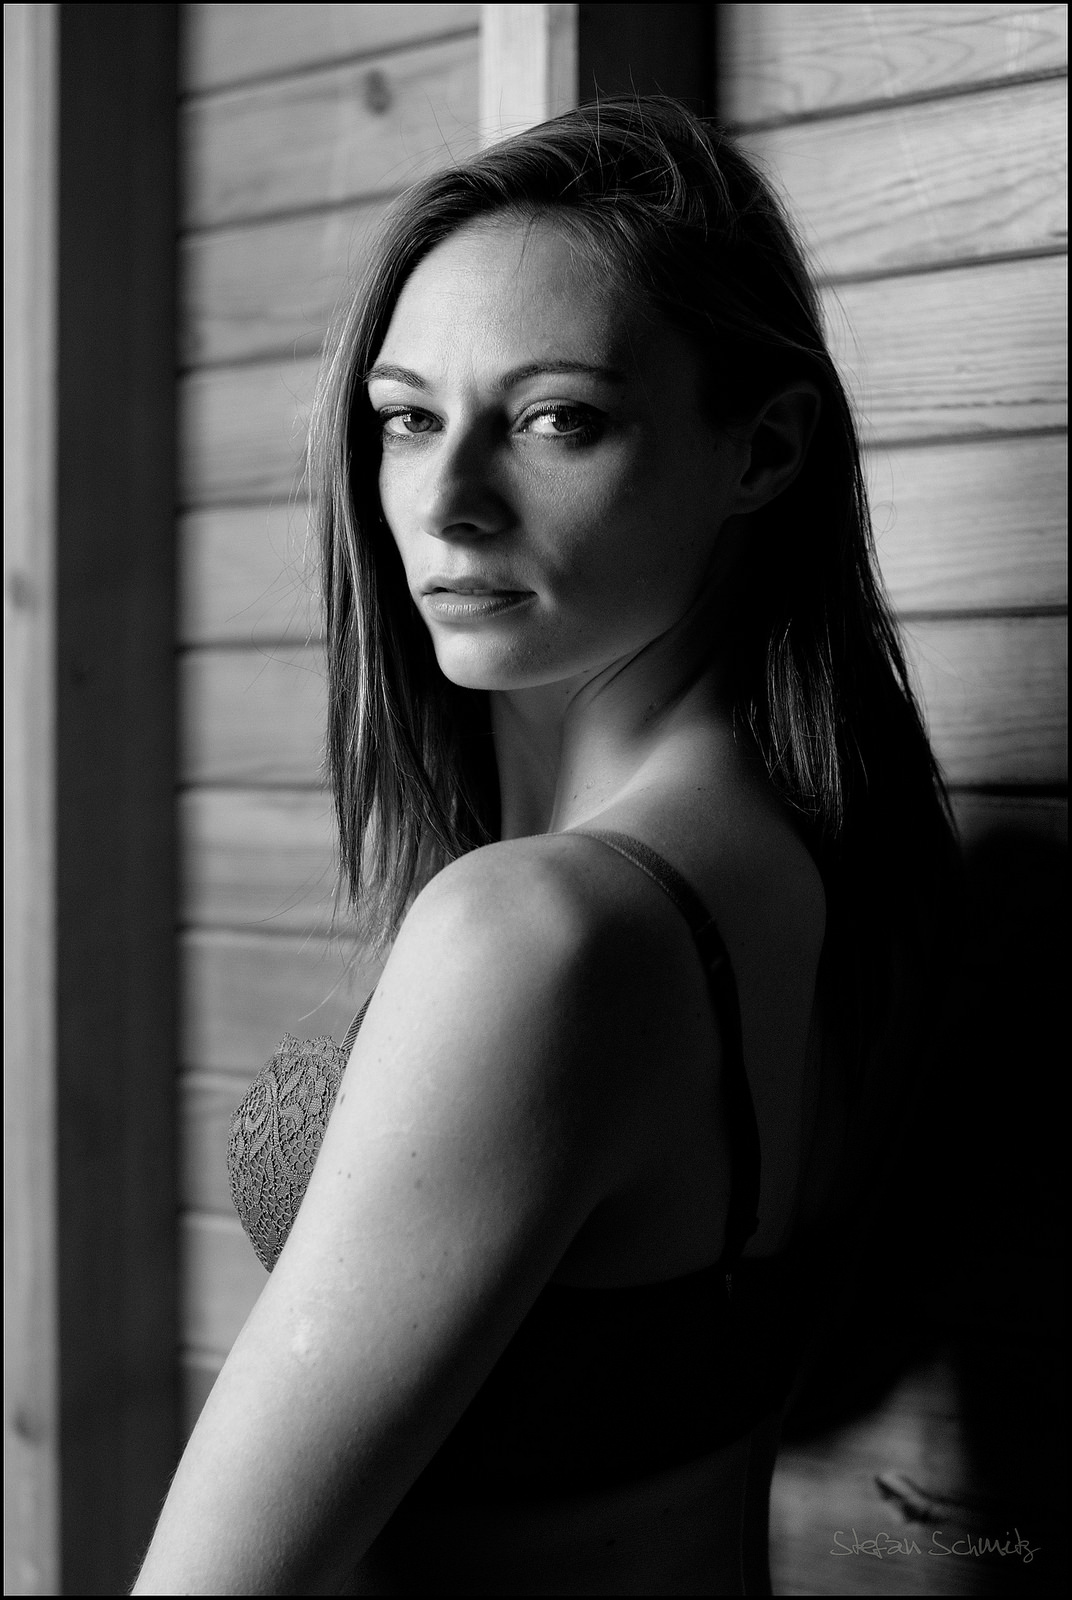
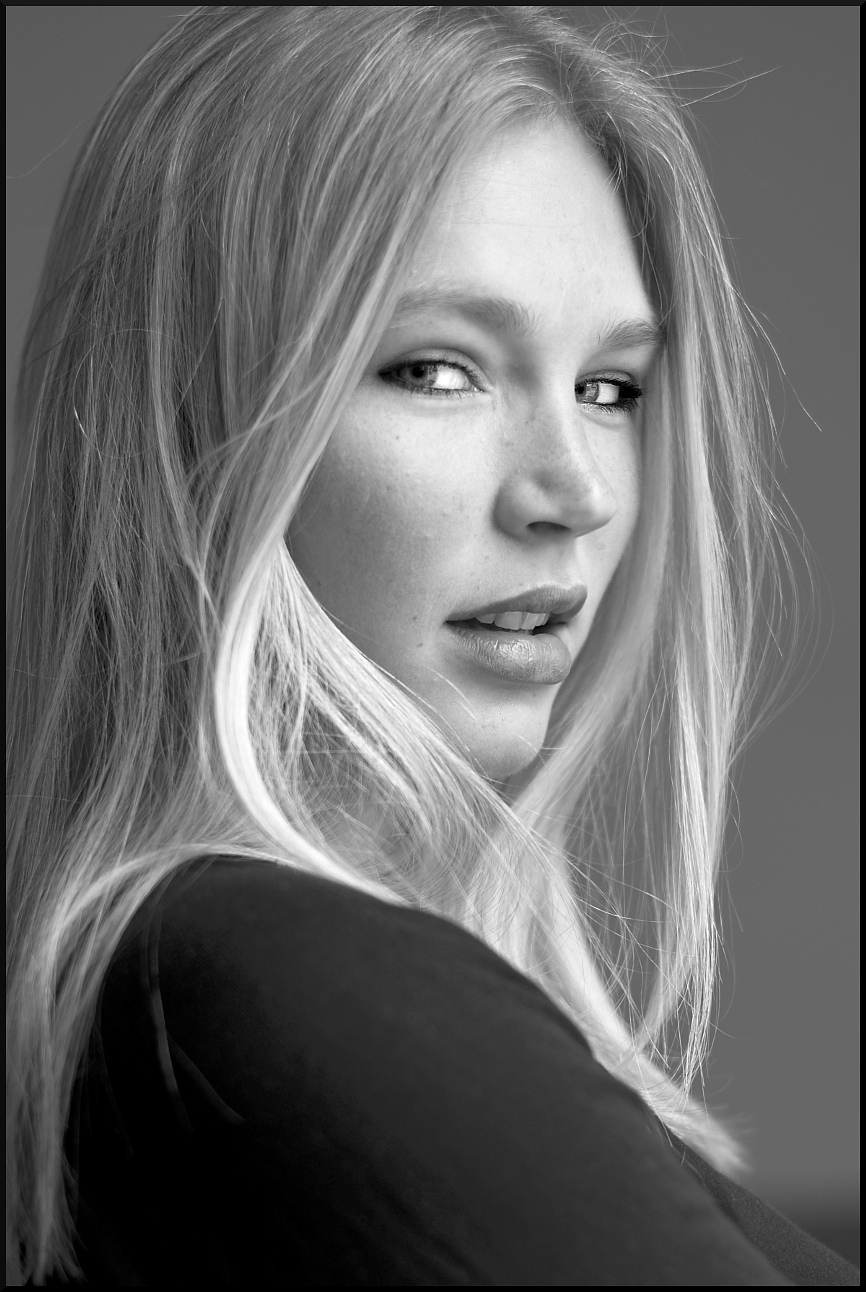
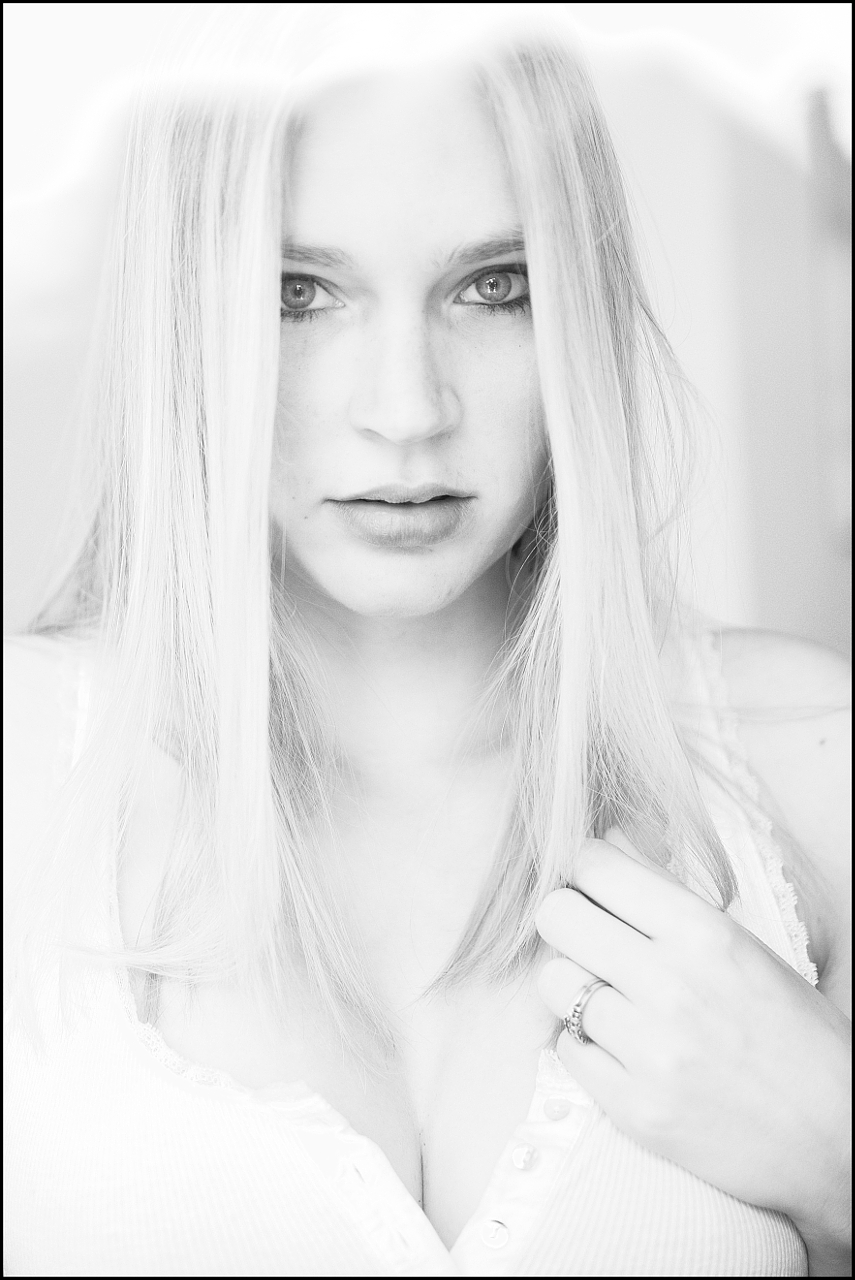
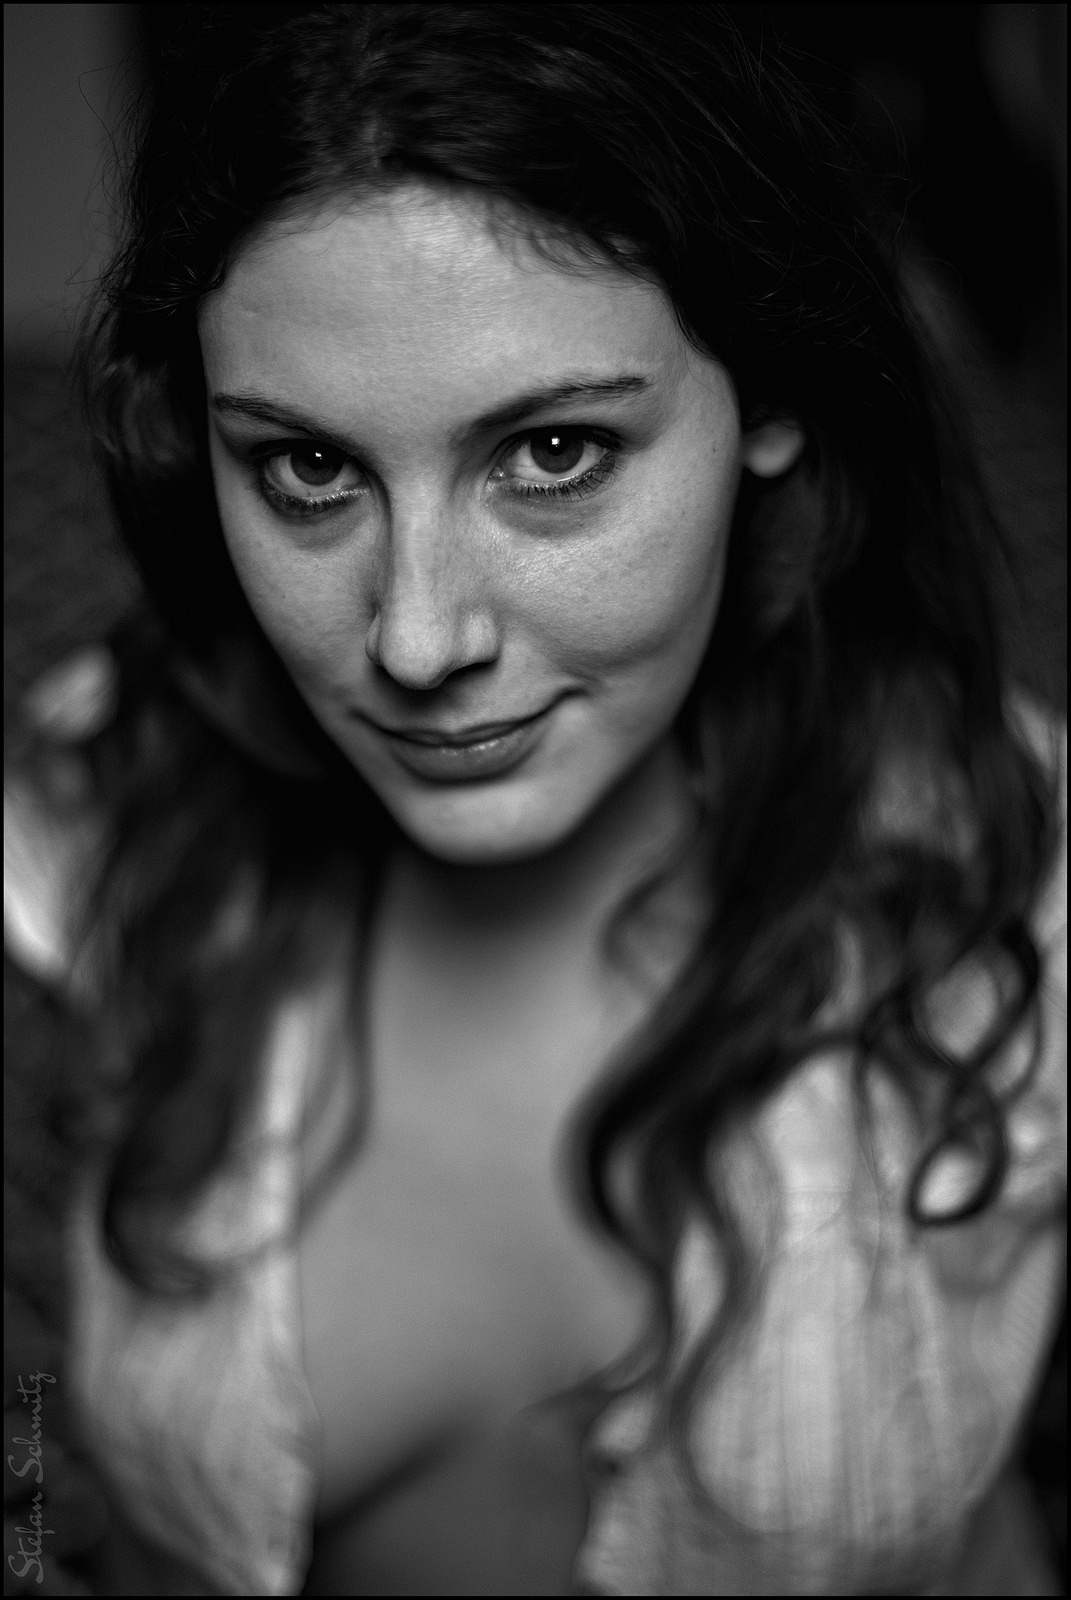

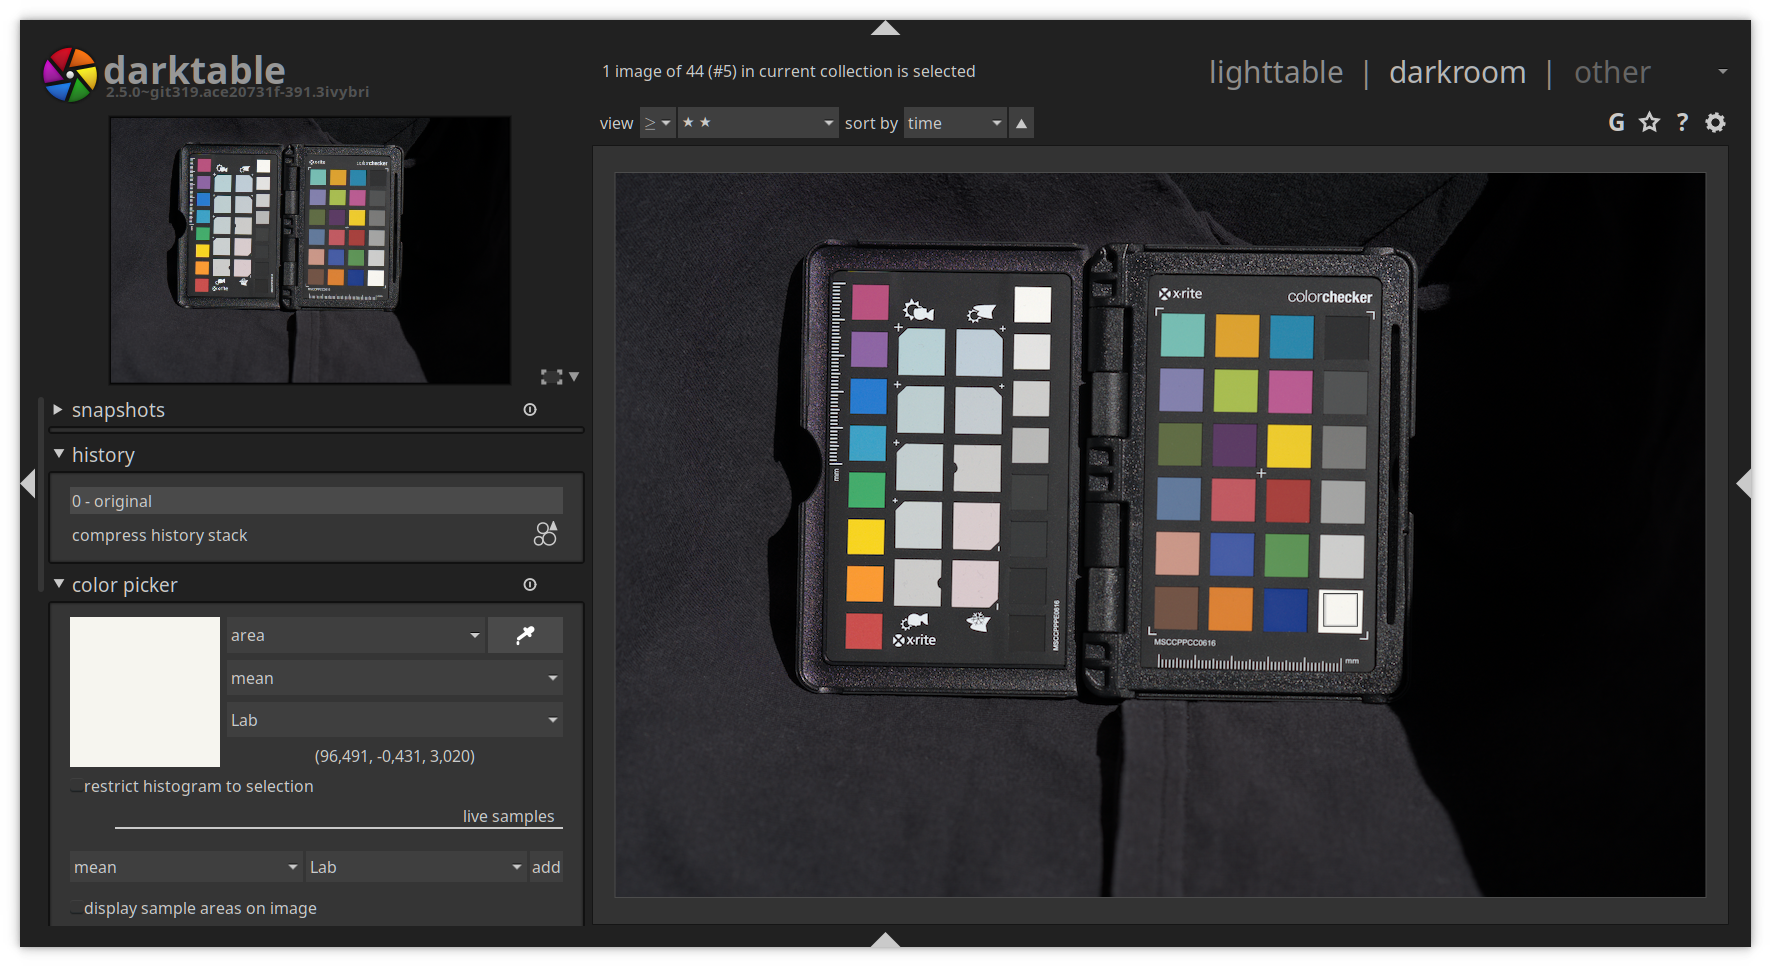
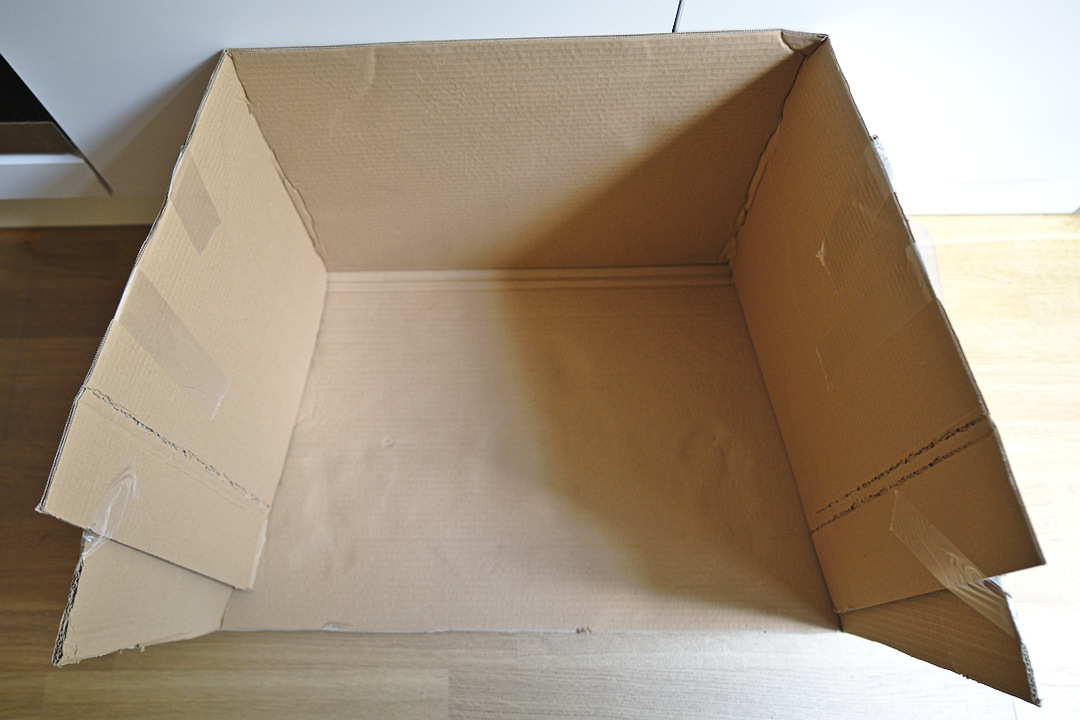
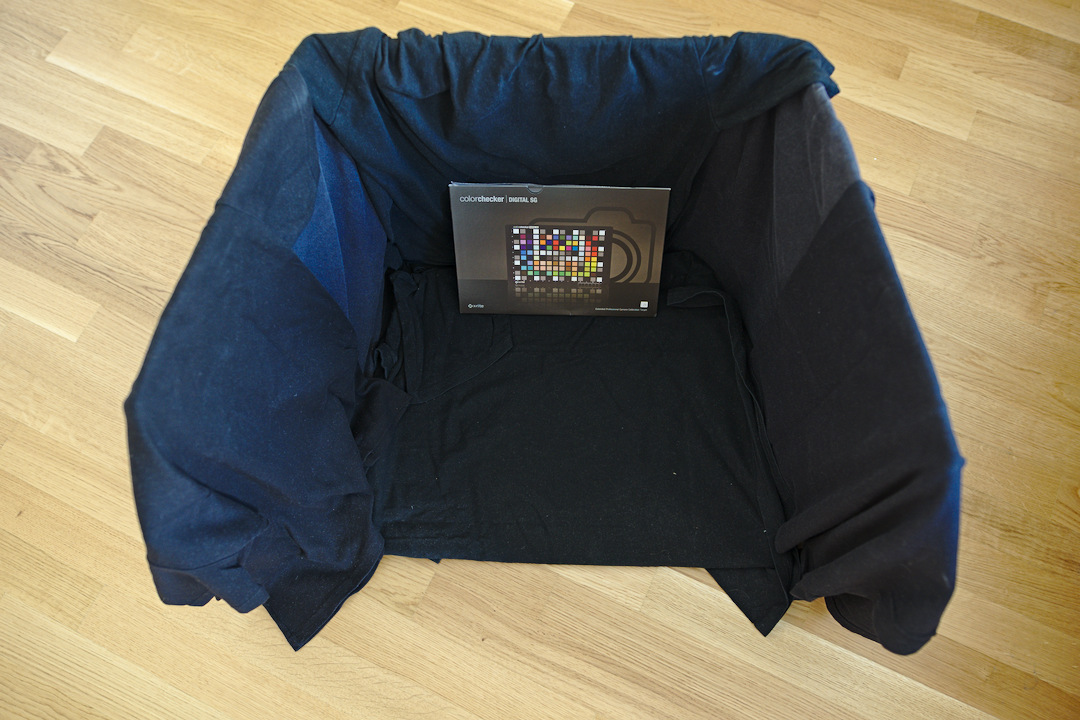
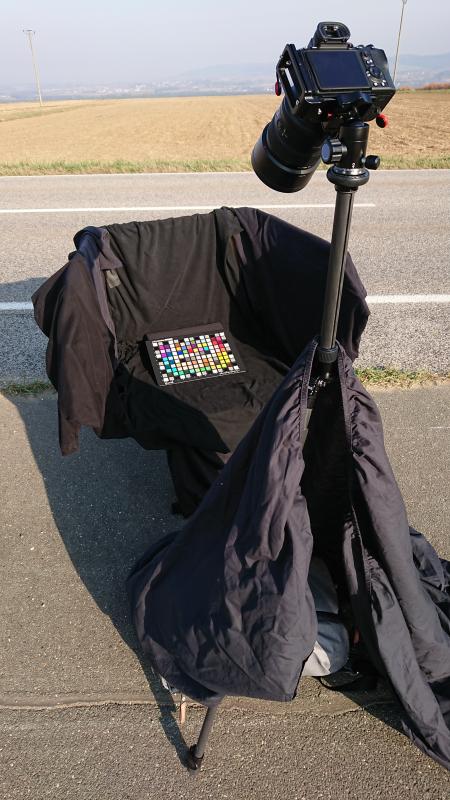
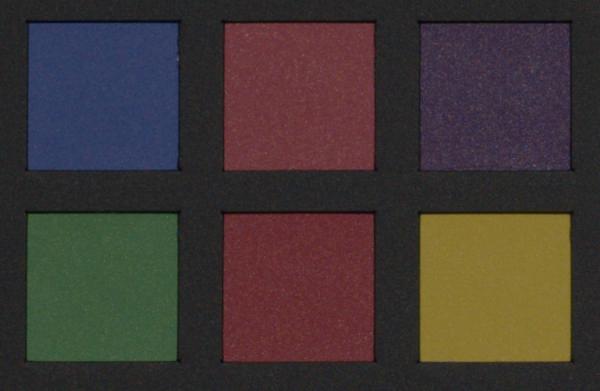
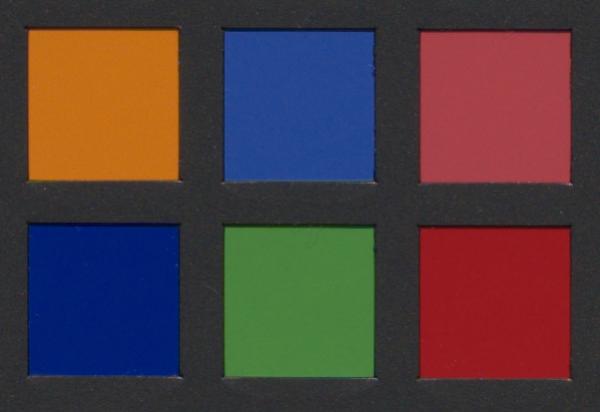
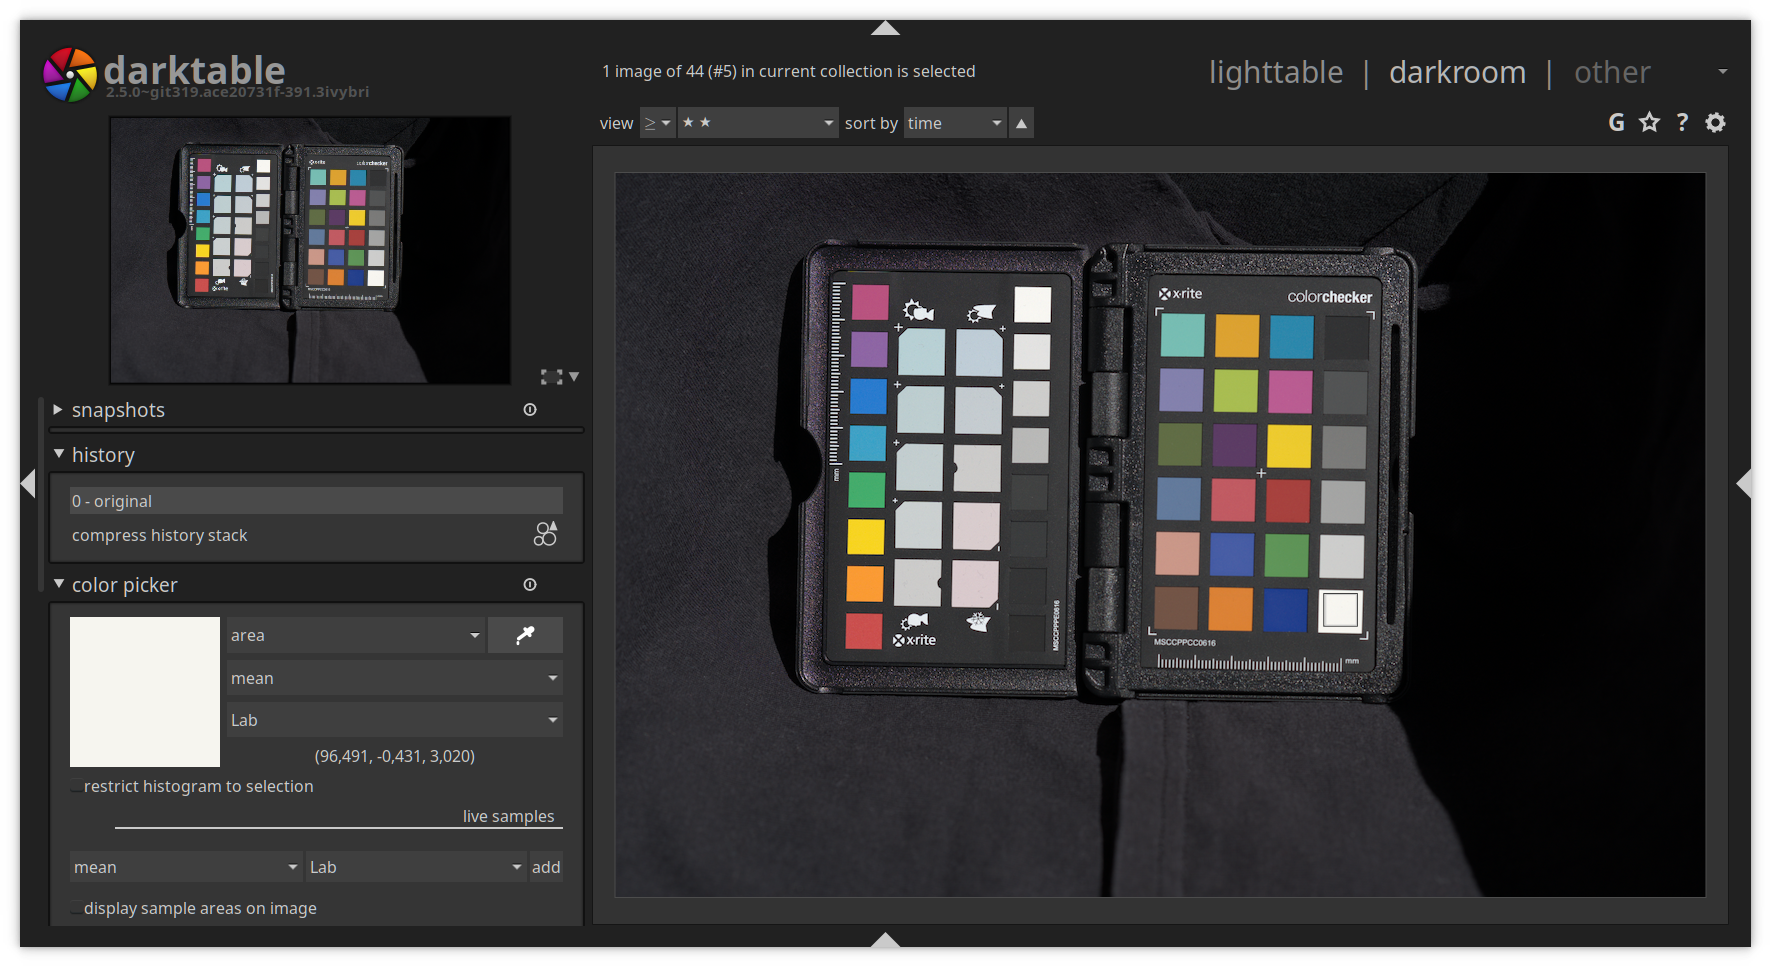
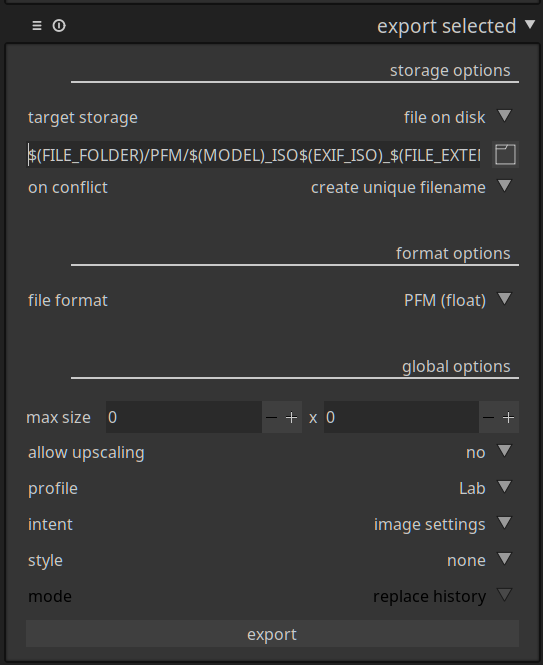
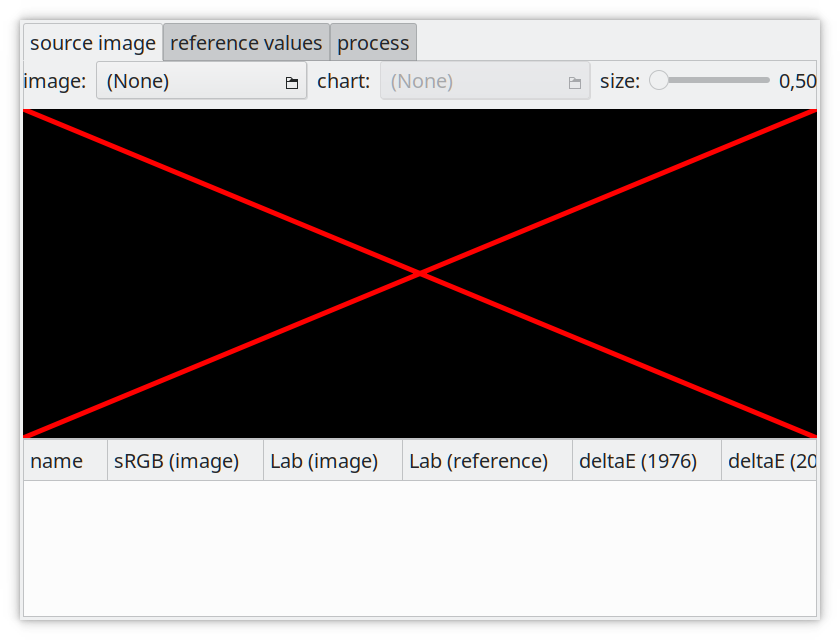
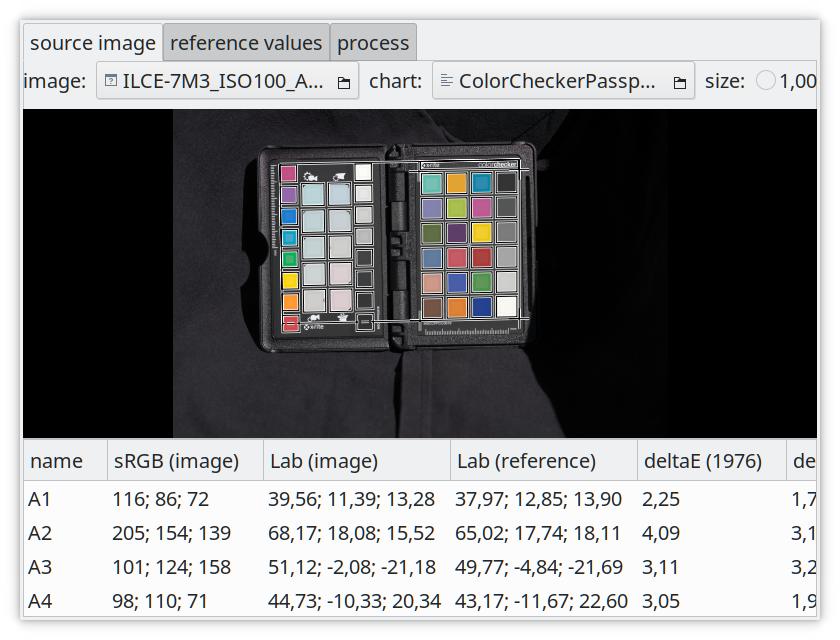


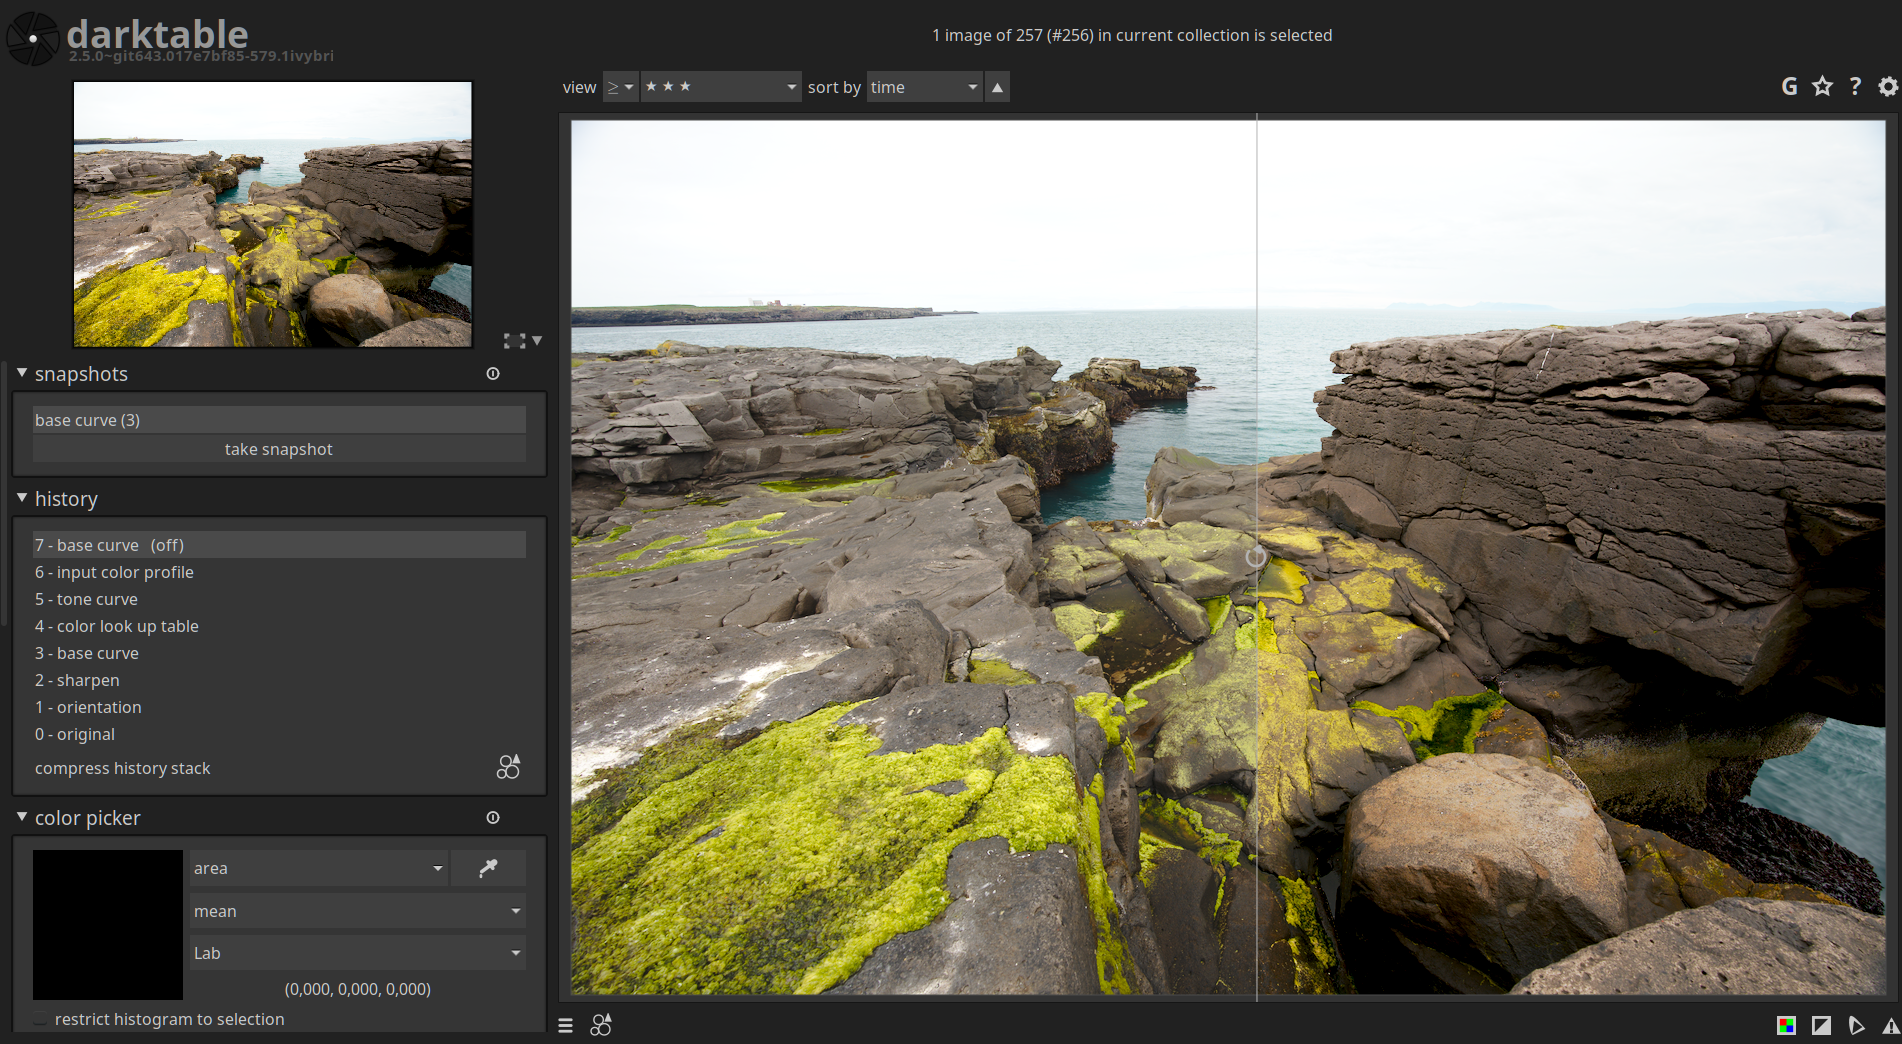
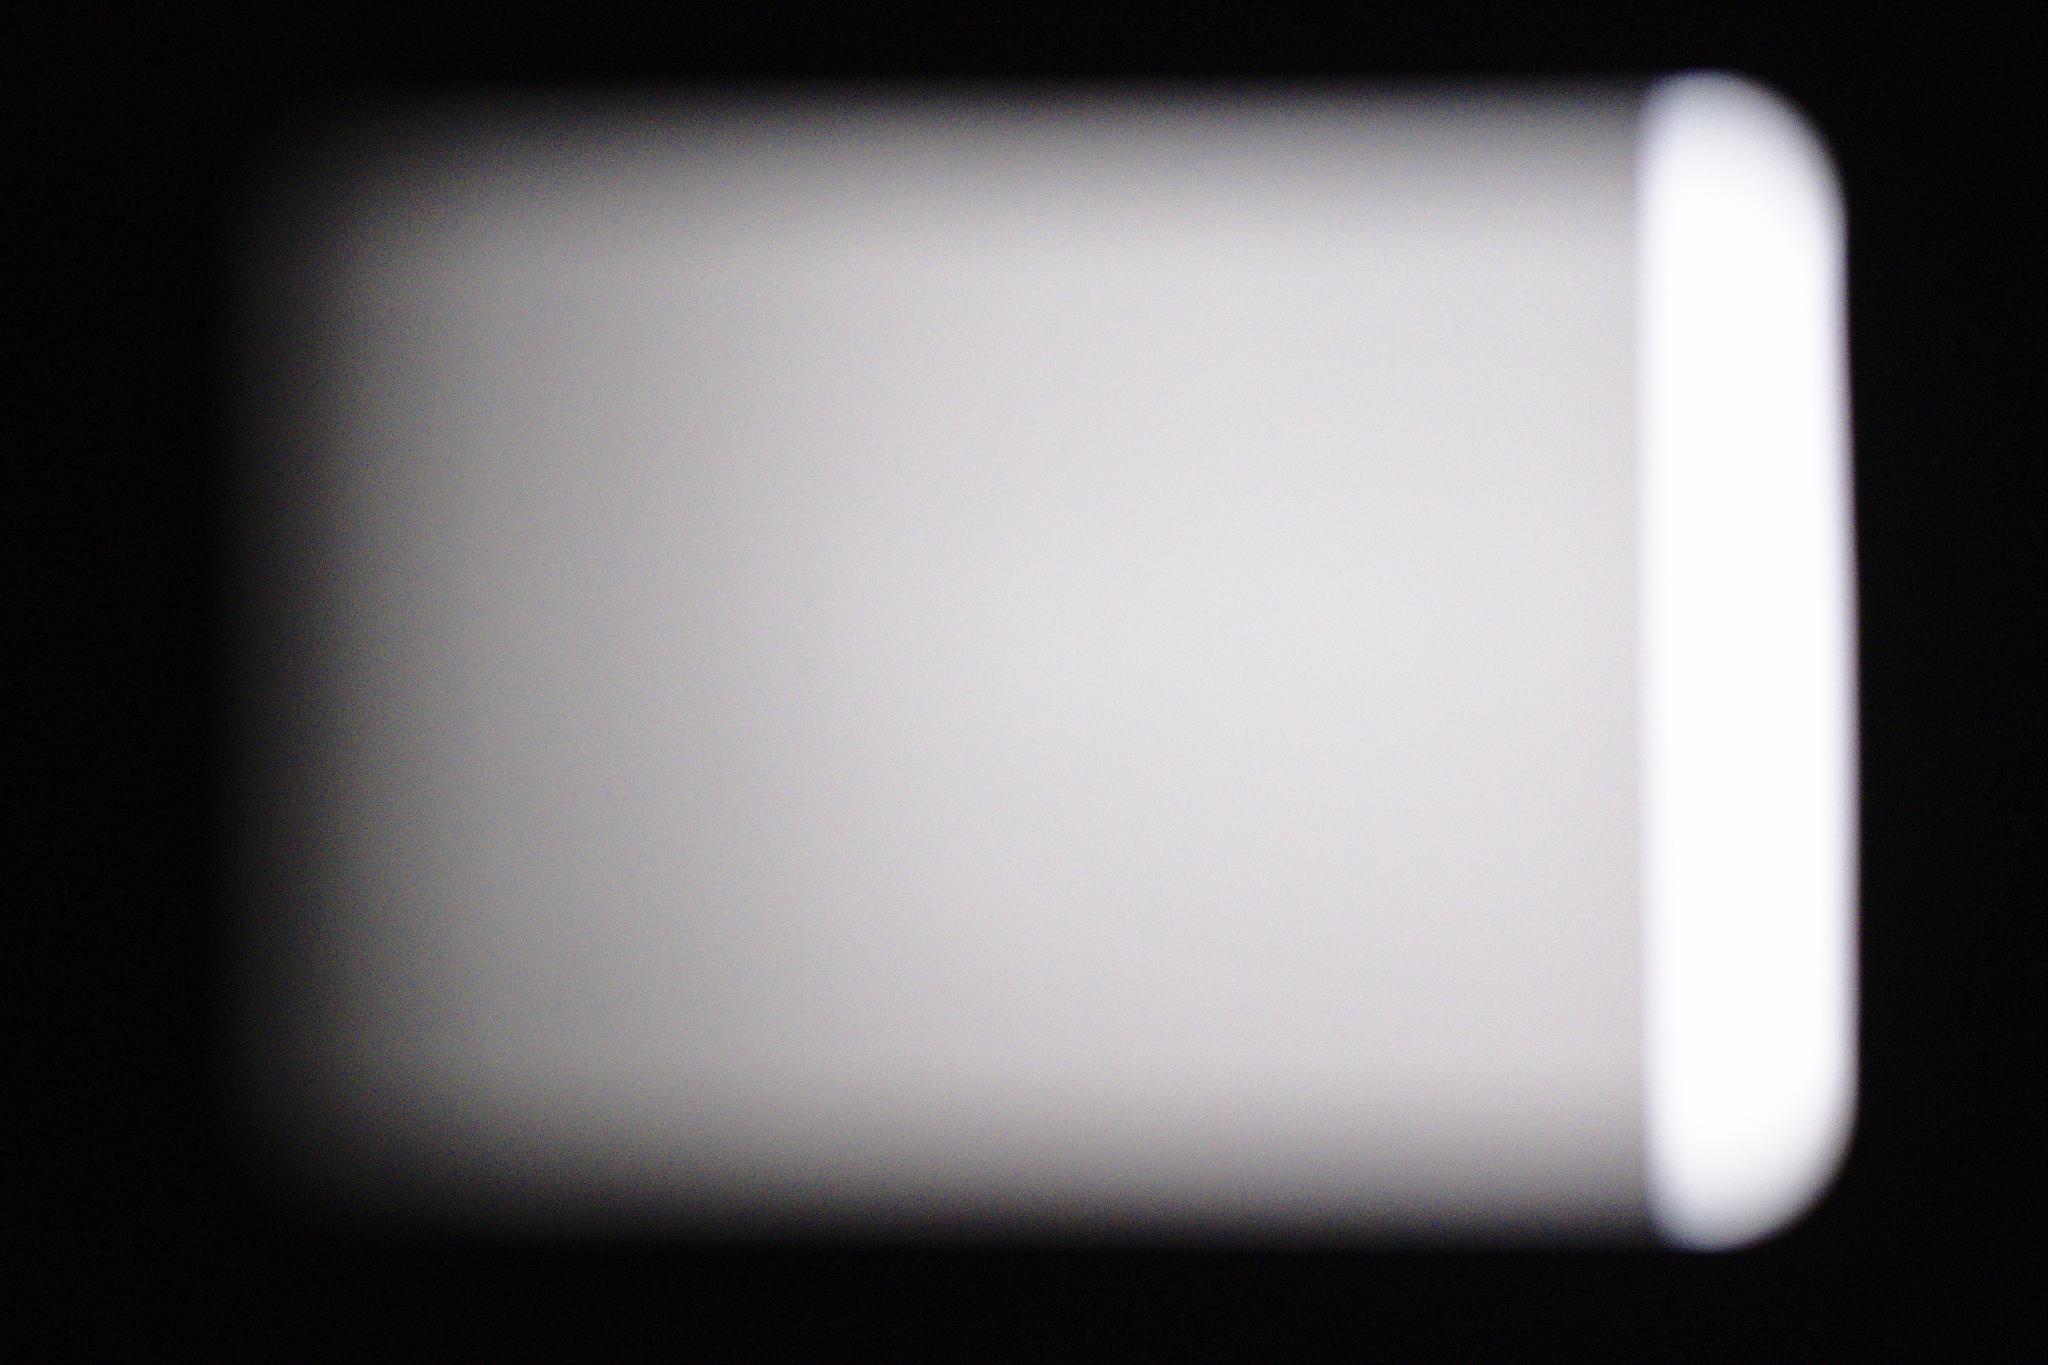
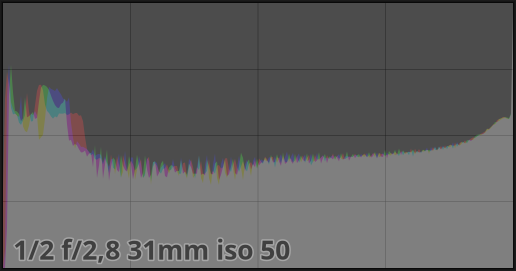
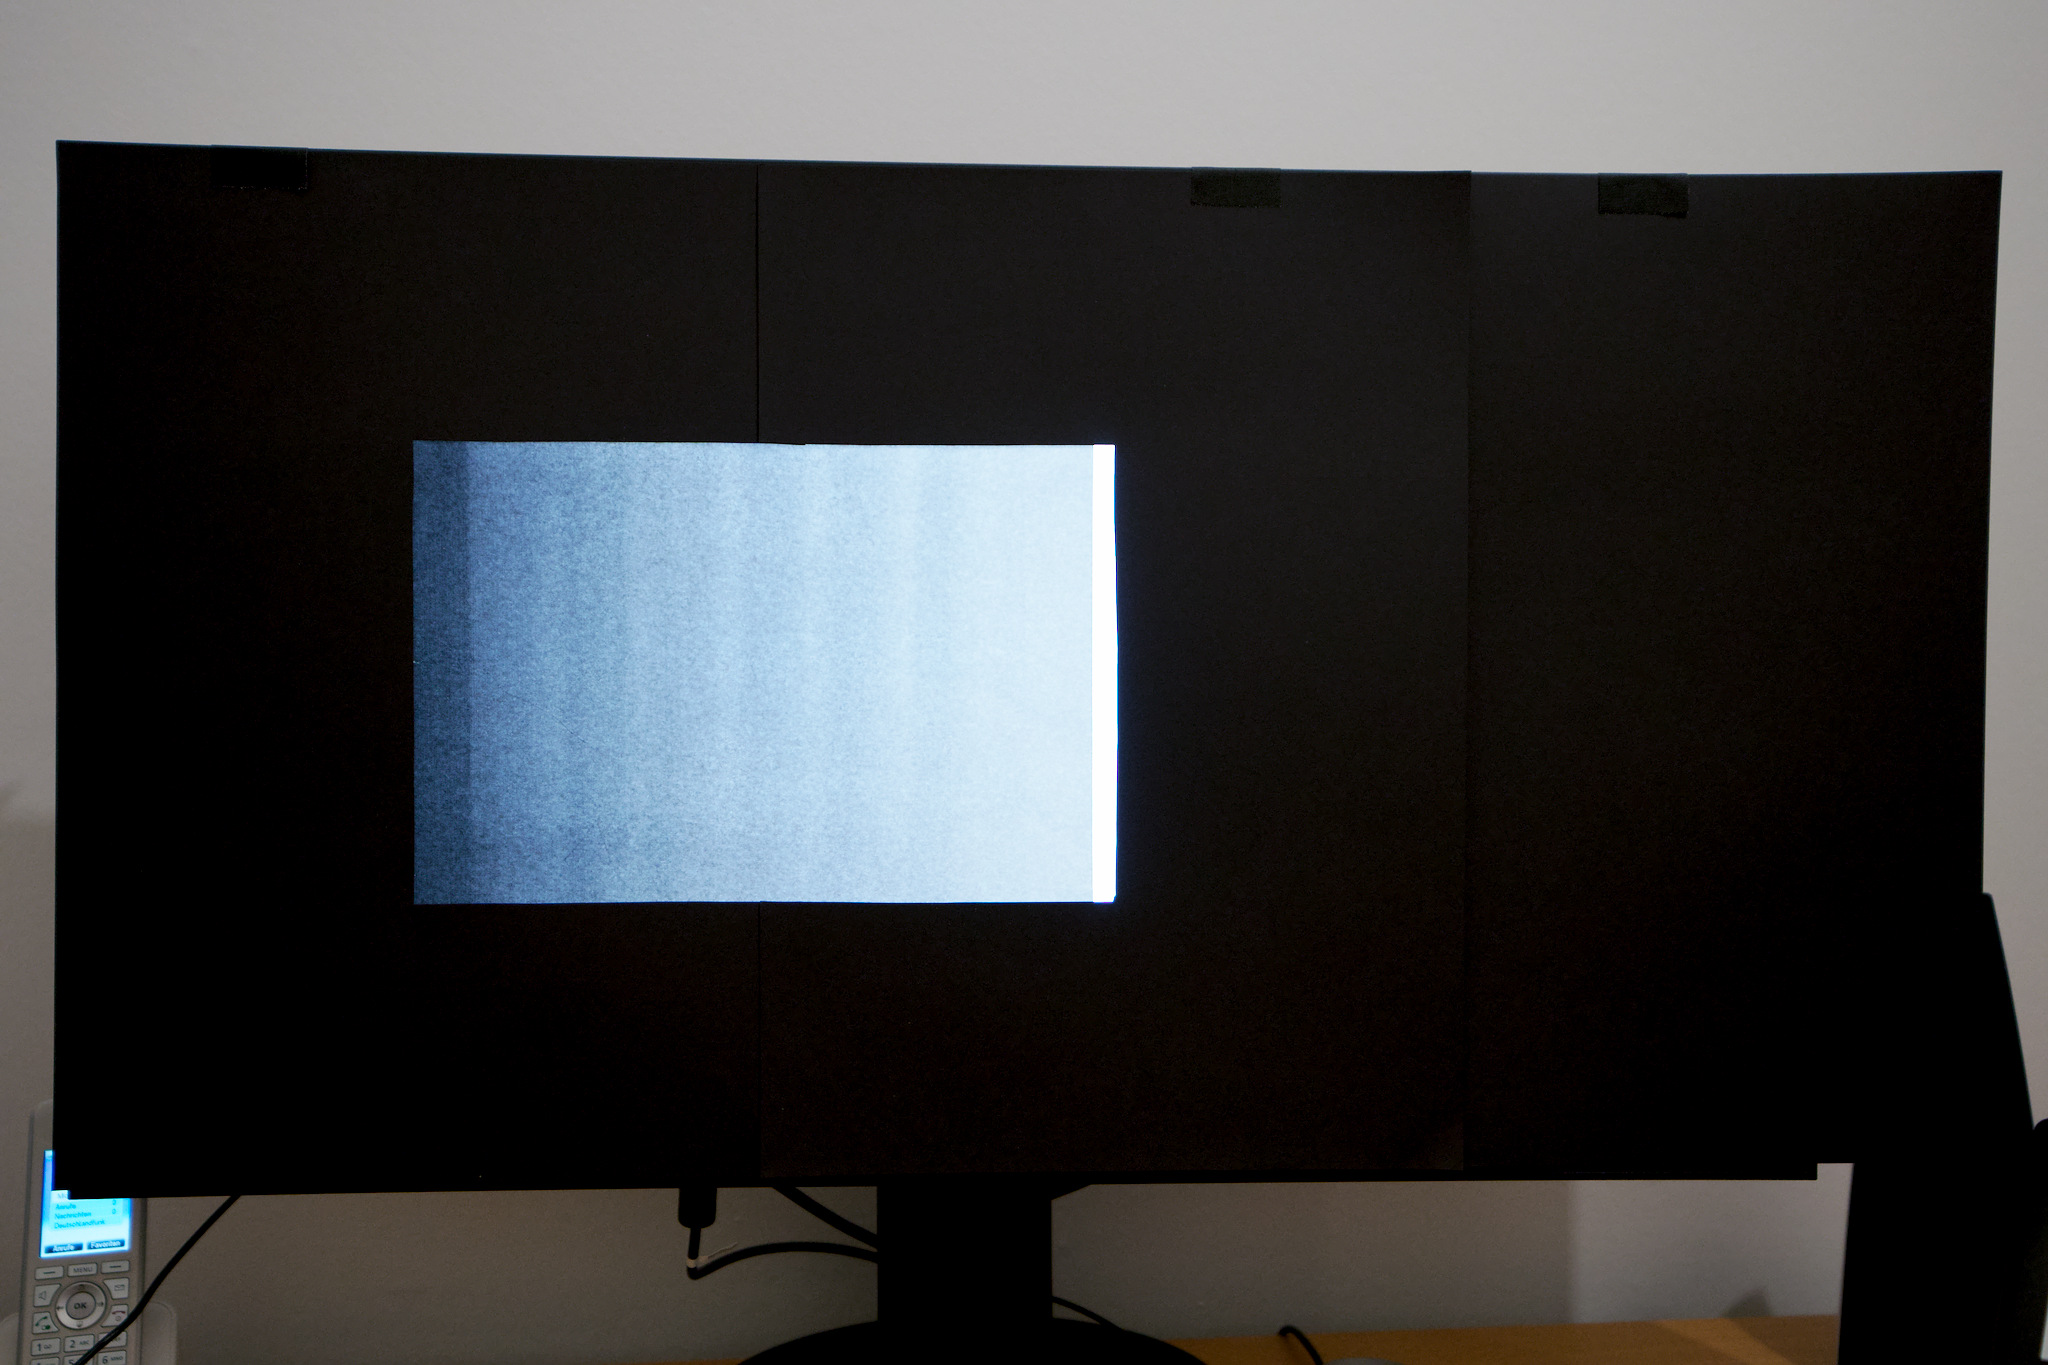
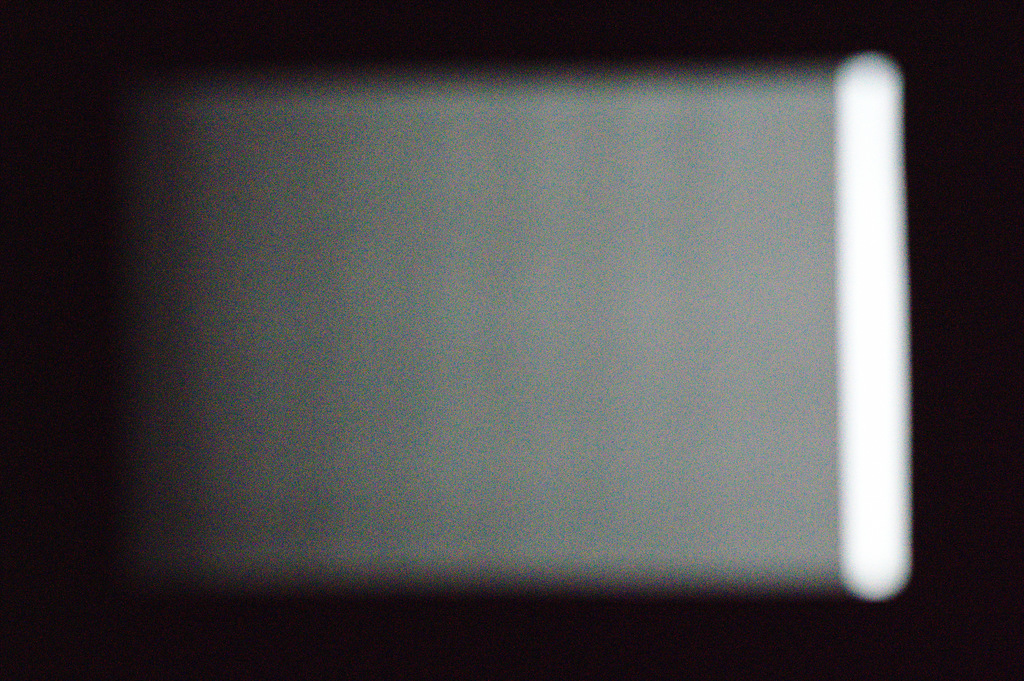
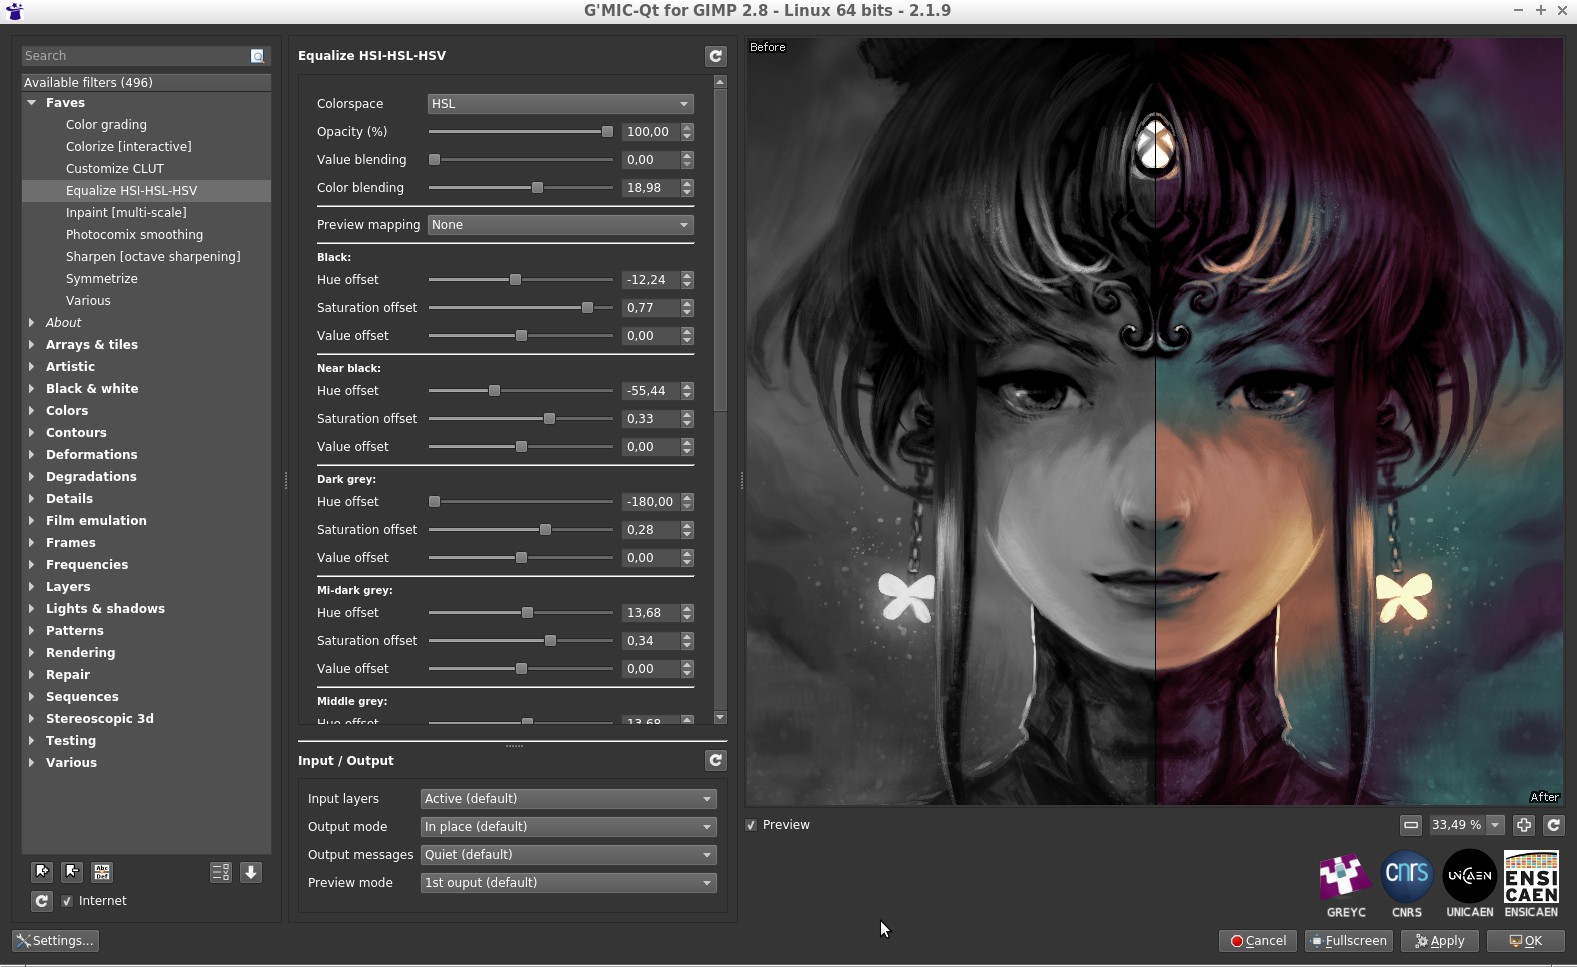
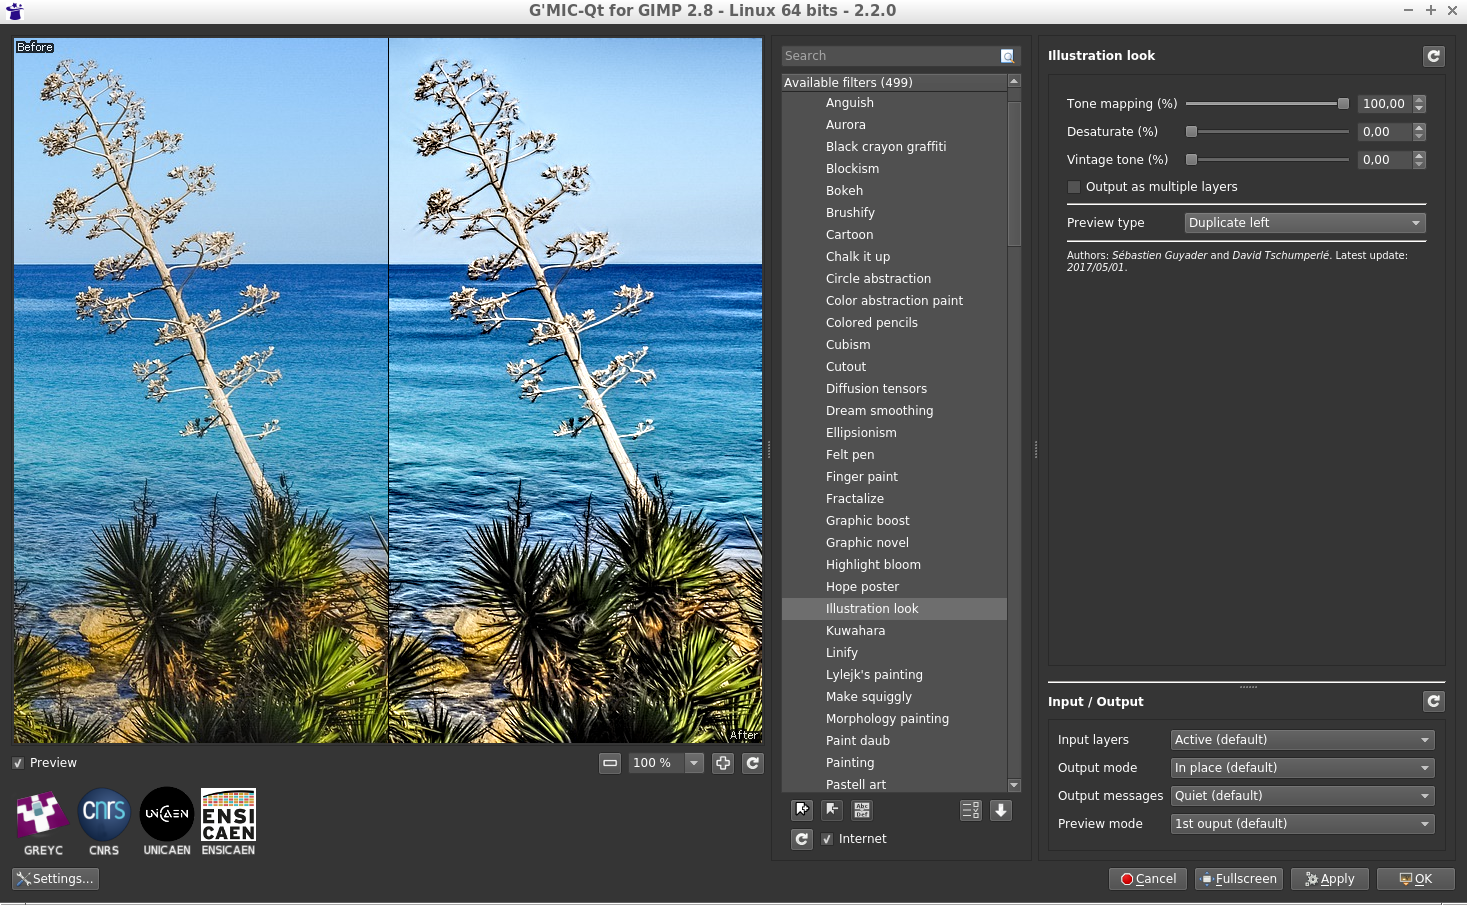
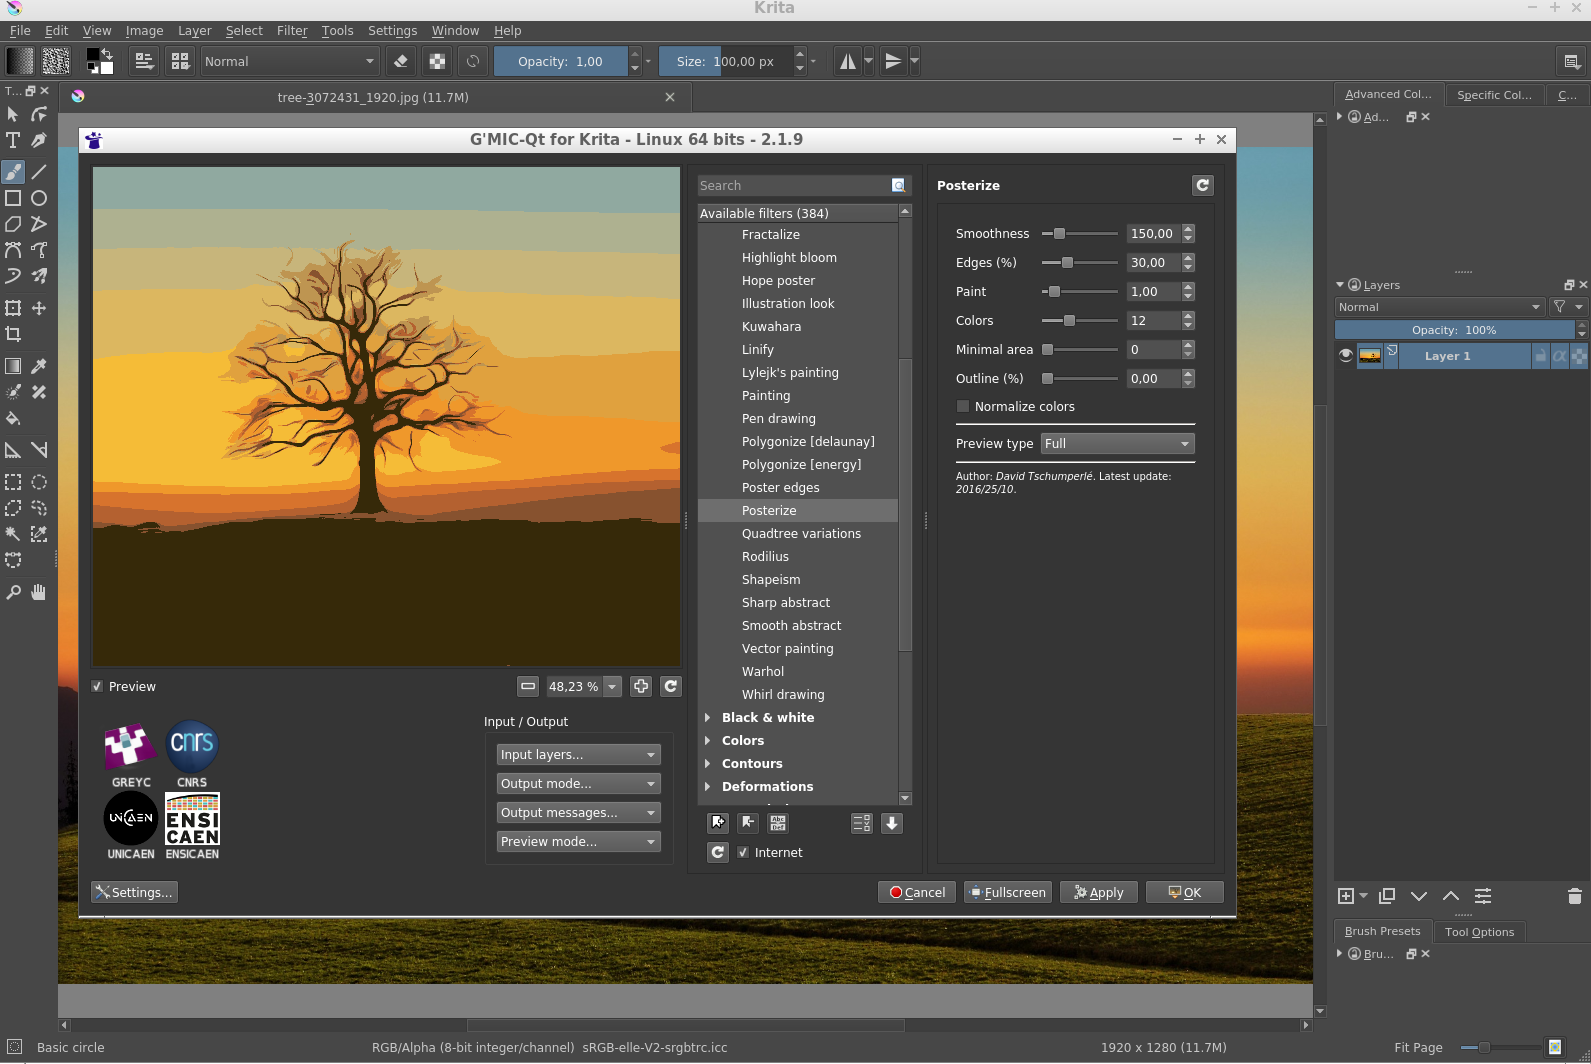
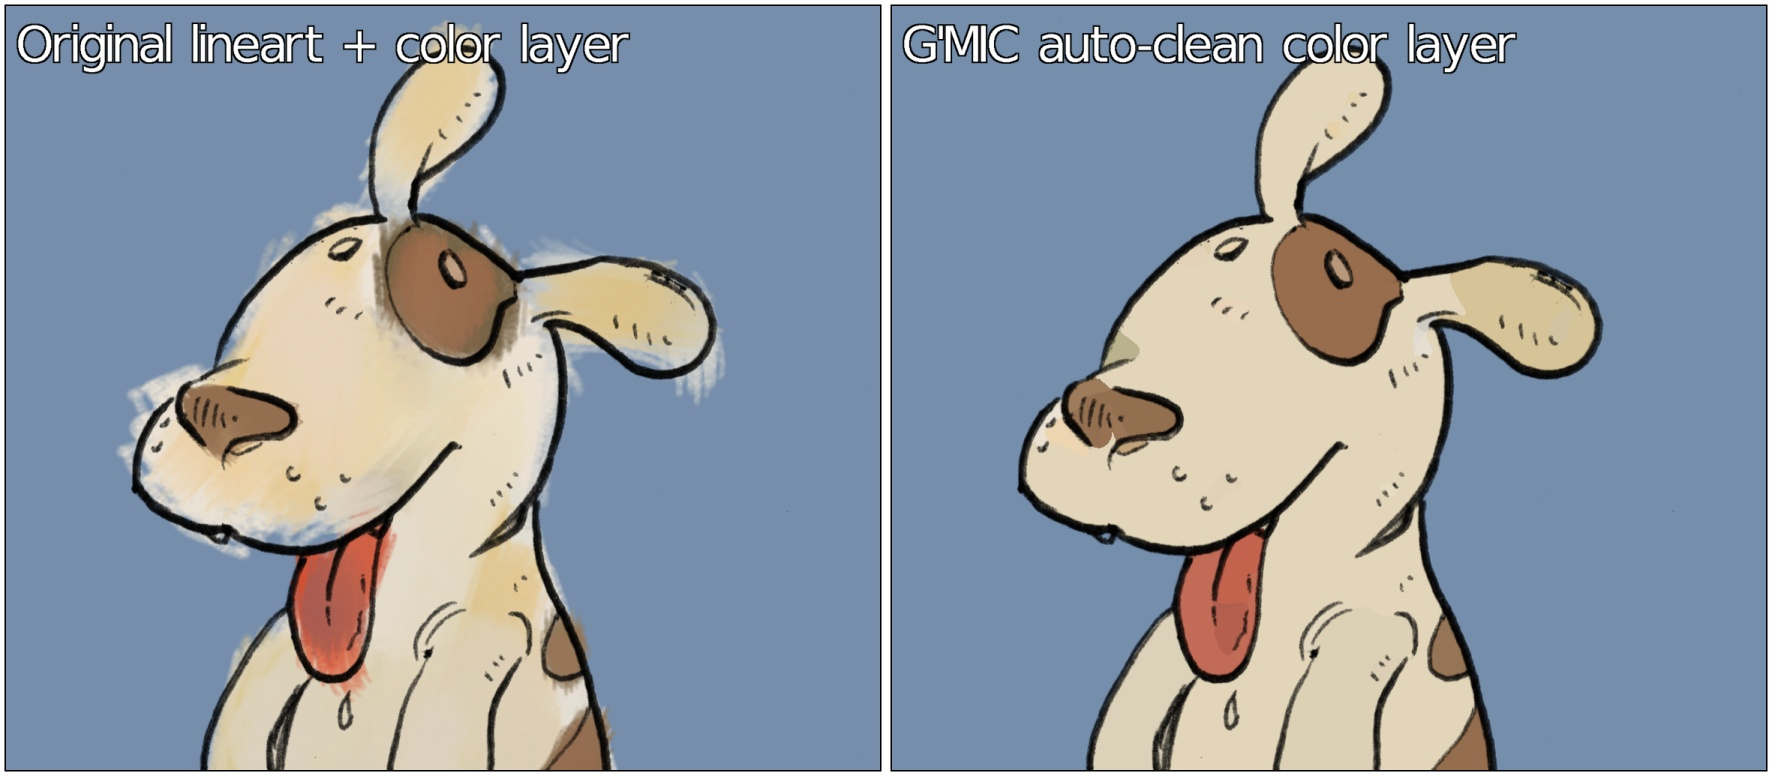
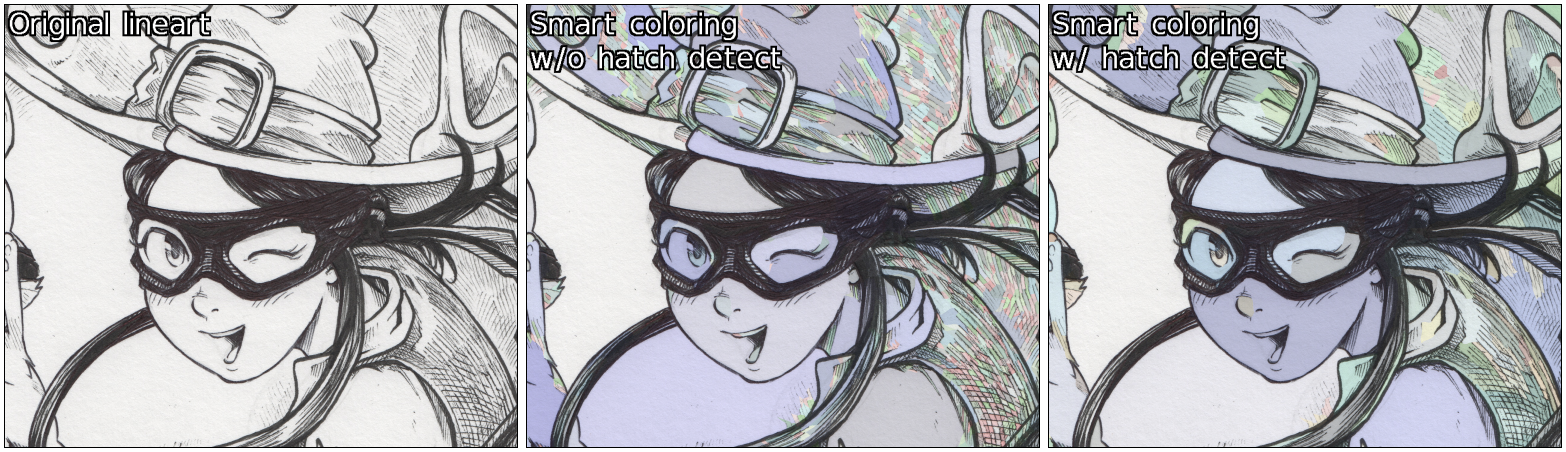

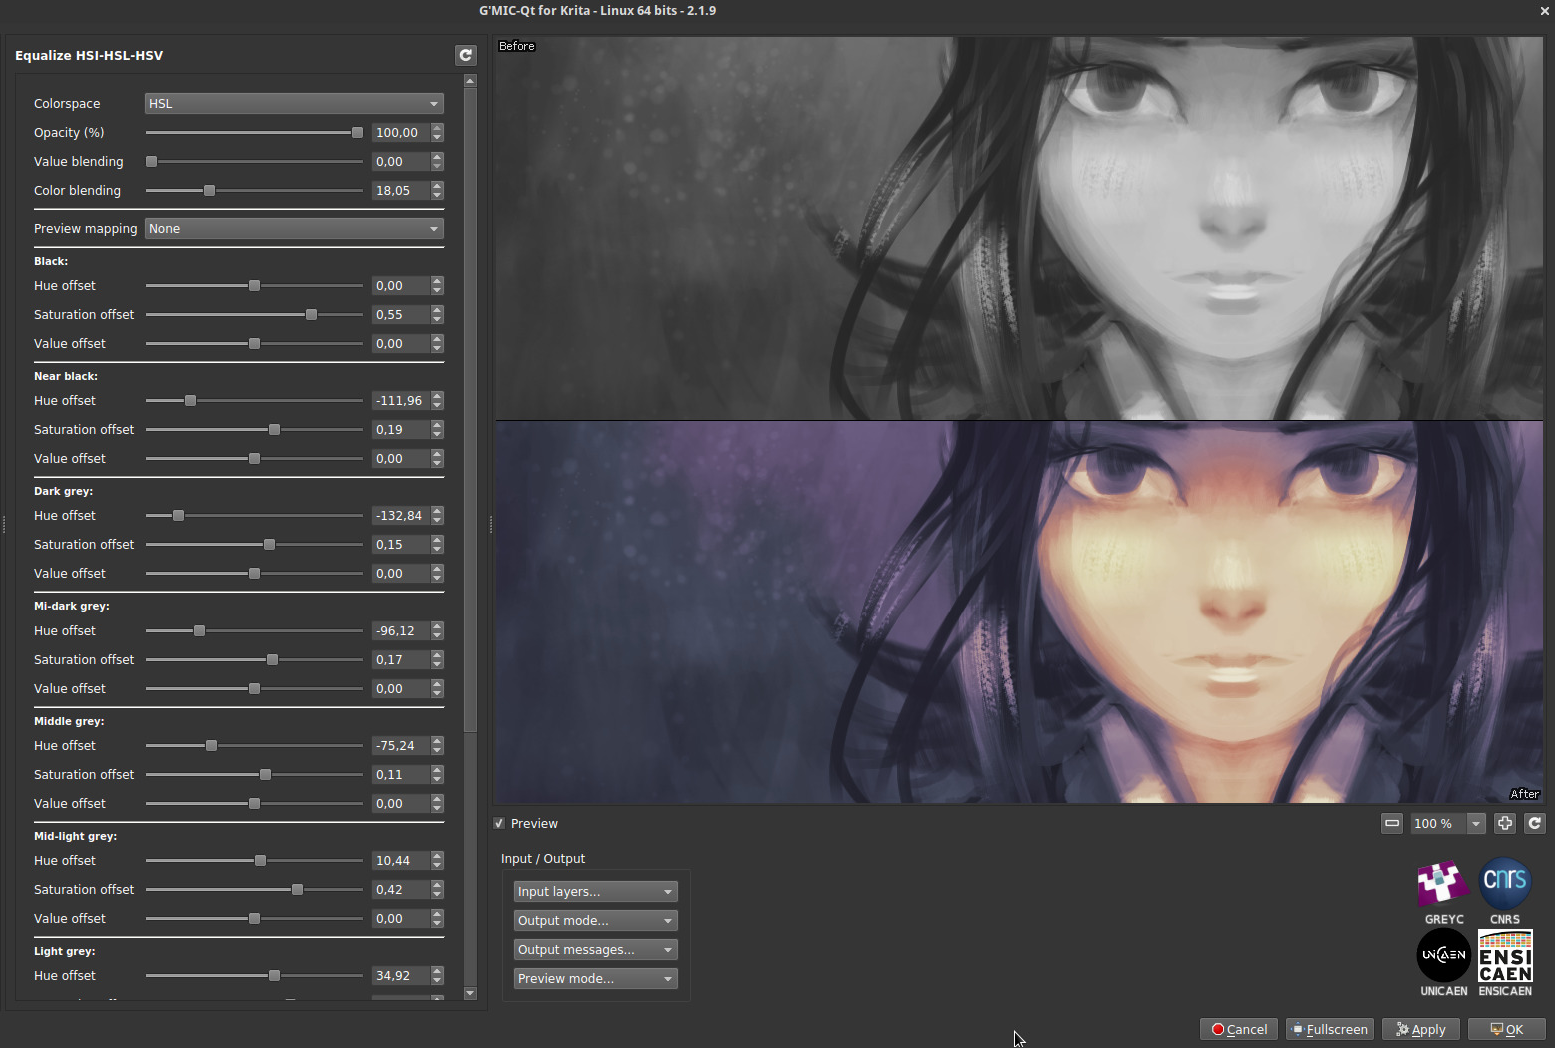
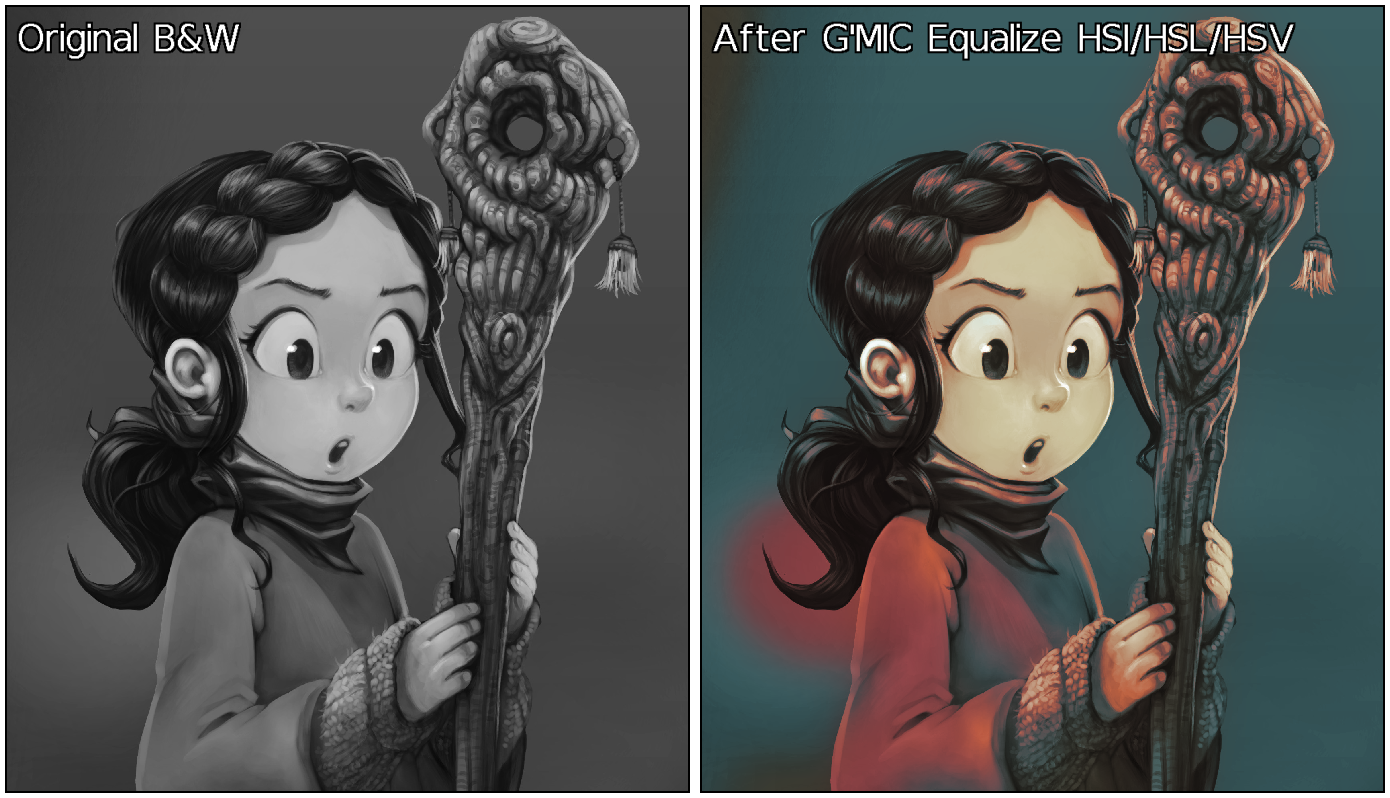
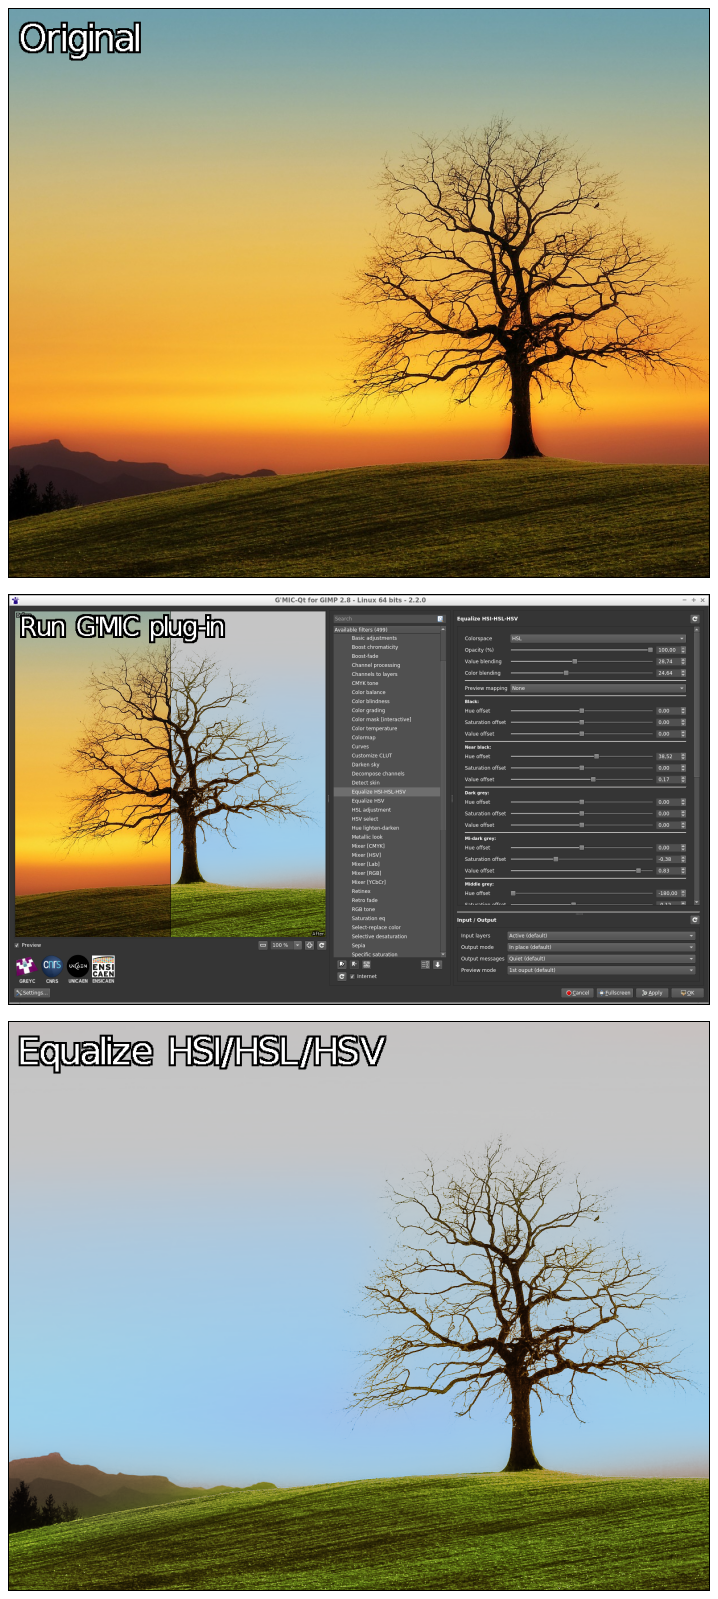
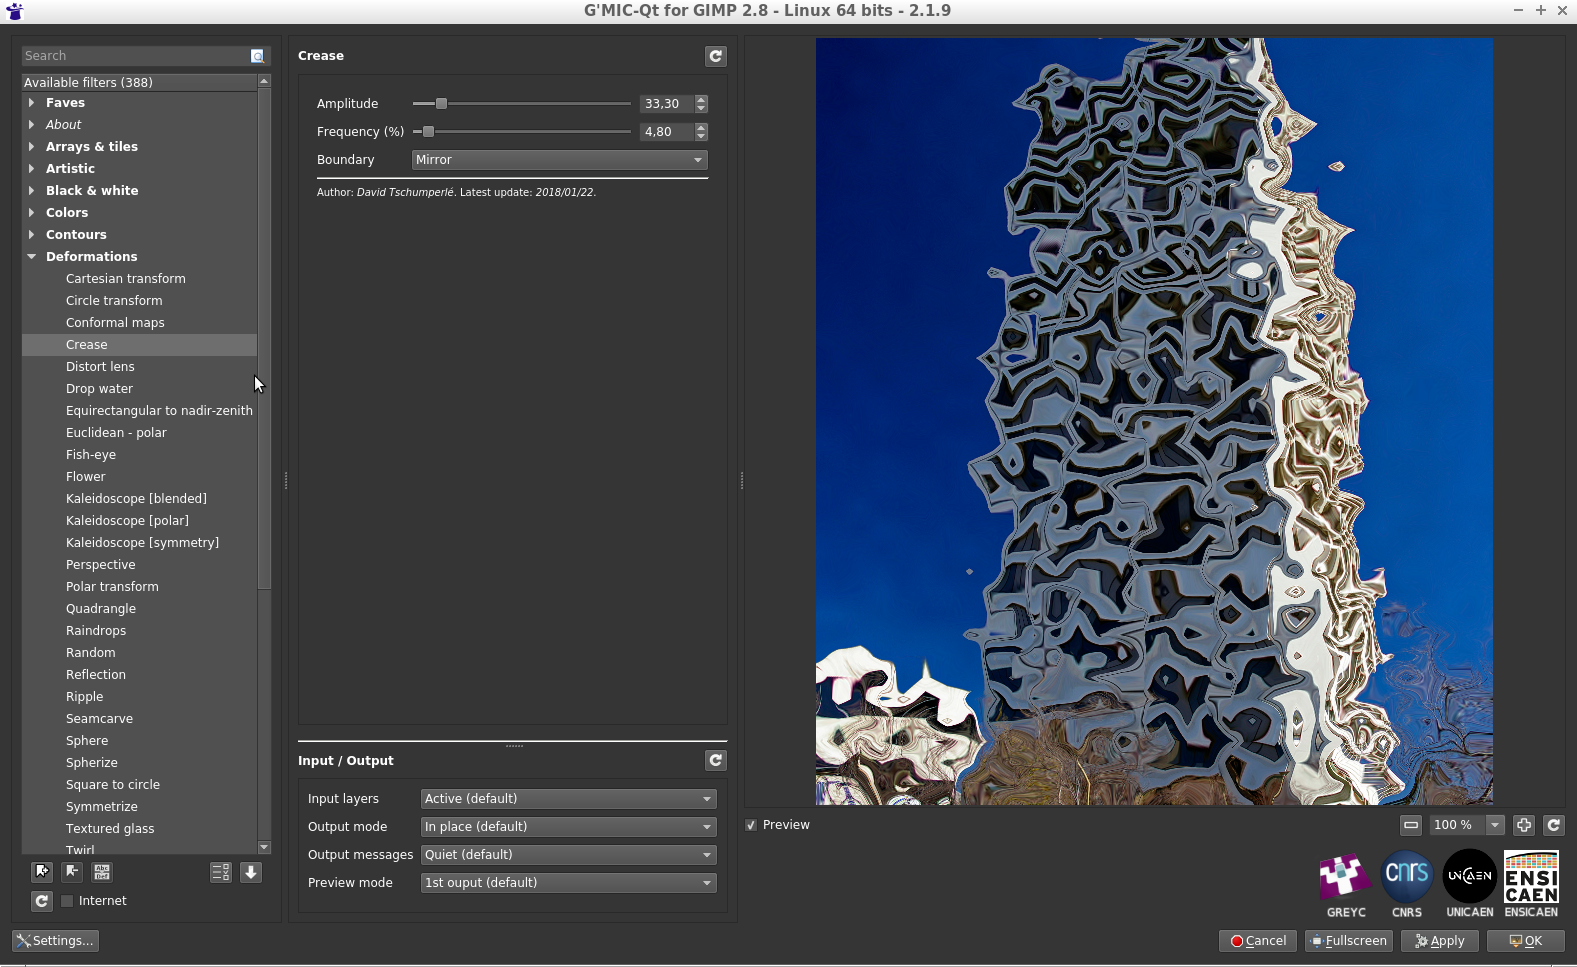
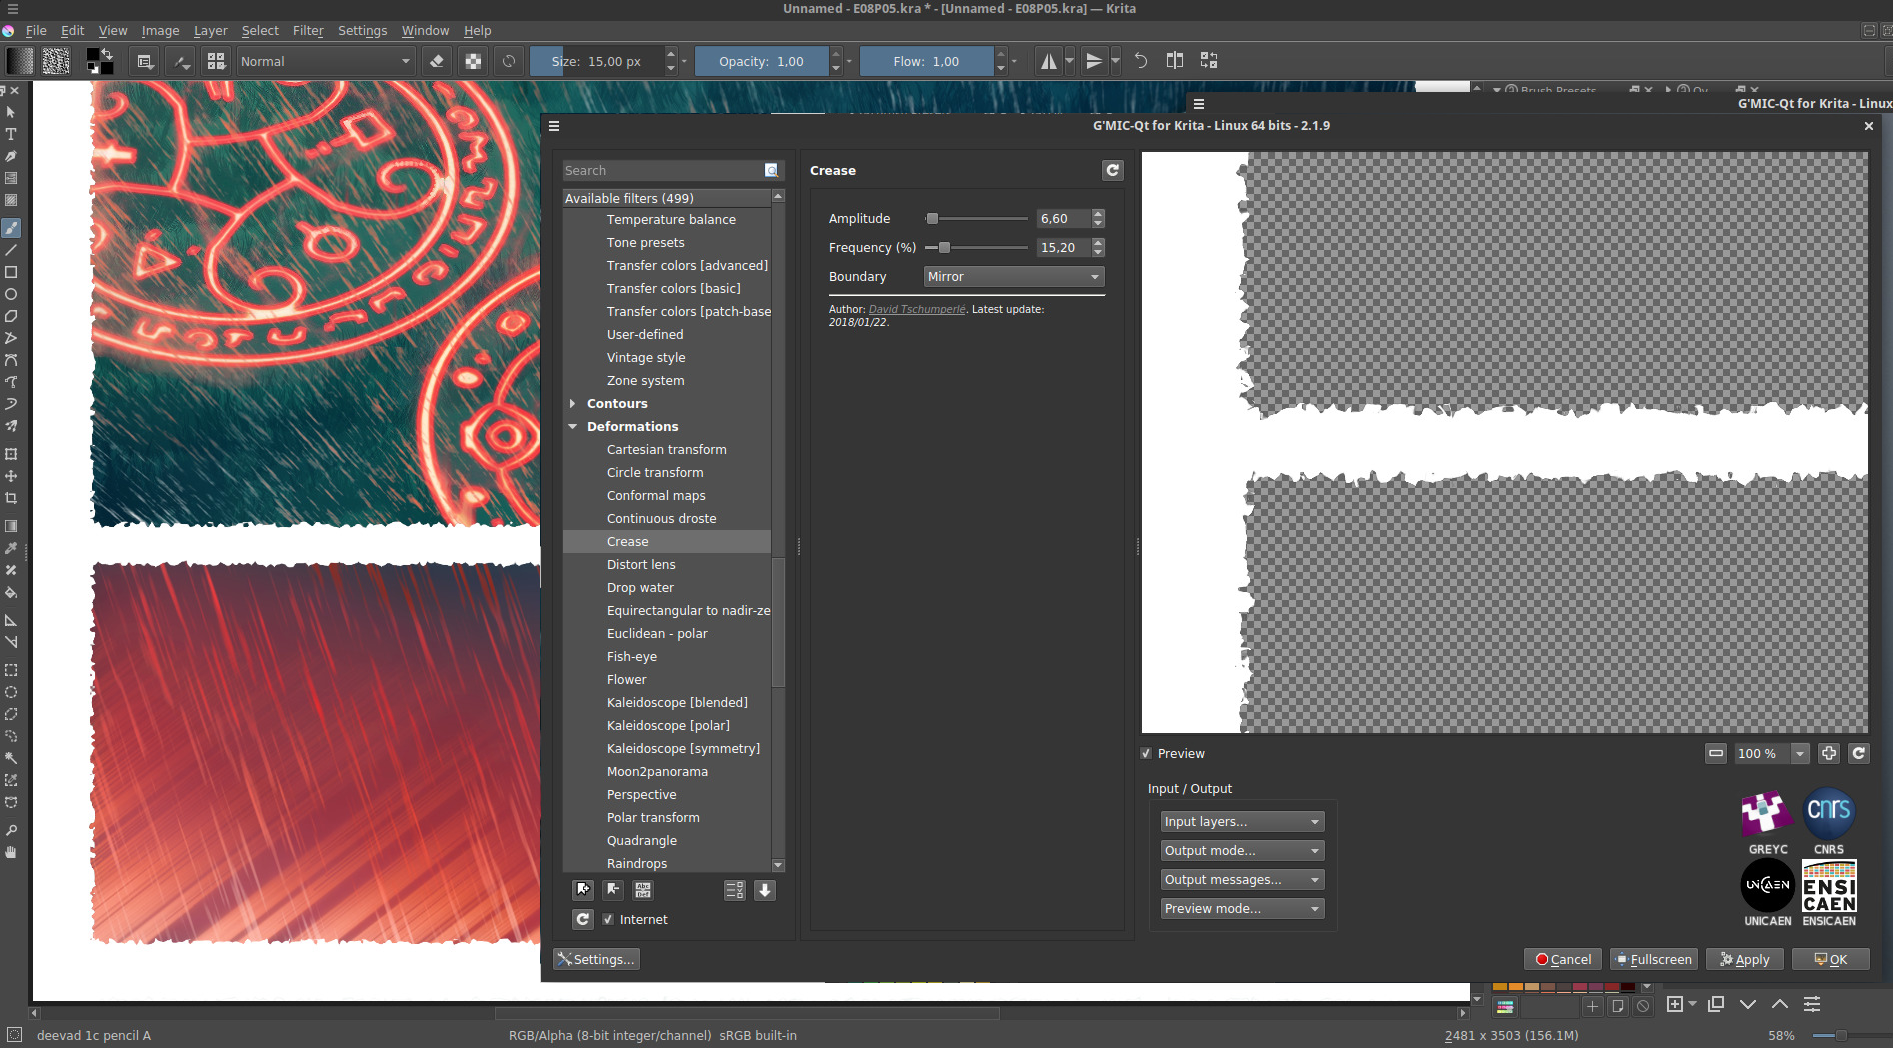
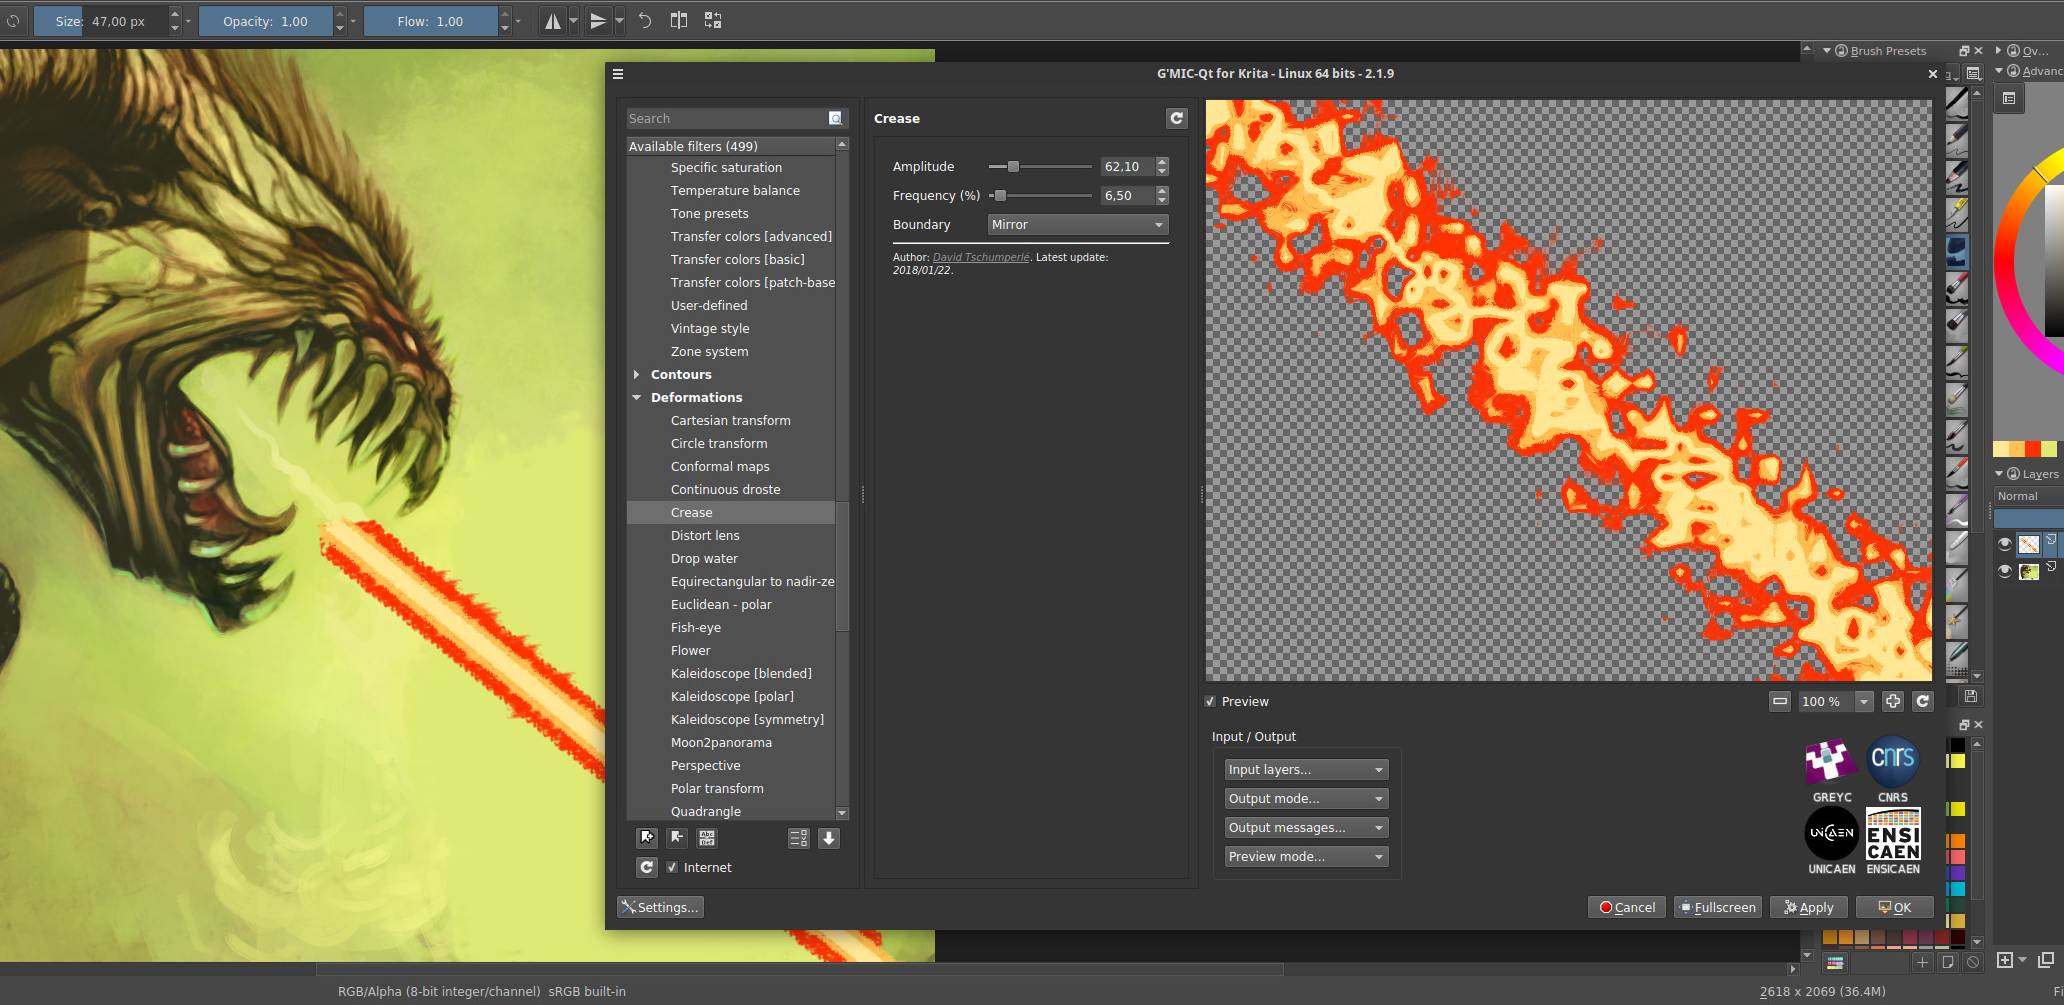
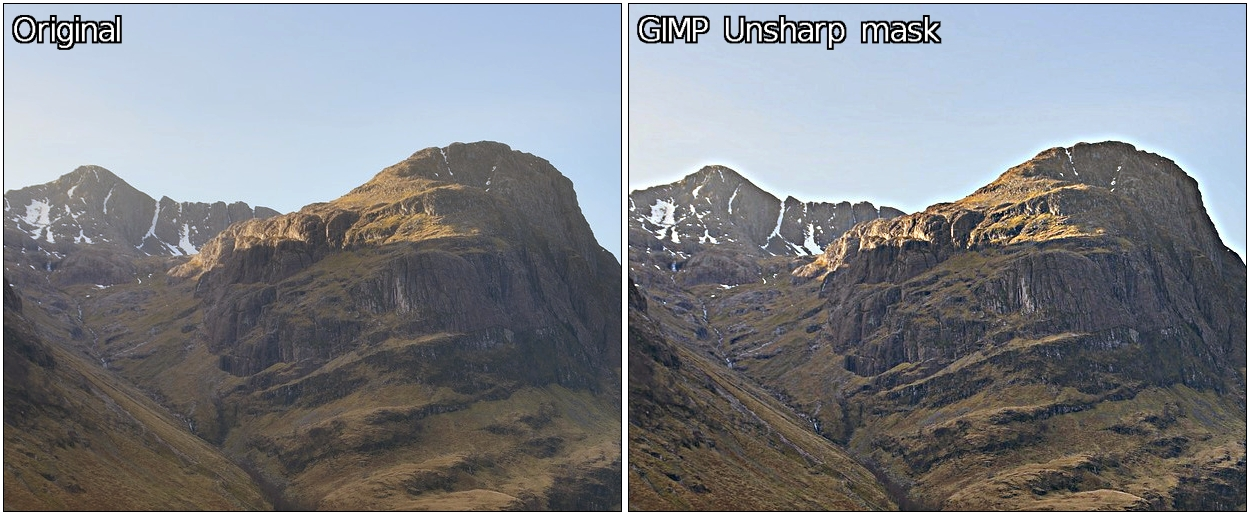
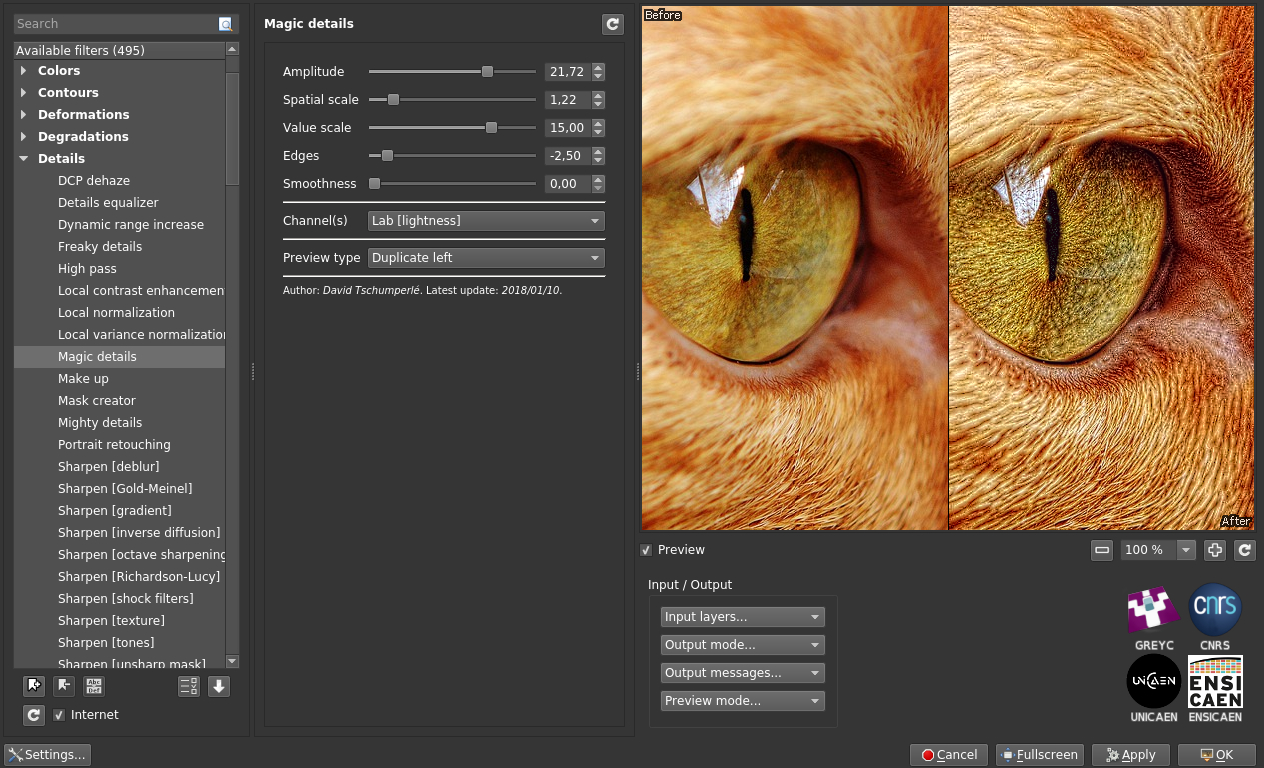
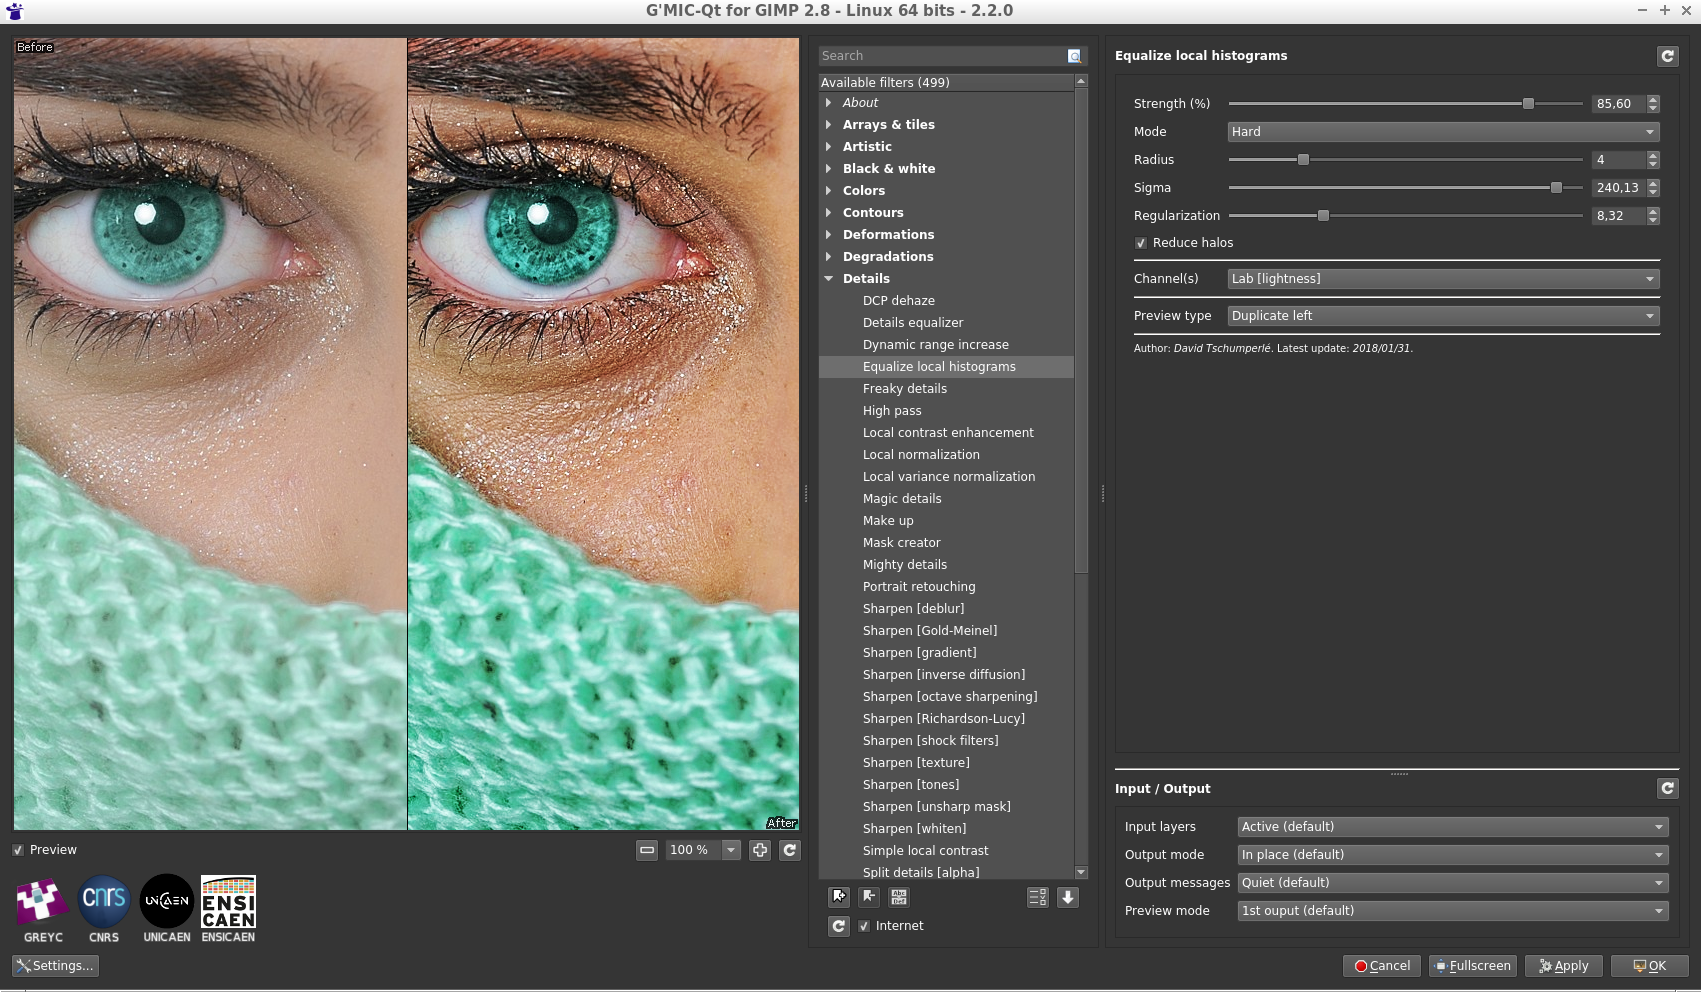
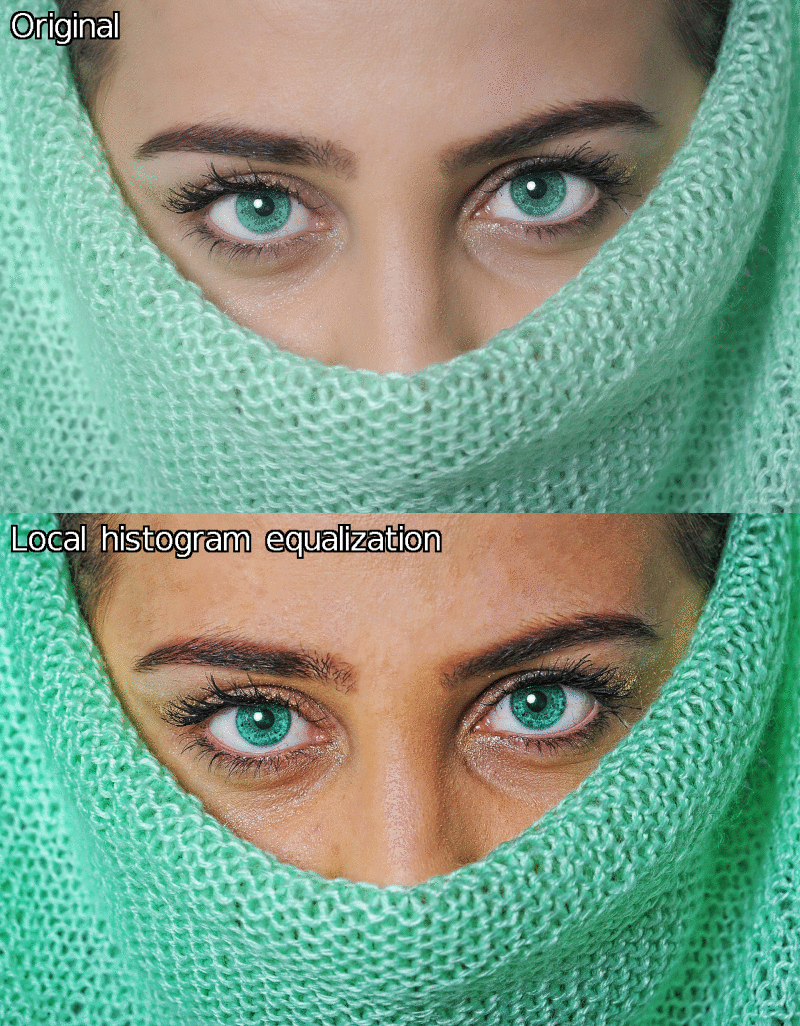
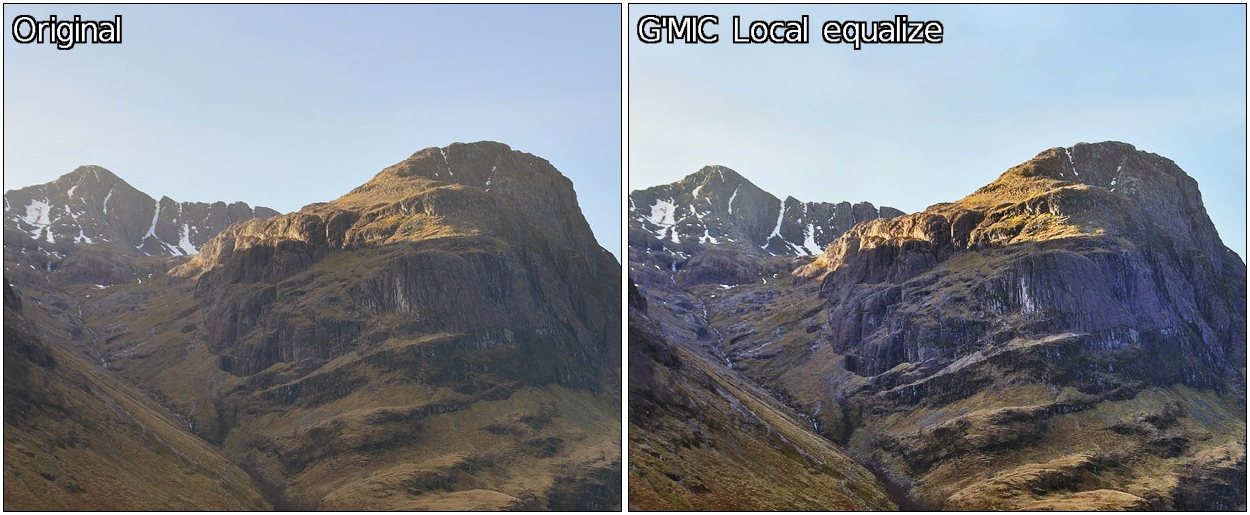

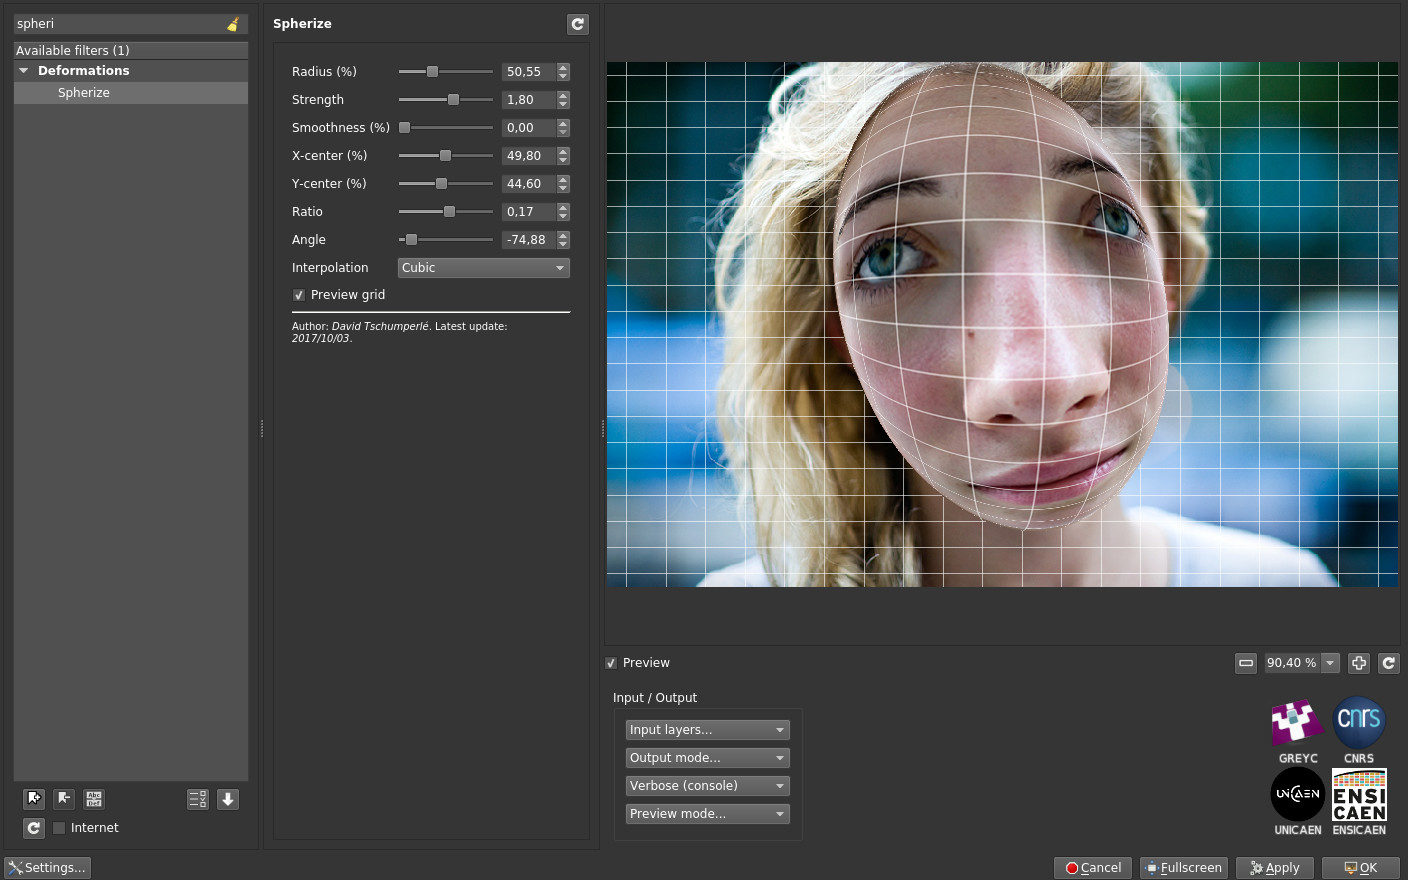
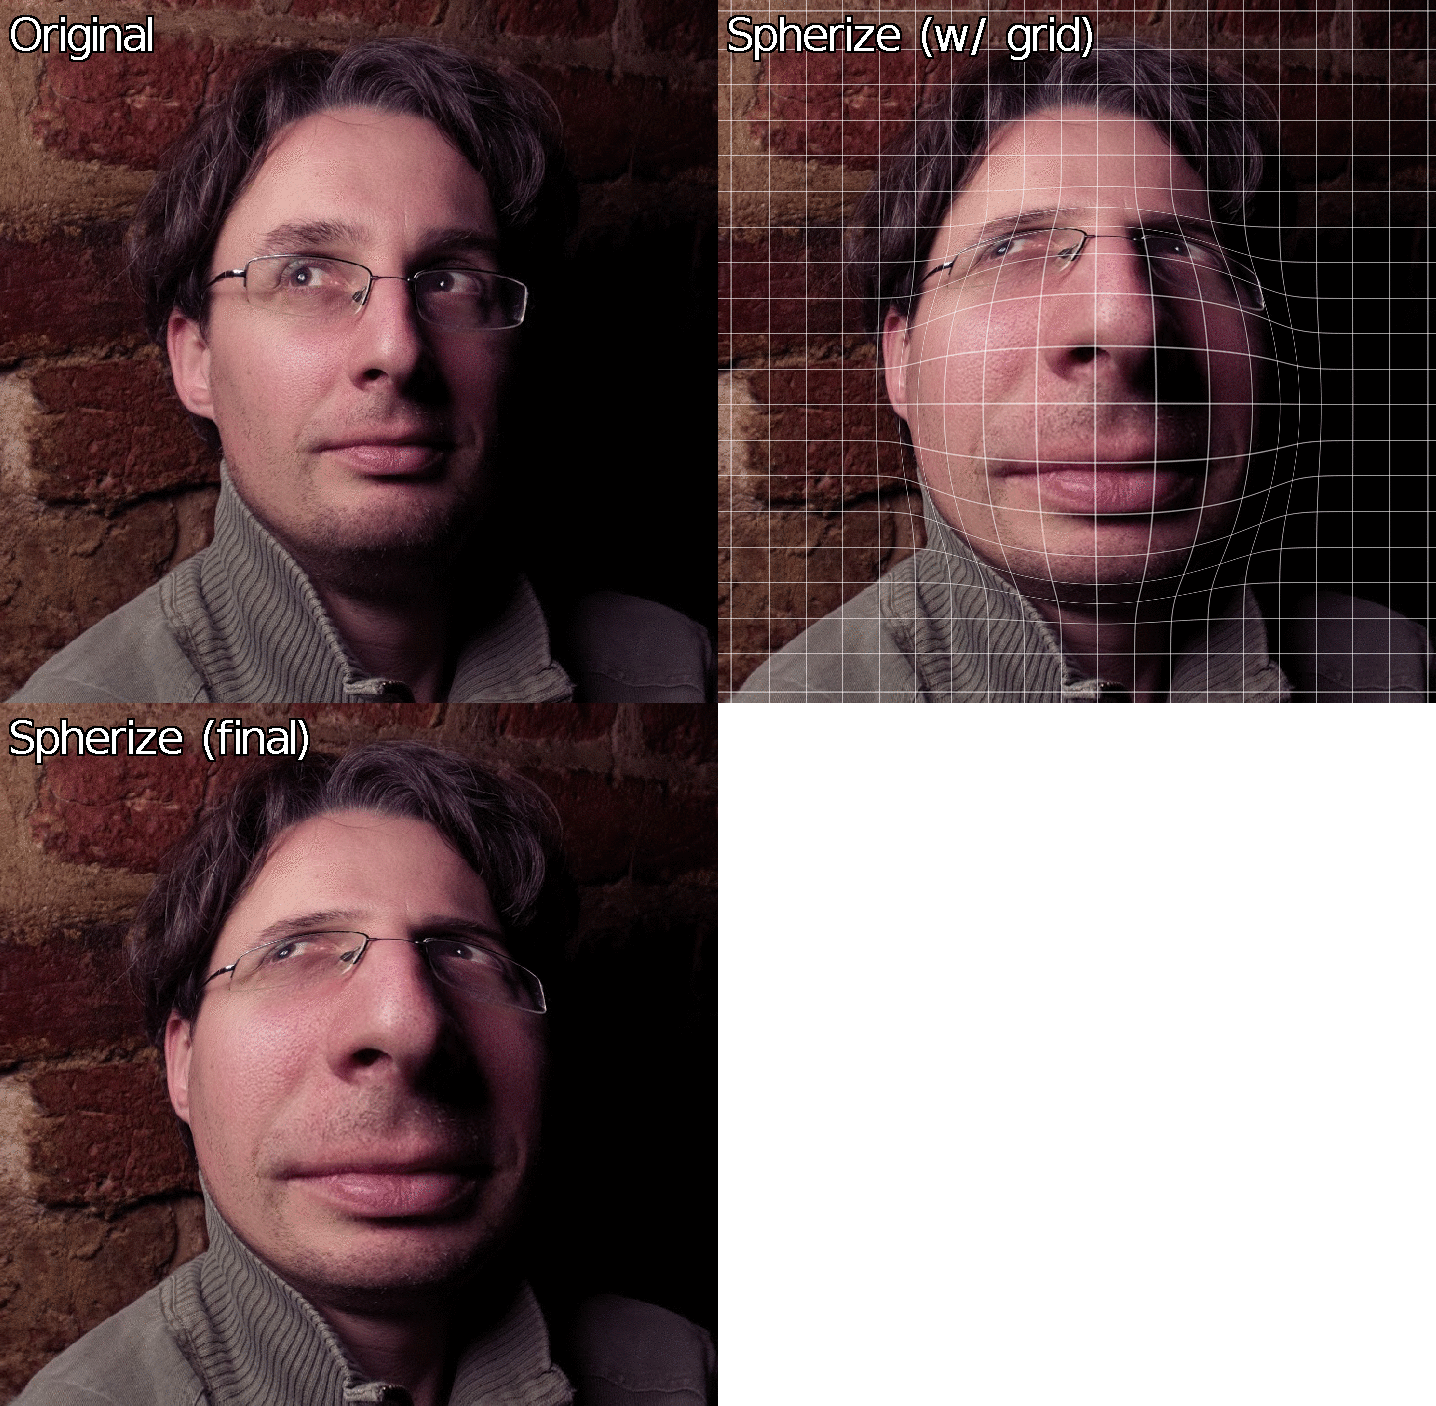
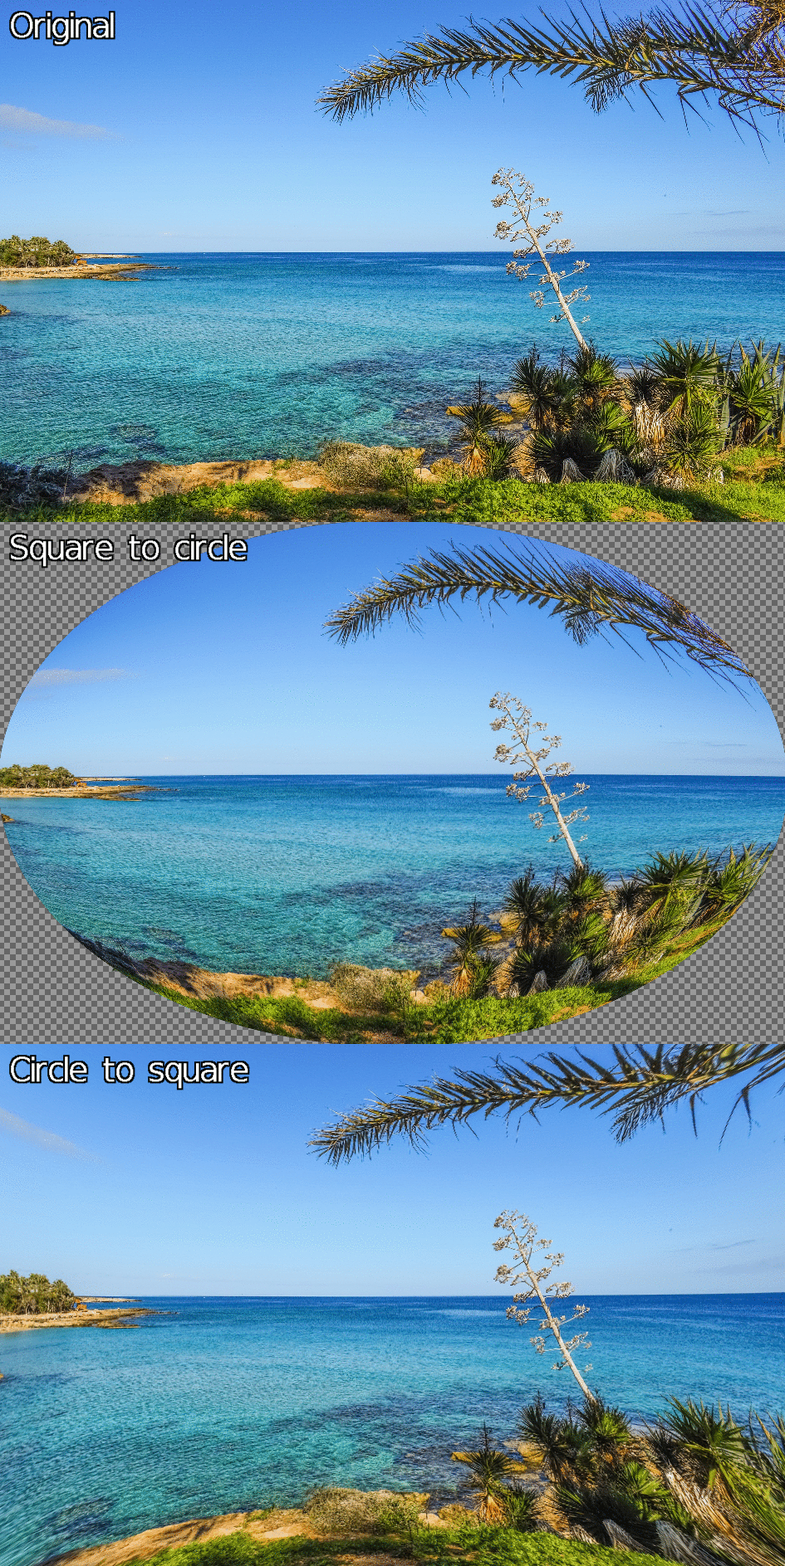
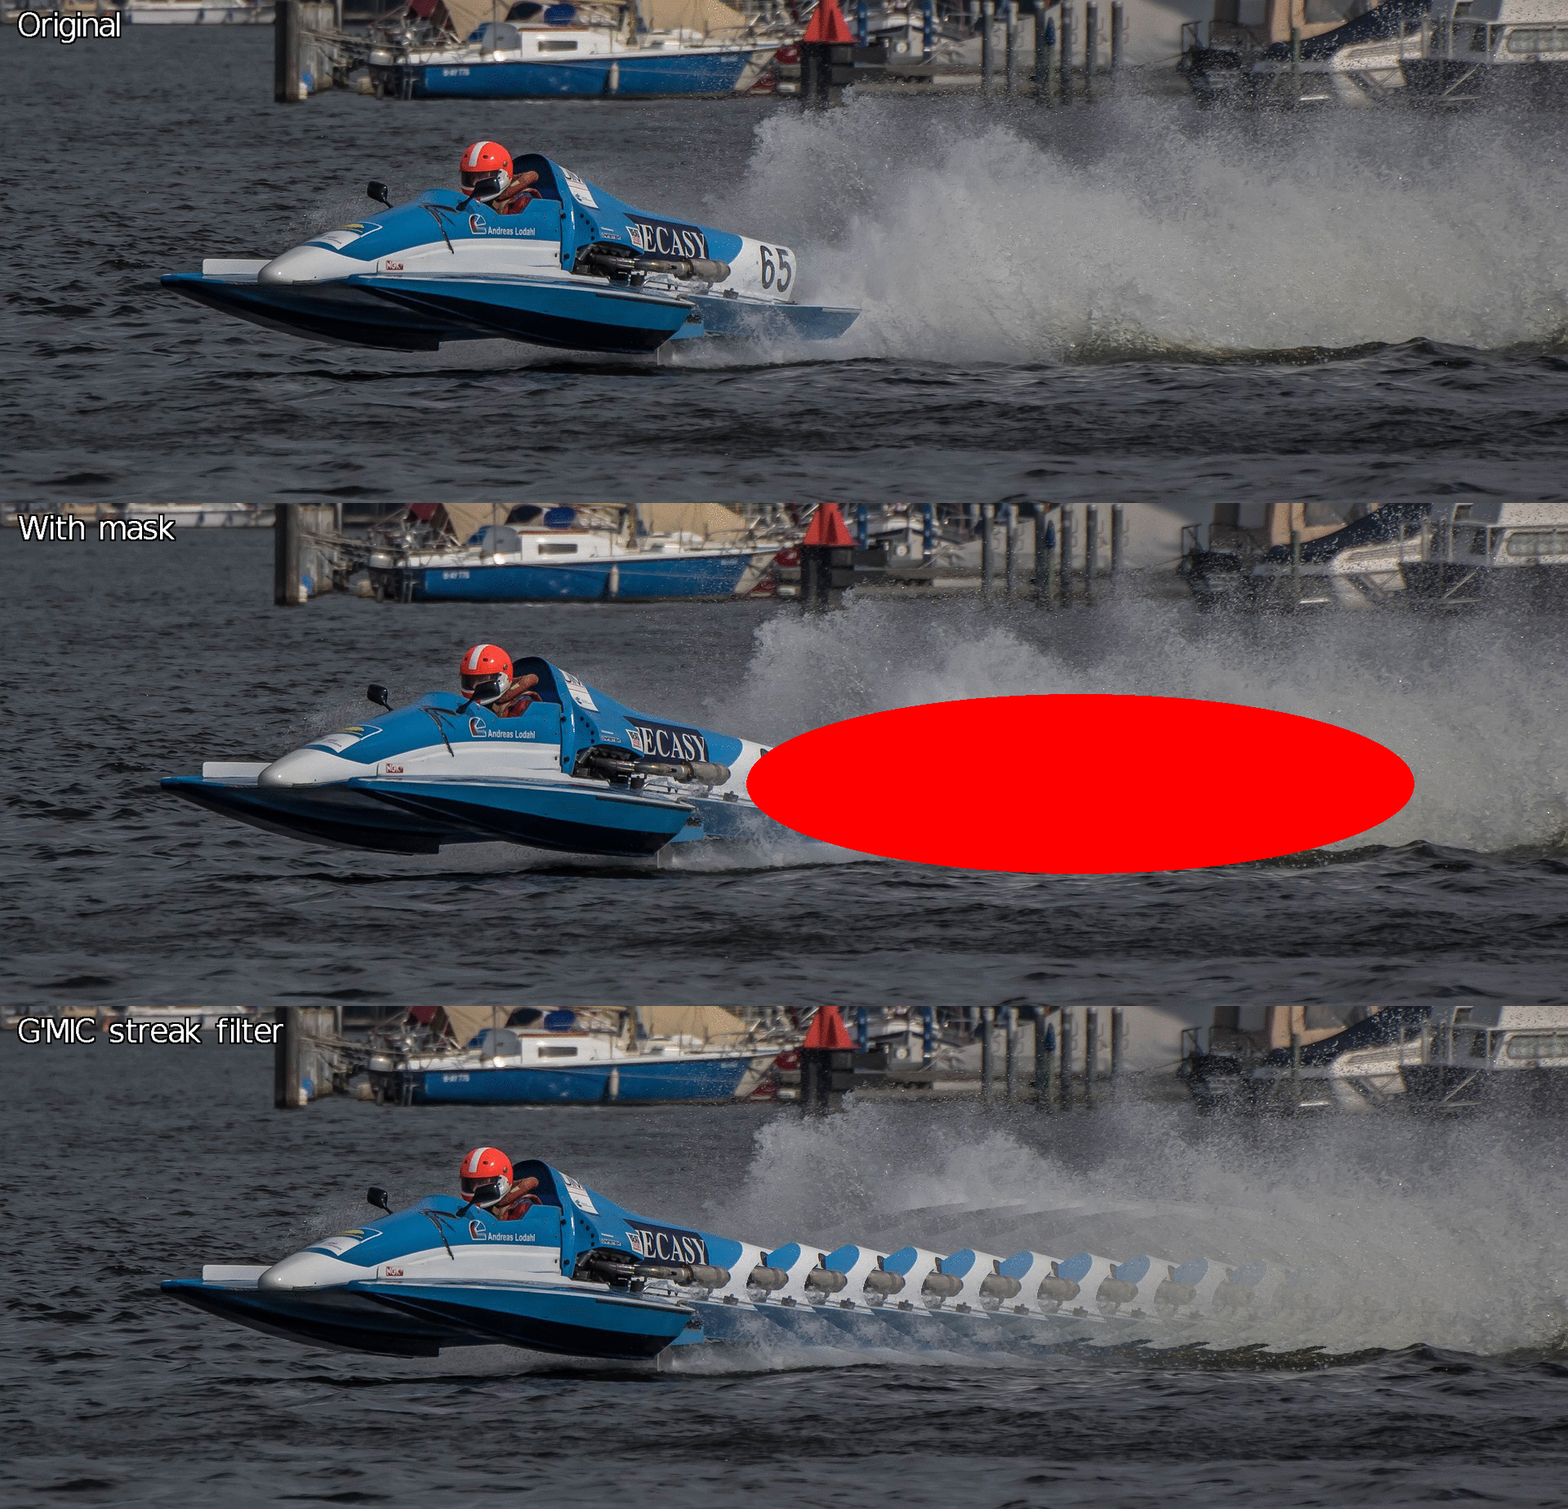


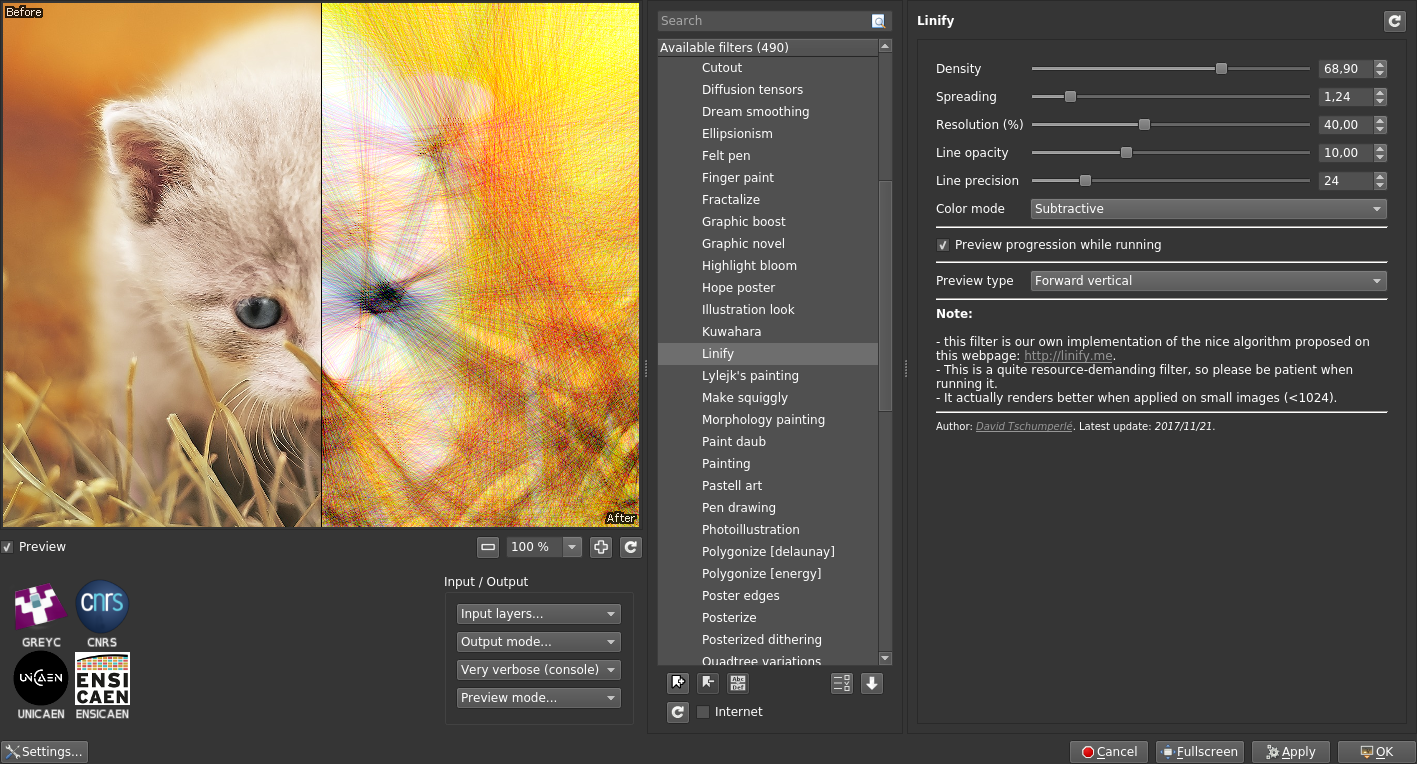

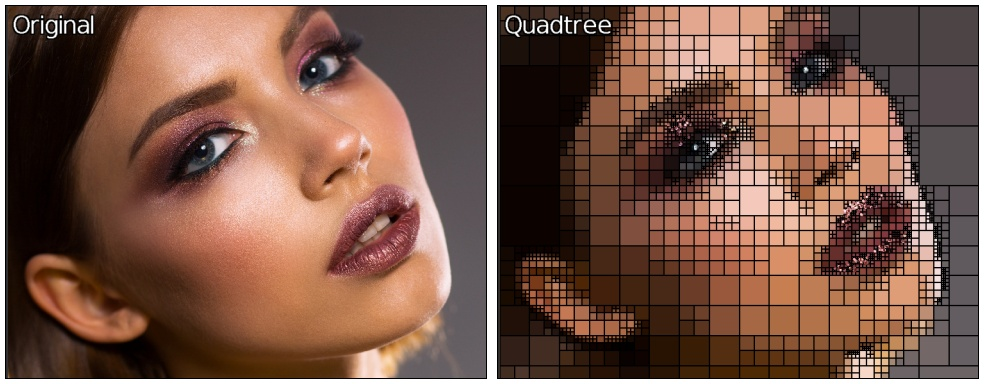


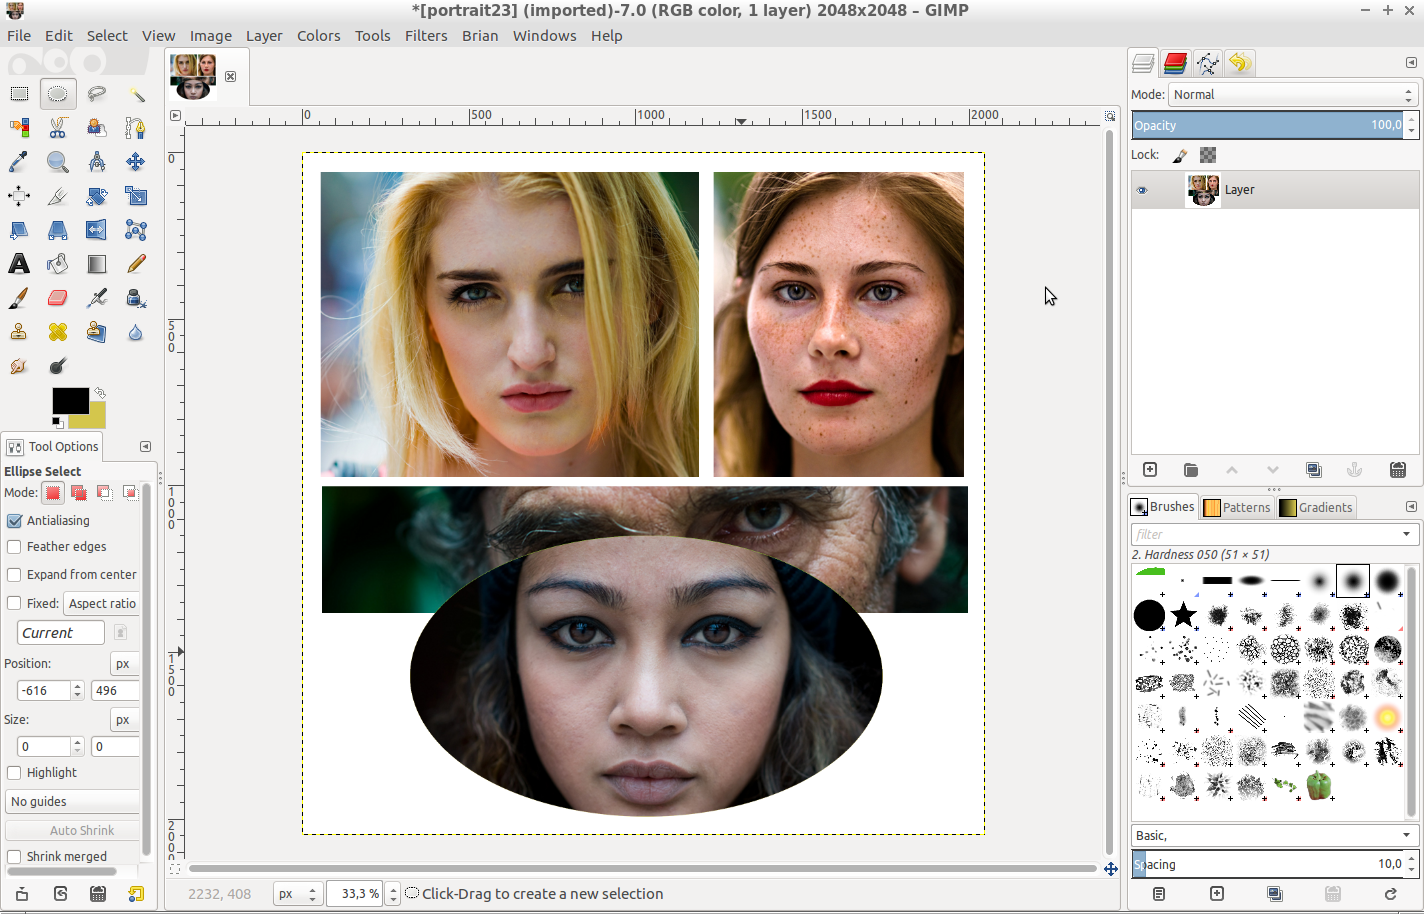

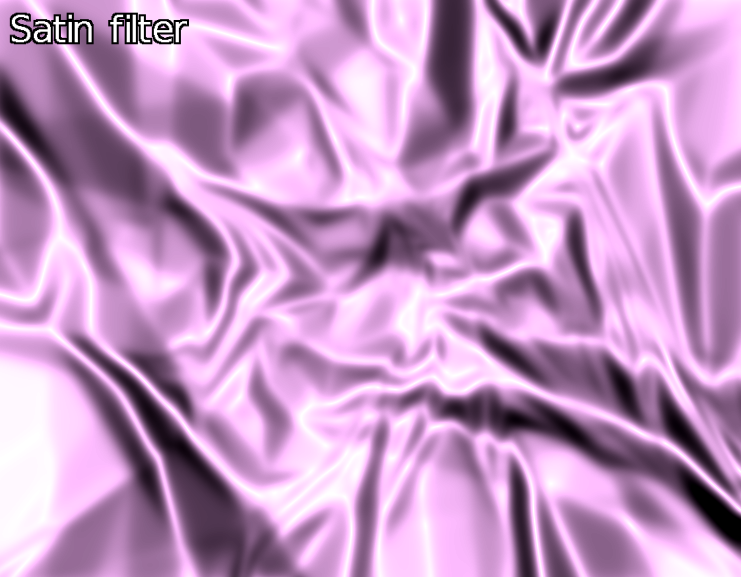
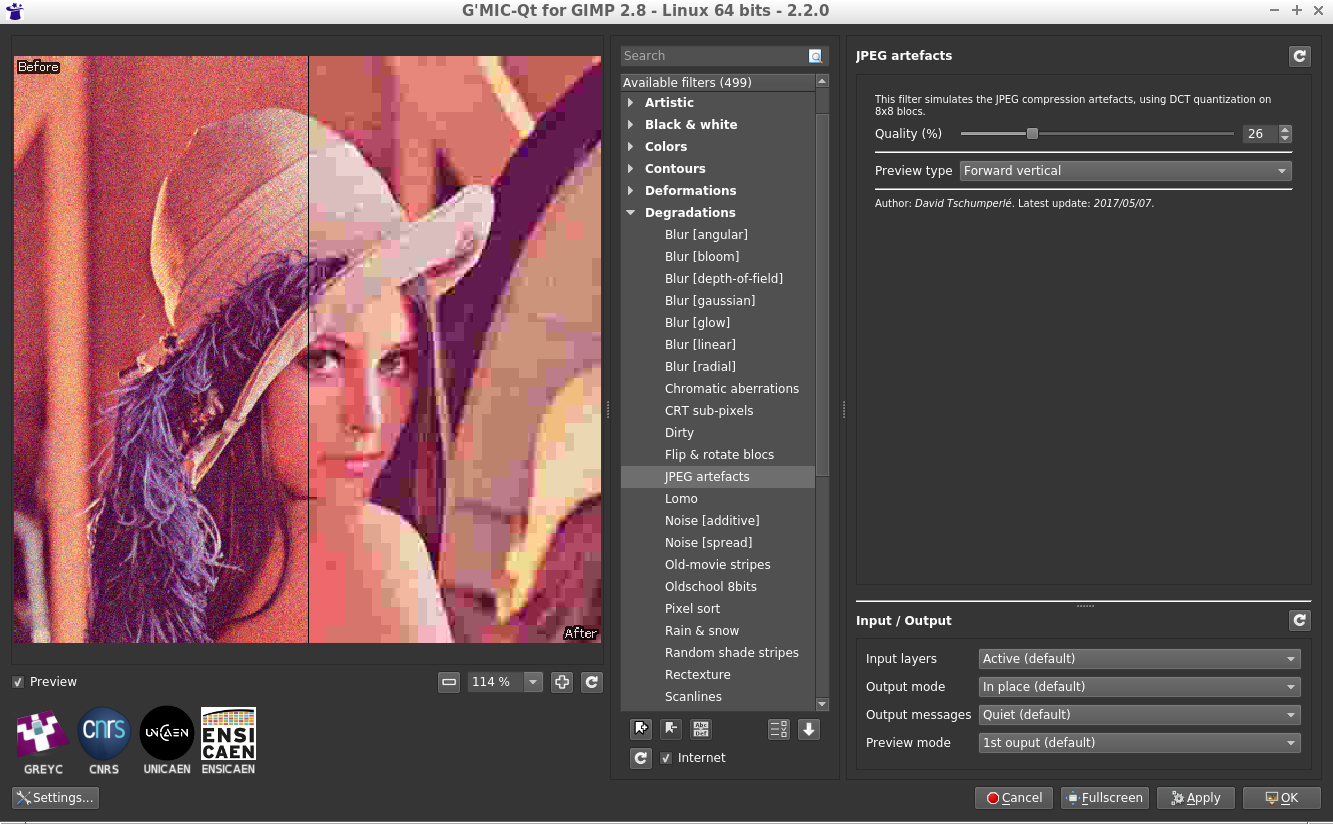

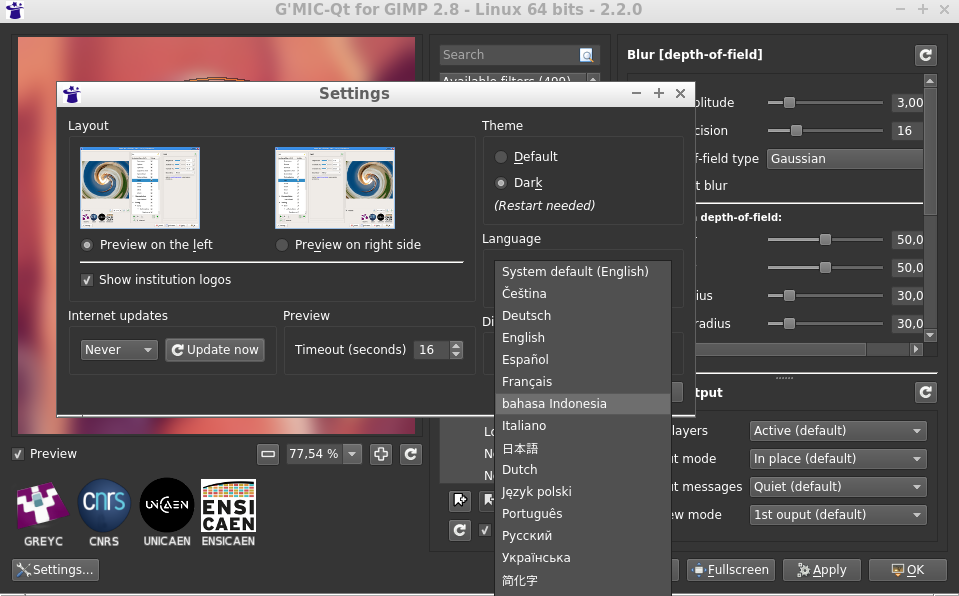

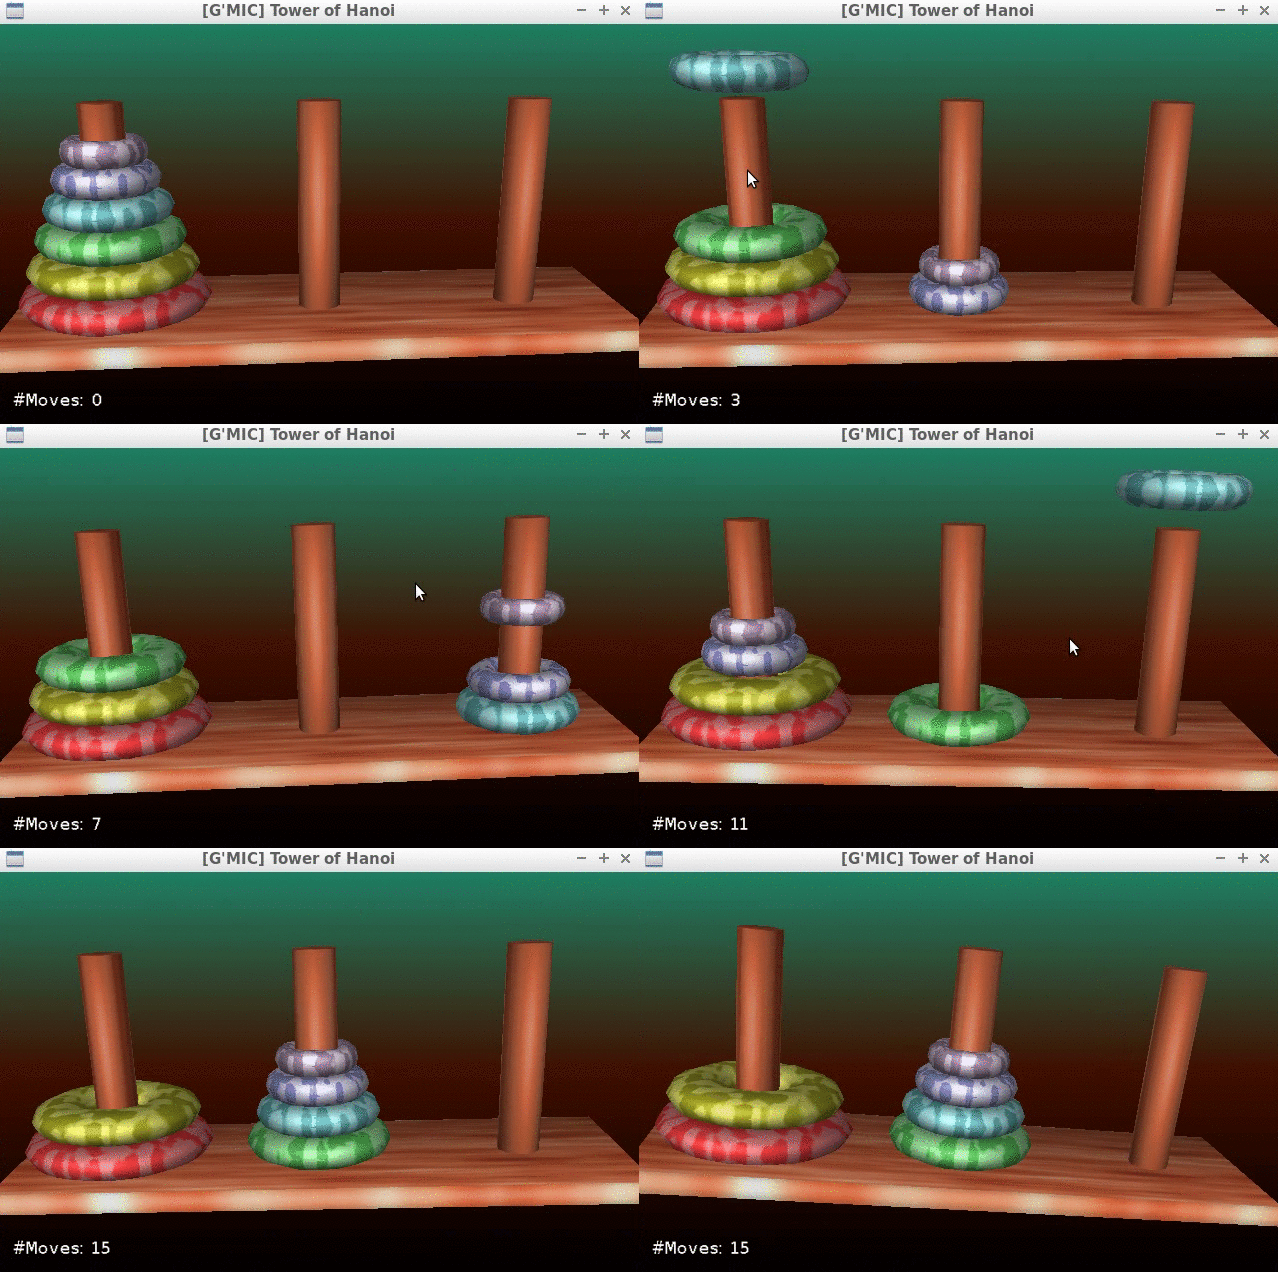
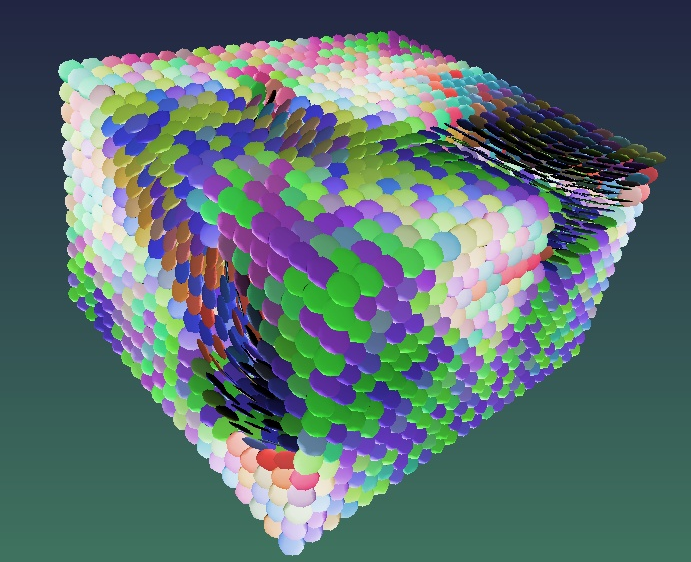





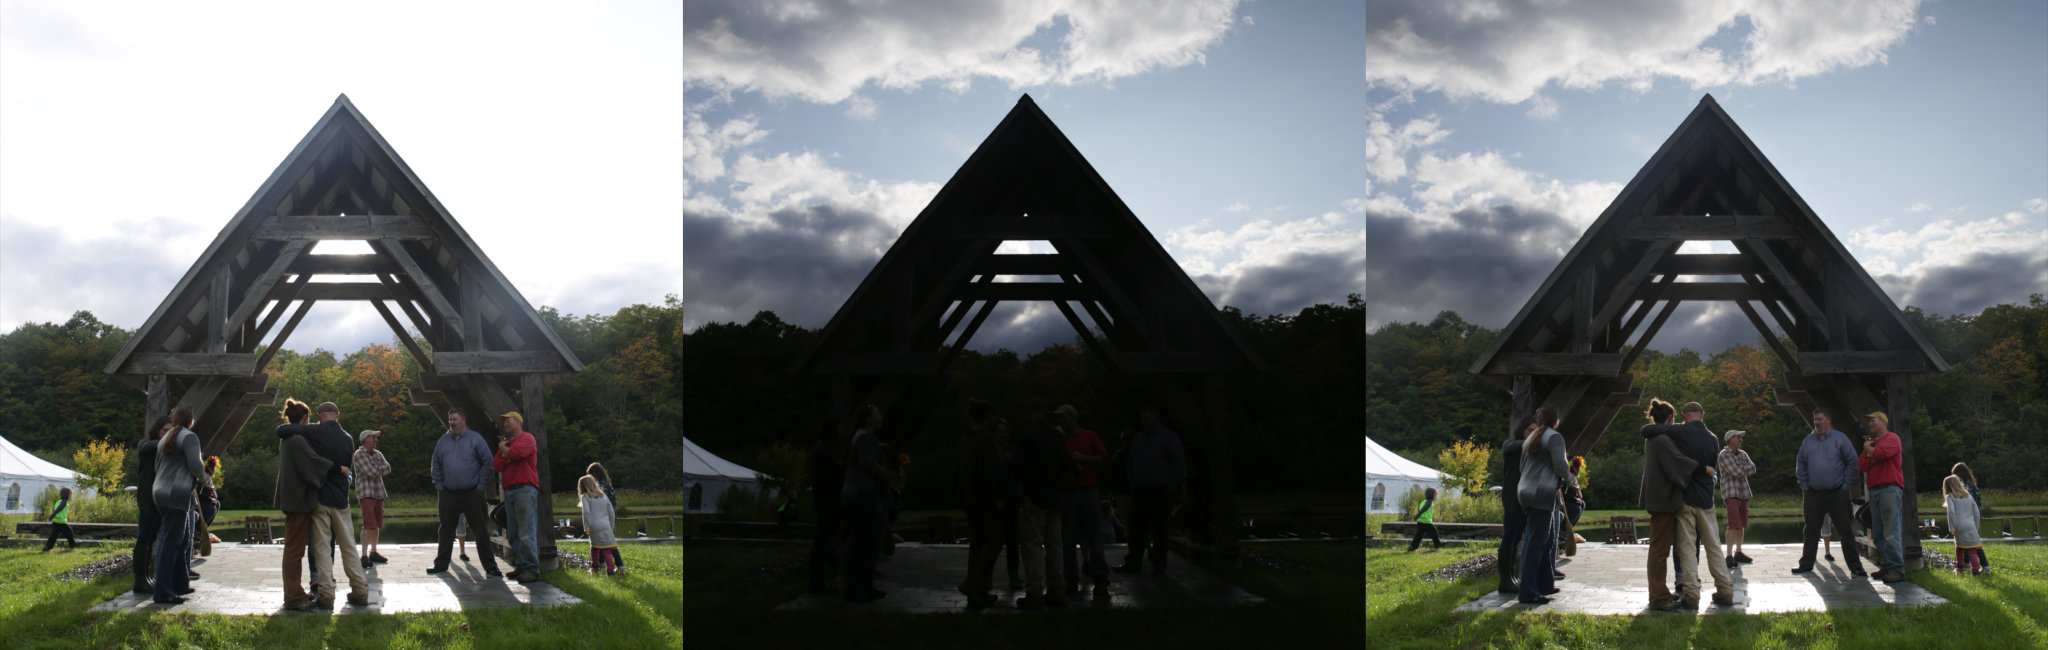
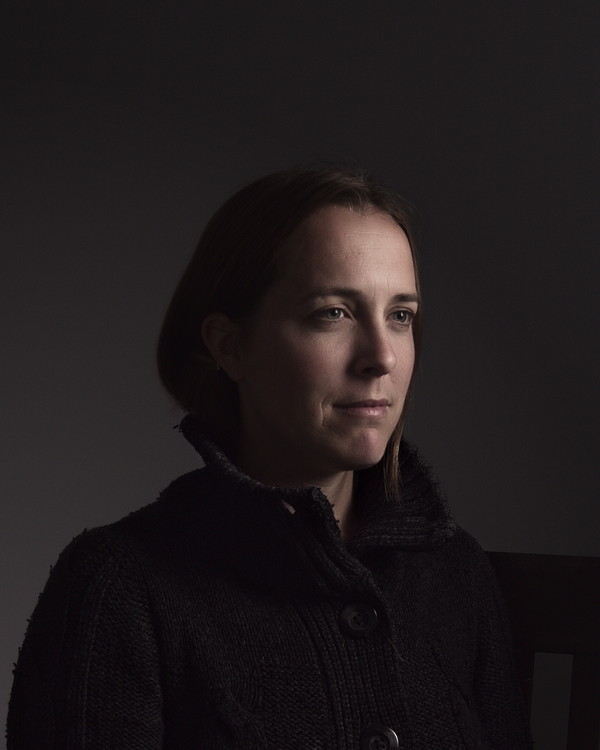
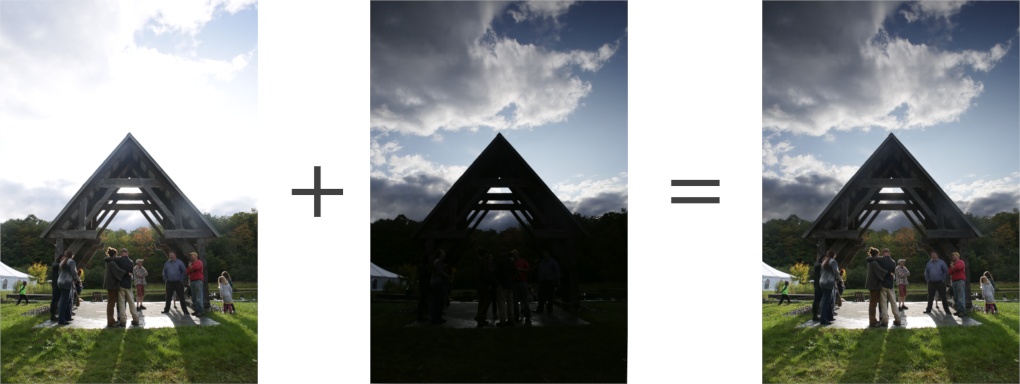
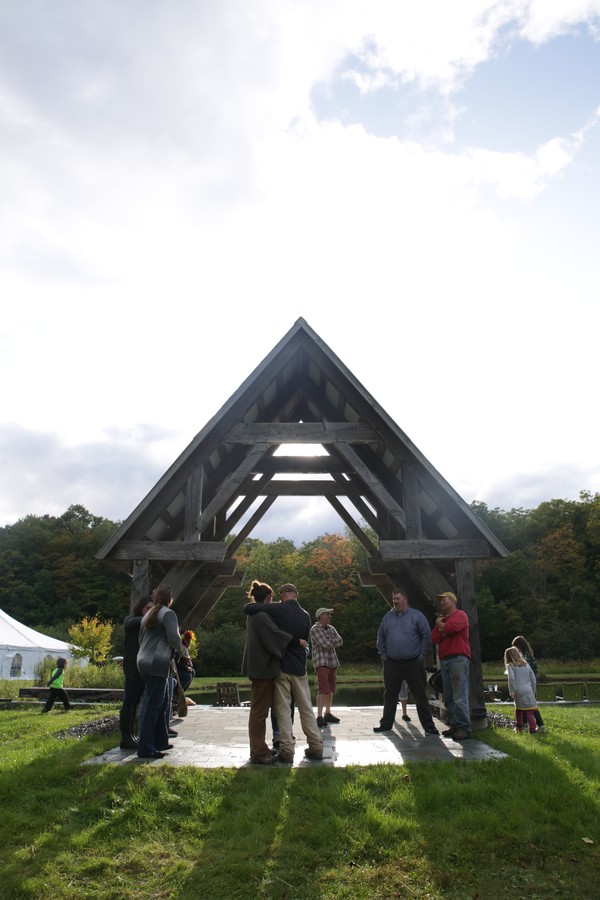
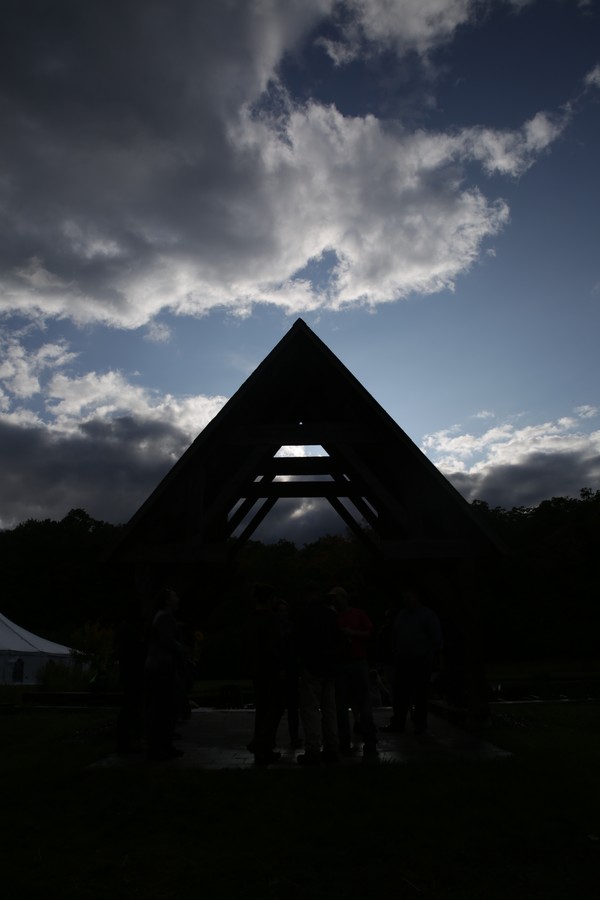
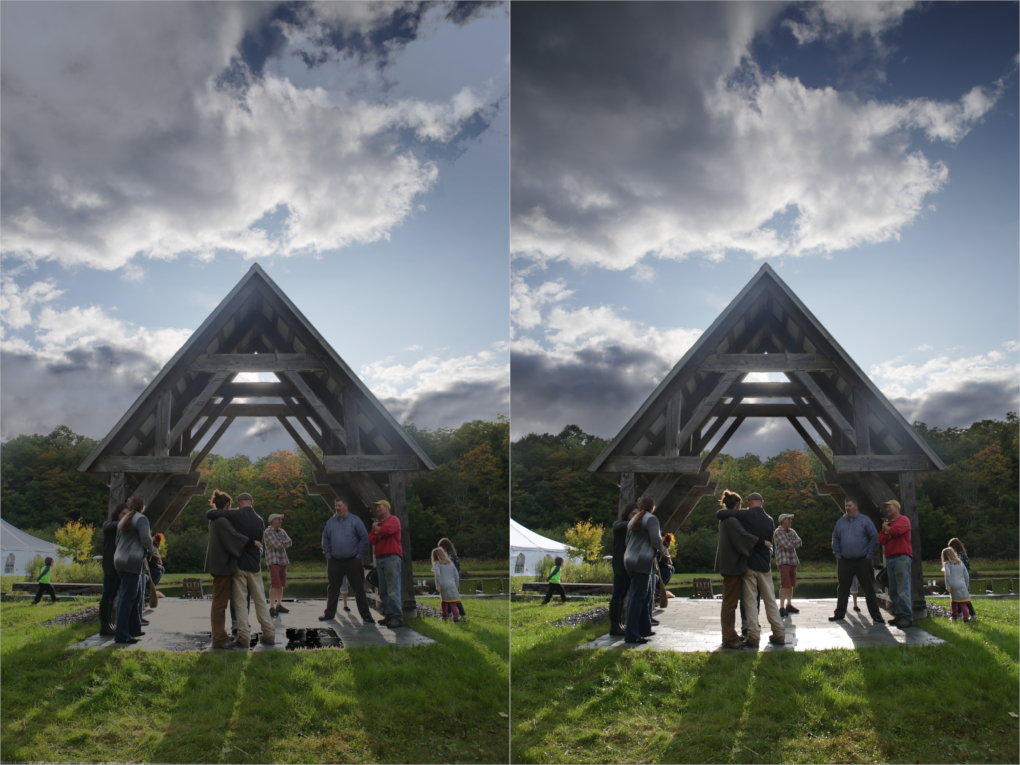
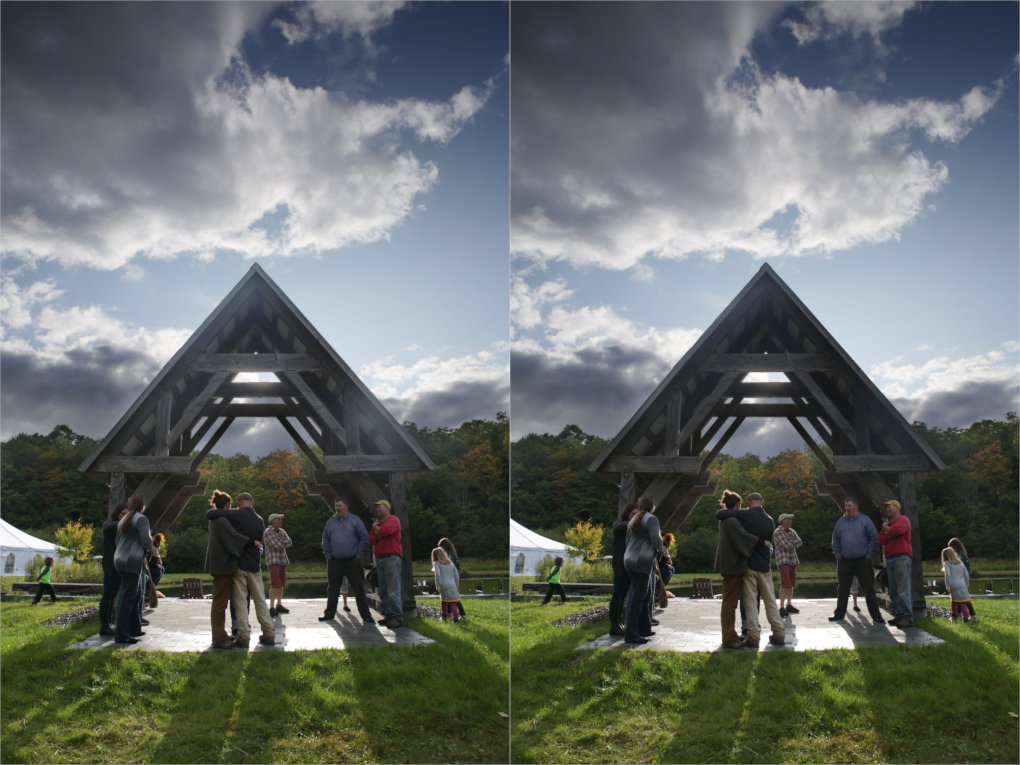
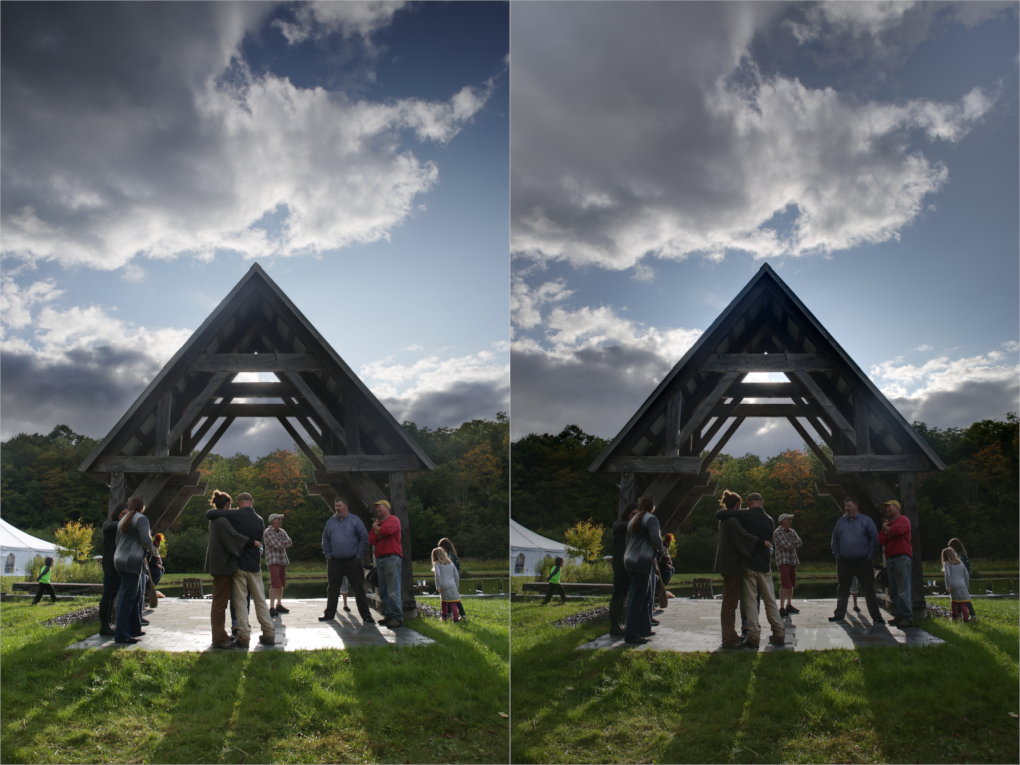
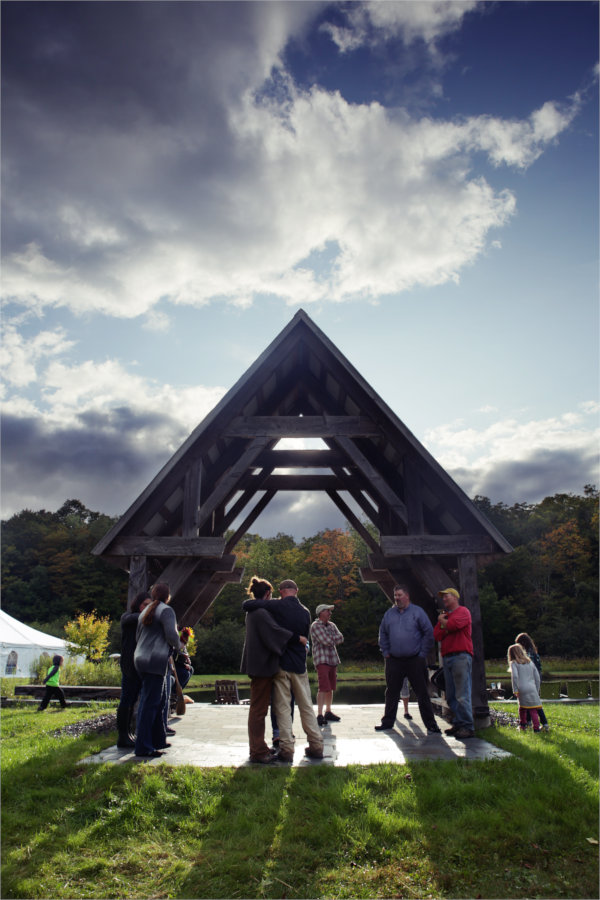
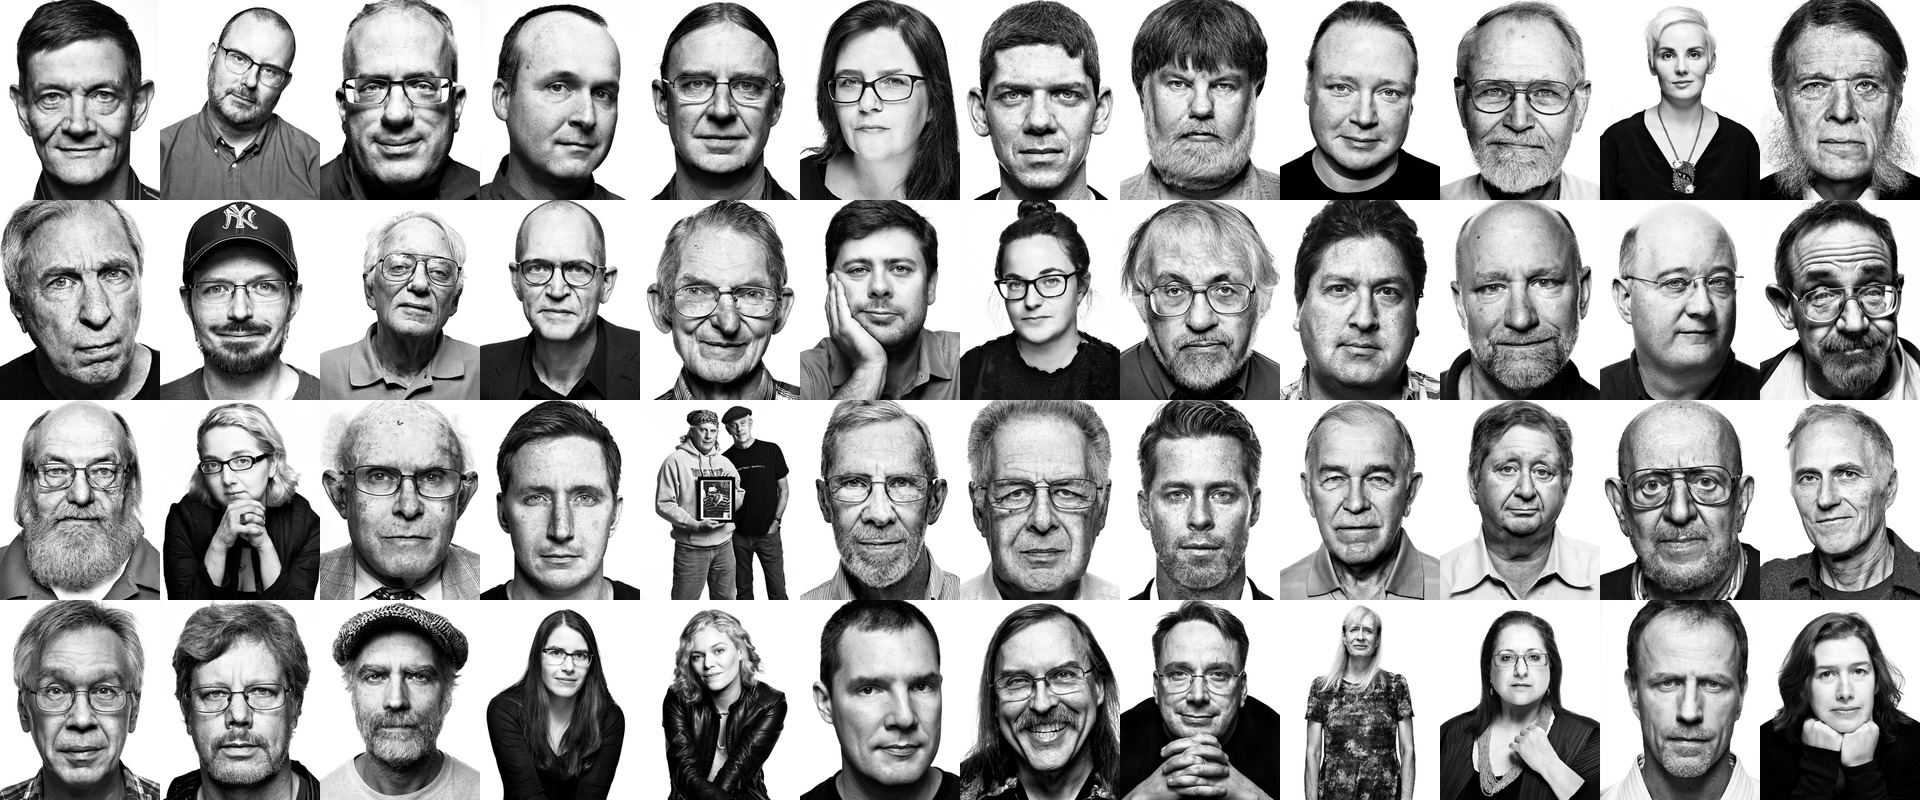

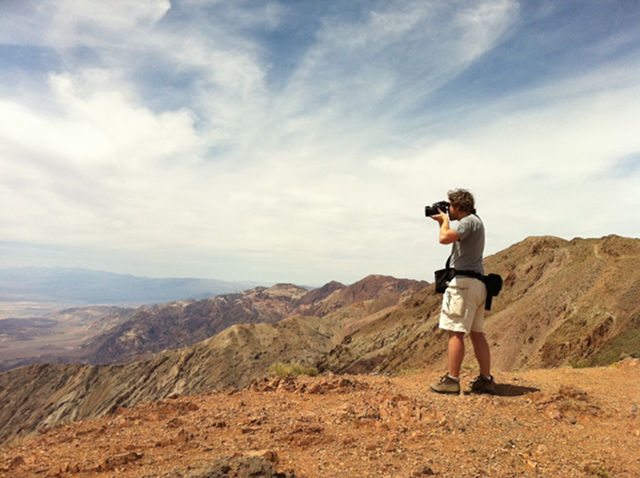



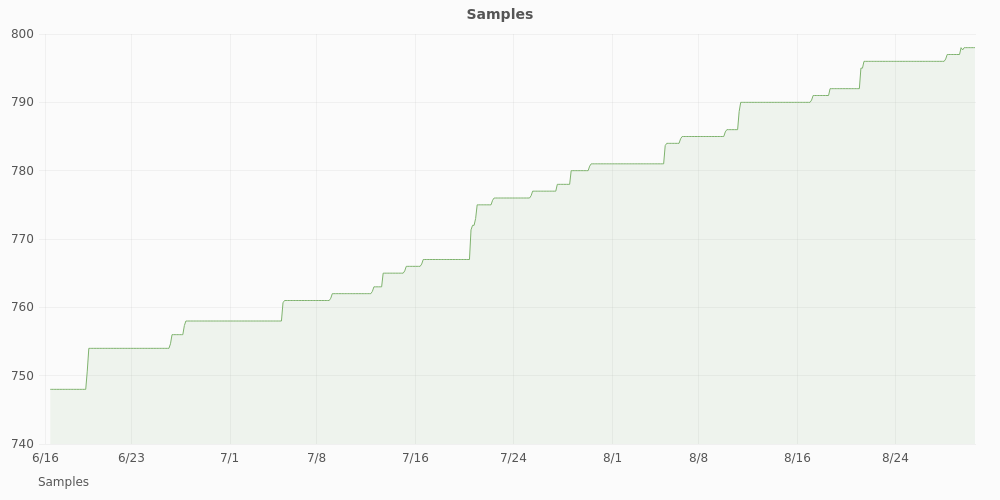
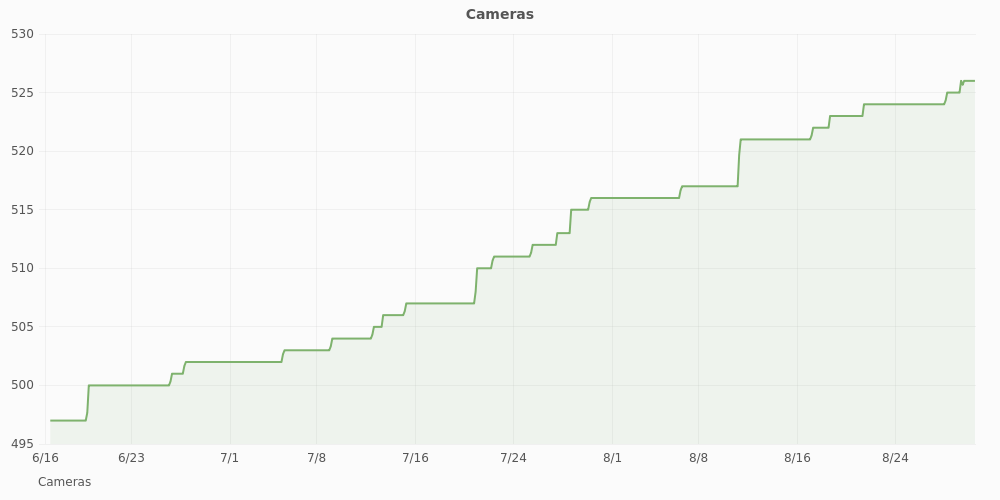

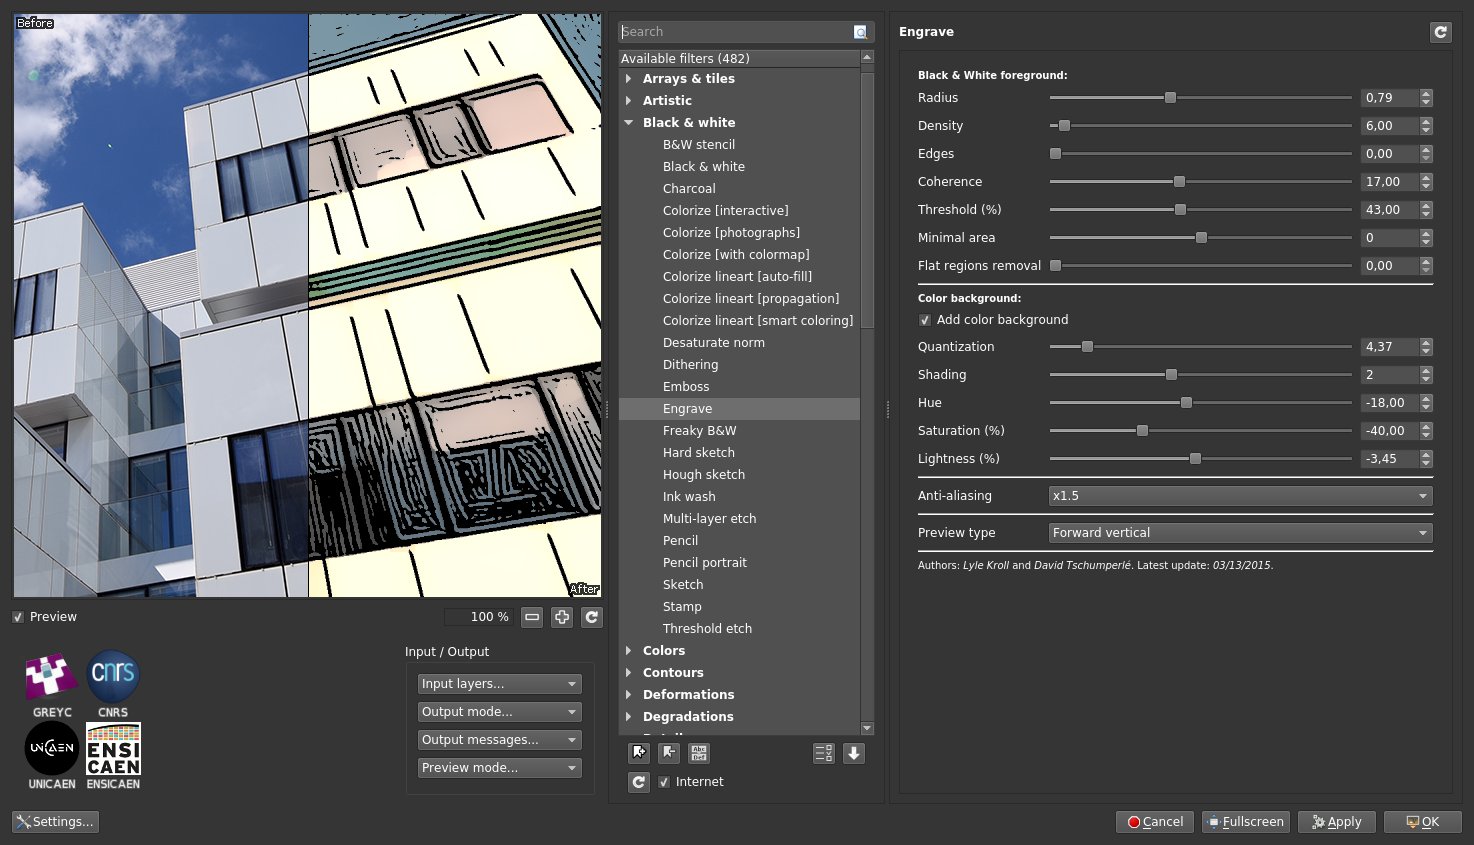
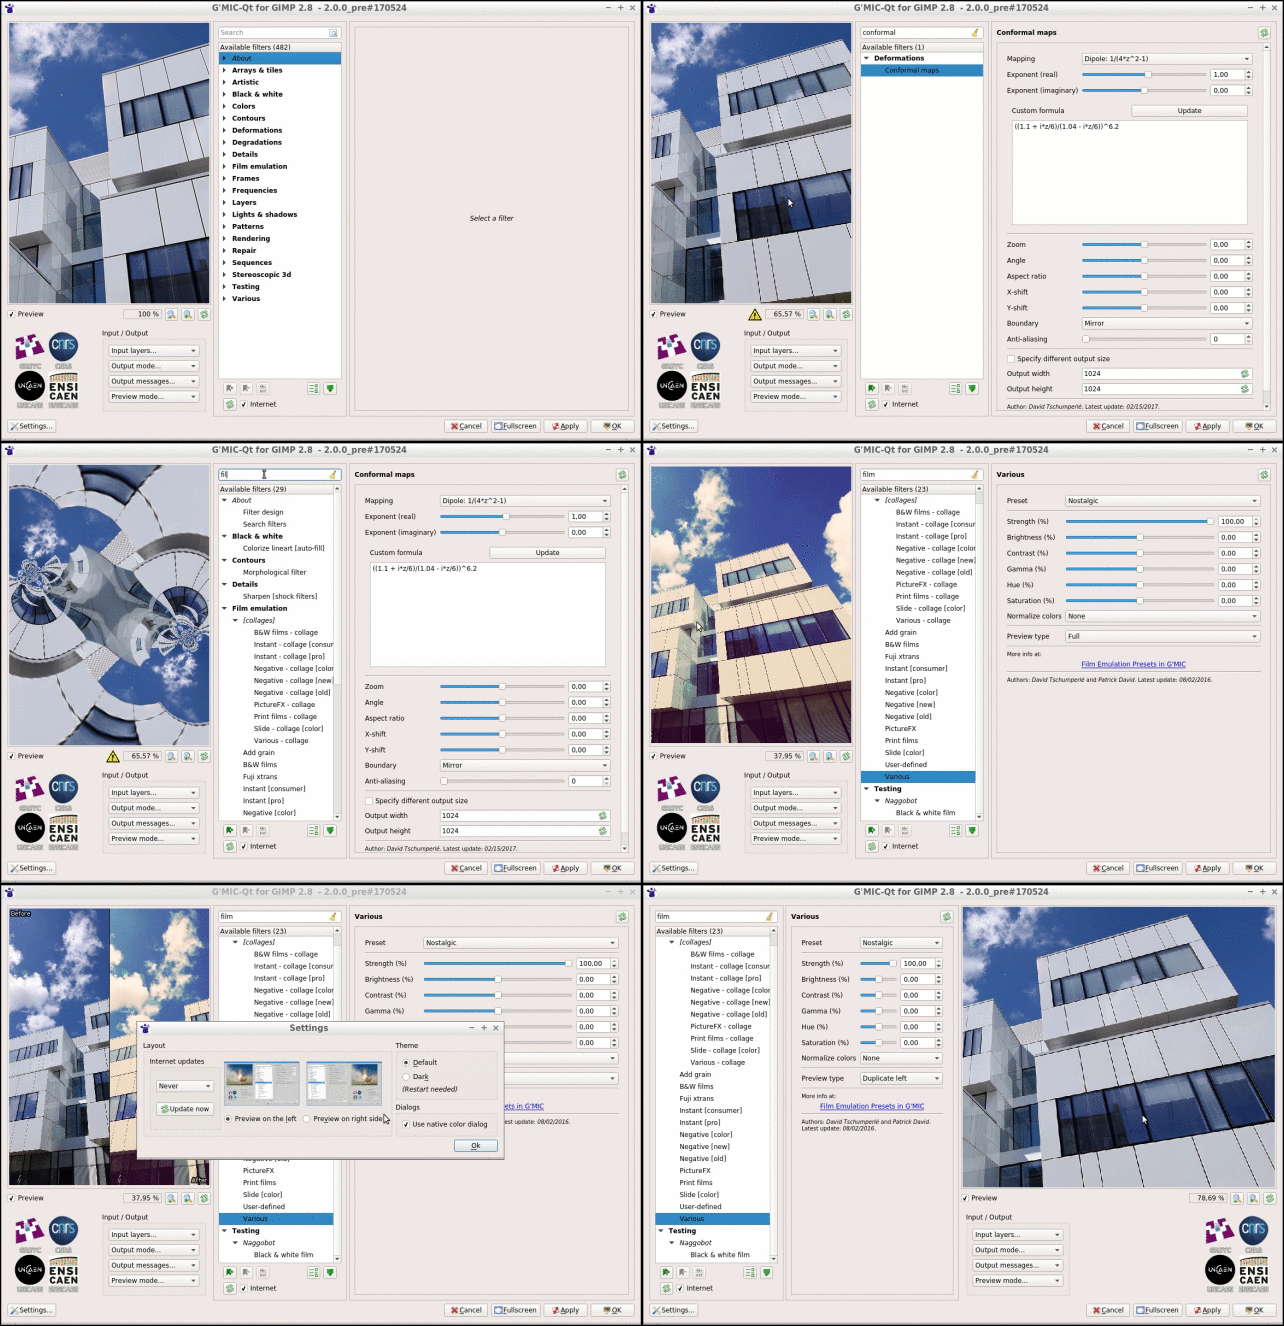
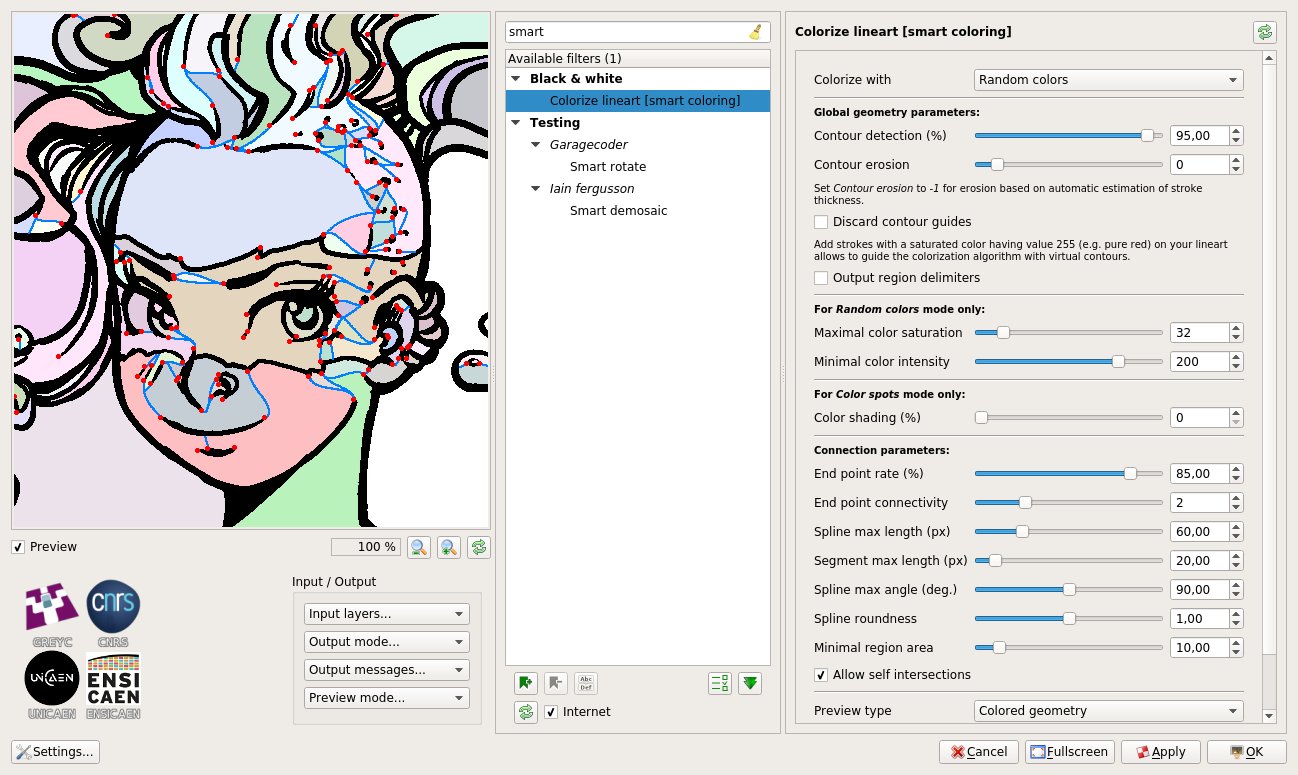
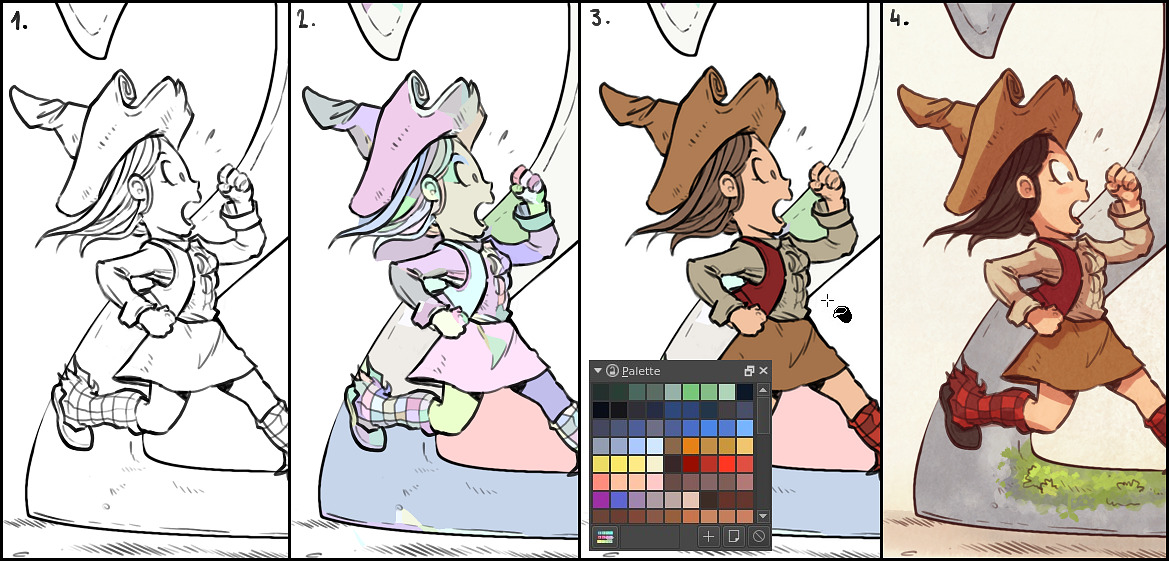
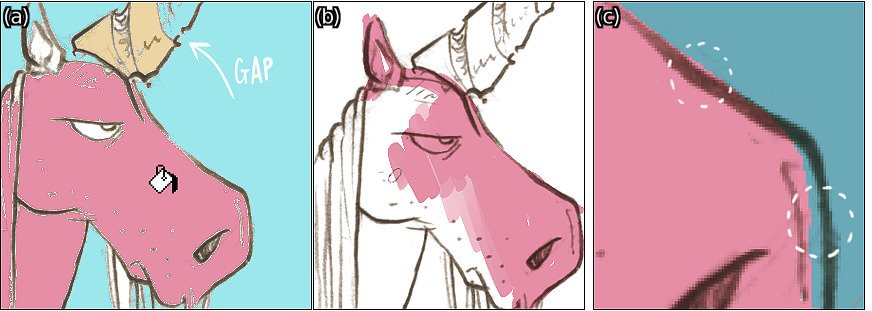
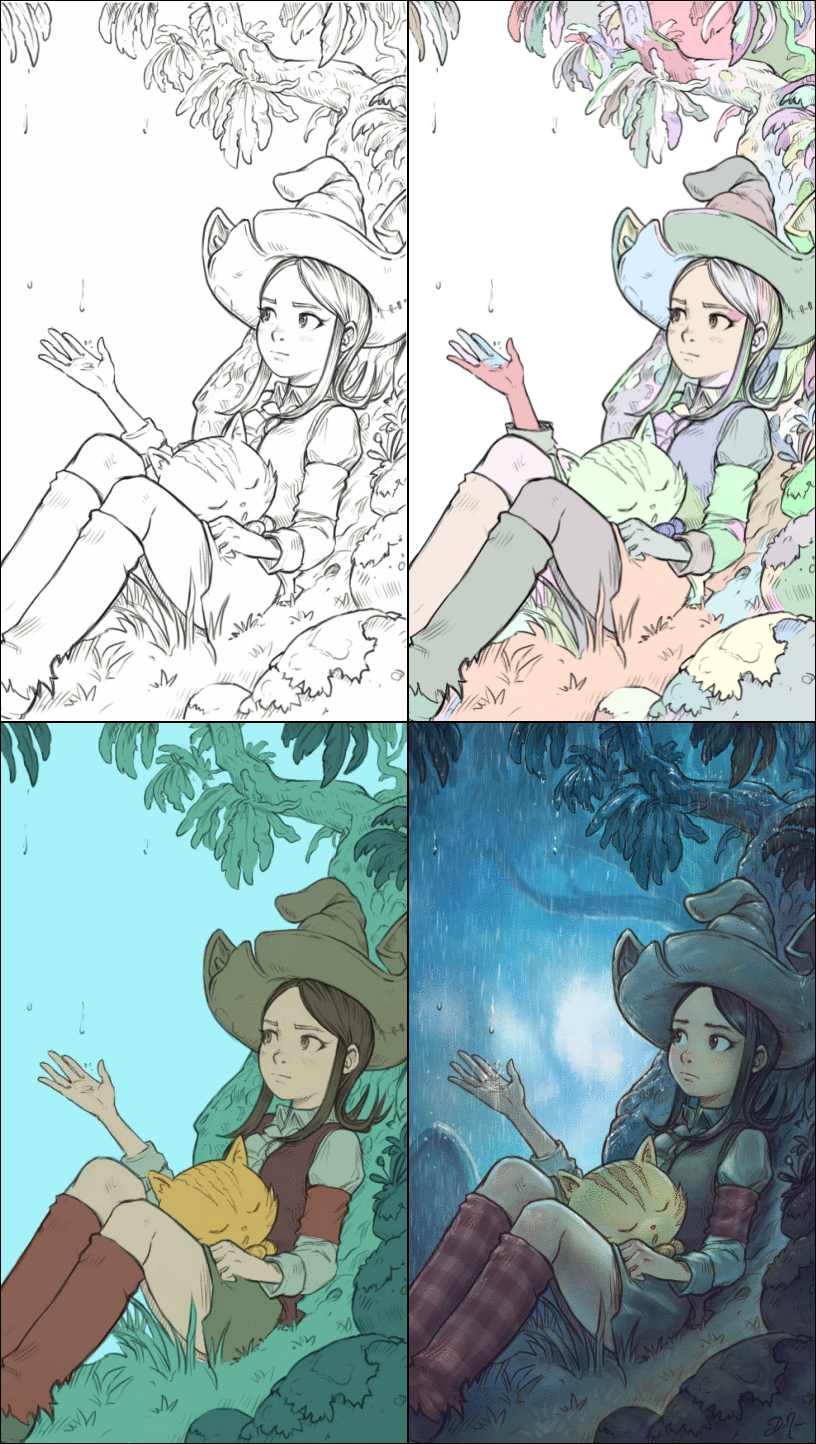
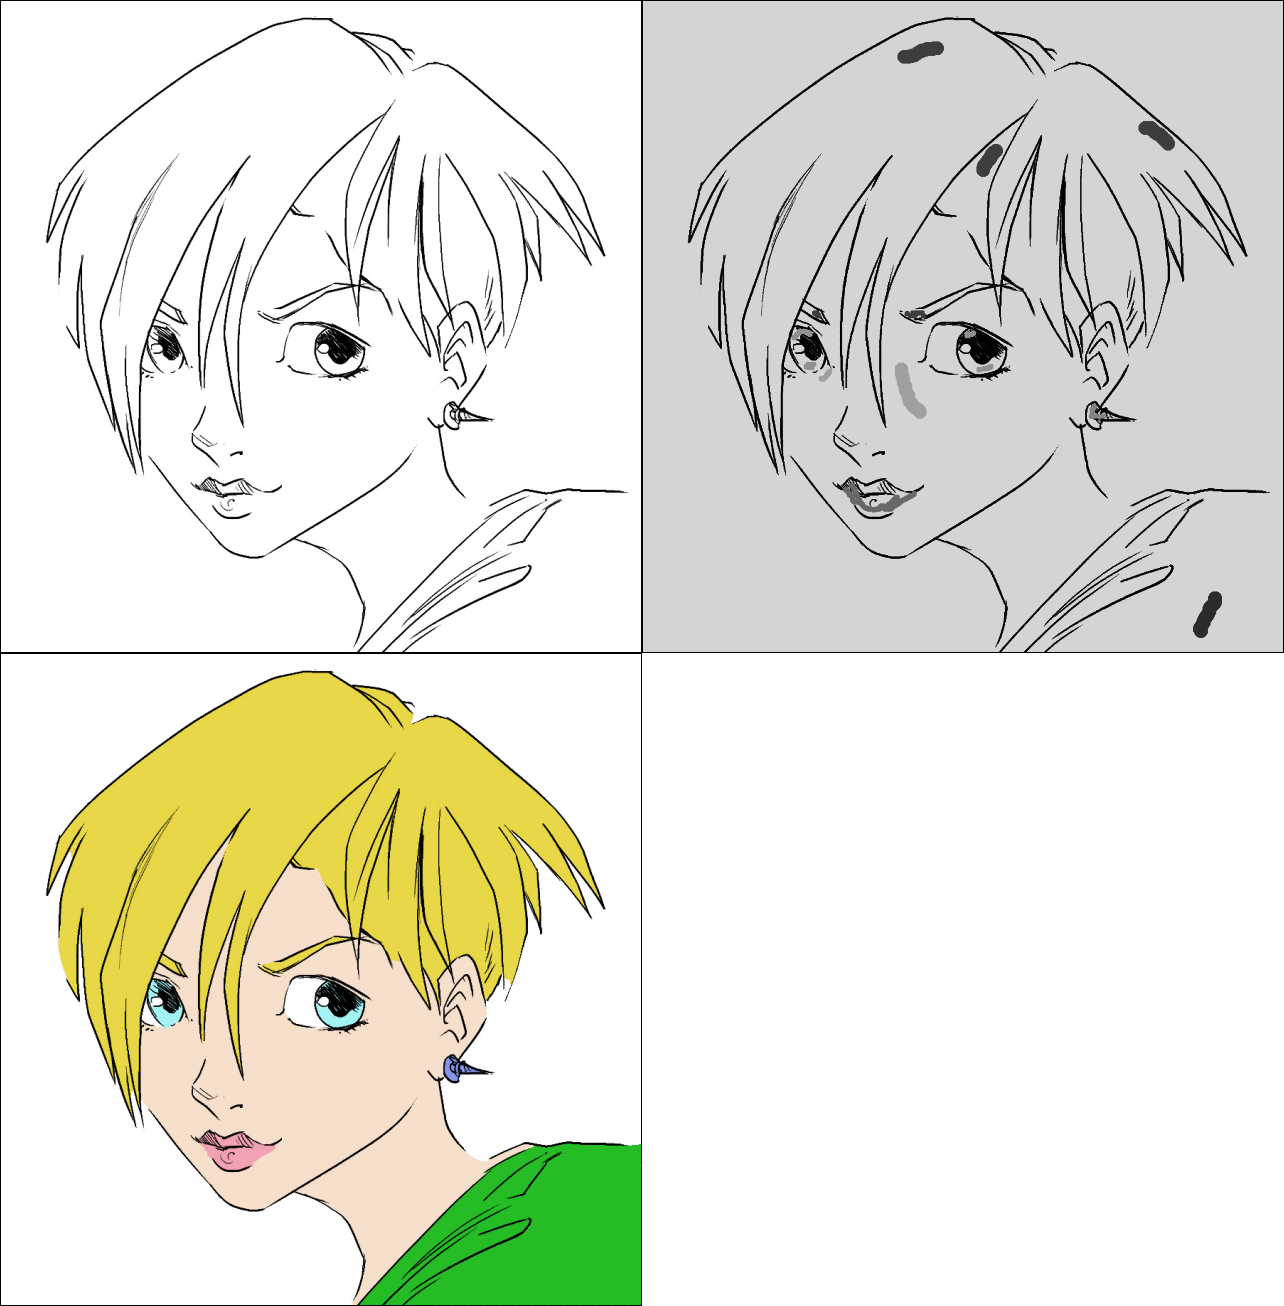
![Smooth [antialias]](https://pixls.us/blog/2017/06/g-mic-2-0/s_gmic_antialiasing.jpg)
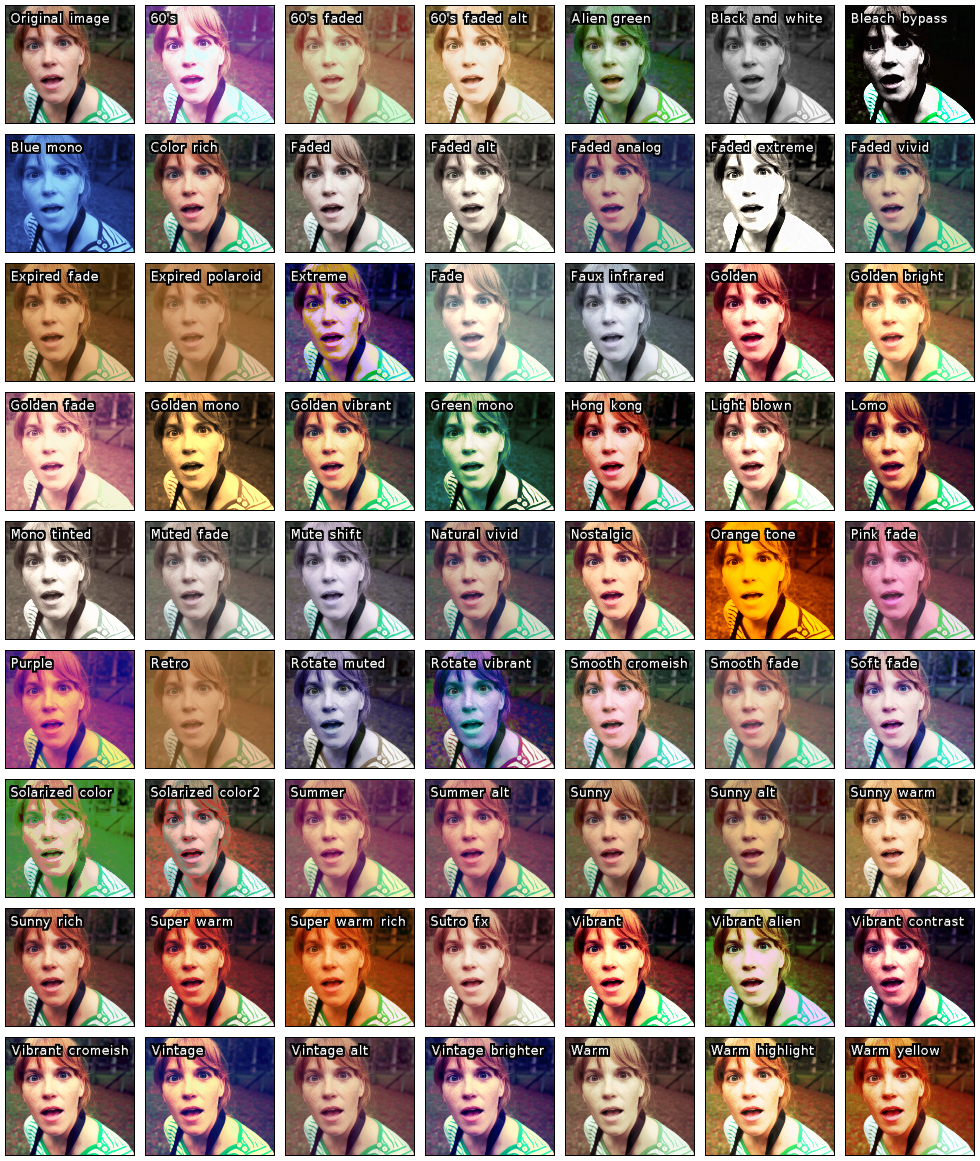
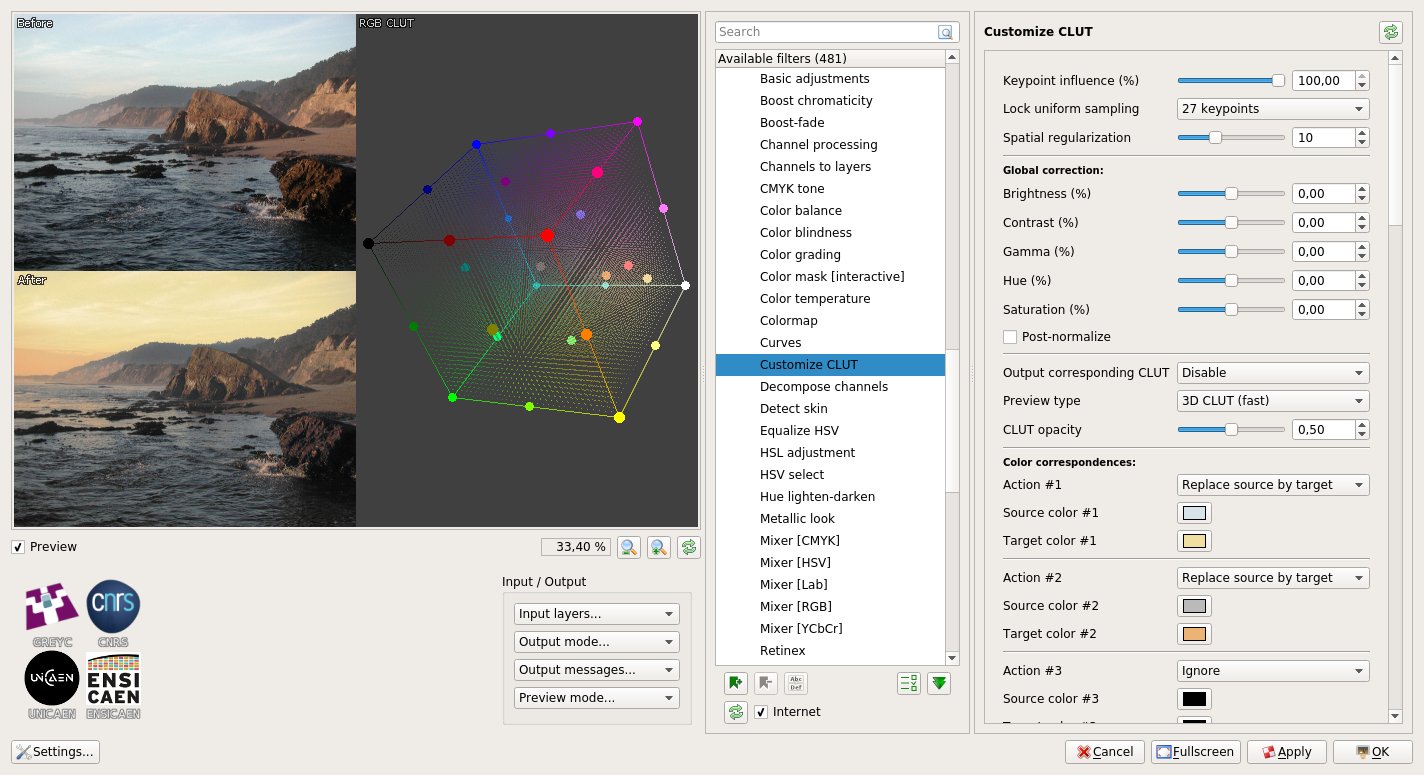
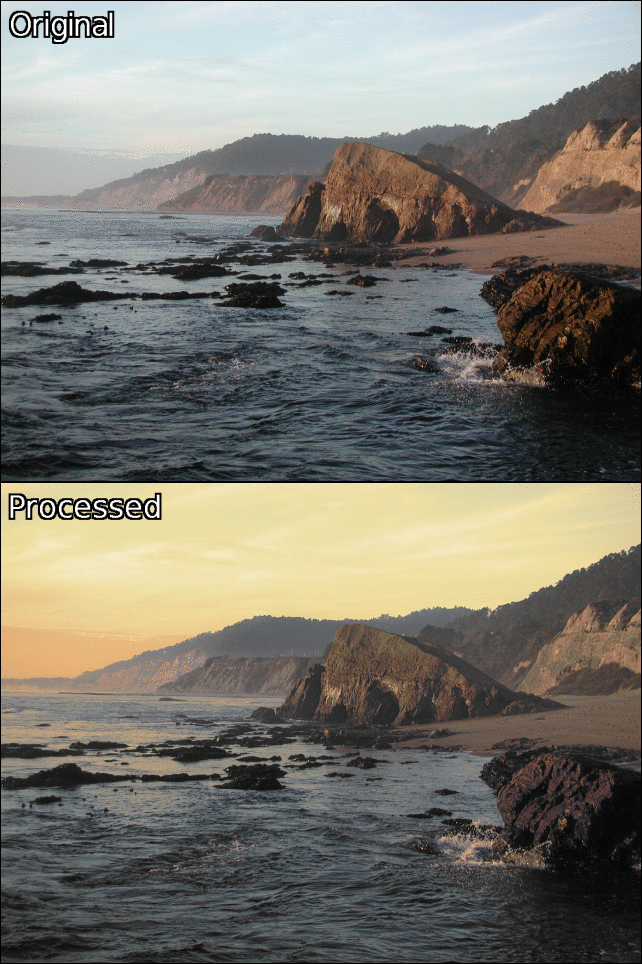
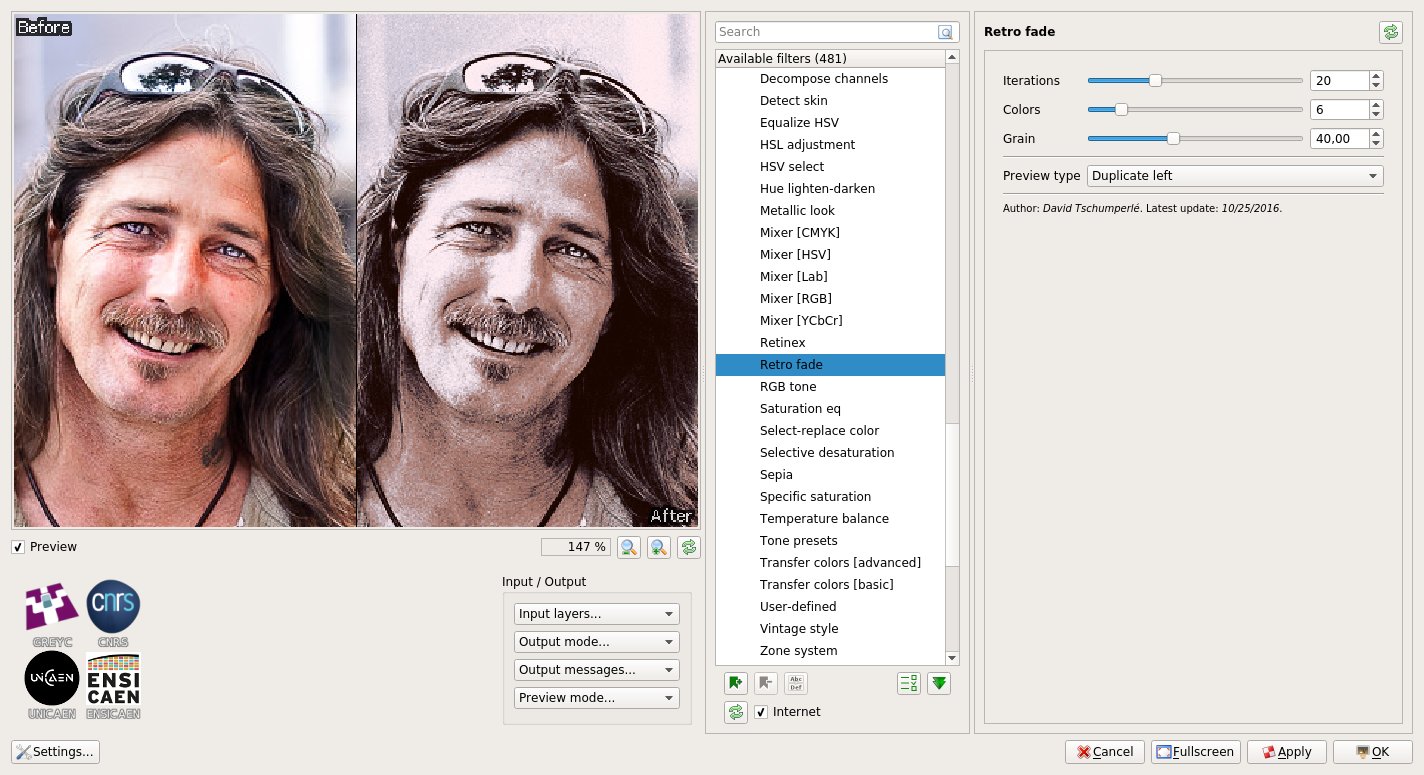
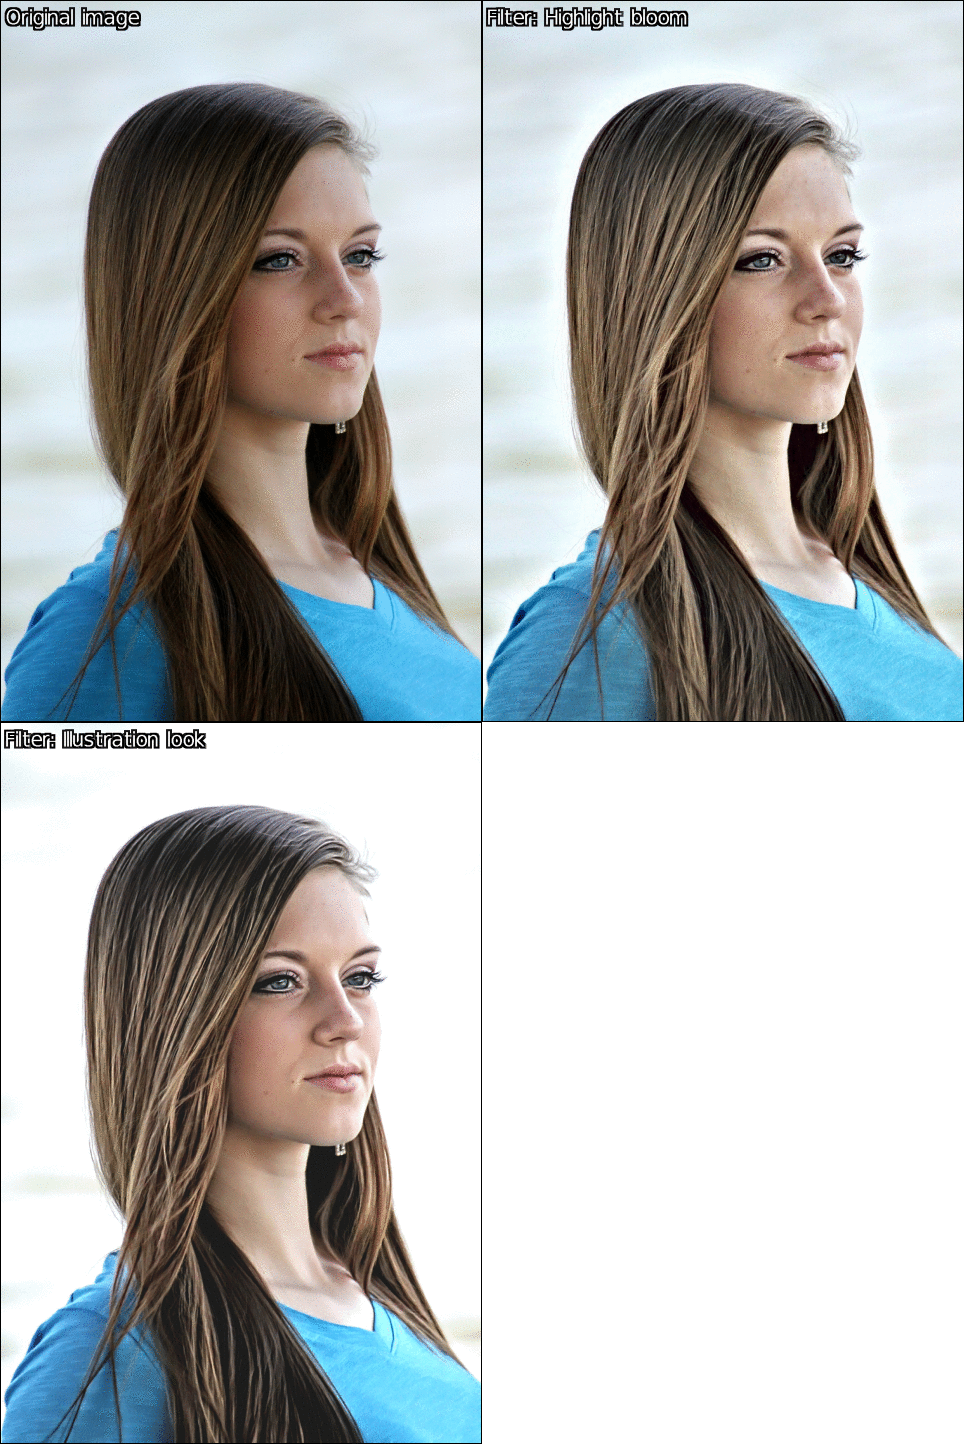

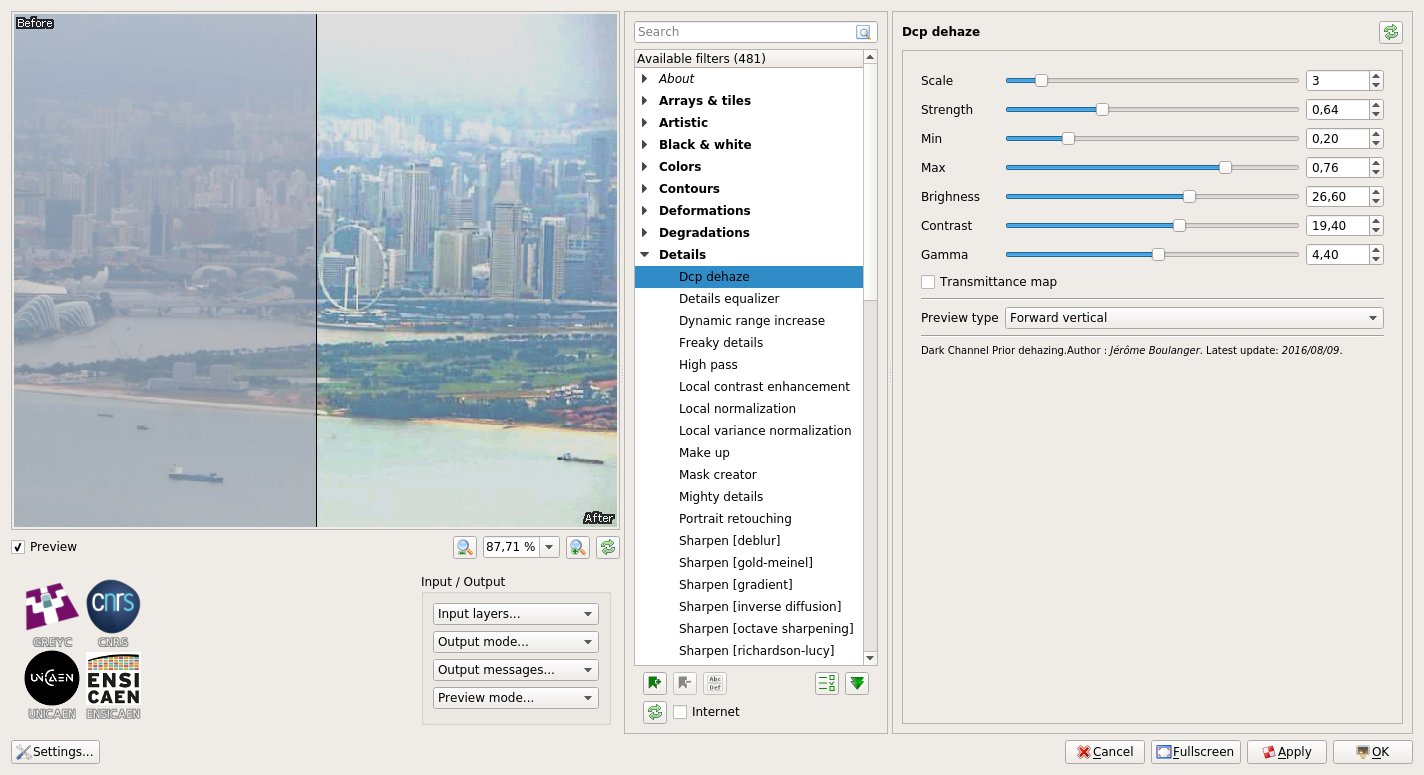
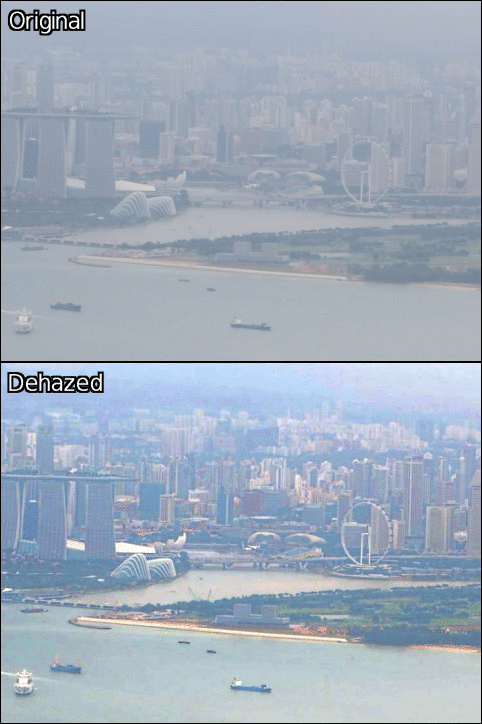
![Sharpen [texture]](https://pixls.us/blog/2017/06/g-mic-2-0/lion_sharpen.gif)
![Color mask [interactive]](https://pixls.us/blog/2017/06/g-mic-2-0/car_hue2.gif)