 Login
LoginHélio Fala - Dente por Dente

Conheça o novo canal do Hélio Ziskind, o ZiS: http://goo.gl/j9YhRn
ouça todas as minhas músicas: http://bit.ly/Spotify_HZ
compre os produtos: http://bit.ly/Helio_Ziskind
site oficial: http://www.helioziskind.com.br

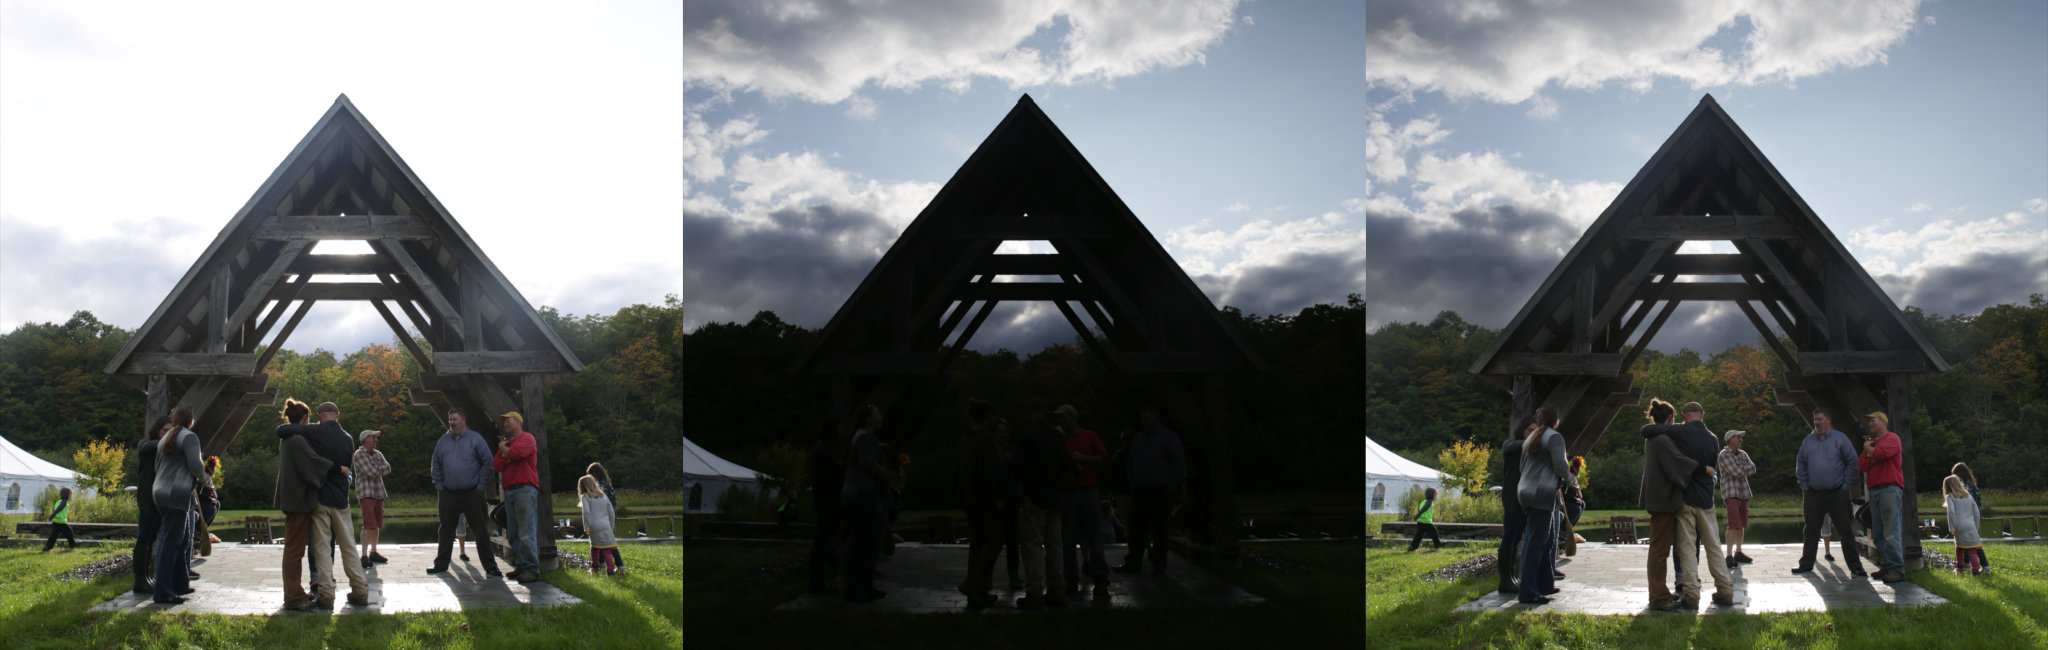
There are many different approaches to blending exposures in the various projects, and they can range from extremely detailed and complex to quick and simple. Today we’re going to look at the latter.
I was recently lucky enough to attend an old friends wedding in upstate NY. Mairi got married! (For those not familiar with her, she’s the model from An Open Source Portrait as well as A Chiaroscuro Portrait tutorials.)
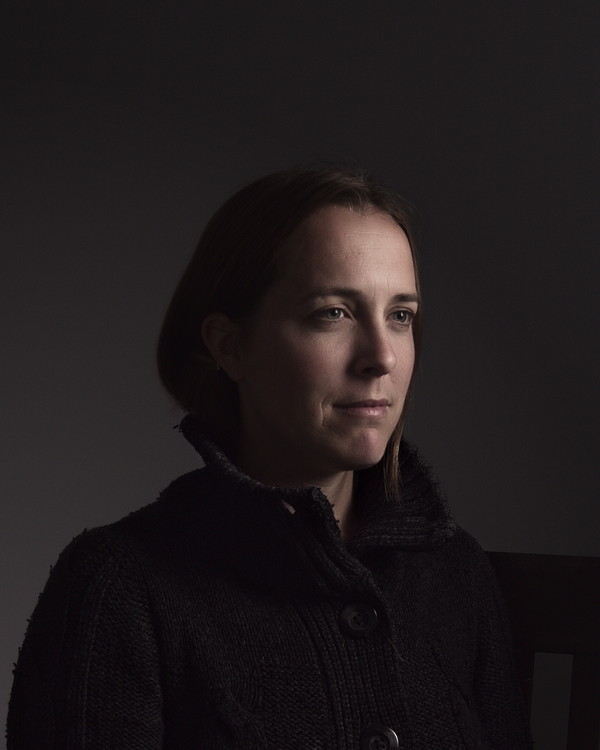
I had originally planned on celebrating with everyone and wrangling my two kids, so I left my camera gear at home. Turns out Mairi was hoping that I’d be shooting photos. Not wanting to disappoint, I quickly secured a kit from a local rental shop. (Thank goodness for friends new and old to help wrangle a very busy 2 year old.)
During the rehearsal I was experimenting with views to get a feel for the room I’d have and how framing would work out. One of the shots looked from the audience and right into a late afternoon sun. My inner nerd kicked in and I thought, “This might be a neat image to use for a tutorial!”.
The idea behind exposure fusion (or mapping) is to extend the dynamic range represented in an image by utilizing more than one exposure of the same subject and choosing relevant bits to fit in the final output.
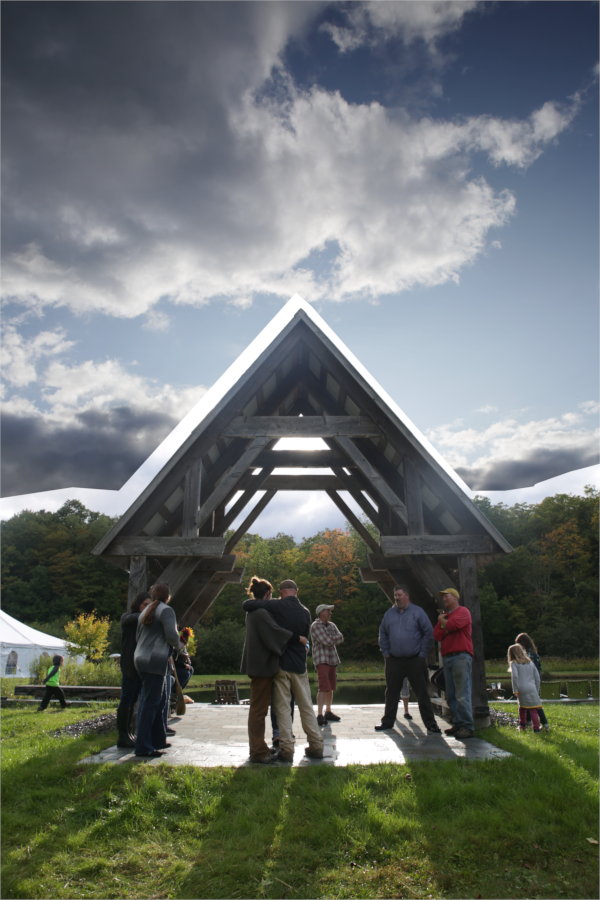
I say “fit” because usually you are trying to put a larger amount of data than a single image might have been able to capture. So you choose which parts you want to use to get something that you’ll like. For example, here we have two images that will be used in this article where the image showing the foreground correctly causes the sky to blow out, while exposing for the sky causes the foreground to go almost black. By selectively combining these two images, we can get something that might show a larger dynamic range than would have been possible in a single exposure:
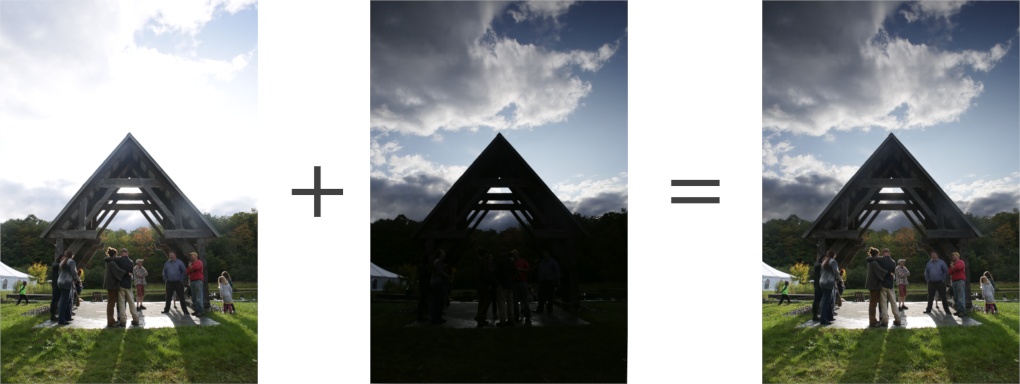
This is one common use case scenario for creating HDR/EXR imaging (and tonemapping is the term for doing exactly what we’re describing here - squishing data into the viewable range in a way that we like). In fact, at the end of this article I’ll show how Enfuse handled merging these image exposures (spoiler: pretty darn well).
In exposing for the subjects in this image, I used the structure to block the sun from direct view (though there’s still a loss of contrast and flaring). The straight out of the camera jpg looks like this:
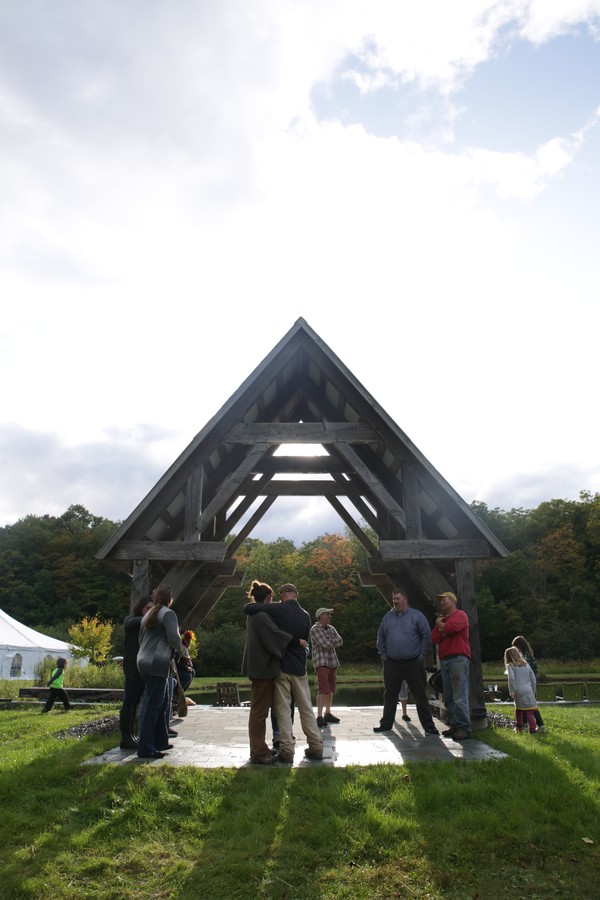
This gave me a well exposed foreground and subjects. I then gave the shutter speed a quick spin to 1⁄1000 (about 4-stops) to get the sky better exposed. The camera jpg for the sky looked like this:
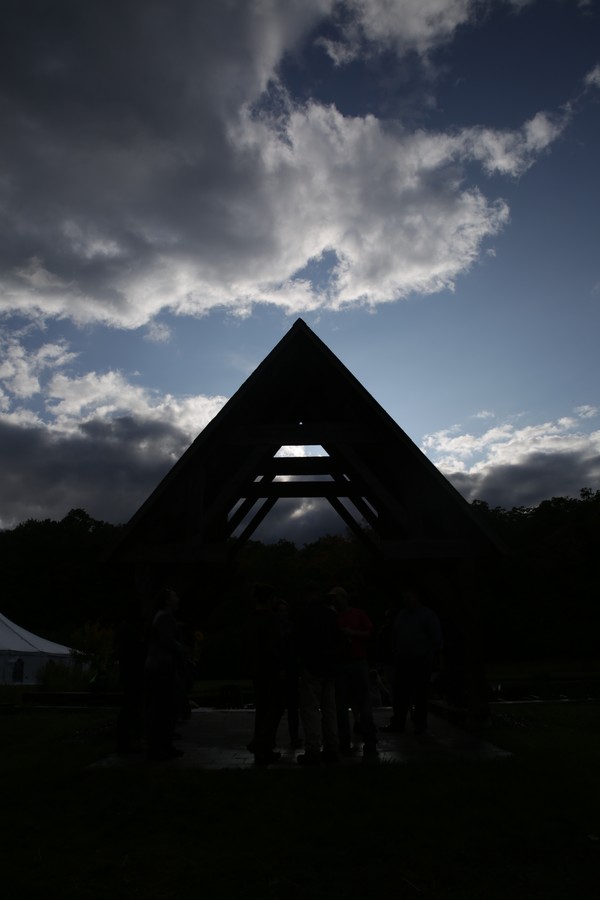
In retrospect I probably would have been better to shoot for 2-stops difference to keep the sky exposed higher in the histogram, but c’est la vie. It also helps to avoid going too far in the extremes when exposing, so as to avoid making it look too unrealistic (yes - the example above probably skirts that pretty close, but it’s exaggerated to make a good article). This gives us a nice enough starting point to play with some simple exposure mapping.
For this to work properly the images do need to line up as perfectly as possible. Imperfect alignment can be worked around to some extent, usually determined by how complex your masking will have to be, but the better aligned the images are the easier your job will be.
As usual I have had good luck using the align_image_stack script that’s included as part of Hugin.
This makes short work of getting the images aligned properly for just this sort of work:
/path/to/hugin/align_image_stack -m -a OUT FILE1 FILE2
On Windows, this looks like:
c:\Program Files\Hugin\bin\align_image_stack.exe -m -a OUT FILE1 FILE2
Once it finishes up, you’ll end up with some new files like OUT0001.tif.
These are your aligned images that we’ll now bring into GIMP!
The heart of fusing these exposures is going to rely entirely on masking. This is where it usually pays off nicely to take your time and consider carefully an approach that will keep things looking clean and with a natural transition between the exposures.
If this had simple geometry it would be an easy problem to solve, but the inclusion of the trees in the background makes it slightly more complex (but not nearly as bad as hair masking can get). The foreground and sky are very simple things to mask overall, where we know we may want 100% of the foreground to come from one image, and 100% of the sky from another. This helps simplifies things greatly.
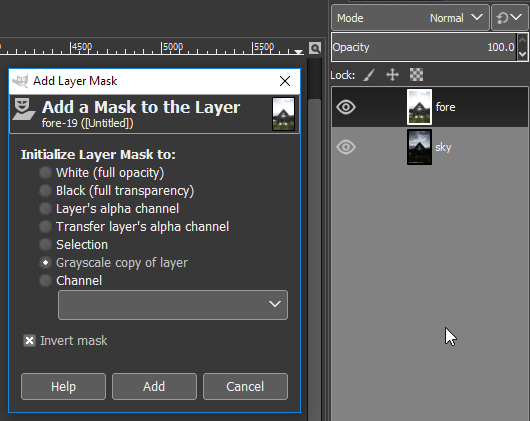
I tend to keep the darker sky layer on the bottom and the lighter foreground layer above that.
The hard edges of the structure make it an easy masking job there, so the main area of concern here is getting a good blend with the treeline in the background. There are a couple of approaches we can take to try and get a good blend, so let’s have a look…
A common approach would be to apply an inverted grayscale mask to the foreground layer. If there’s a decent amount of contrast between the foreground/sky layers then this is a quick and easy way to get something to use as a base for further work:
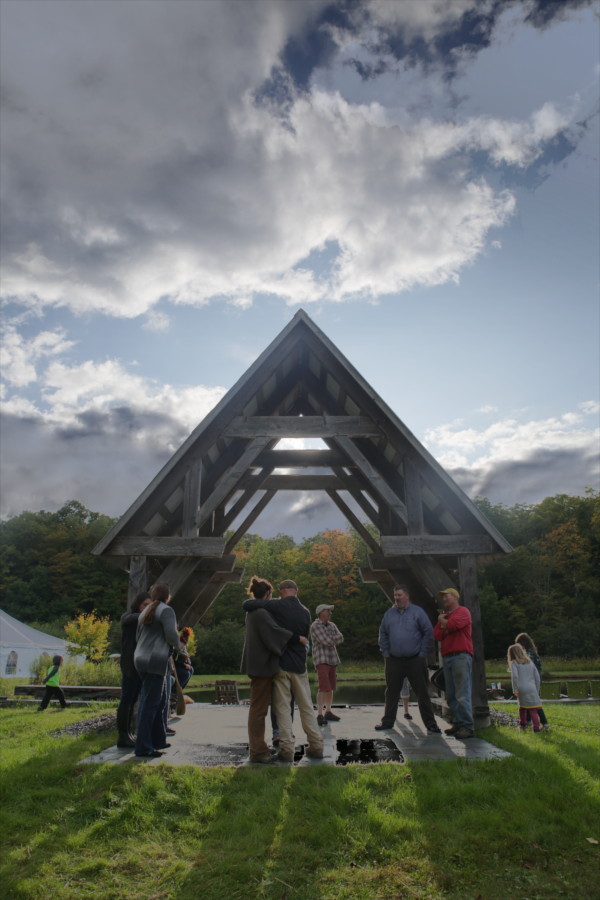
Applying this mask yields pretty good looking results right away:
You can also investigate some of the other color channel options to see if there might be something that works better to create a clean mask with.
In GIMP 2.9.x I also found that using Colors > Components > Extract Component using CMYK Key produced another finely separated option.
This makes a nice starting point. As we said we wanted all of the sky from one exposure and the rest of the image from the other exposure, we can start roughing in the overall mask.
For this simple walkthrough we can make our job a bit easier by using two copies of the foreground layer and selectively blending them over the sky layer.
If you take your foreground layer and start cleaning up the mask for the sky by painting in black, it should be relatively easy. Until you get down to the treeline. You can use a soft-edged brush and try to blend in smoothly, but in order to let the sky come through nicely you may find yourself getting more of the dark exposure trees showing through. This will show as a dark halo on the tops of the trees:
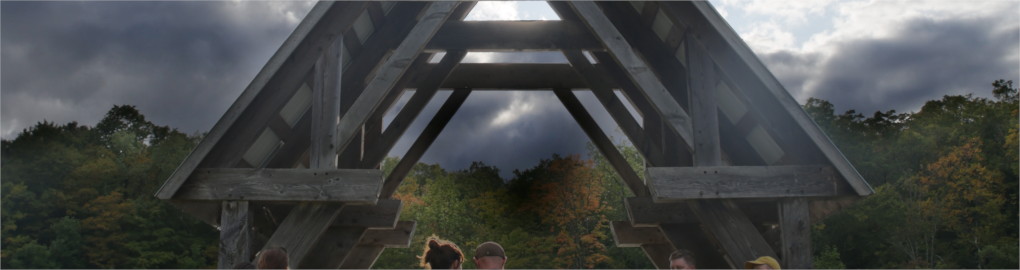
A nice way to adjust the falloff along the tops of the trees is by using a second copy of the foreground layer, and using a gradient on the mask that will blend smoothly from full sky to full foreground along the tops of the trees. This will ease the dark halo a bit until the transition looks good to you. You can then modify/update the gradient on the copy until the transition is smooth or to your liking.
At this point my layers would look like this in GIMP:
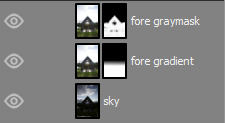
The results of using a second fore layer with a gradient to help ease the transition:
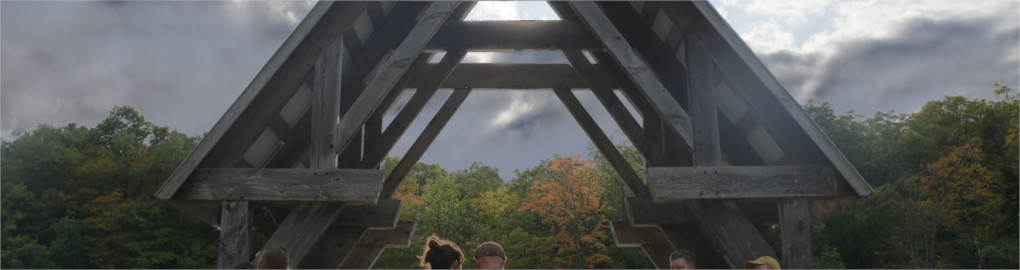
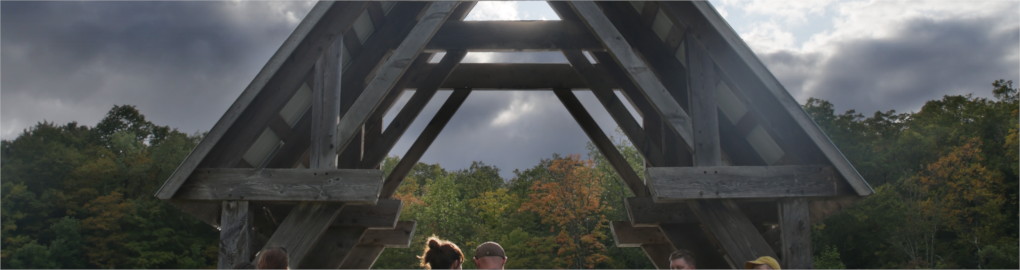
When pixel-peeping it may not seem perfect, but in the context of the entire image it’s a nice way to get an easy blend for not too much extra work.
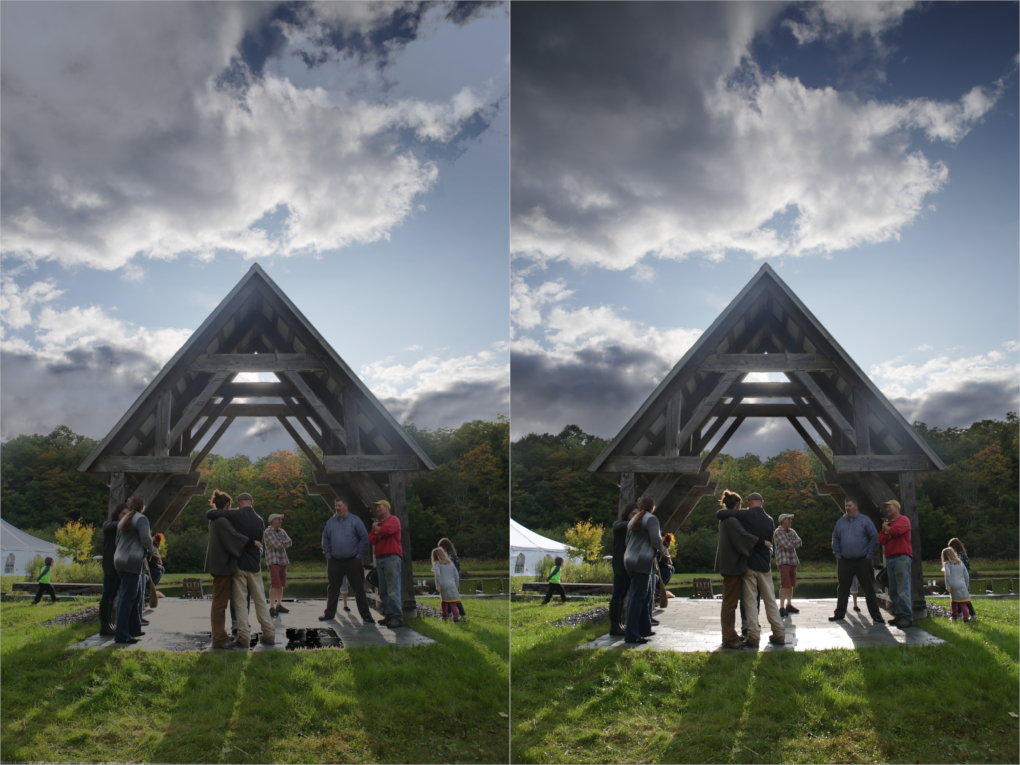
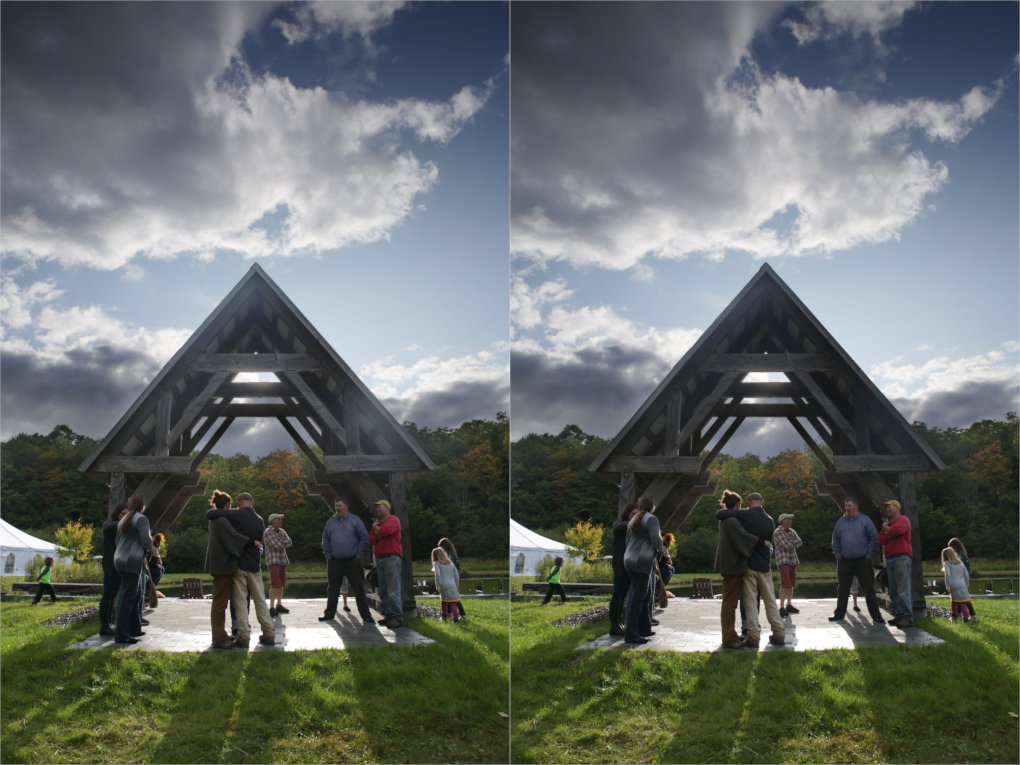
At this point most of the exposure is blended nicely. The only place in this particular image I would work some more would be to darken the structure a little bit to lessen the flaring and maybe bring back a little darkness.
This can be accomplished by painting over the top mask. I used black with a smaller opacity of around 25% to paint over the structure and allow the darker version underneath to show through a bit more:
I have previously used Enfuse and gotten great results even more quickly. For comparison here is the result of running Enfuse against the same images:
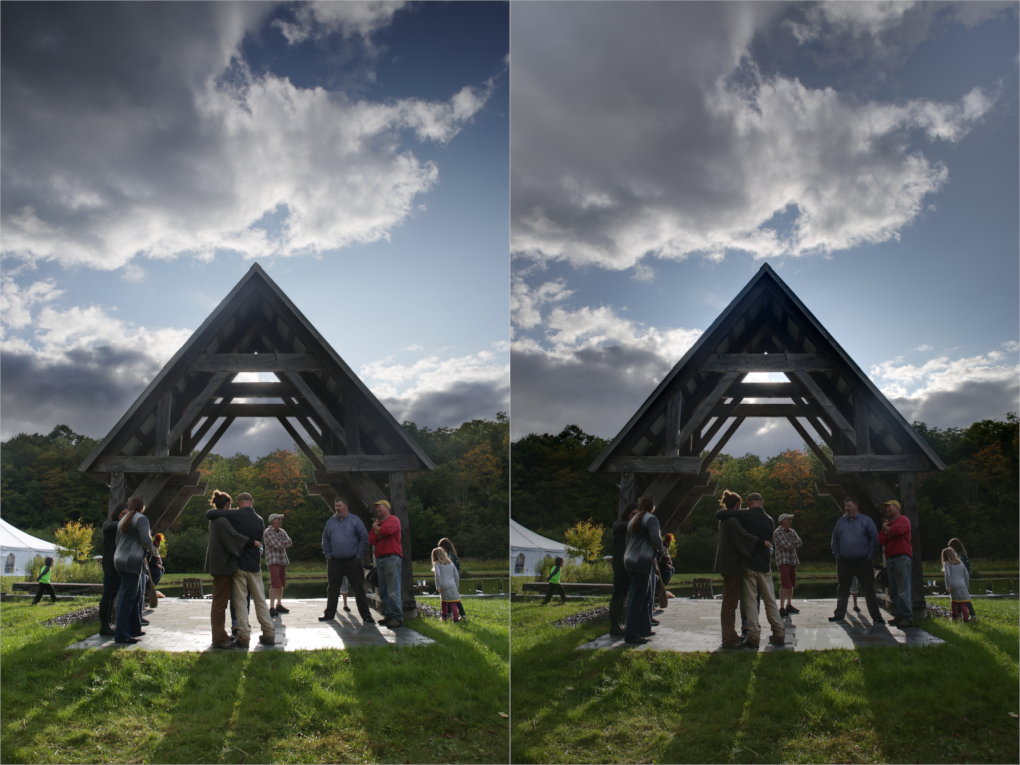
I prefer our manually blended result personally, but I could see another future article or post about using the Enfuse blend for areas of complexity and blending the Enfuse output into the final image to help. Might be interesting.
(I prefer our blended result because Enfuse considered extremely bright areas as candidates for fusion with the other exposure - so the bricks and tent highlights got pushed down automatically.)
From here any further fiddling with the image is purely for fun. The two versions of the image have been merged nicely. If you wanted to adjust the result to not appear quite as extreme you could modify each of the layers to taste.
For instance, you could lighten the sky layer to decrease the extreme range difference between it and the foreground layer. Where’s the fun in keeping it too realistic though? :)
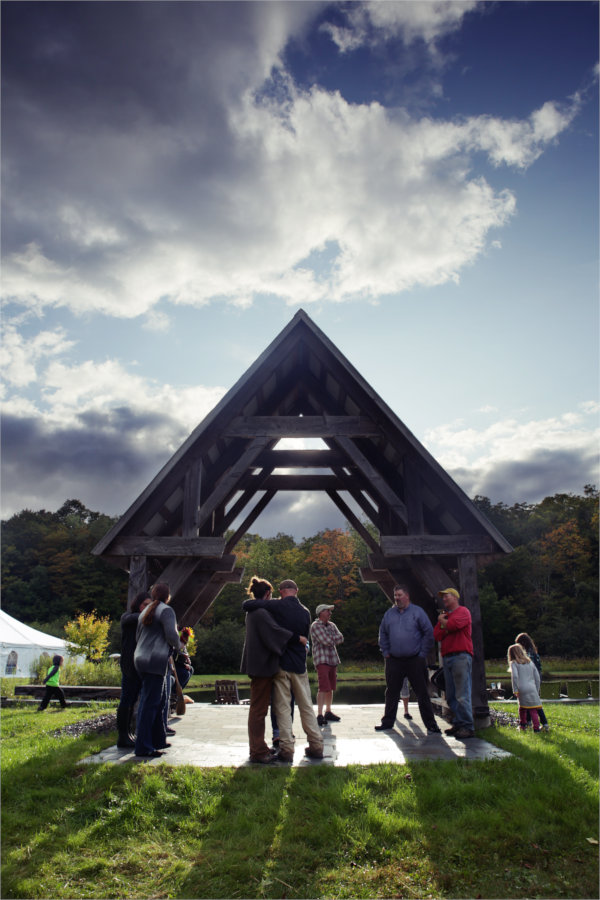
For reference, here’s my final version after masking with a bit of a Portra tone thrown in for good measure:
This wouldn’t be complete with some resources and further reading for folks!
I have saved the GIMP 2.9.x .XCF file I used to write this. It has all of the masks and layers I used to create the final version of the image:
@McCap also created a YouTube video walking through how he approached exposure blending:
The image Wedding Rehearsal by Pat David is licensed under a Creative Commons Attribution-ShareAlike 4.0 International License.
Permissions beyond the scope of this license may be available at https://patdavid.net/about.
Hosted on Acast. See acast.com/privacy for more information.
Hosted on Acast. See acast.com/privacy for more information.
Hosted on Acast. See acast.com/privacy for more information.
This is becoming a sort of tradition for me to post something giving thanks around this holiday. I think it’s because this community has become such a large part of my life (even if I don’t have nearly as much time to spend on it as I’d like). Also, I think it helps to remind ourselves once in a while of the good things that happen to us. So in that spirit…
I want to start things off by acknowledging those that go the extra mile and help offset the costs of the infrastructure to keep this crazy ship afloat (sorry, I’m an ocean engineer by training and a sailor - so nautical metaphors abound!).
Once again the amazing Dimitrios Psychogios has graciously covered our server expenses (and then some) for another full year. On behalf of the community, and particularly myself, thank you so much! Your generosity will cover infrastructure costs for the year and give us room to grow as the community does.
We also have some awesome folks who support us through monthly donations (which are nice because we can plan better if we need to). Together they cover the costs of data storage + transfer in/out of Amazon AWS S3 storage (basically the storage and transfer of all of the attachments and files in the forums). So thank you, you cool froods, you really know where your towels are:
Thank you all! If you happen to see any of these great folks around the forum consider taking a moment to thank them for their generosity! If you’d like to join them in supporting the site financially, check out the support page.
The community has just been amazing, and we’ve seen nice growth this past year. Since the end of August we’ve seen about a 50% increase in weekly sessions on discuss. We’re currently hovering around 2,500 daily pageviews on the forums:
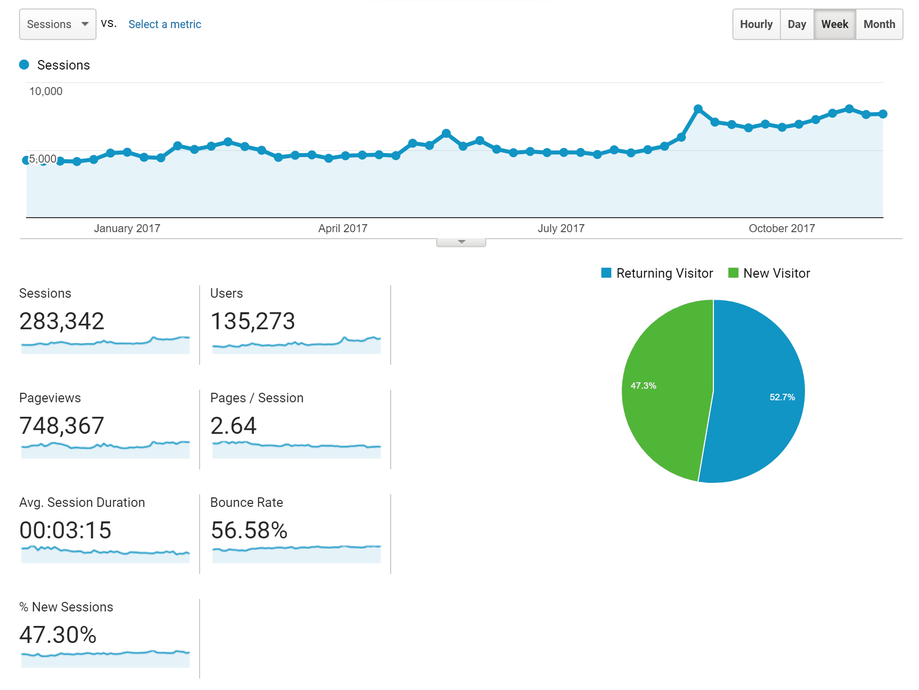
We’ve added almost 950 new users, or almost 3 new users every day!
There have been quite a few interesting discussions happening on the forums as well. The RawTherapee folks have some neat conversations going on (Local Lab build, New Windows builds, and Pixel Shift!), and @Carmelo_DrRaw (creator of the PhotoFlow editor) has been packaging a GIMP 2.9.X AppImage as well!
Of course, the fun news for many was @houz finally pushing out a Windows version of darktable that was made possible through the help of Peter Budai.
I figure @LebedevRI will yell at me if I forget to mention raw.pixls.us (RPU) again. Back in January @andabata built a new site to help pick up the work of the old rawsamples.ch website to collect raw sample files for testing.
So thank you @andabata and @LebedevRI for your work on this! A big thank you to everyone who has taken the time to check the site and upload missing (or non-freely licensed) raw files to include!
While we’re talking about RPU, please consider having a look at this post about it on discuss and take a few minutes to see if you might be able to contribute by providing raw samples that we are missing or need (see the post for more details). If you don’t have something we need, please consider sharing the post on social media to help us raise awareness of RPU! Thank you!
If you’re not aware of it, one of the things we try to do here beside run the site and forum is to assist projects with websites and design work if they want it. Earlier this year the digiKam team needed to migrate their old Drupal website to something more modern (and secure) and @paperdigits figured, “why not”?
So we rolled up our sleeves and got them setup with a newly designed static website built using Hugo (which was completely new to me). We were also able to manage their comments on the website for them by embedding topics from right here on discuss. This way their users can still own their comments and we can manage spam and moderate things for them.
The best part, though, is the addition of their users and knowledge to the community!
I want to personally take a moment to thank @darix for all the work he does keeping things running smoothly here. If you don’t see him, it means all the work he’s doing is paying off.
I speak with him daily and see firsthand the great work he’s doing to make sure all of us have a nice place to call home. Thank you so much, @darix!
As usual @paperdigits (https://silentumbrella.com) also has a great attitude and pro-active approach to the community which I am super thankful for. He also does things that aren’t always visible, but are essential to keeping things running smoothly, like moderating the forum, checking the health of sites we are helping to manage, and writing/editing posts.
I can’t stress enough how much it helps to keep your interest and spirits engaged in the community when you have someone else around who’s so positive and helpful. Thank you so much, @paperdigits!
At the end of the day this is a community, and it’s vibrancy and health is a direct result of all of you, its members. So above all else this is by far the thing I am most thankful for - getting to meet, learn, and interact with all of you.

Hosted on Acast. See acast.com/privacy for more information.
Hosted on Acast. See acast.com/privacy for more information.

Hosted on Acast. See acast.com/privacy for more information.


Hosted on Acast. See acast.com/privacy for more information.

Hosted on Acast. See acast.com/privacy for more information.
Hosted on Acast. See acast.com/privacy for more information.
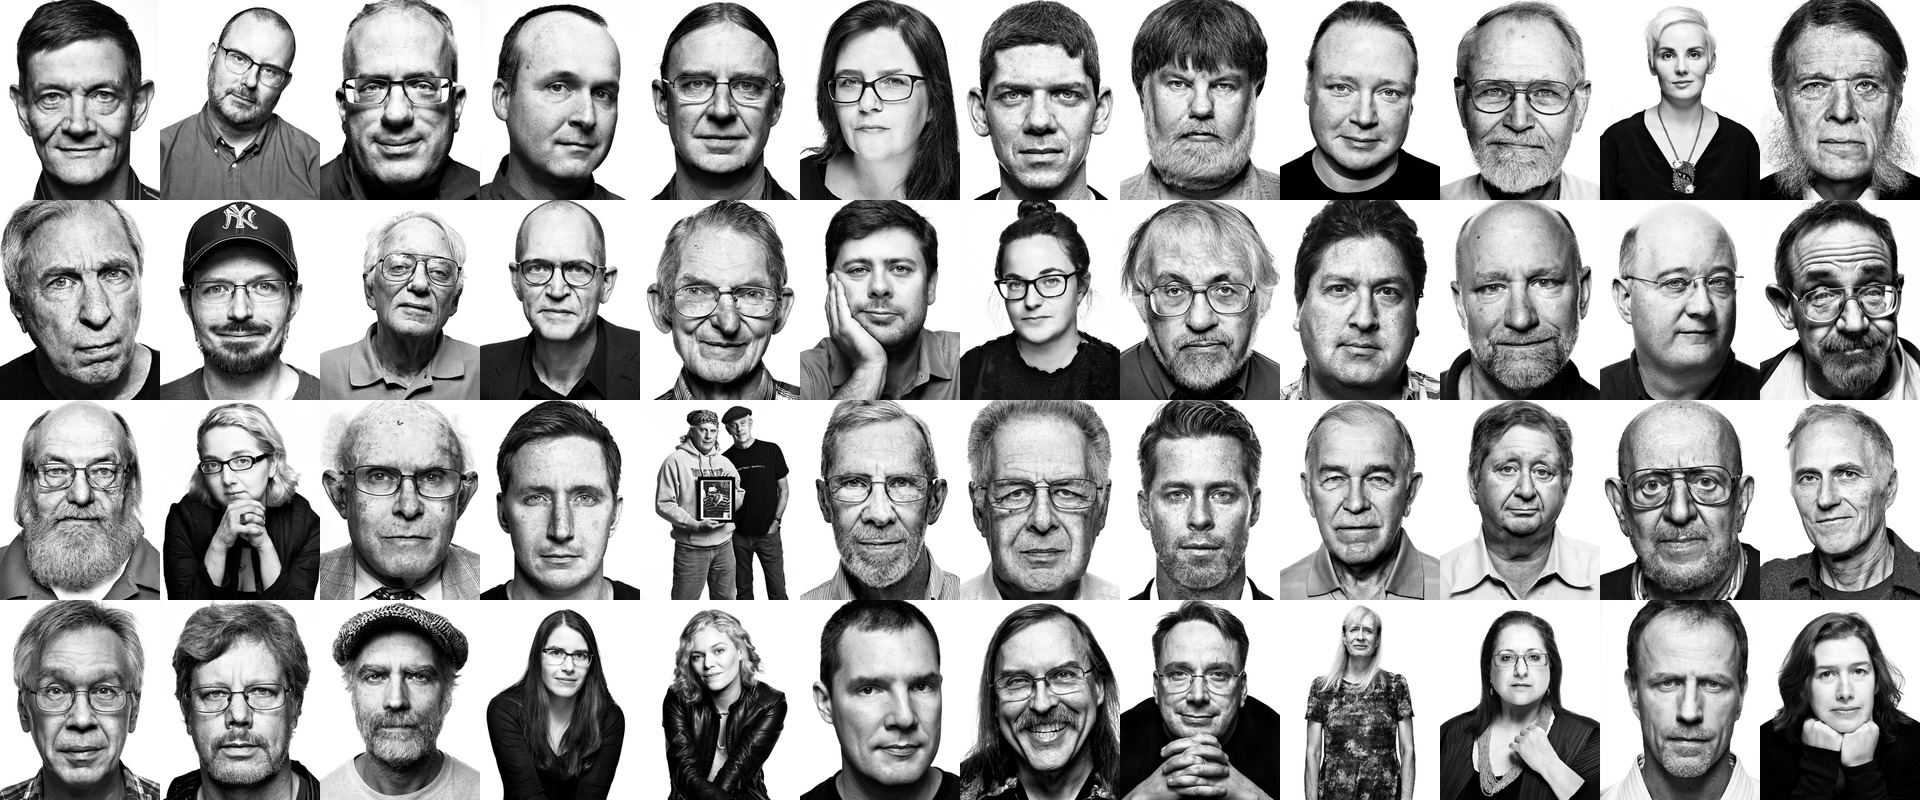
Recently, @houz posted about an amazing project by photographer Peter Adams called Faces of Open Source.
Peter really (ahem) throws a light on many amazing luminaries from not only the Free/Open Source Software community, but in some cases the history and roots of all modern computing. He has managed to coordinate portrait sessions with many people that may be unassuming to a layperson, but take a moment to read any of the short bios on the site and the gravity of the contributions from the subjects to modern computing becomes apparent.
It’s easy for non-technical folks to spot a Bill Gates or Steve Jobs, but what about those who invented the most-used programming language, created the web server that runs the majority of the internet, or mapped the human genome?

He is acutely aware that his subjects represent an important part of the history of Open Source, and in his artist statement for the project he notes:
This project is my attempt to highlight a revolution whose importance is not broadly understood by a world that relies heavily upon the fruits of its labor.
That’s really what Peter has done here. He has collected individuals whose contributions all add up to something far greater than their collective sums to shape the digital world many take for granted these days, and is presenting them in a powerful and thoughtful way more befitting their gifts.
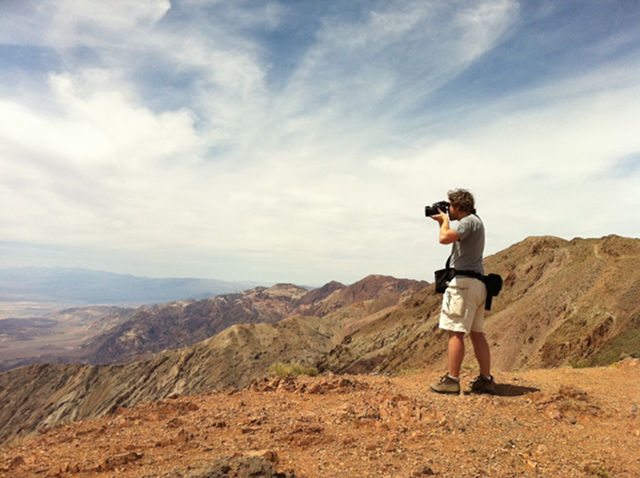
I was lucky enough to be able to get a little bit of time with Peter recently, and with some help from the community had a few questions to present to him. He was kind enough to take some time out of his day and be patient while I prattled on…
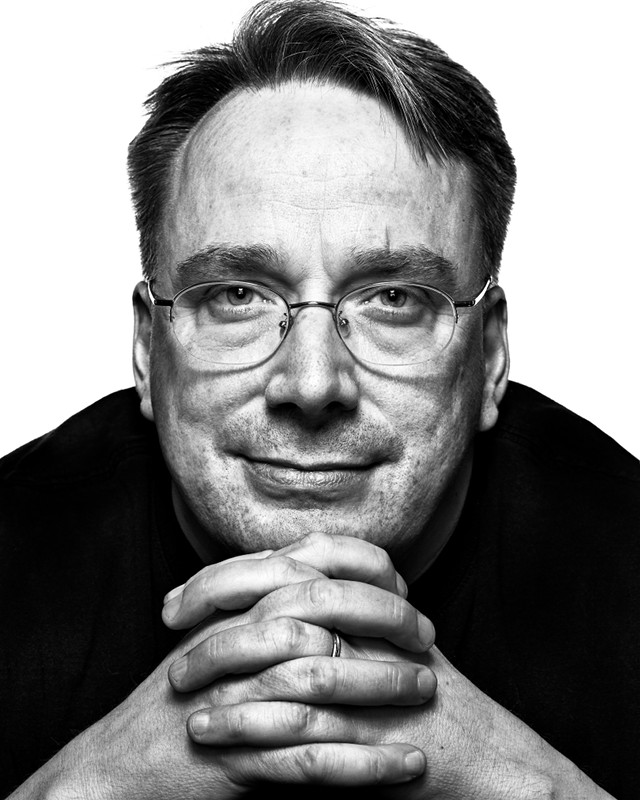
I had a long career working in the tech industry, and kind of grew up on a lot of this software when I was in college.
Then got to apply it throughout a career as senior technologist or CTO at a bunch of different companies in the valley.
So I went from learning about it in college, to being someone that used it, to then being somebody that contributed to it and starting my own open source project back in 2006.
That open source ethos, the software, and the people that created, maintained and promoted it - it’s something that’s been right there in my face for, really, the last 25 years.
I wanted to marry my knowledge of it with my passion for photography, and shine a light on it. I went through a few different chapters of the story myself in the 80’s and then the mid-90’s with linux. I kind of felt like the story was starting to slip into obscurity, not because it’s less important - in fact I think it’s more important now than it’s ever been.
The software is actually used by more people now than it has ever been. The smartphone revolution, mobile, has brought that to a forefront and all of these mobile platforms are based on this open source technology. Everything Apple does is based on BSD, and everything Google/Android does is based on Linux.
I feel like it’s a more impactful story now than ever, but very few people are telling the story. As a photographer I’ve always cringed at the photographic response to the story. Podium shot after podium shot of these incredible people.
So I wanted to put some faces to names, bring these people to life in a more impactful way than I think anyone has done before. Hopefully that’s what the project is doing!
P: It absolutely does!
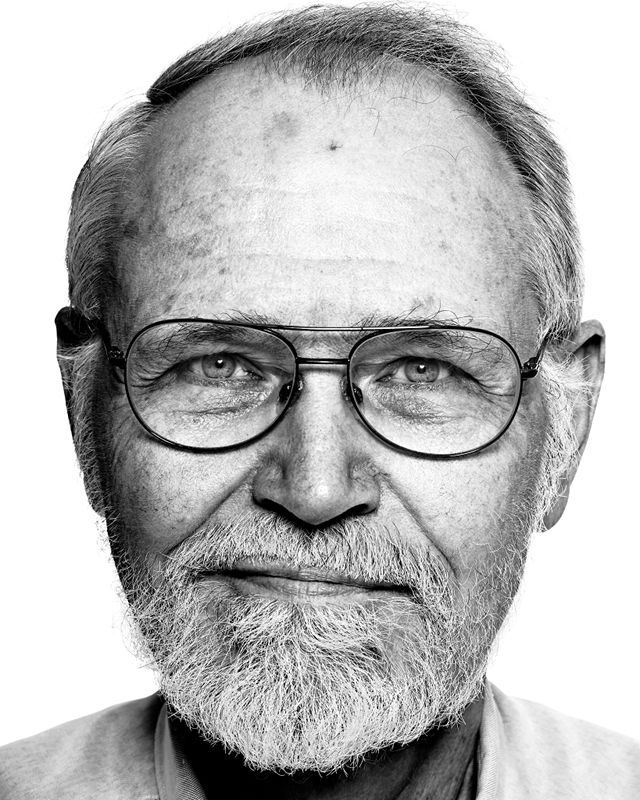
I started this project in 2013/2014, in earnest probably late 2014.
Everyone that I’ve photographed has been absolutely wonderful. I mean, that’s the first thing about this community: it’s a very gracious community. Everybody was very gracious with their time, and eager to participate. I think people recognize that this is a community they belong to and they really want me to be a part of it, which is really great.
So, I enjoyed my time with everybody. Everybody brought a different, interesting story about things. The UNIX crew from Bell Labs had particularly colorful stories, very interesting sort of historical tidbits about UNIX and Free Software.
I talked to Ken Thompson about going to Russia and flying MIGs right after the collapse of the Soviet Union. Wonderful stories from Doug McIlroy about the team and the engineering - how they worked together at Bell labs. Just a countless list of cool stories and cool people for sure.
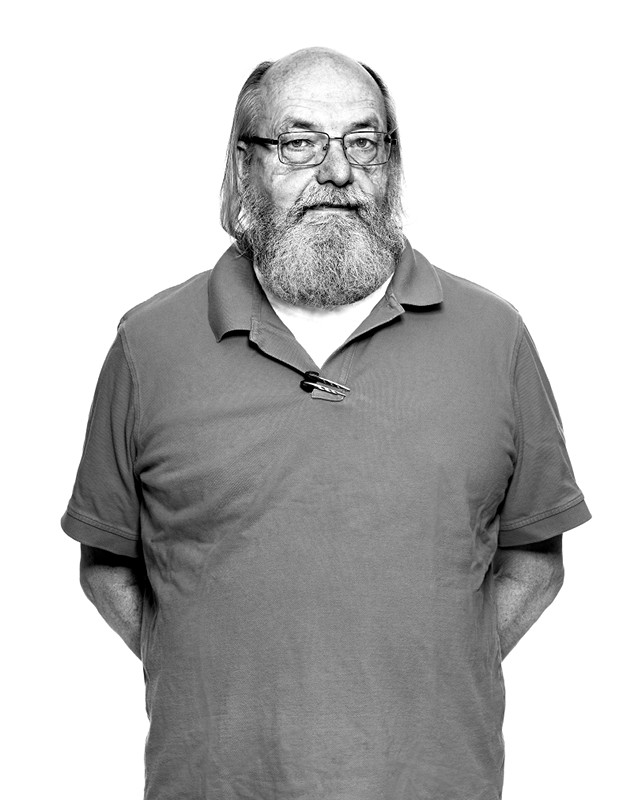
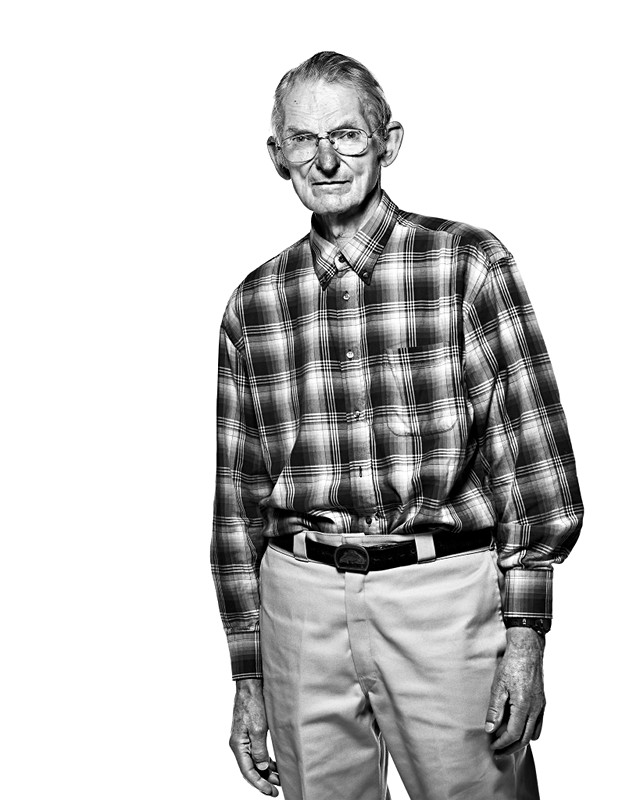
P: It must have been fascinating!
It’s been really fun. A lot of these folks, I’ve really looked up to them over the years as sort of heroes, and so when you get people in front of your lens like that, it’s a really wonderful experience. It’s also a challenging experience because you want to do justice to them. Many of these folks that I’ve thought about for 20+ years, finally getting to shoot them is a real treat.
I shot a lot of people when I had a studio in Silicon Valley. I brought a lot of people there and that was great. Now typically I’m doing shoots on the coasts. So I’ll do shoots in NY and I’ll rent a studio and bring 6 or 7 people in there or we’ll do a studio up in SF for some people. But I’ve done shoots in back alleyways, I’ve done shoots in tiny little conference rooms, I’ll bring the studio to people if that’s what I have to do. So I’d say so far it’s been about 50-50.
B&W on a white background was a conscious choice right from the beginning. Knowing the group, I felt like that was going to be the best way to explore the people and the faces. Every one of these faces just tells, I think, a really interesting story. I try to bring the personality of the person into the photo, and B&W has always been my favorite way to do that. The white background just puts the emphasis right on the person.
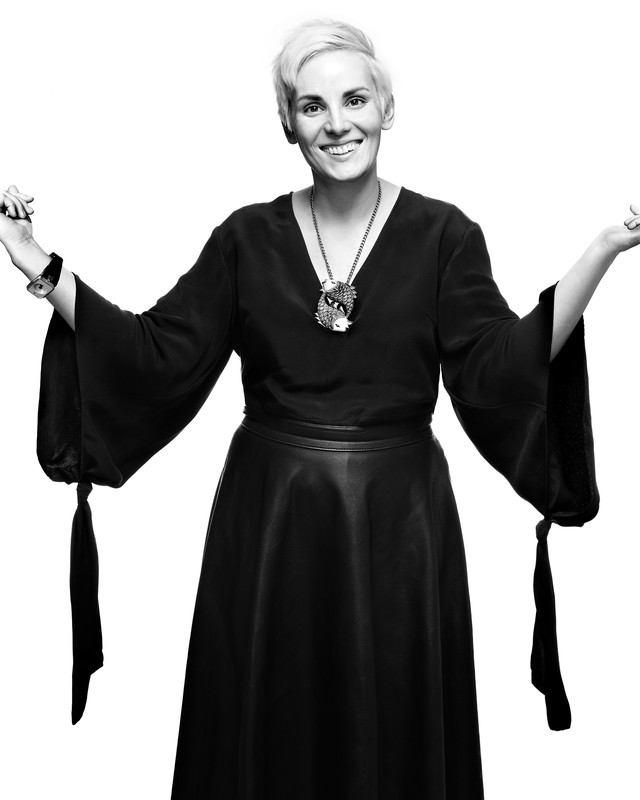
It’s a little bit of both. I wish I got to spend a lot of time up front with the person before we started shooting, but the way everybody’s schedule worked is - none of these shoots are more than an hour and many of them are much shorter than an hour. There’s definitely the pleasantries up front and talking for a little bit, but then I try to get people right in front of the camera as quick as possible.
I don’t really pose them. My process is to sit back and observe, and I always tell people “if I’m not taking photos, it’s not because you’re doing anything wrong - I’m just waiting for you to settle or looking, examining”. Which is, for most people, a really uncomfortable process, I try to make it as comfortable as possible. Then we’ll start taking pictures. I may move them a little bit, or we may setup a table so they can rest their hand on their chin or something like that. Generally the photos that come out are not pre-meditated.
It’s very rare that I go into any of these shoots with an actual “I want the person like this, setup like that, etc…”. I’d say 99% of these shots, the expressions, the feeling that comes out, that I’m capturing is organic. It’s something that comes up in the shoot. I just try to capture it whenever I see it by clicking the shutter, that’s basically what I’m doing there.
The lighting is literally the same on every shot, though there’s slightly different positions. It’s a six light setup: there are four lights on the background, there’s a beauty dish overhead, and generally a fill light. The fill is either a big Photek or PLM, basically a big umbrella, or a ringflash depending on how small the room is. That’s the same lighting setup on all of them. Four lights on the background, two lights on the subject. I’ll vary the two lights on the subject positionally, but for the most part they’re pretty close.
I don’t use as much Free Software as I’d like in my own workflow. My workflow, because I shoot with Phase One, the files go into Capture One and then from there they go into Photoshop for final edits. I have used GIMP in the past. I really would like to use more Free Software, so I’m a learner in that regard for what tools would make sense.
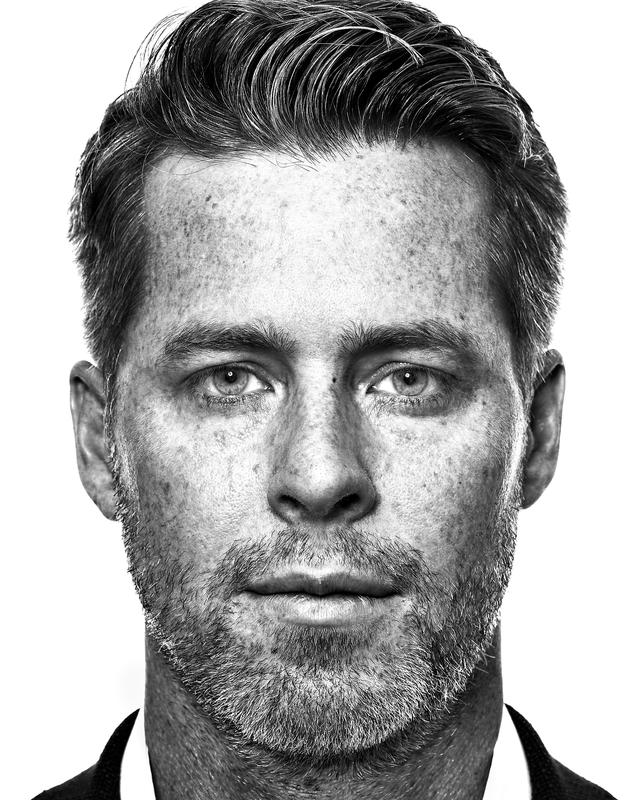
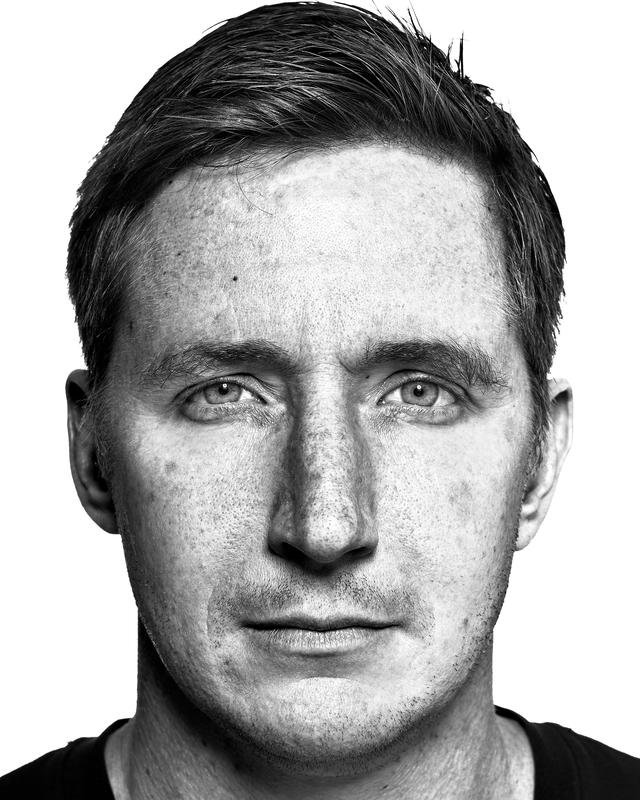
Phase One, which makes the Medium Format digital back and camera that I use for all of my portrait work, also makes Capture One. They have basically customized the software to get the most of their own files. That’s pretty much why I’ve wound up there instead of Lightroom or another tool. It’s just that that software tends to bring out the tonality, especially in the B&W side, better I’ve found than any other tool.
Yes, this is a self-financed project. I do hope that we’ll get some sponsors, especially for the book, just because it tends to be a pretty heavy upfront outlay to produce a book. I’m going to think about things like Kickstarter but the corporate sponsors I think will be really helpful for the exhibits and the book.
No, the book isn’t ready yet. I still have probably another 10-12 people that I need to photograph and then we’ll start producing it. I’ve done some prototypes and things on it but it’s still a little bit of a ways away. The biggest hurdle on this project is actually scheduling and logistics. Getting access to people in a way that is economical. Instead of me flying all over the place for one shot, I try to stack up a number of people into a day. It’s tough - this is a busy crowd, very in demand.

Absolutely! First of all it’s an incredibly inspiring group of people. This is a group of people that have dedicated, in some cases most of, their lives to the development of software that they give away to the world, and don’t monetize themselves. The work they’re doing is effectively a donation to humanity. That’s incredibly inspiring when you look at how much time goes into these projects and how much time this group of people spends on that. It’s a very humbling thing.
I’d say the other big lesson is that Open Source is such a unique thing. There’s really nothing like it. It’s starting to take over other industries and moving beyond just software - it’s gone into hardware. I’ve started to photograph some of the open source hardware pioneers. It’s going into bio-tech, pharmaceuticals, agriculture (there’s an open source seed project). I think that the lessons that are learned here and that this group of people is teaching is really affecting humanity on a much much larger level than the fact that this stuff is powering your cell phone or is powering your computer.
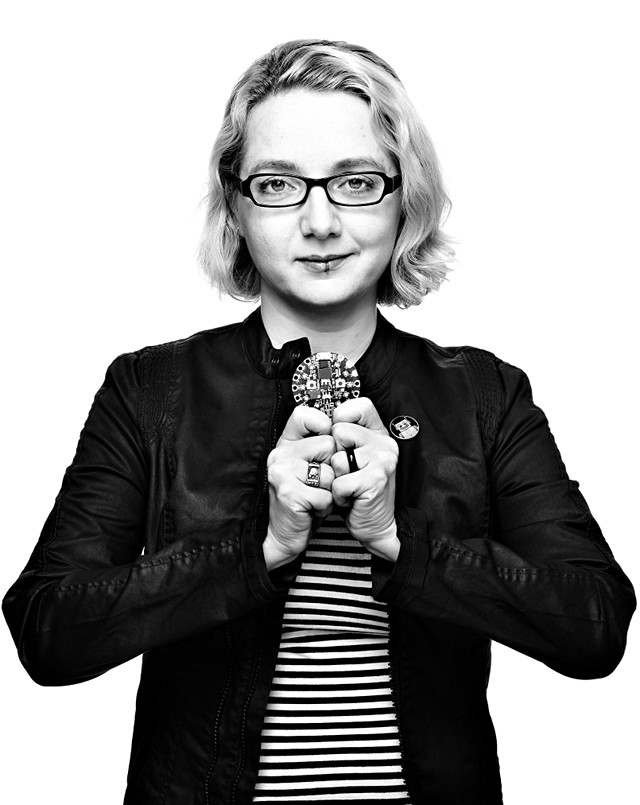
Open source is really sort of a way of doing business now. Even more than doing business it’s a way of operating in the world. More and more people, industries, and companies are choosing that. In today’s world where all you read is bad news, that’s a lot of really good news. It’s an awesome thing to see that accelerating and catching on. It’s been incredibly inspiring to me.
P: I think even all the way back to the Polio vaccine, is one of those things. The effect that it had on humanity was immeasurable, and the fact that it wasn’t monetized by Salk was amazing.
Look at how many lives were saved because of that. If you think about the acceleration of the innovation we’ve had just in the technology sector - could things like the iPhone or the Android operating system - would these things have happened now, or over the last decade, without this [open source], or would we be looking at those types of innovations happening twenty years from now? I think that’s a question you have to ask.
I don’t think it’s an obvious answer that Apple or Google or somebody else would have just come up with this without the open source [contributions]. This stuff is so fundamental, it’s such a basic building block for everything that’s happening now. It may be responsible for the golden age that we’re seeing now. I think it is.
The average teenager they pick up and post a photo to Instagram - they don’t realize that there’s a hundred open source projects at work to make that possible.
P: And the fact that the people that underlay that entire stack gave it away.
Right. And that giving it away was necessary to create the Instagrams to create all these networks. It wasn’t just this happenstance thing where people didn’t know any better. In some cases obviously that did exist, but it’s the fact that consciously people are contributing into a commons that makes it so powerful and enables all of this innovation to happen. It’s really cool.
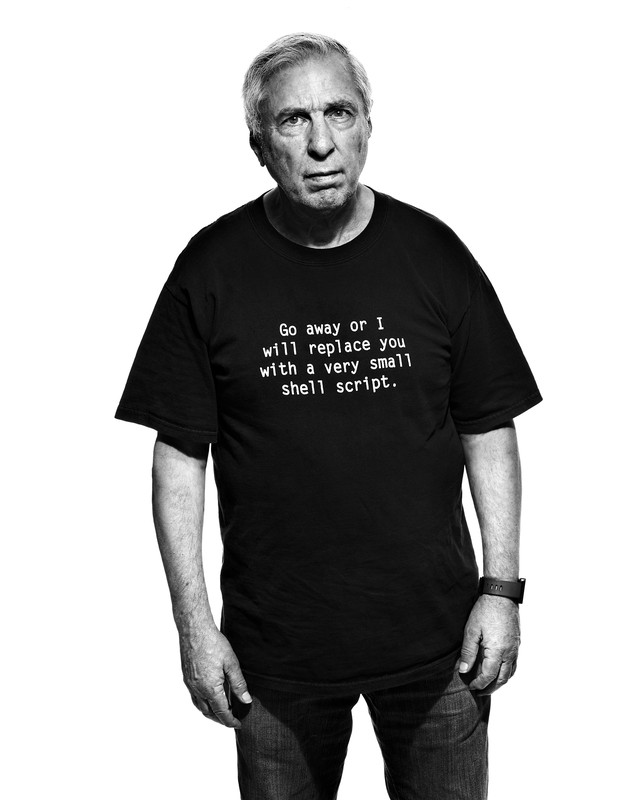
Sure! You’ve mentioned Martin Schoeller, who is one of my personal favorites and inspirations out there. I’d say the other photographer who has had probably the most impact on my photography over the years has been Richard Avedon. For people that aren’t familiar with his work I’d say definitely go check out the Avedon foundation. Pick up any of his books which are just wonderful. You’ll definitely see that influence on my photography, especially this project, since he shot black and white on white background. Such stunning work. I’d say that those are two great ones to start with.
Alright! Avedon and Schoeller - I can certainly think of worse people to go start a journey with. Thank you so much for taking time with me today!
Hey no problem! It’s been fun to talk to you.
There are many more fascinating portraits awaiting you over on the project site, and every one of them is worth your time! See them all at:
You can also connect with the project on
Find more of Peters work at his website.
All images from “Faces of Open Source” by Peter Adams, licensed CC BY NC SA 4.0.
Hosted on Acast. See acast.com/privacy for more information.
Hosted on Acast. See acast.com/privacy for more information.
